Tag Archives: Ponderosa pine

Priest’s Chair – Palace of the Governors, Santa Fe, New Mexico

I found this picture online of an 18th century chair in the collection of the New Mexico Museum of Art in Santa Fe, New Mexico, known as the Priest’s Chair.  See below.

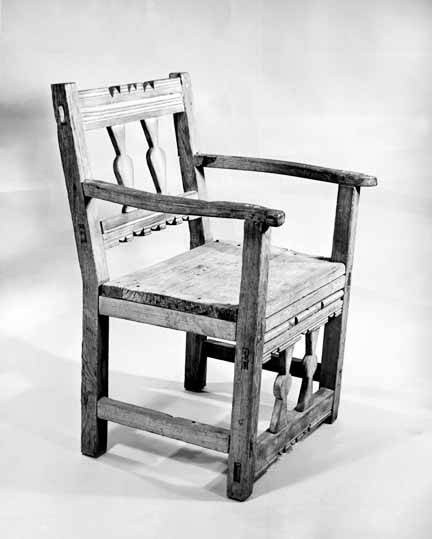
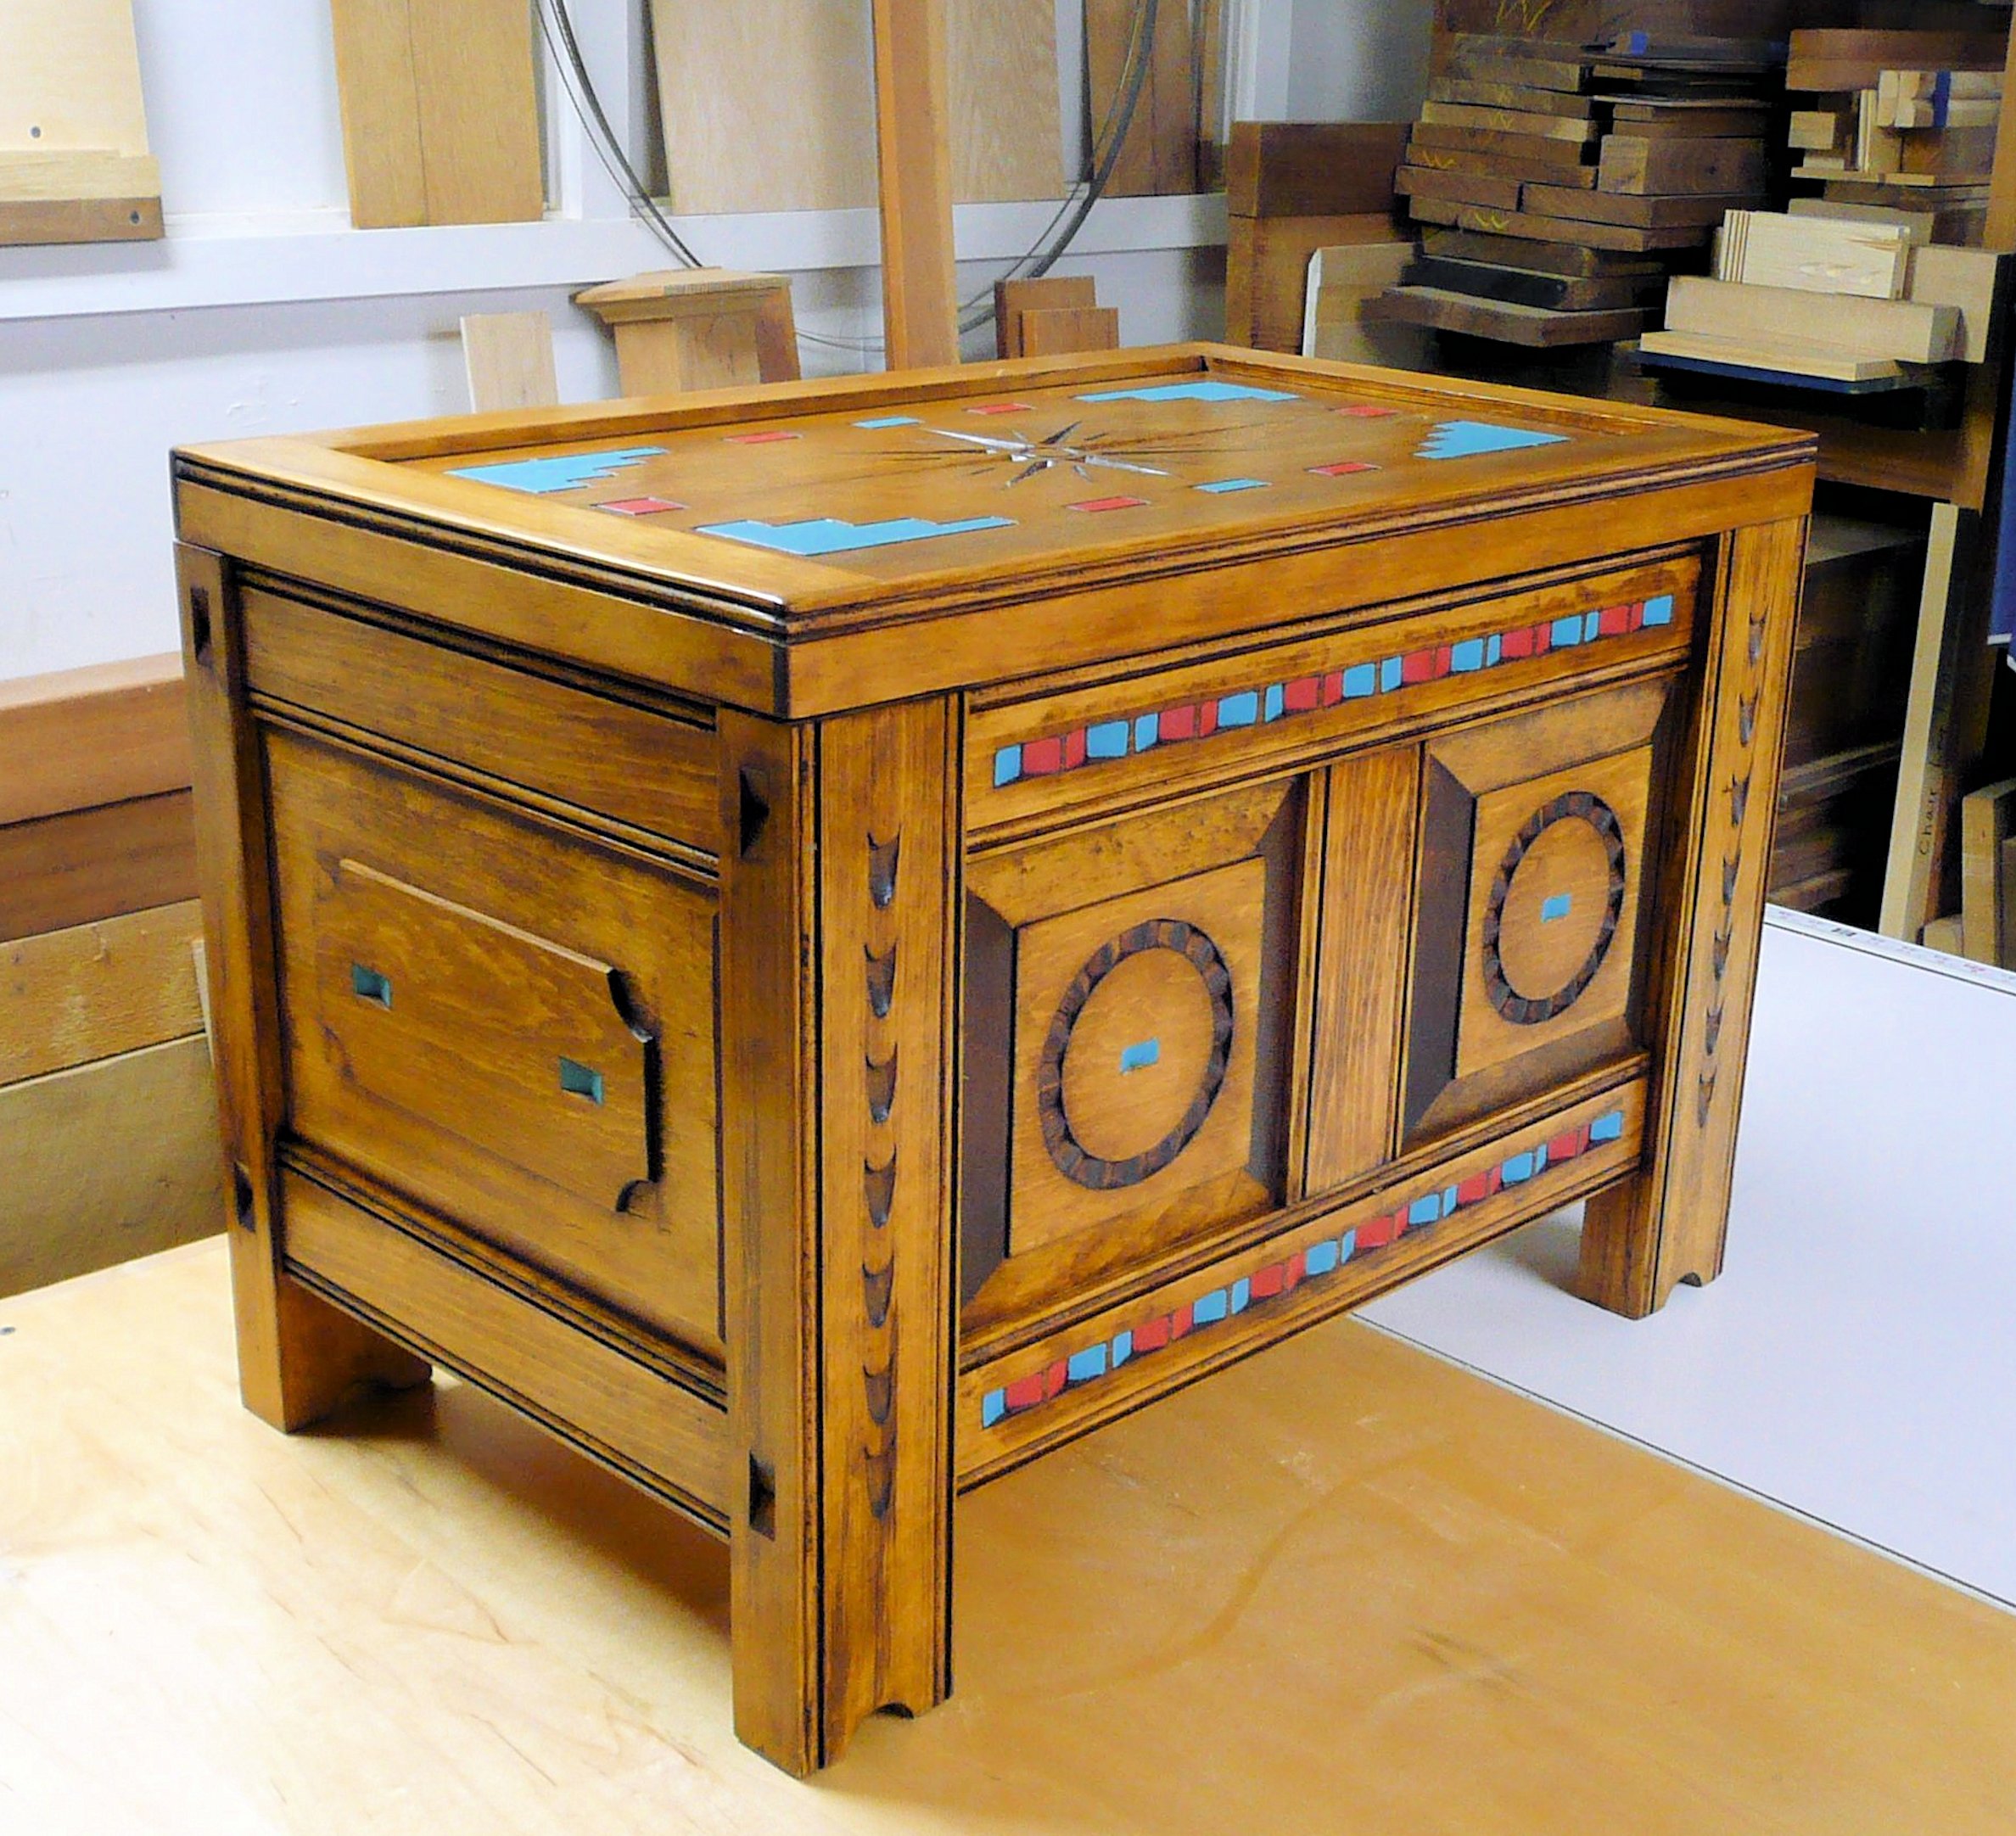
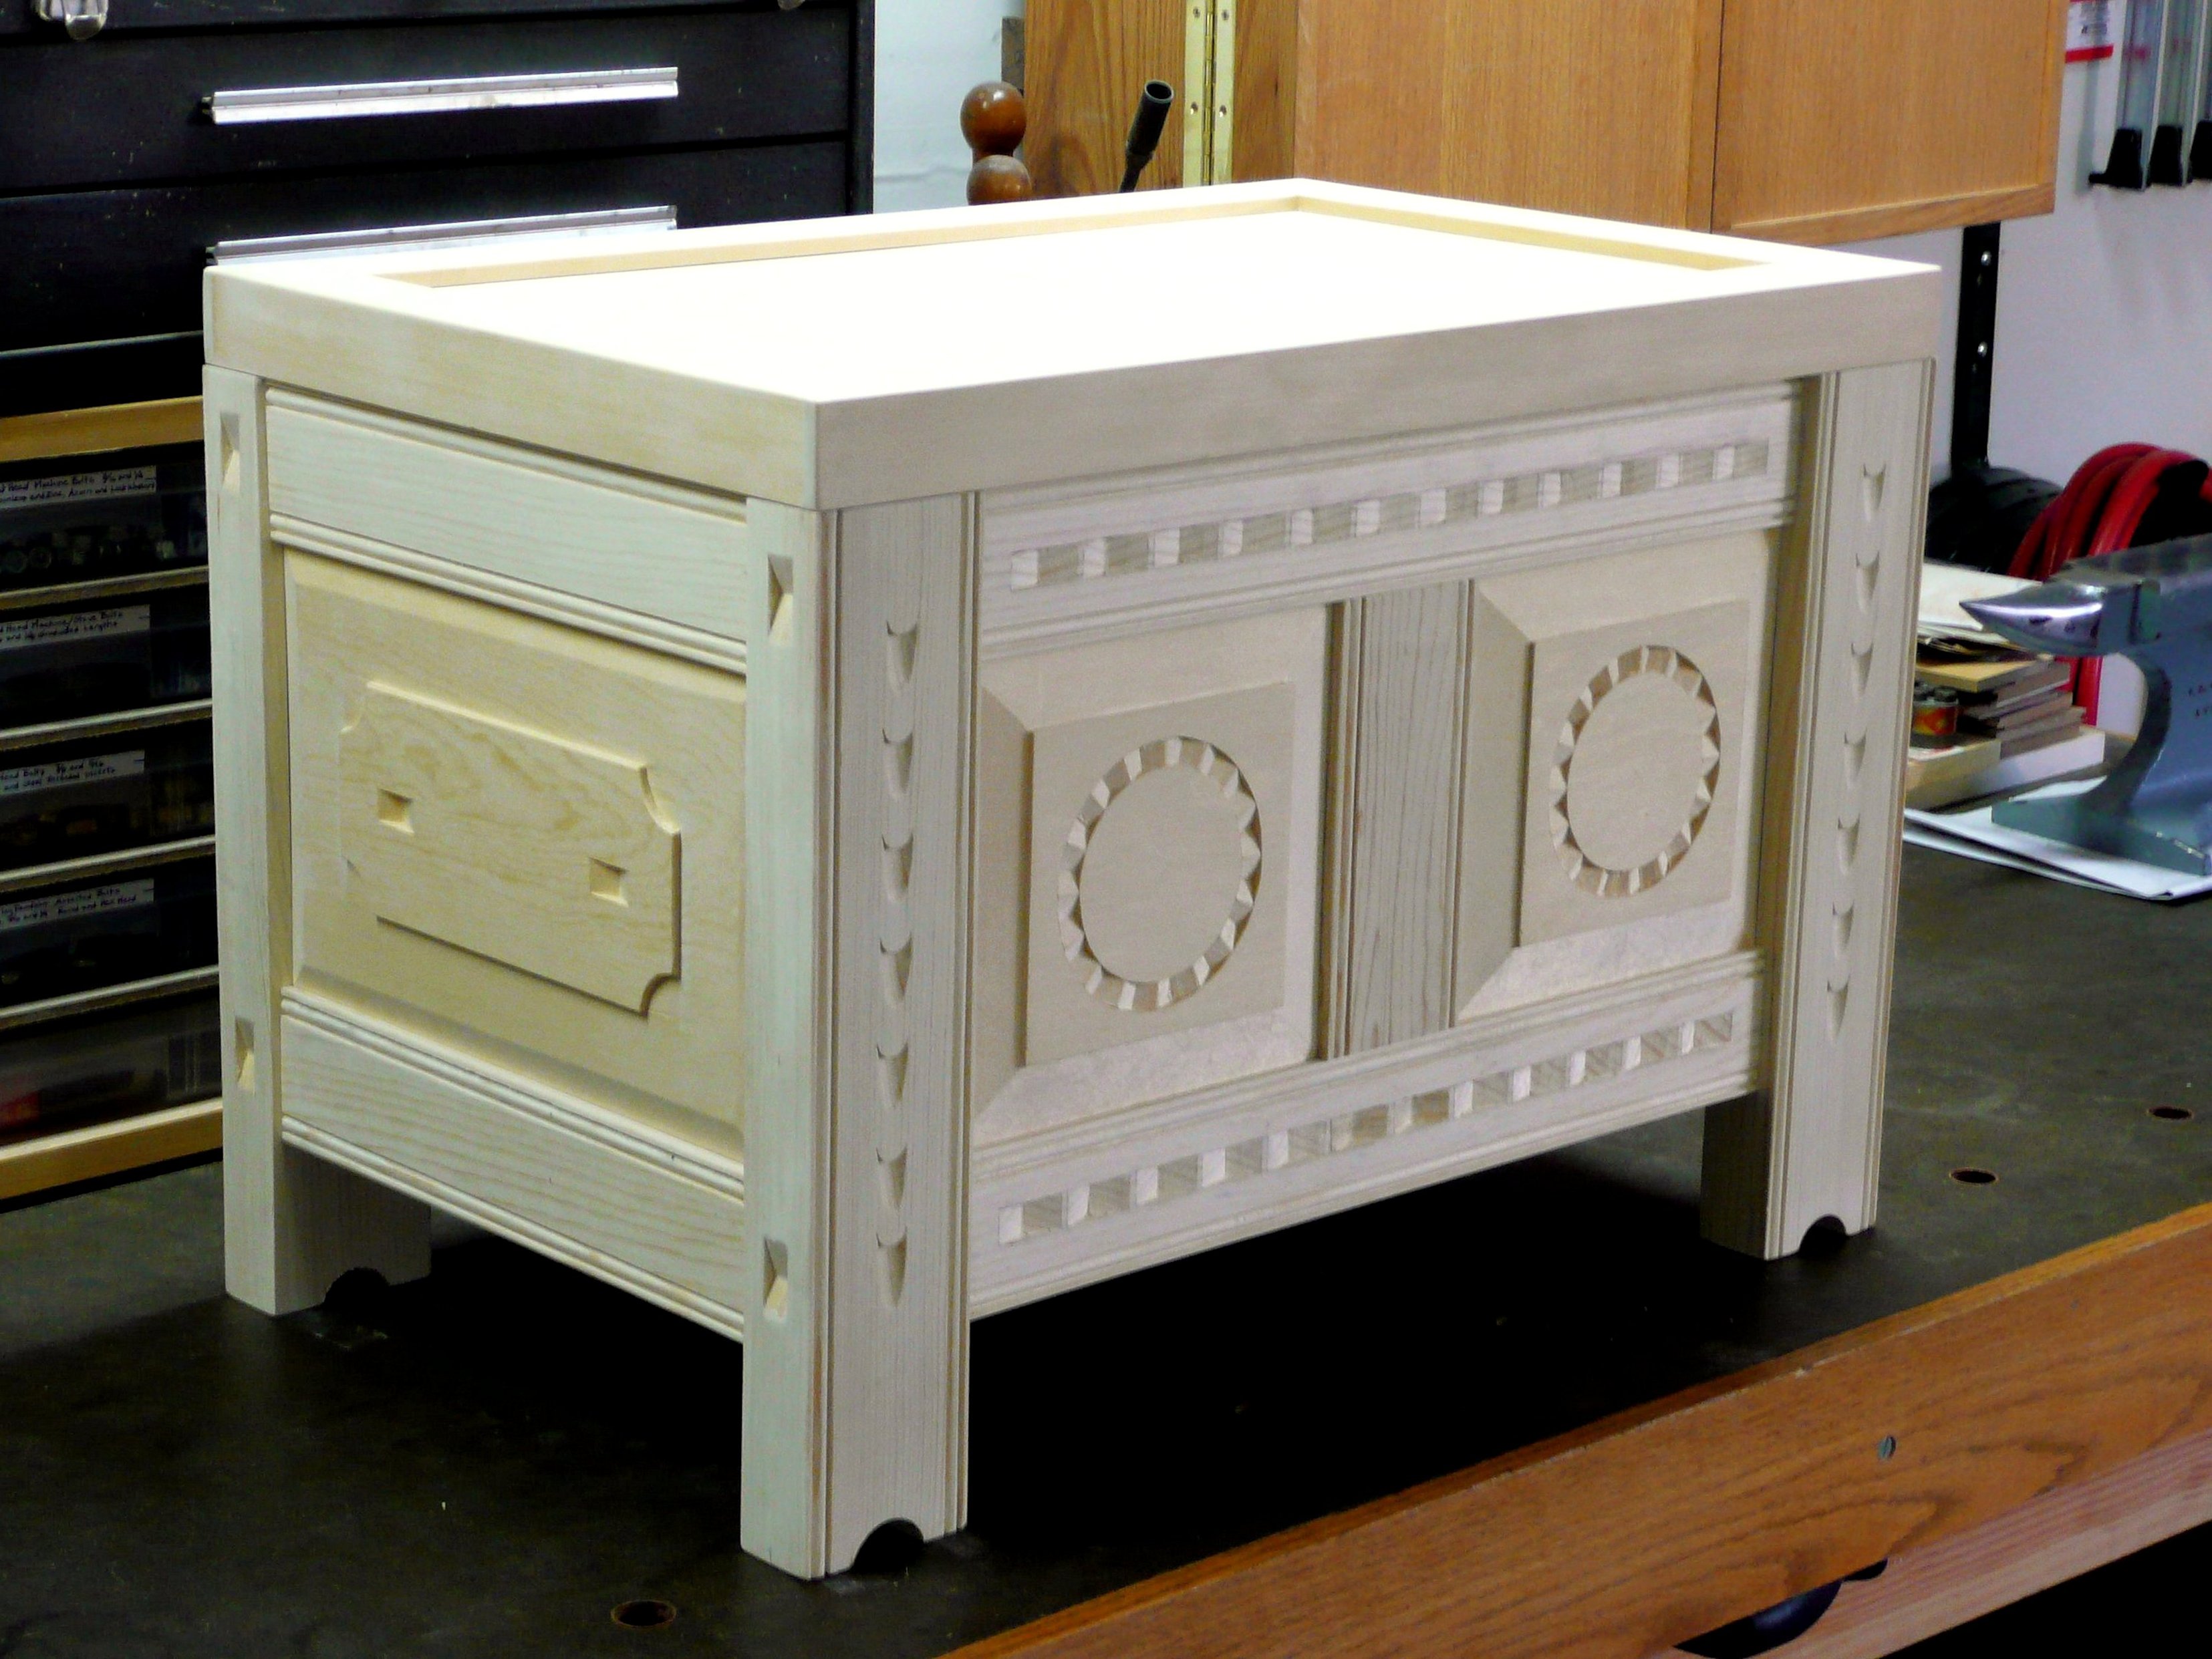
There are a few, early, carved armchairs like this one from northern New Mexico that are referred to as Priest’s Chairs without any documented connections to churches.  However, chairs of any kind were few and far between on the northern New Mexico frontier in the 1700’s and armchairs like this one would have been found only in the homes of prosperous Spanish families and in a few Catholic churches with larger congregations.  The wood used in the original was the best timber available at the time, Ponderosa pine from the Sangre de Cristo mountains.   I decided to make a copy of this chair, with added details, to accompany my carved New Mexico bench (October 2015 Archive) and my carved Harinero chest (January 2018 Archive).  This was the last project I completed before dismantling my shop in January 2020.

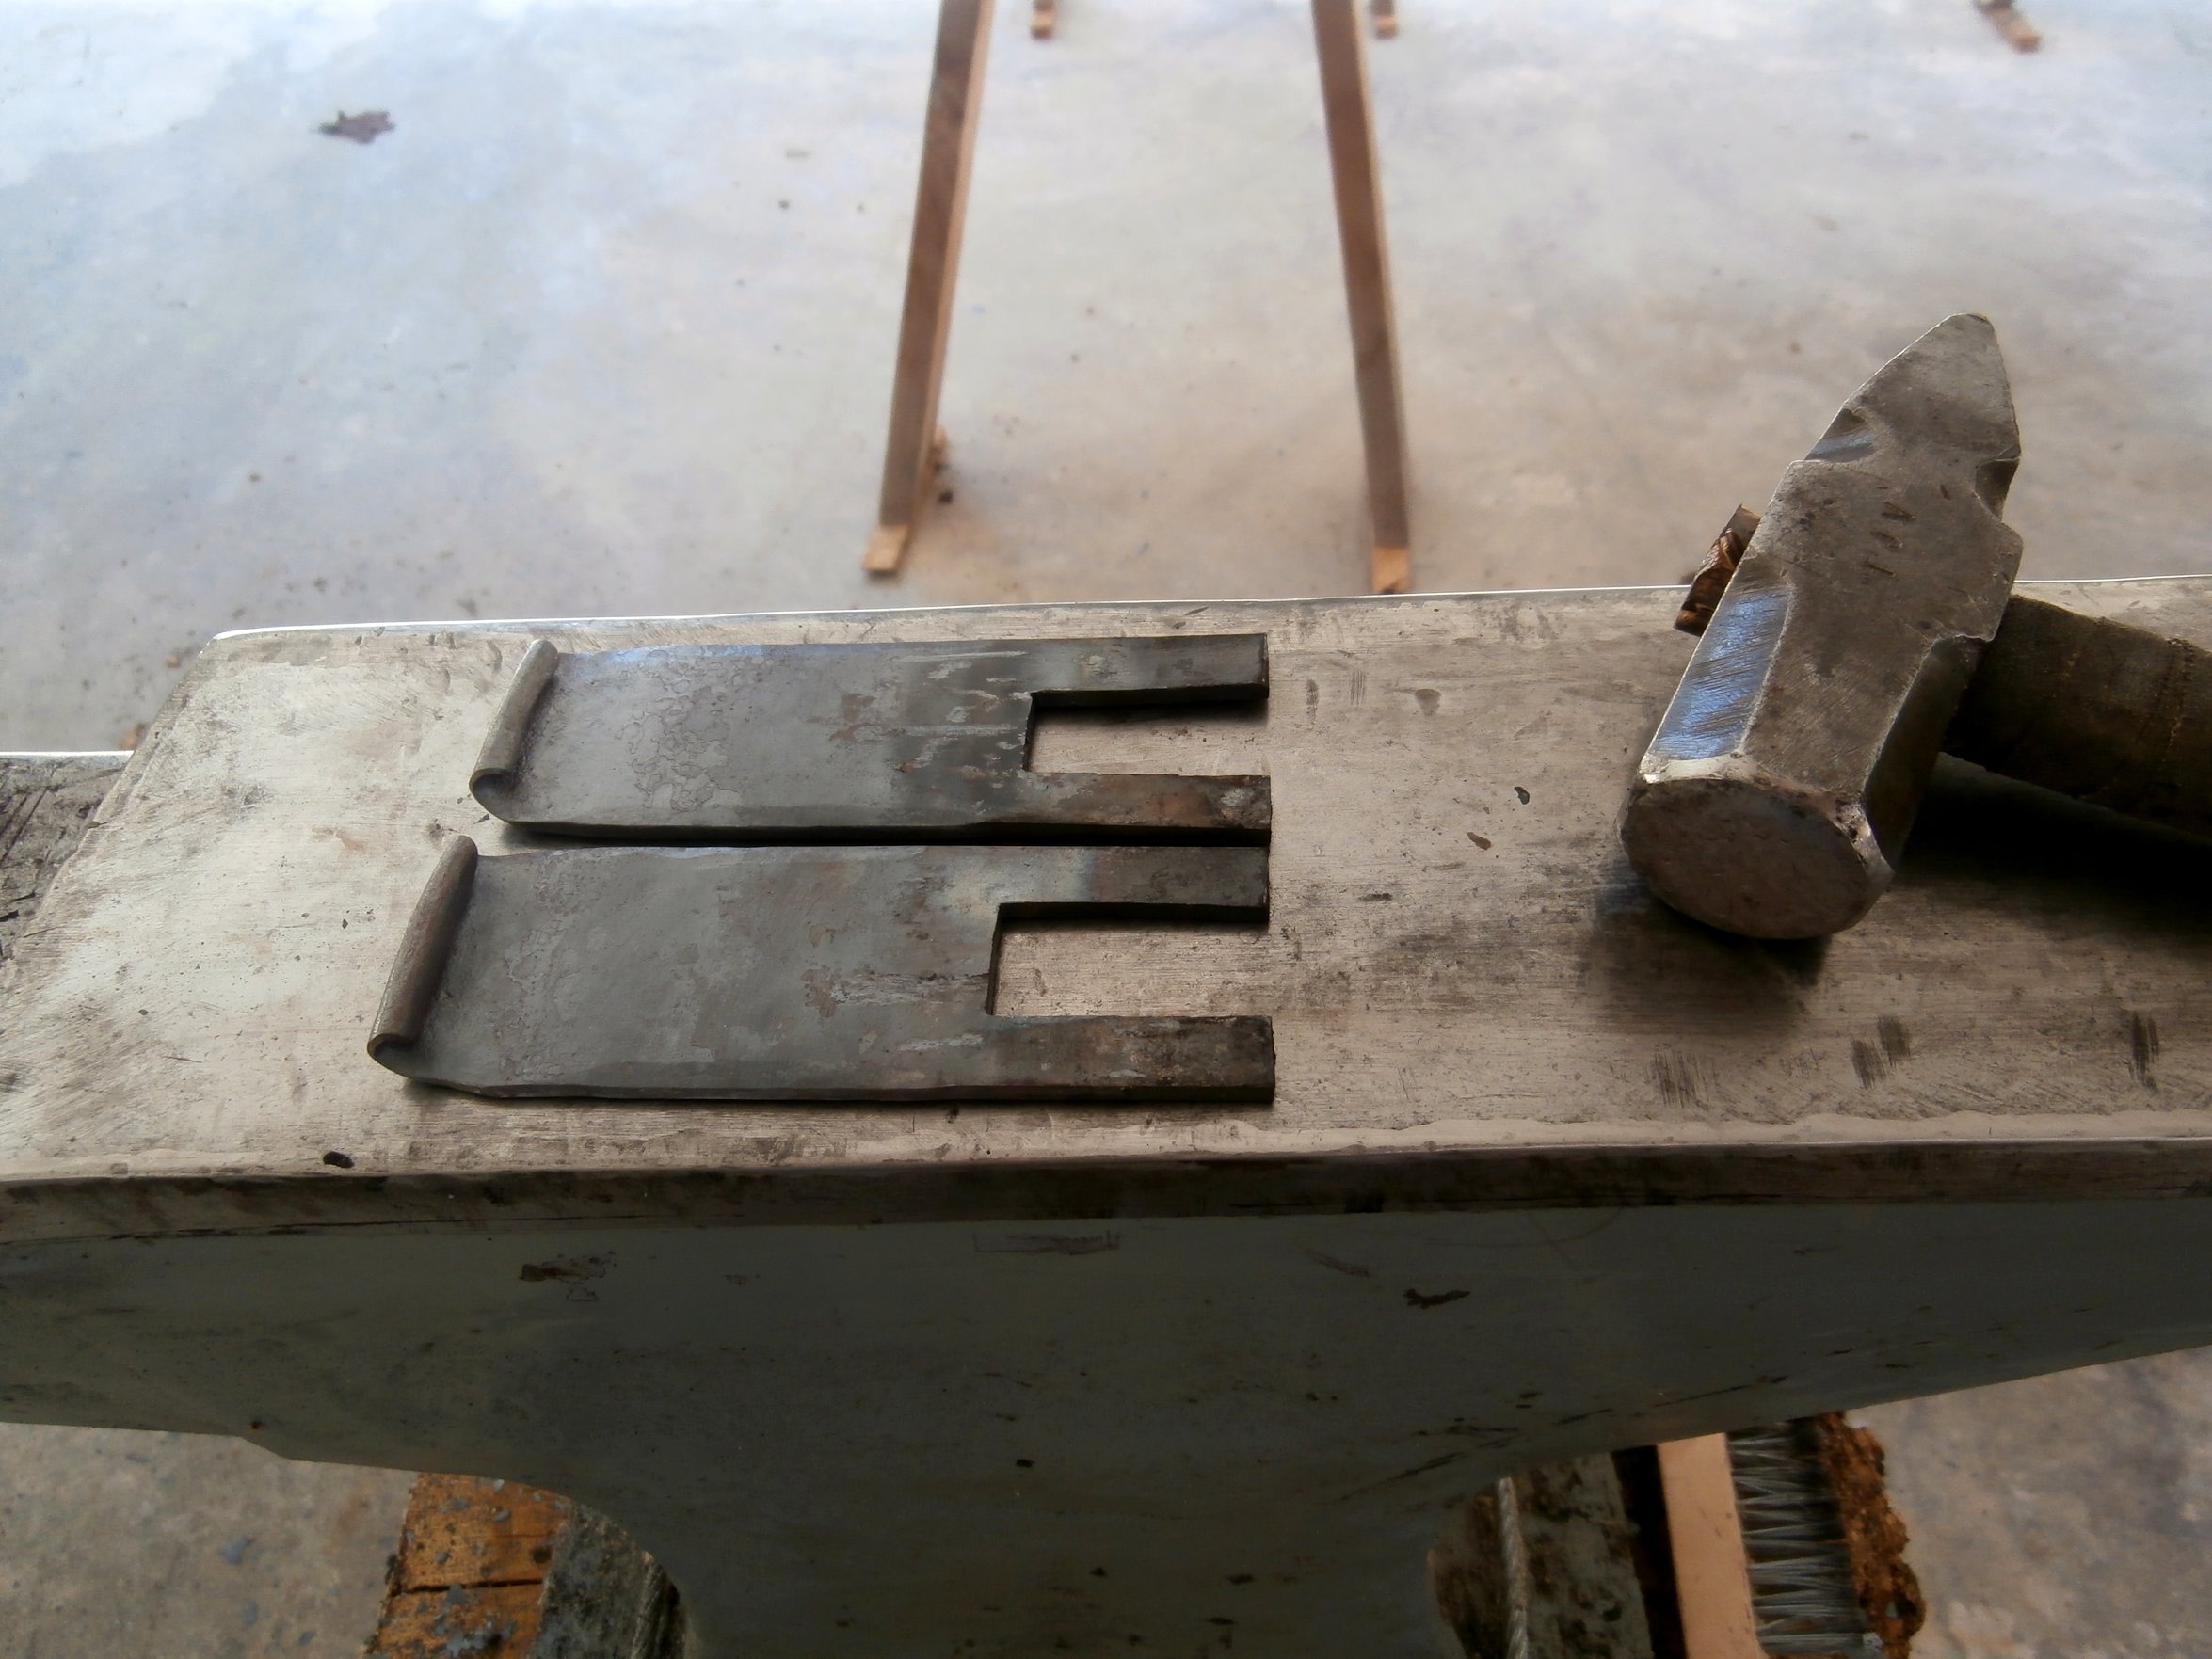
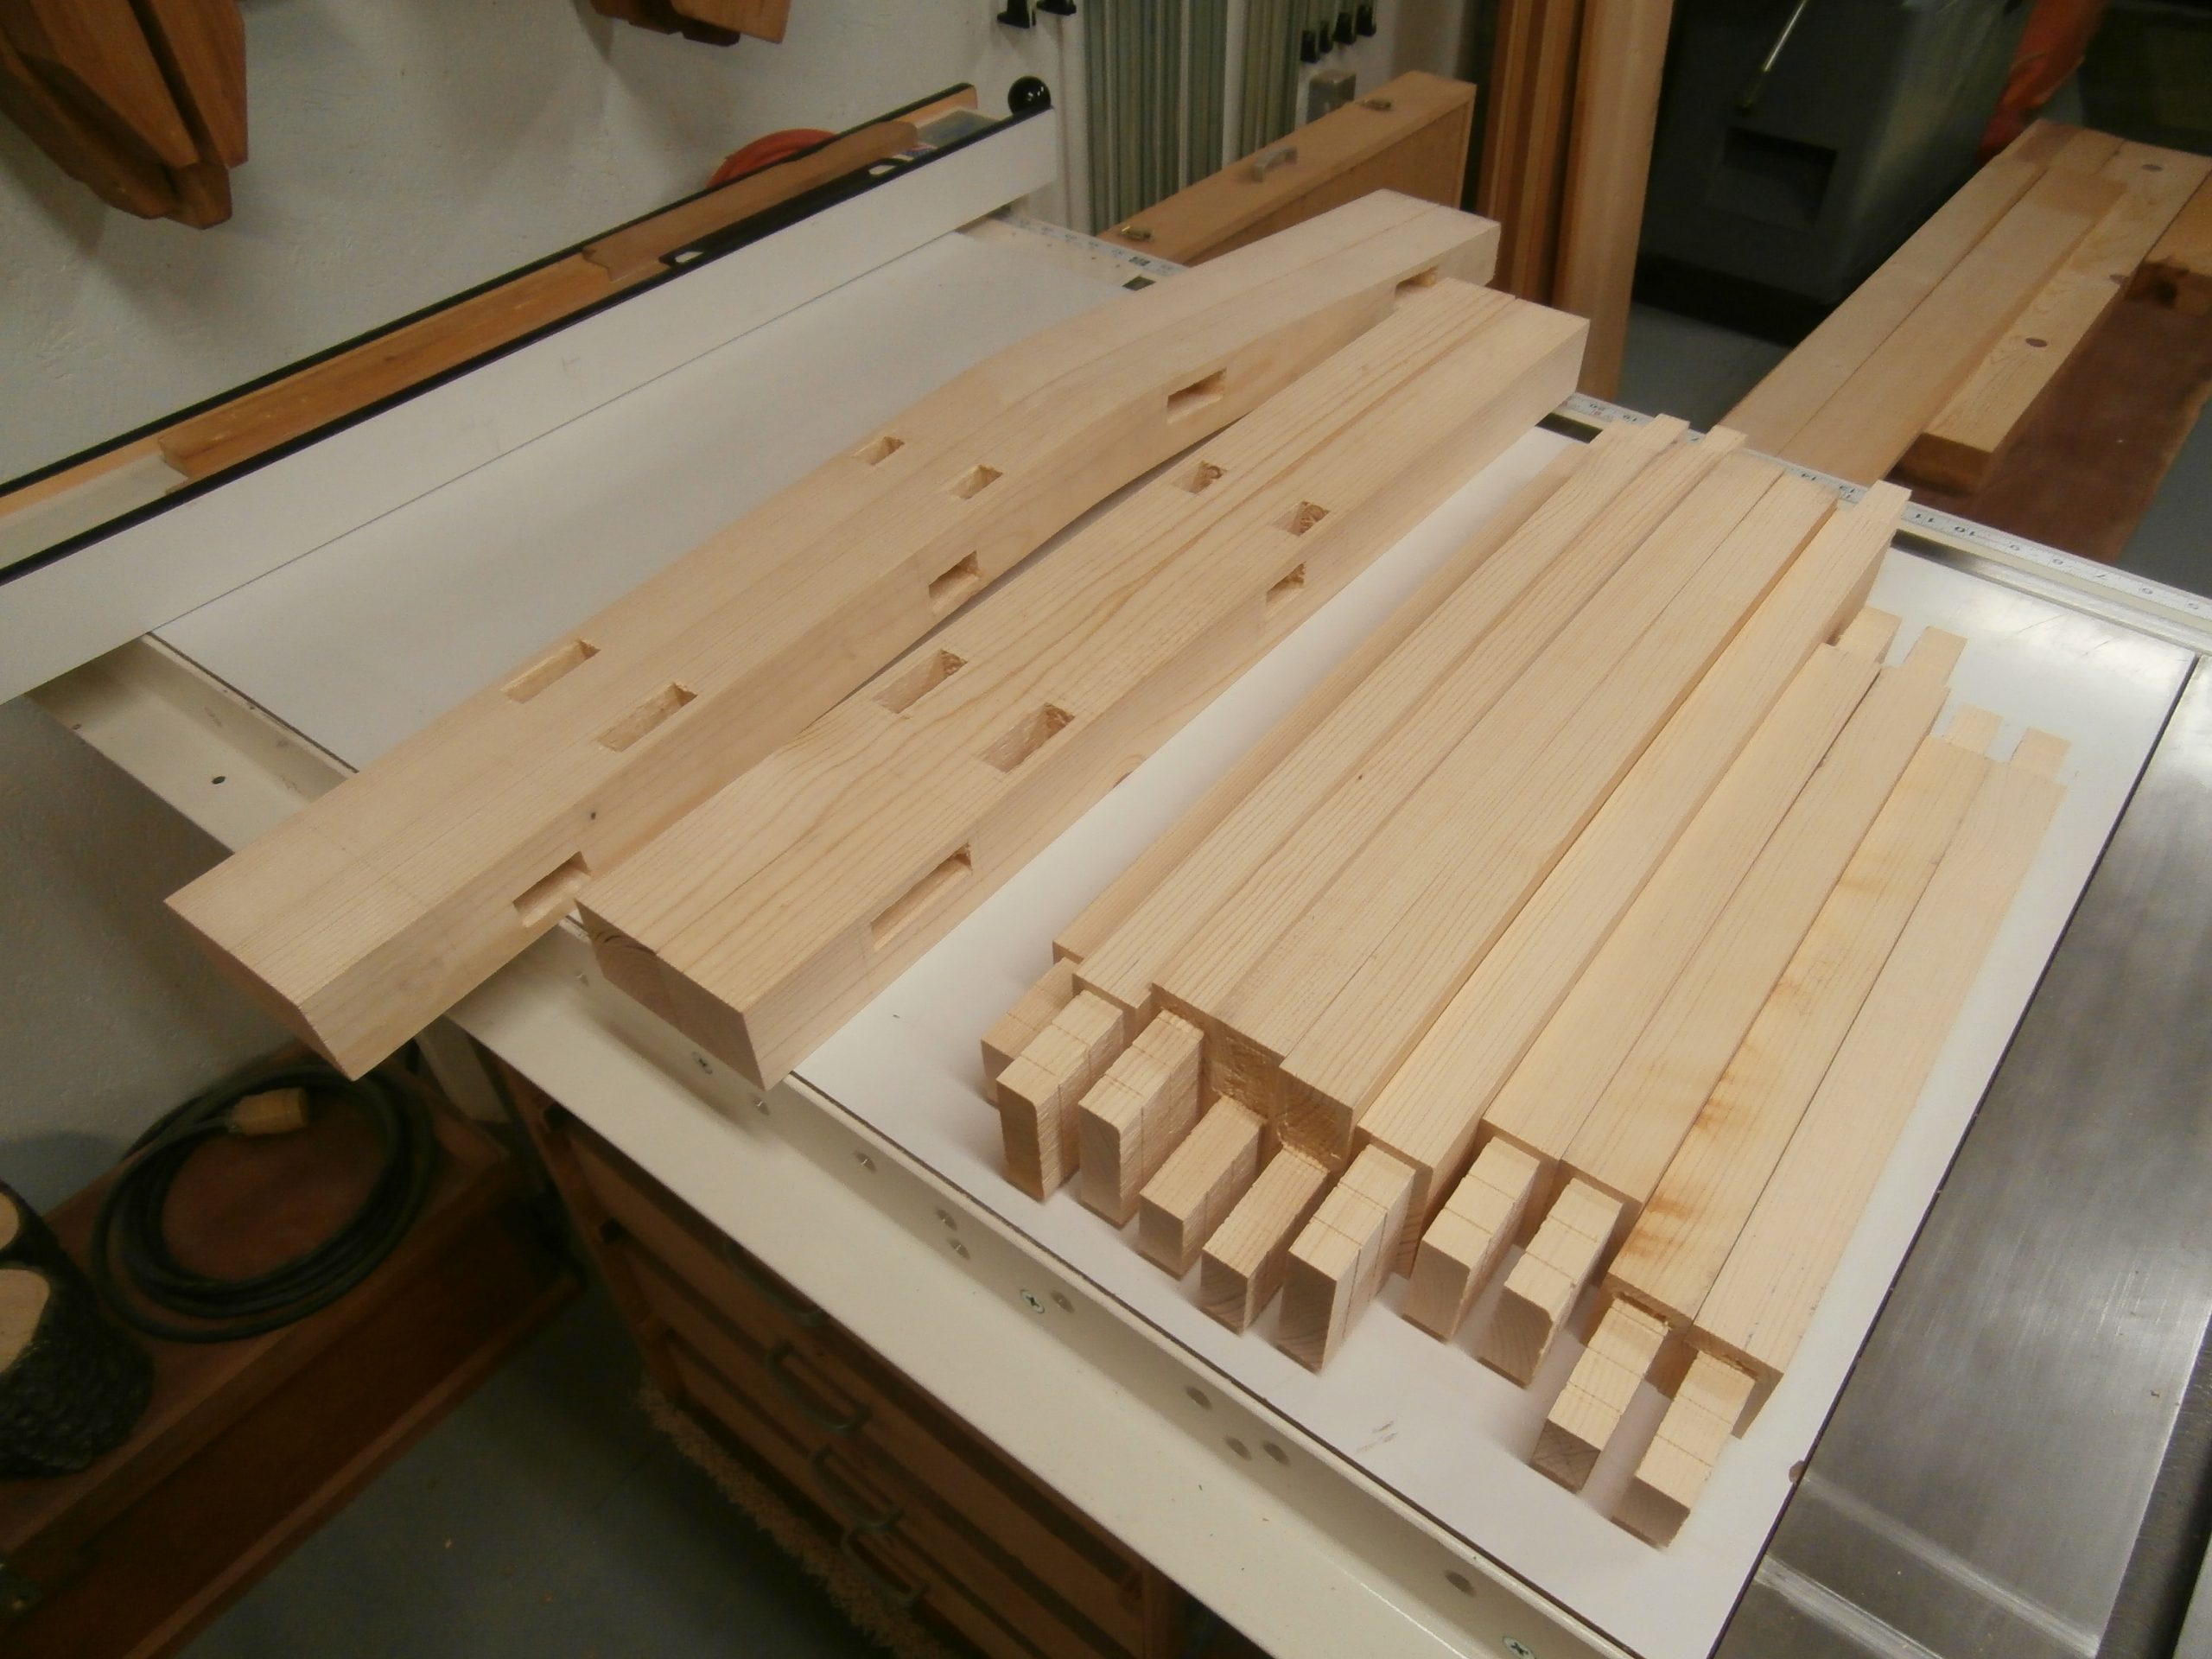
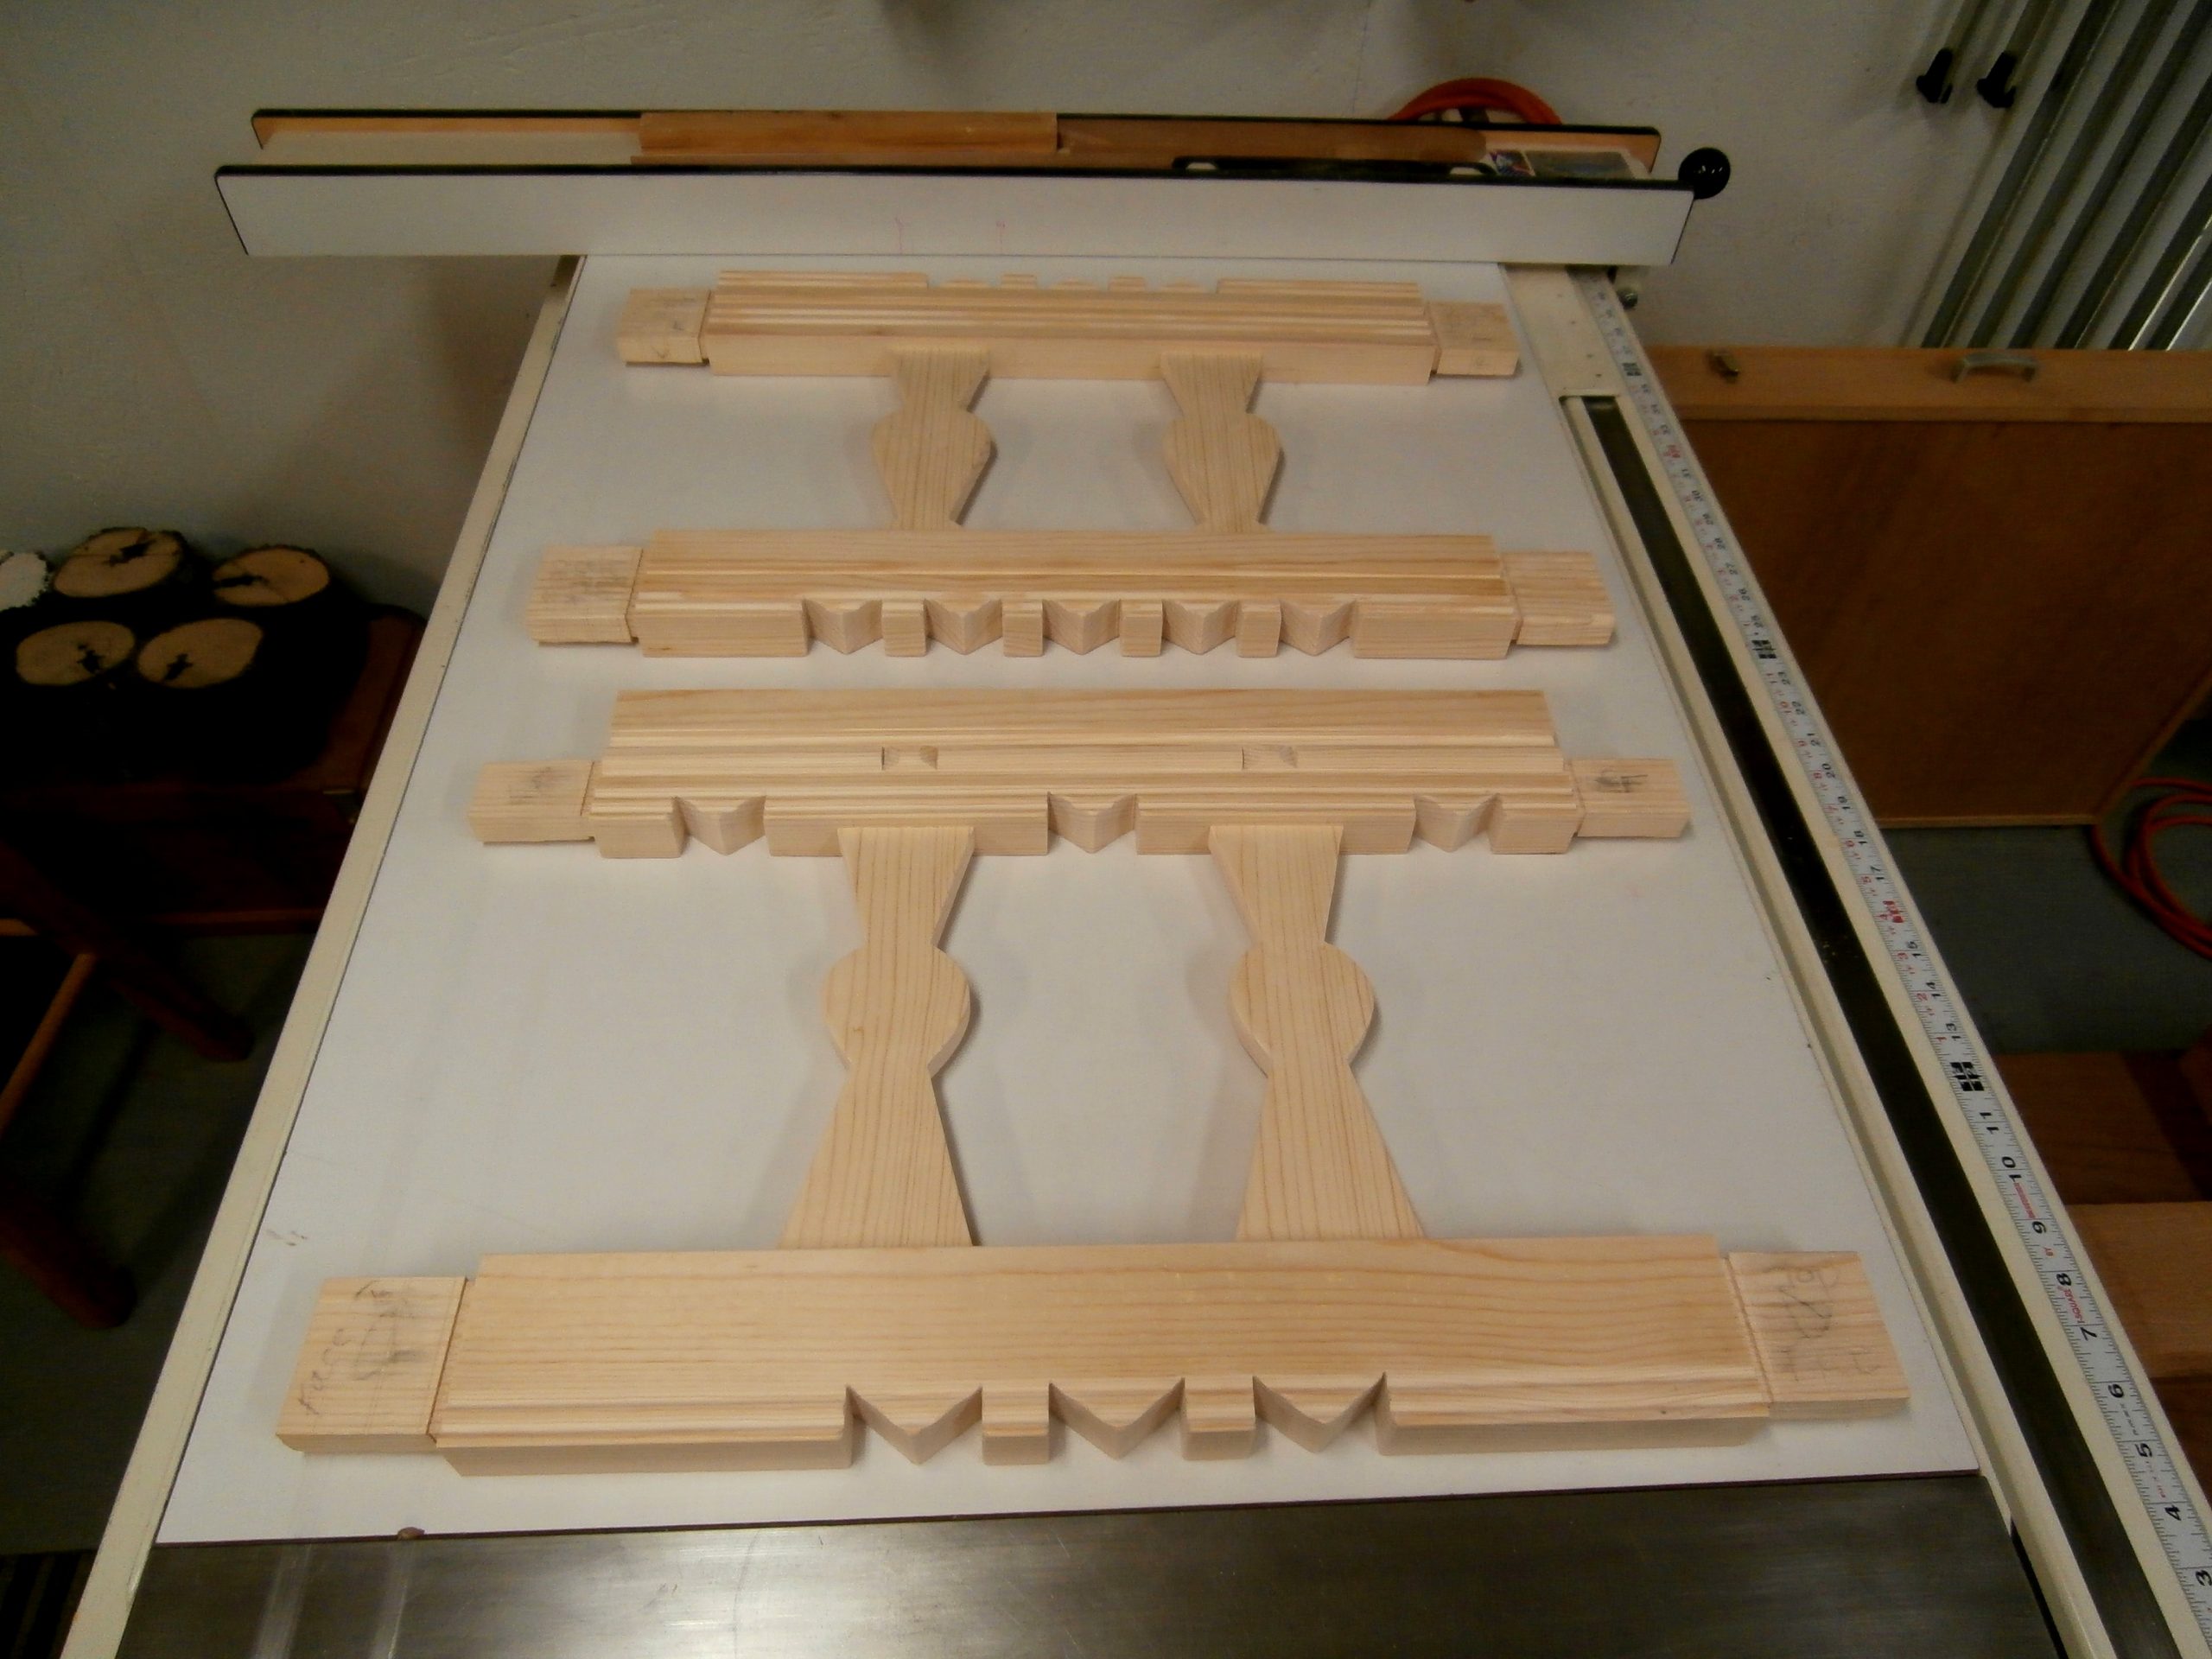
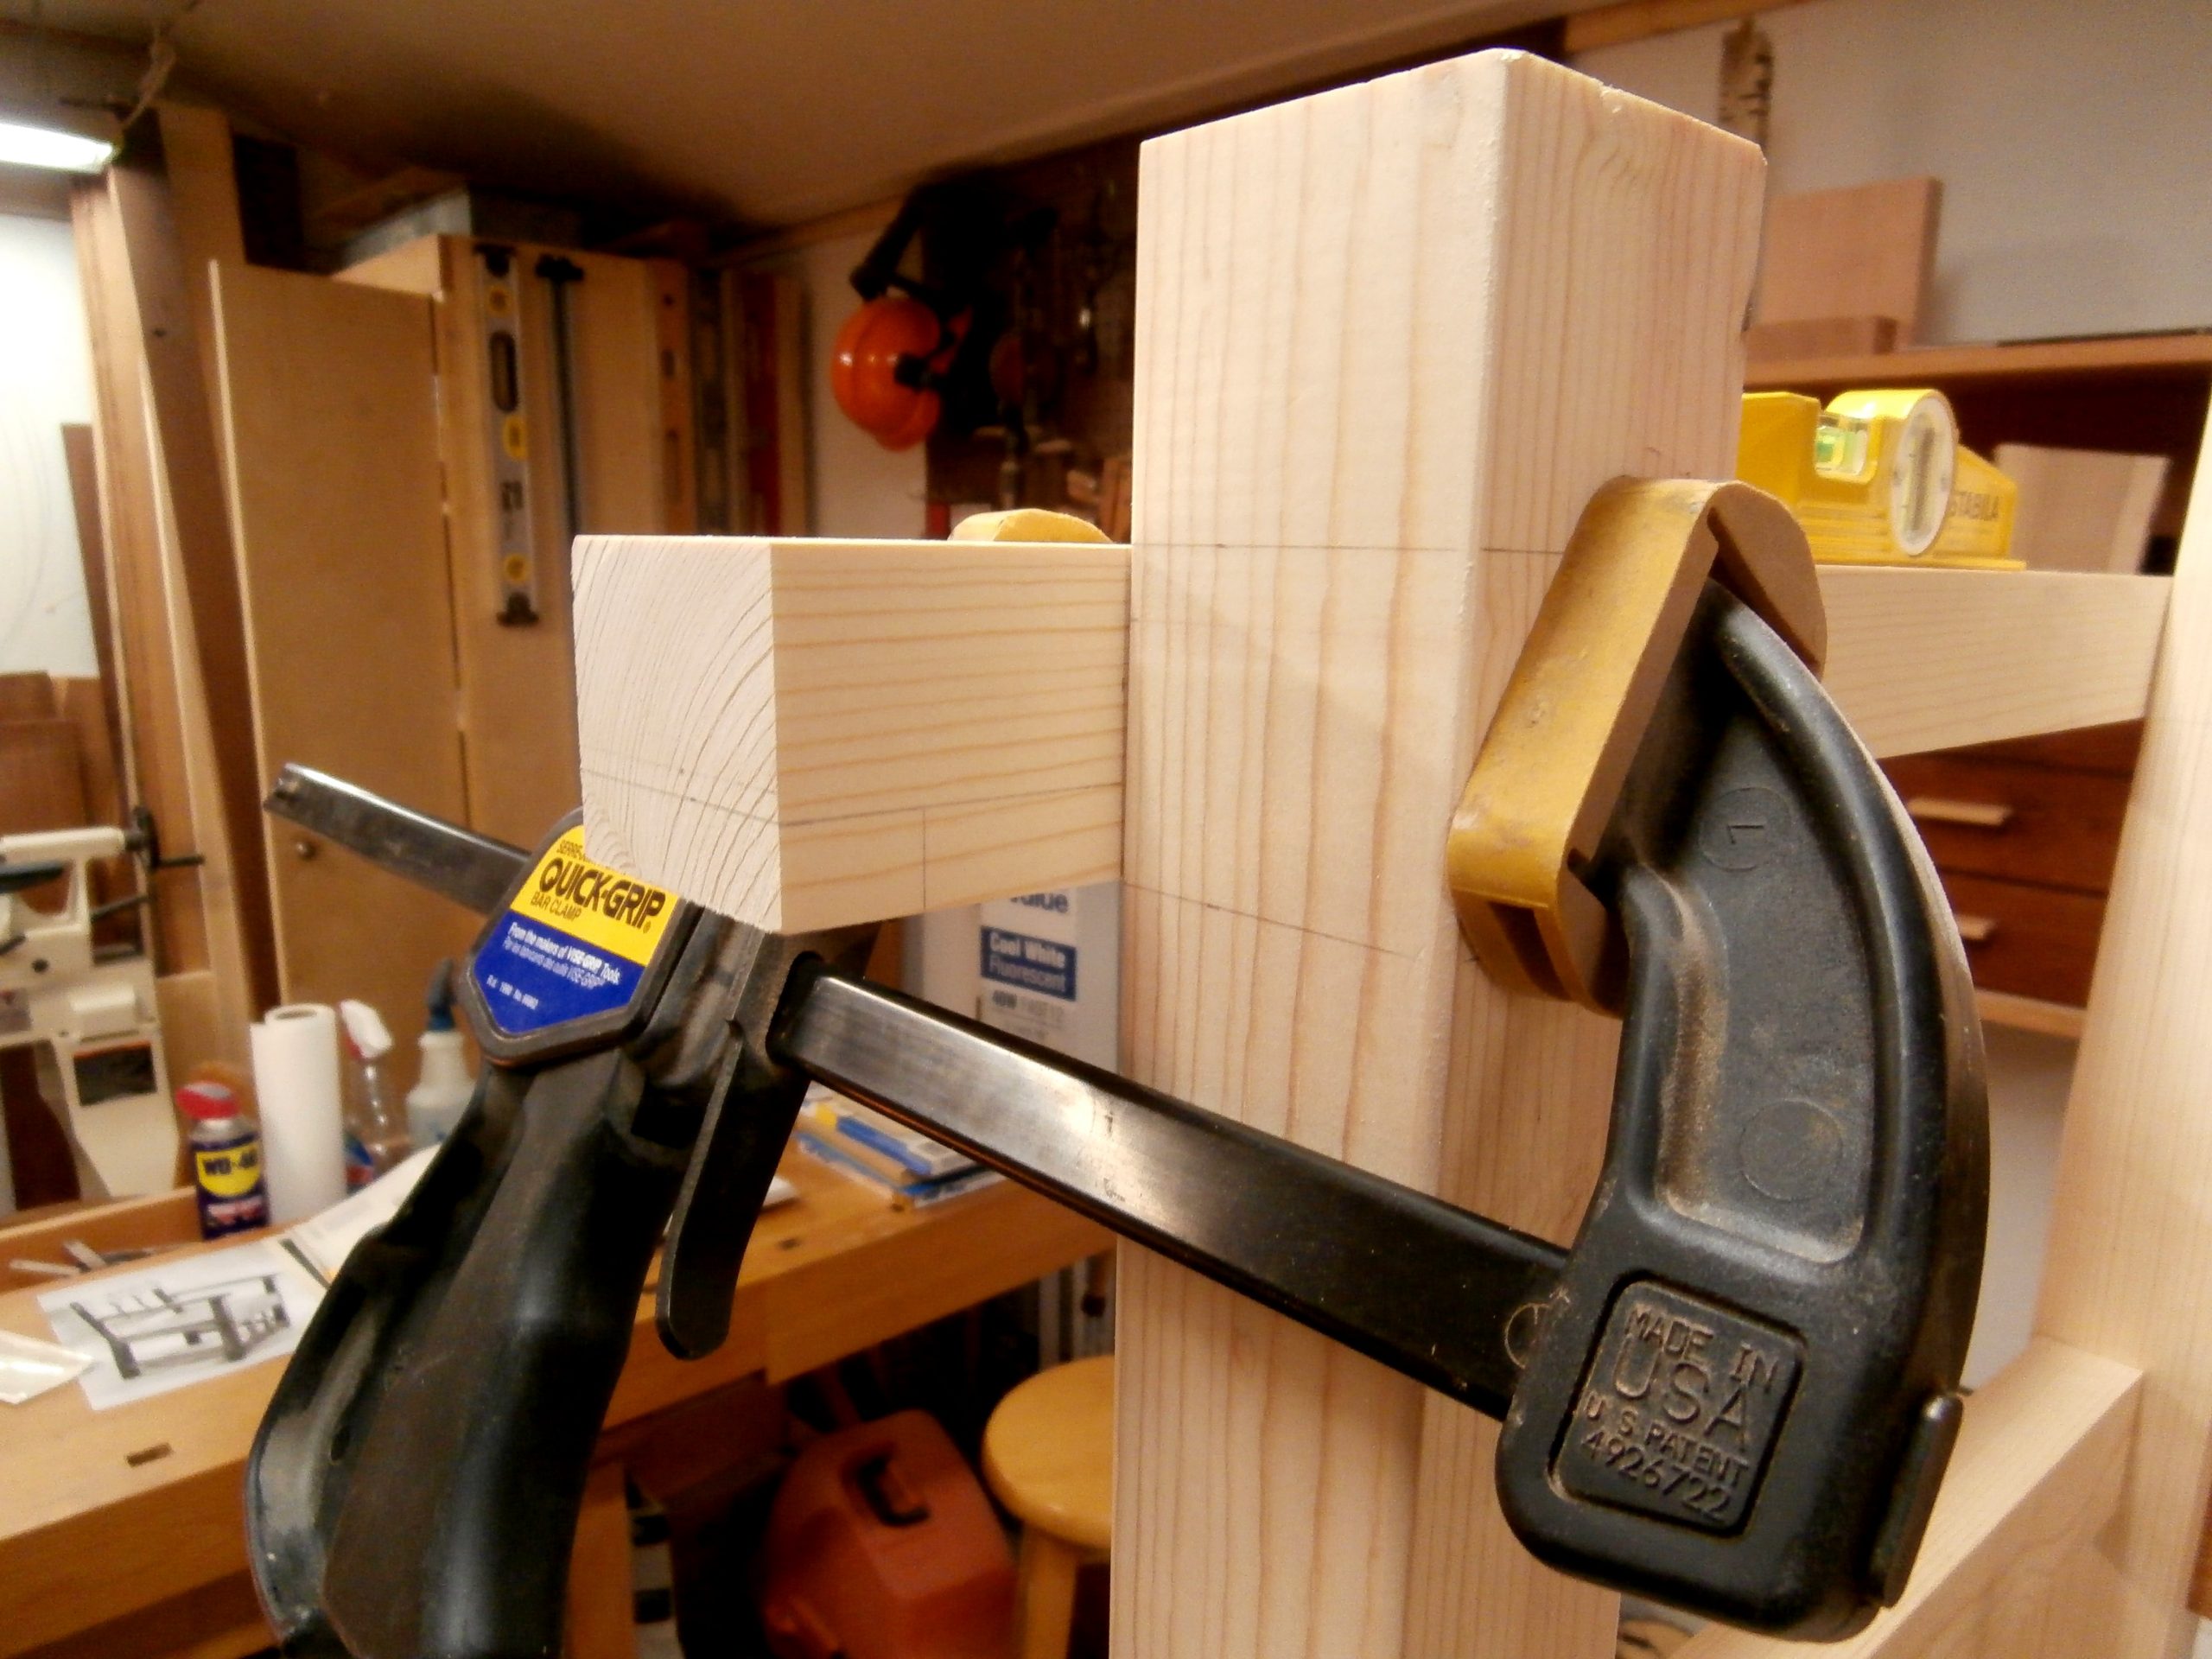
Without plans or the actual chair to go by, I based my chair dimensions on the research I did for the New Mexico bench and the old photograph.  I prepared scaled drawings and then followed my usual practice of cutting and shaping all the individual pieces for the chair, including in this case, the “through” mortise and tenon joinery used on the original (“through” referring to the fact that mortises pass all the way through the wood so that the tenon ends are exposed).  See below.  [Click on any image to enlarge, All photos copyright symbol Max Vollmer]

I then tried to estimate the original dimensions of the back splats and those in front, below the seat; drew them on paper, glued the paper down to boards, and rough cut out the shapes on the bandsaw leaving enough wood top and bottom for tenons to go into the chair rails front and back.

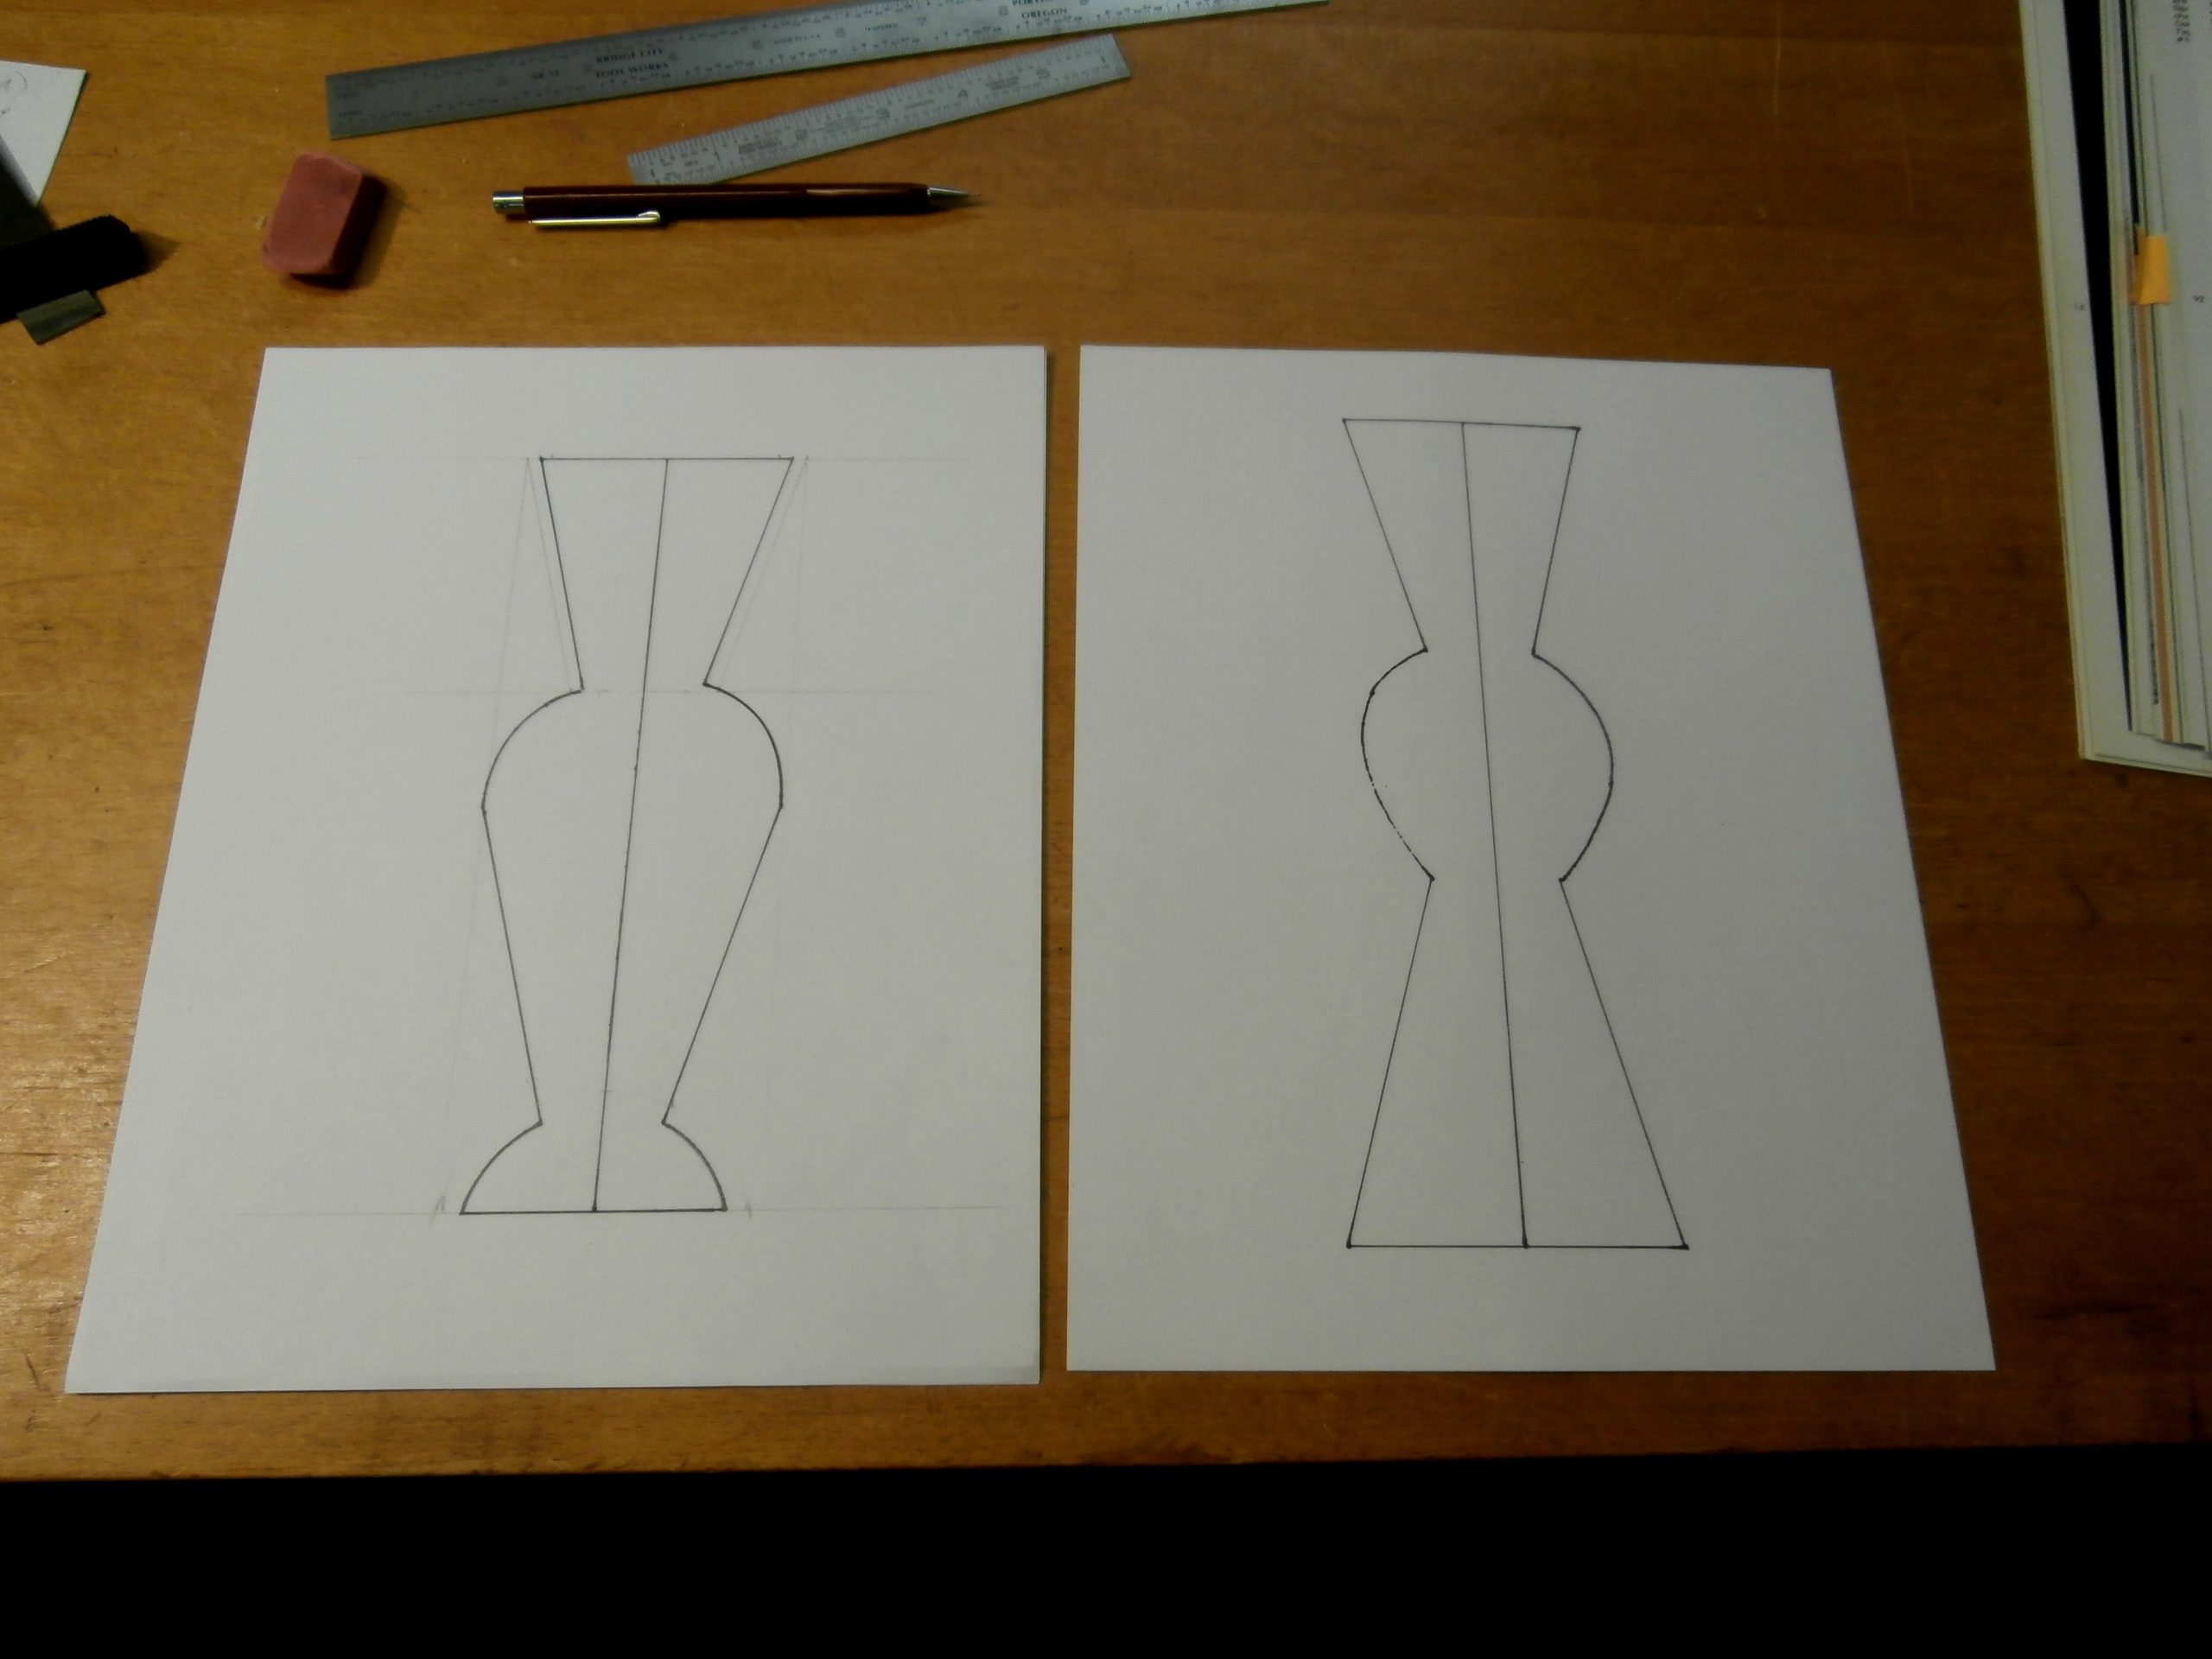
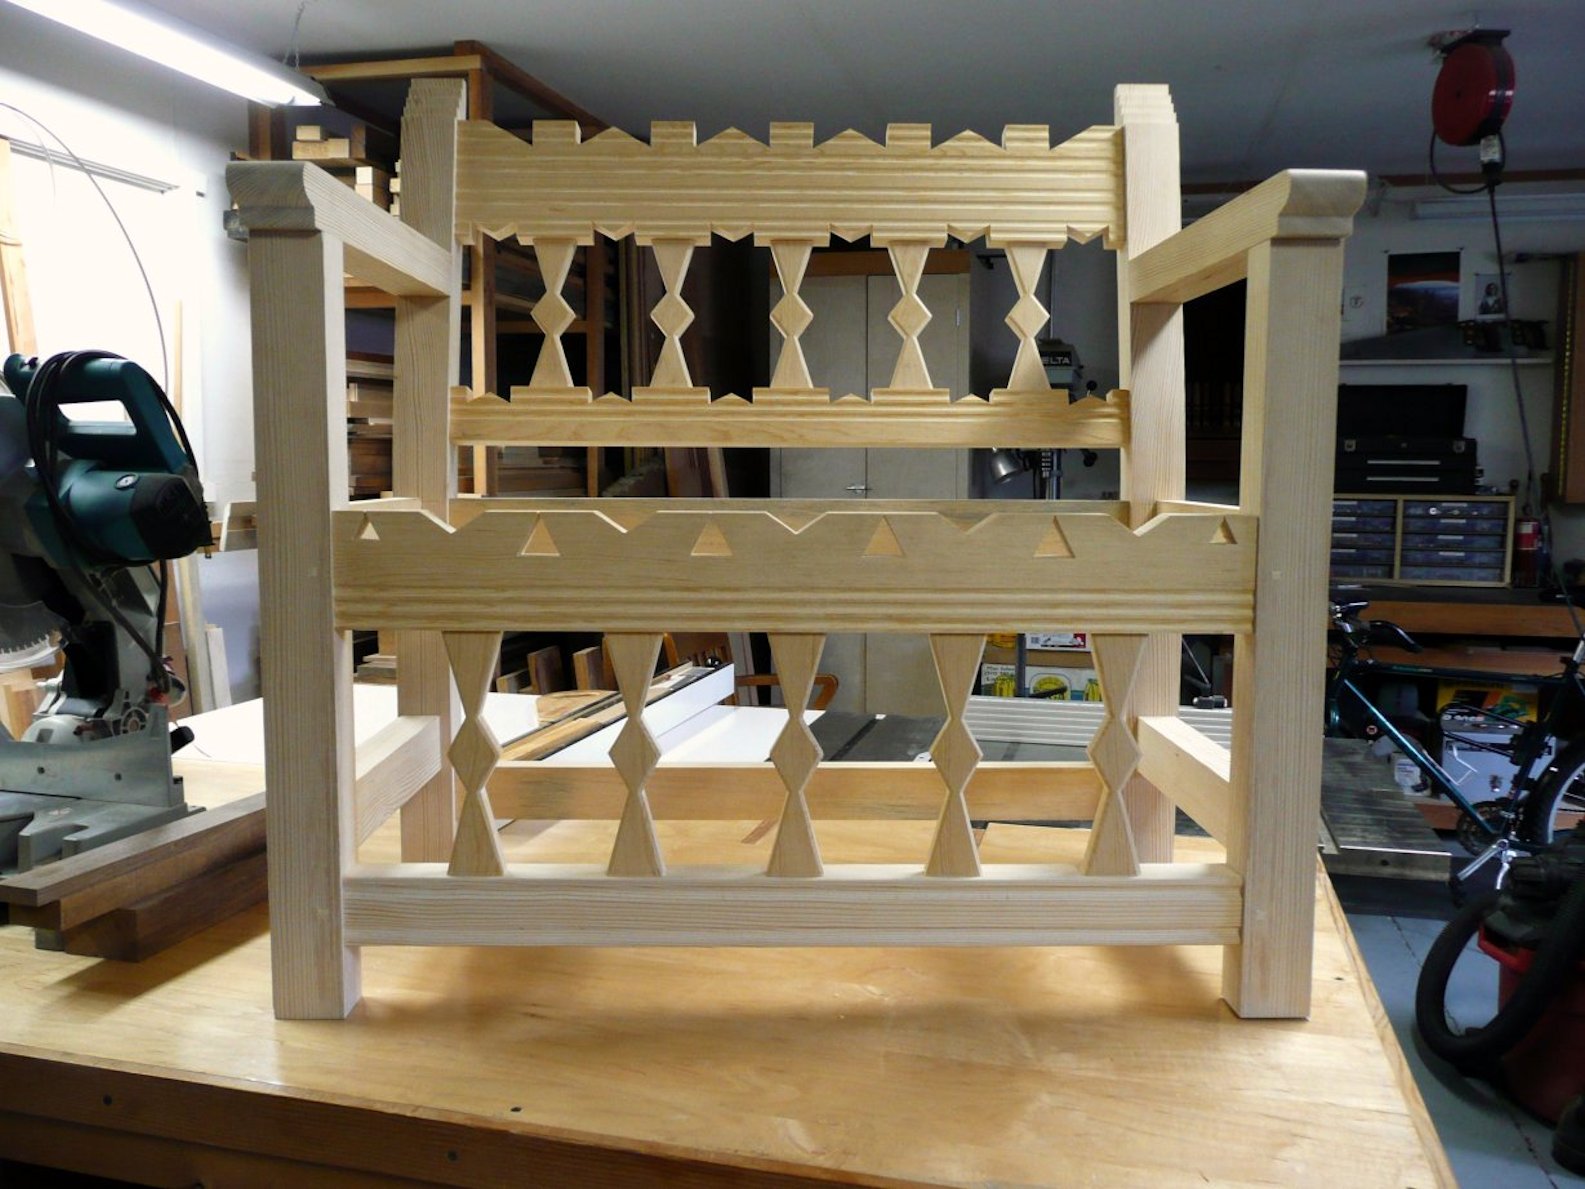
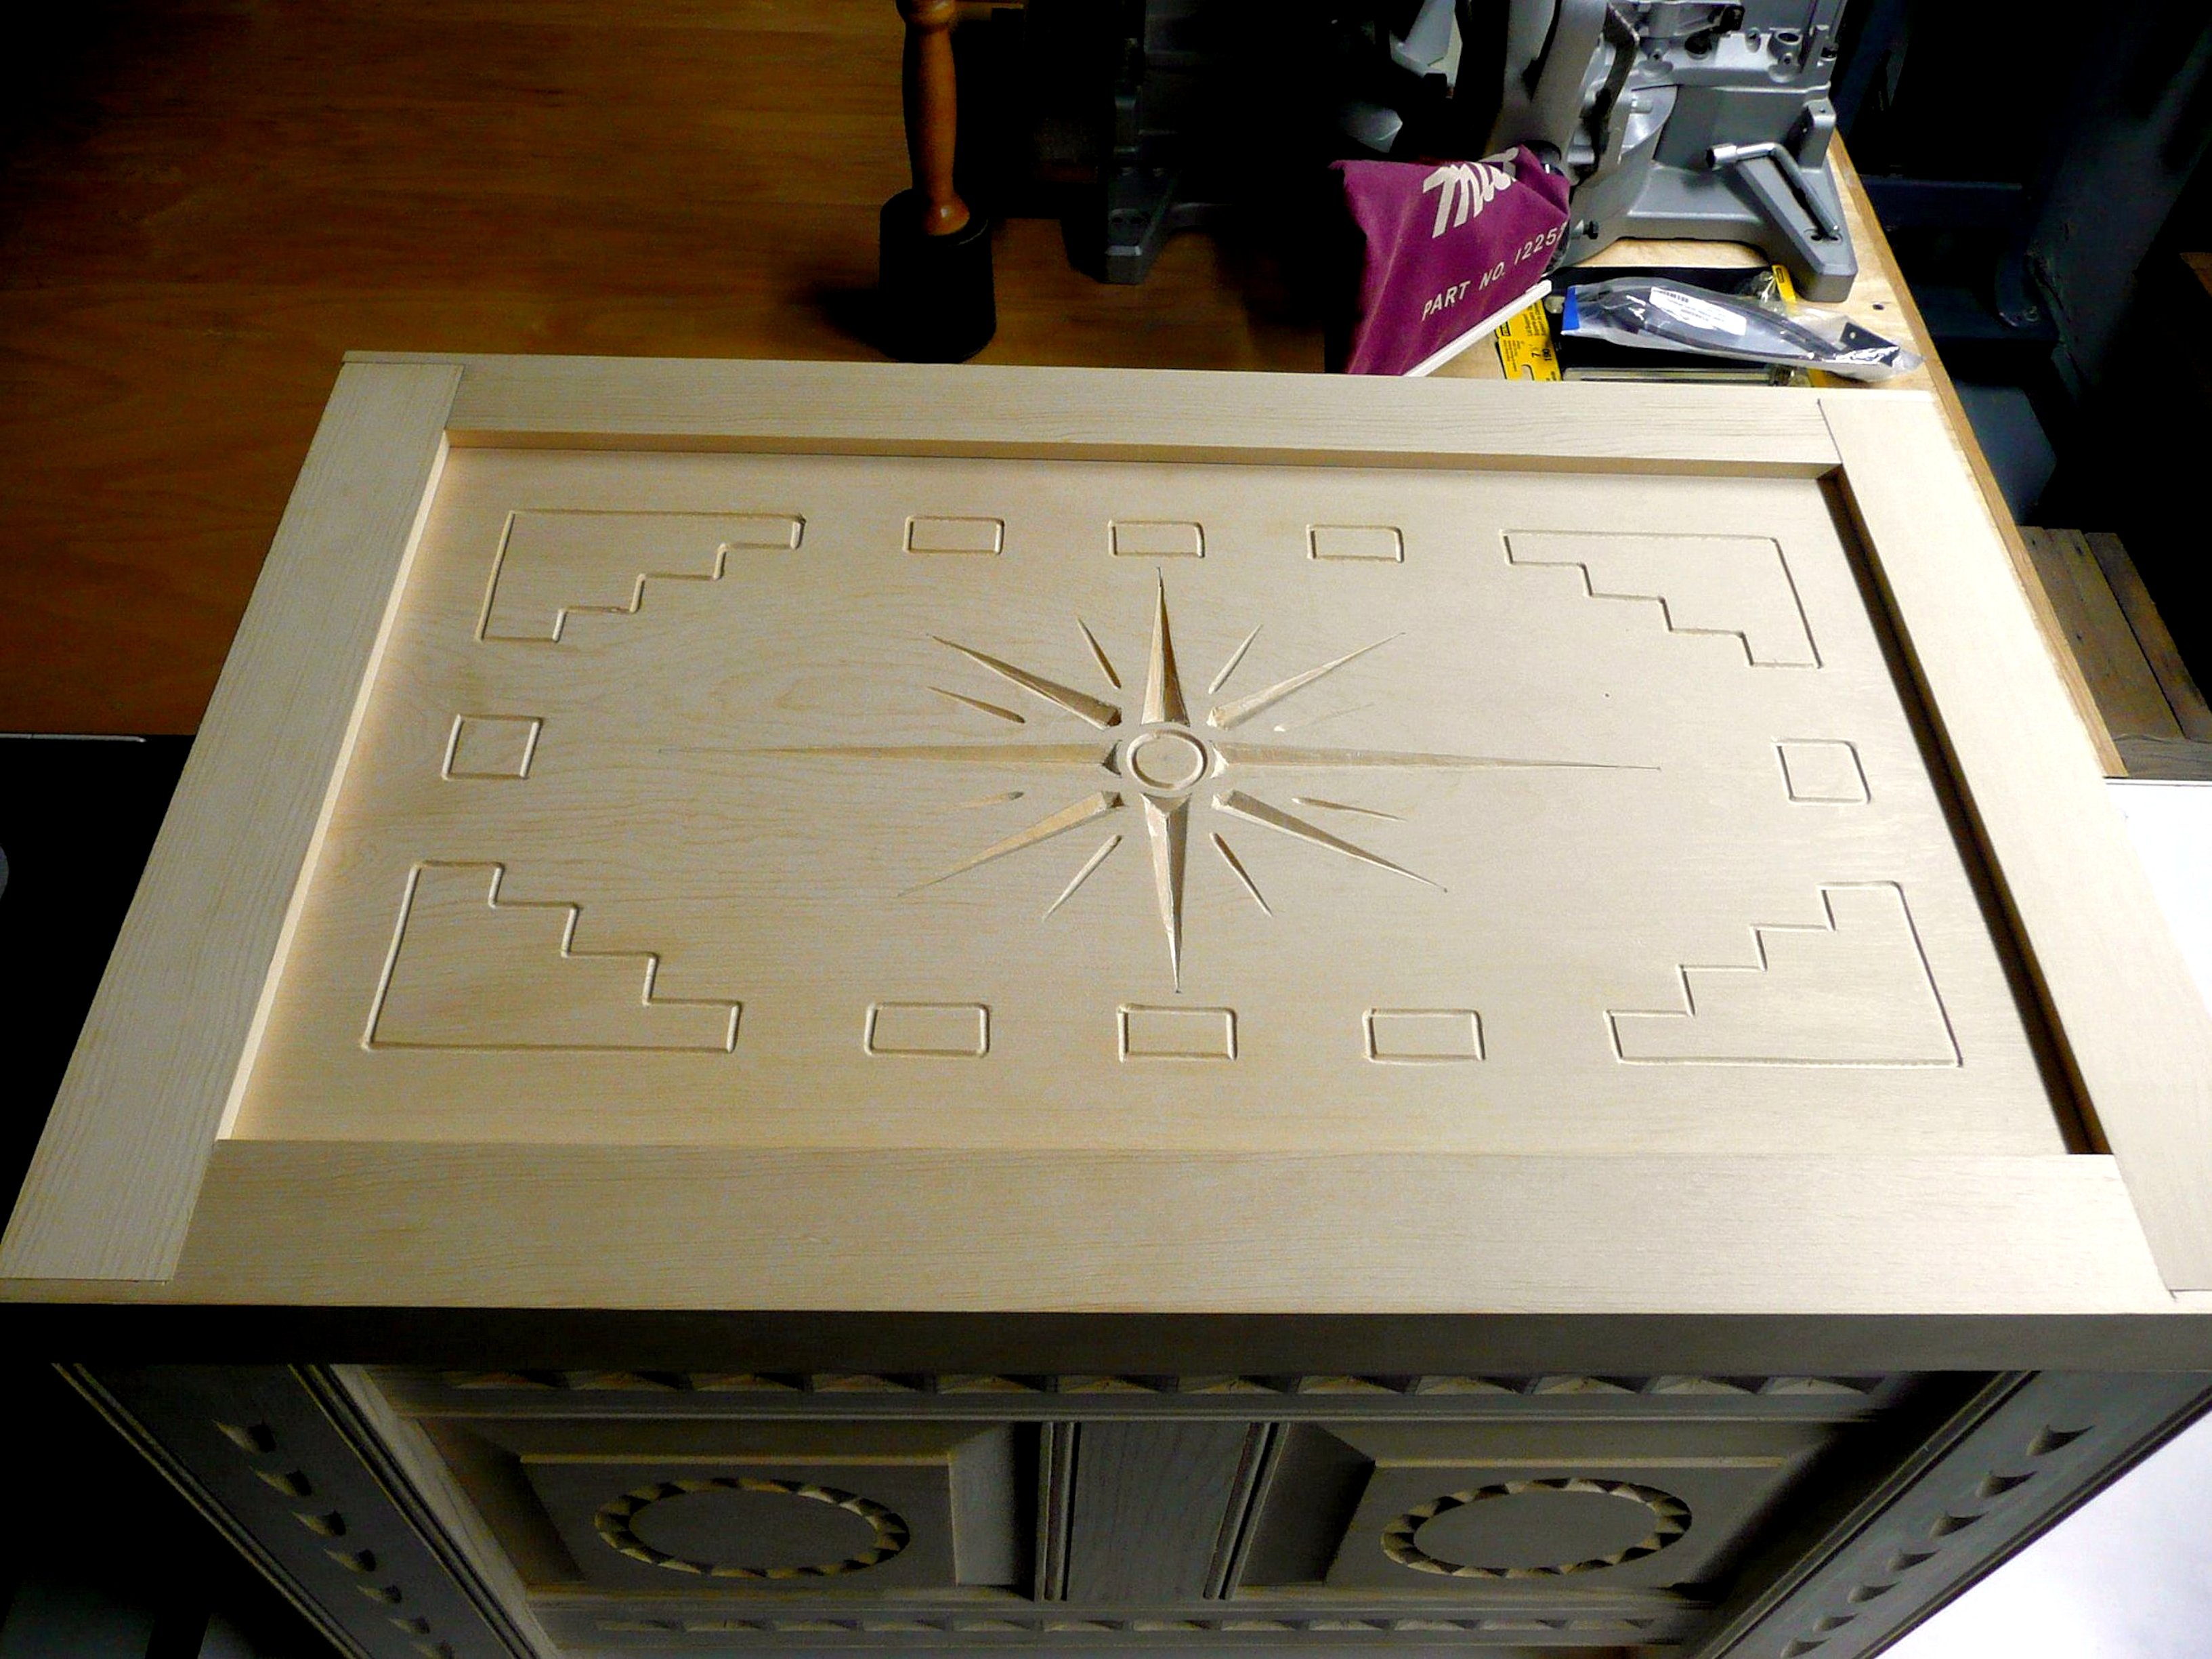
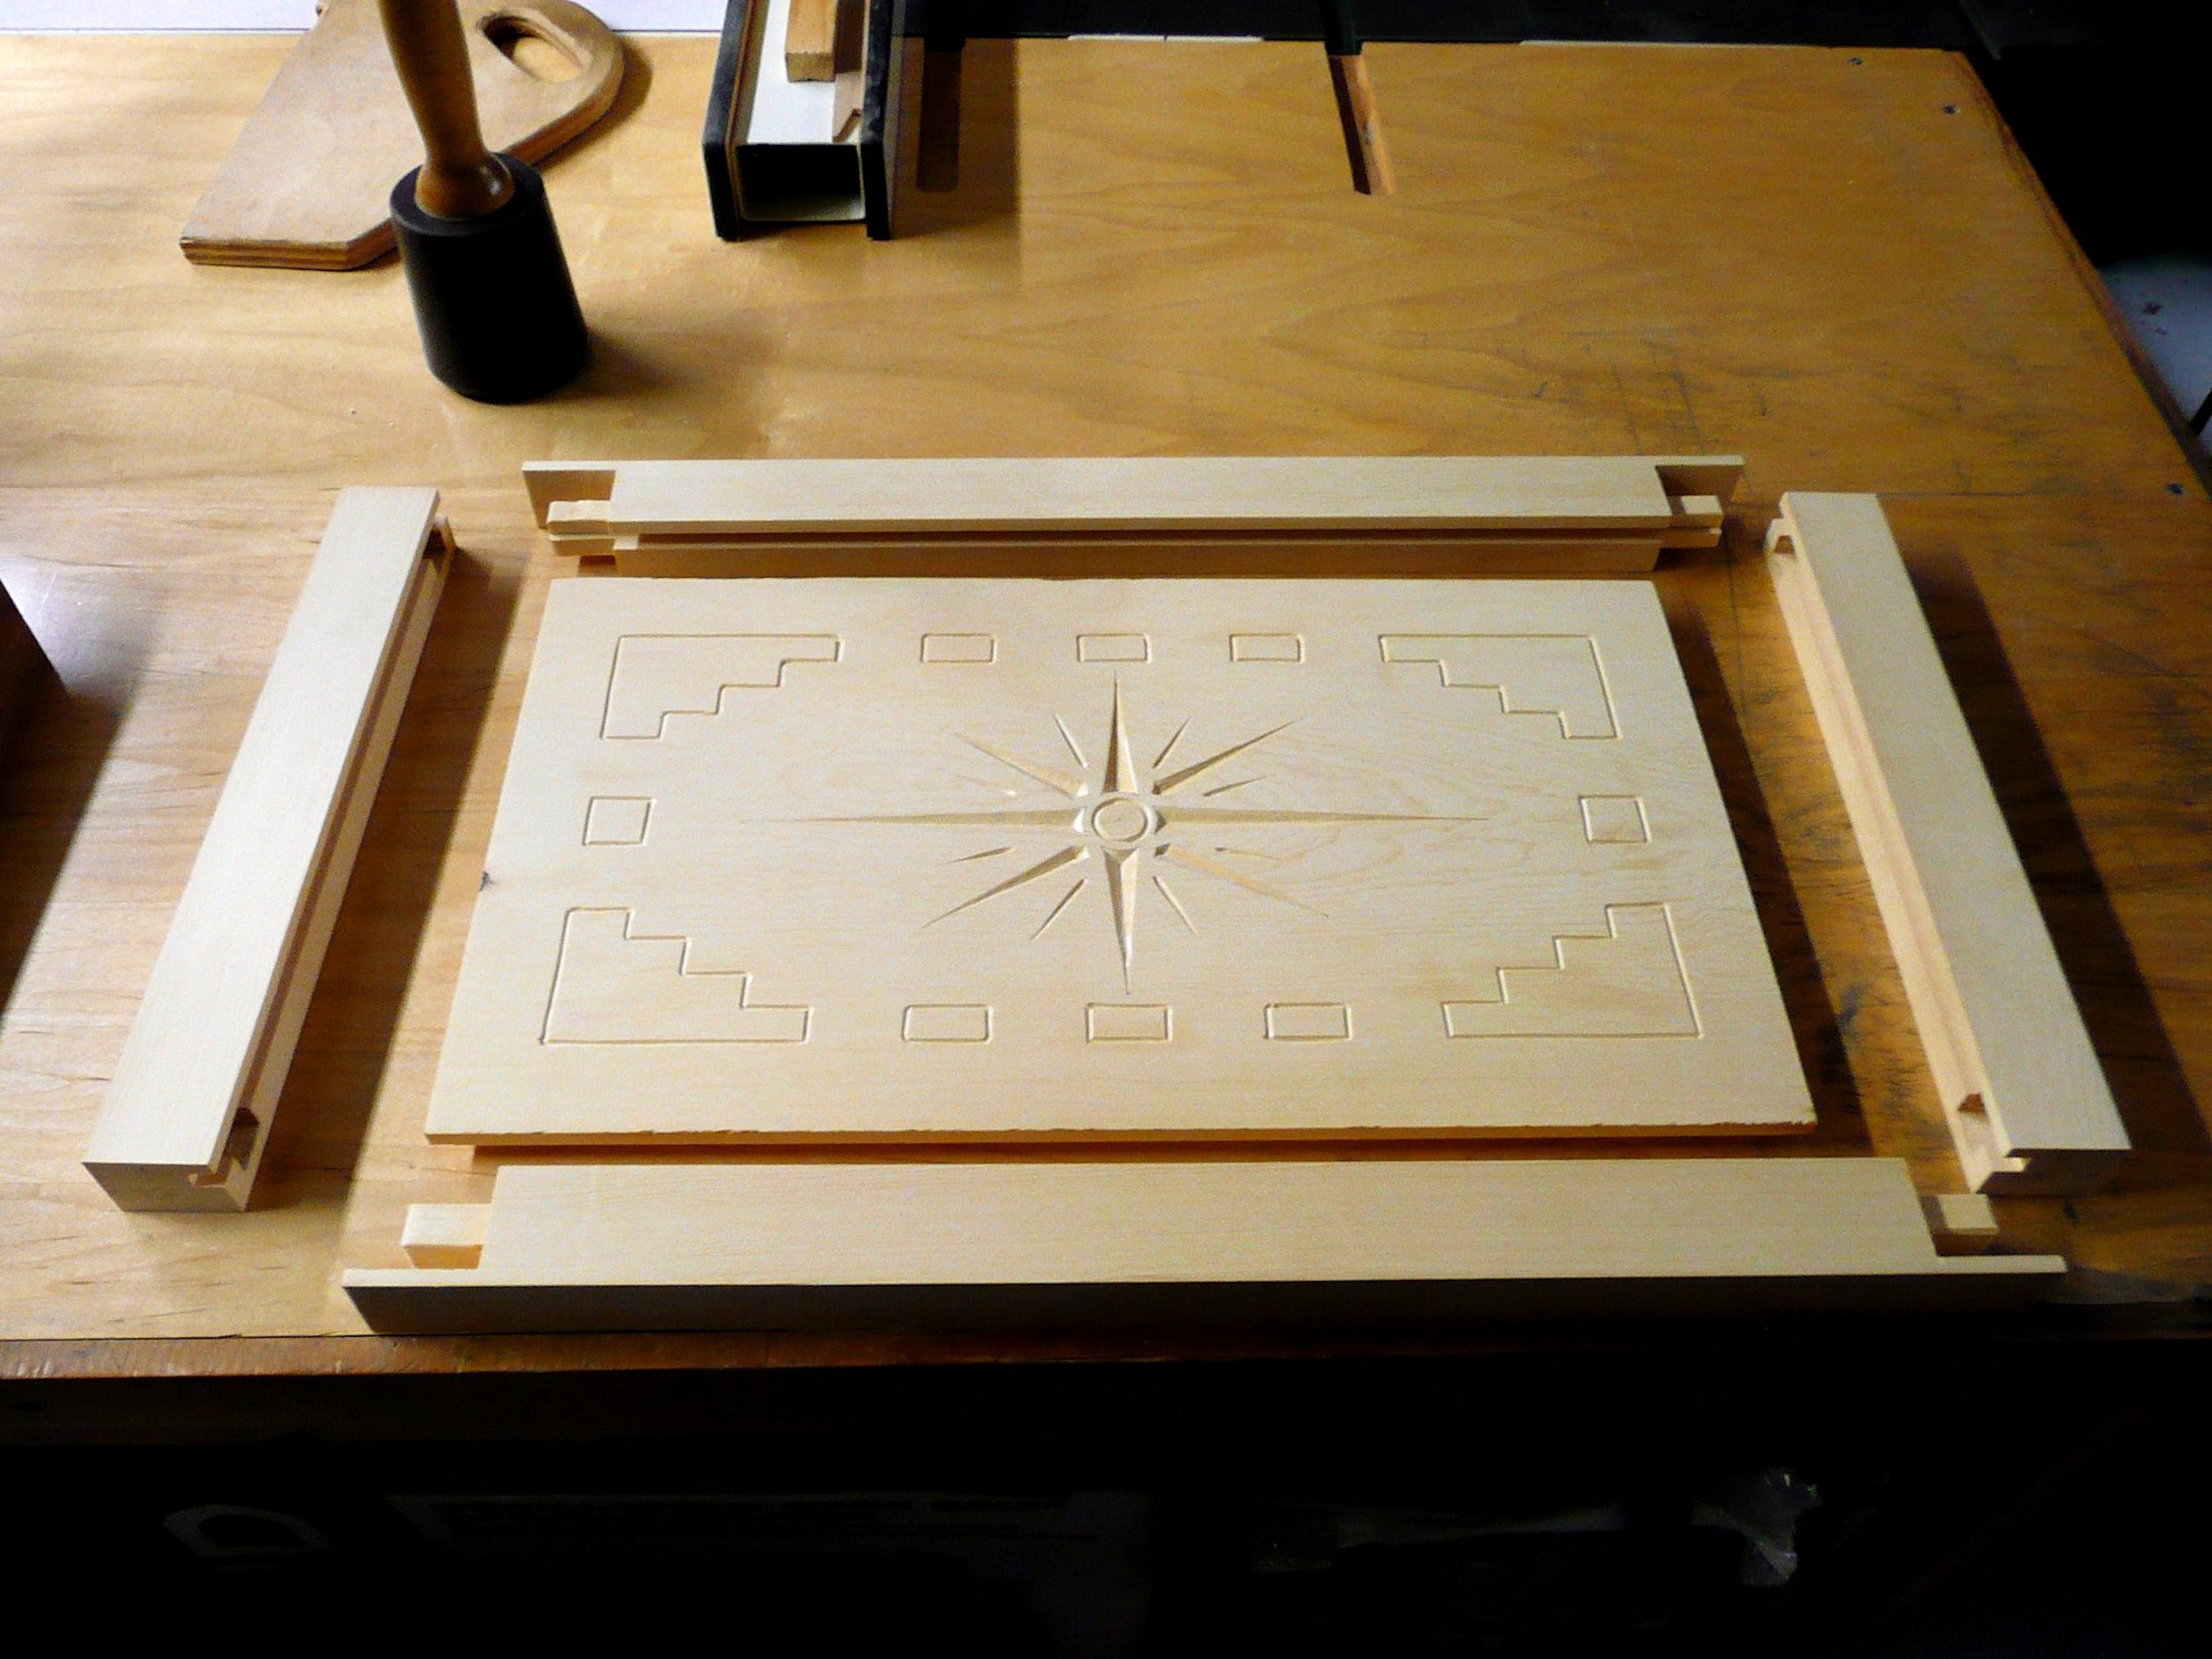
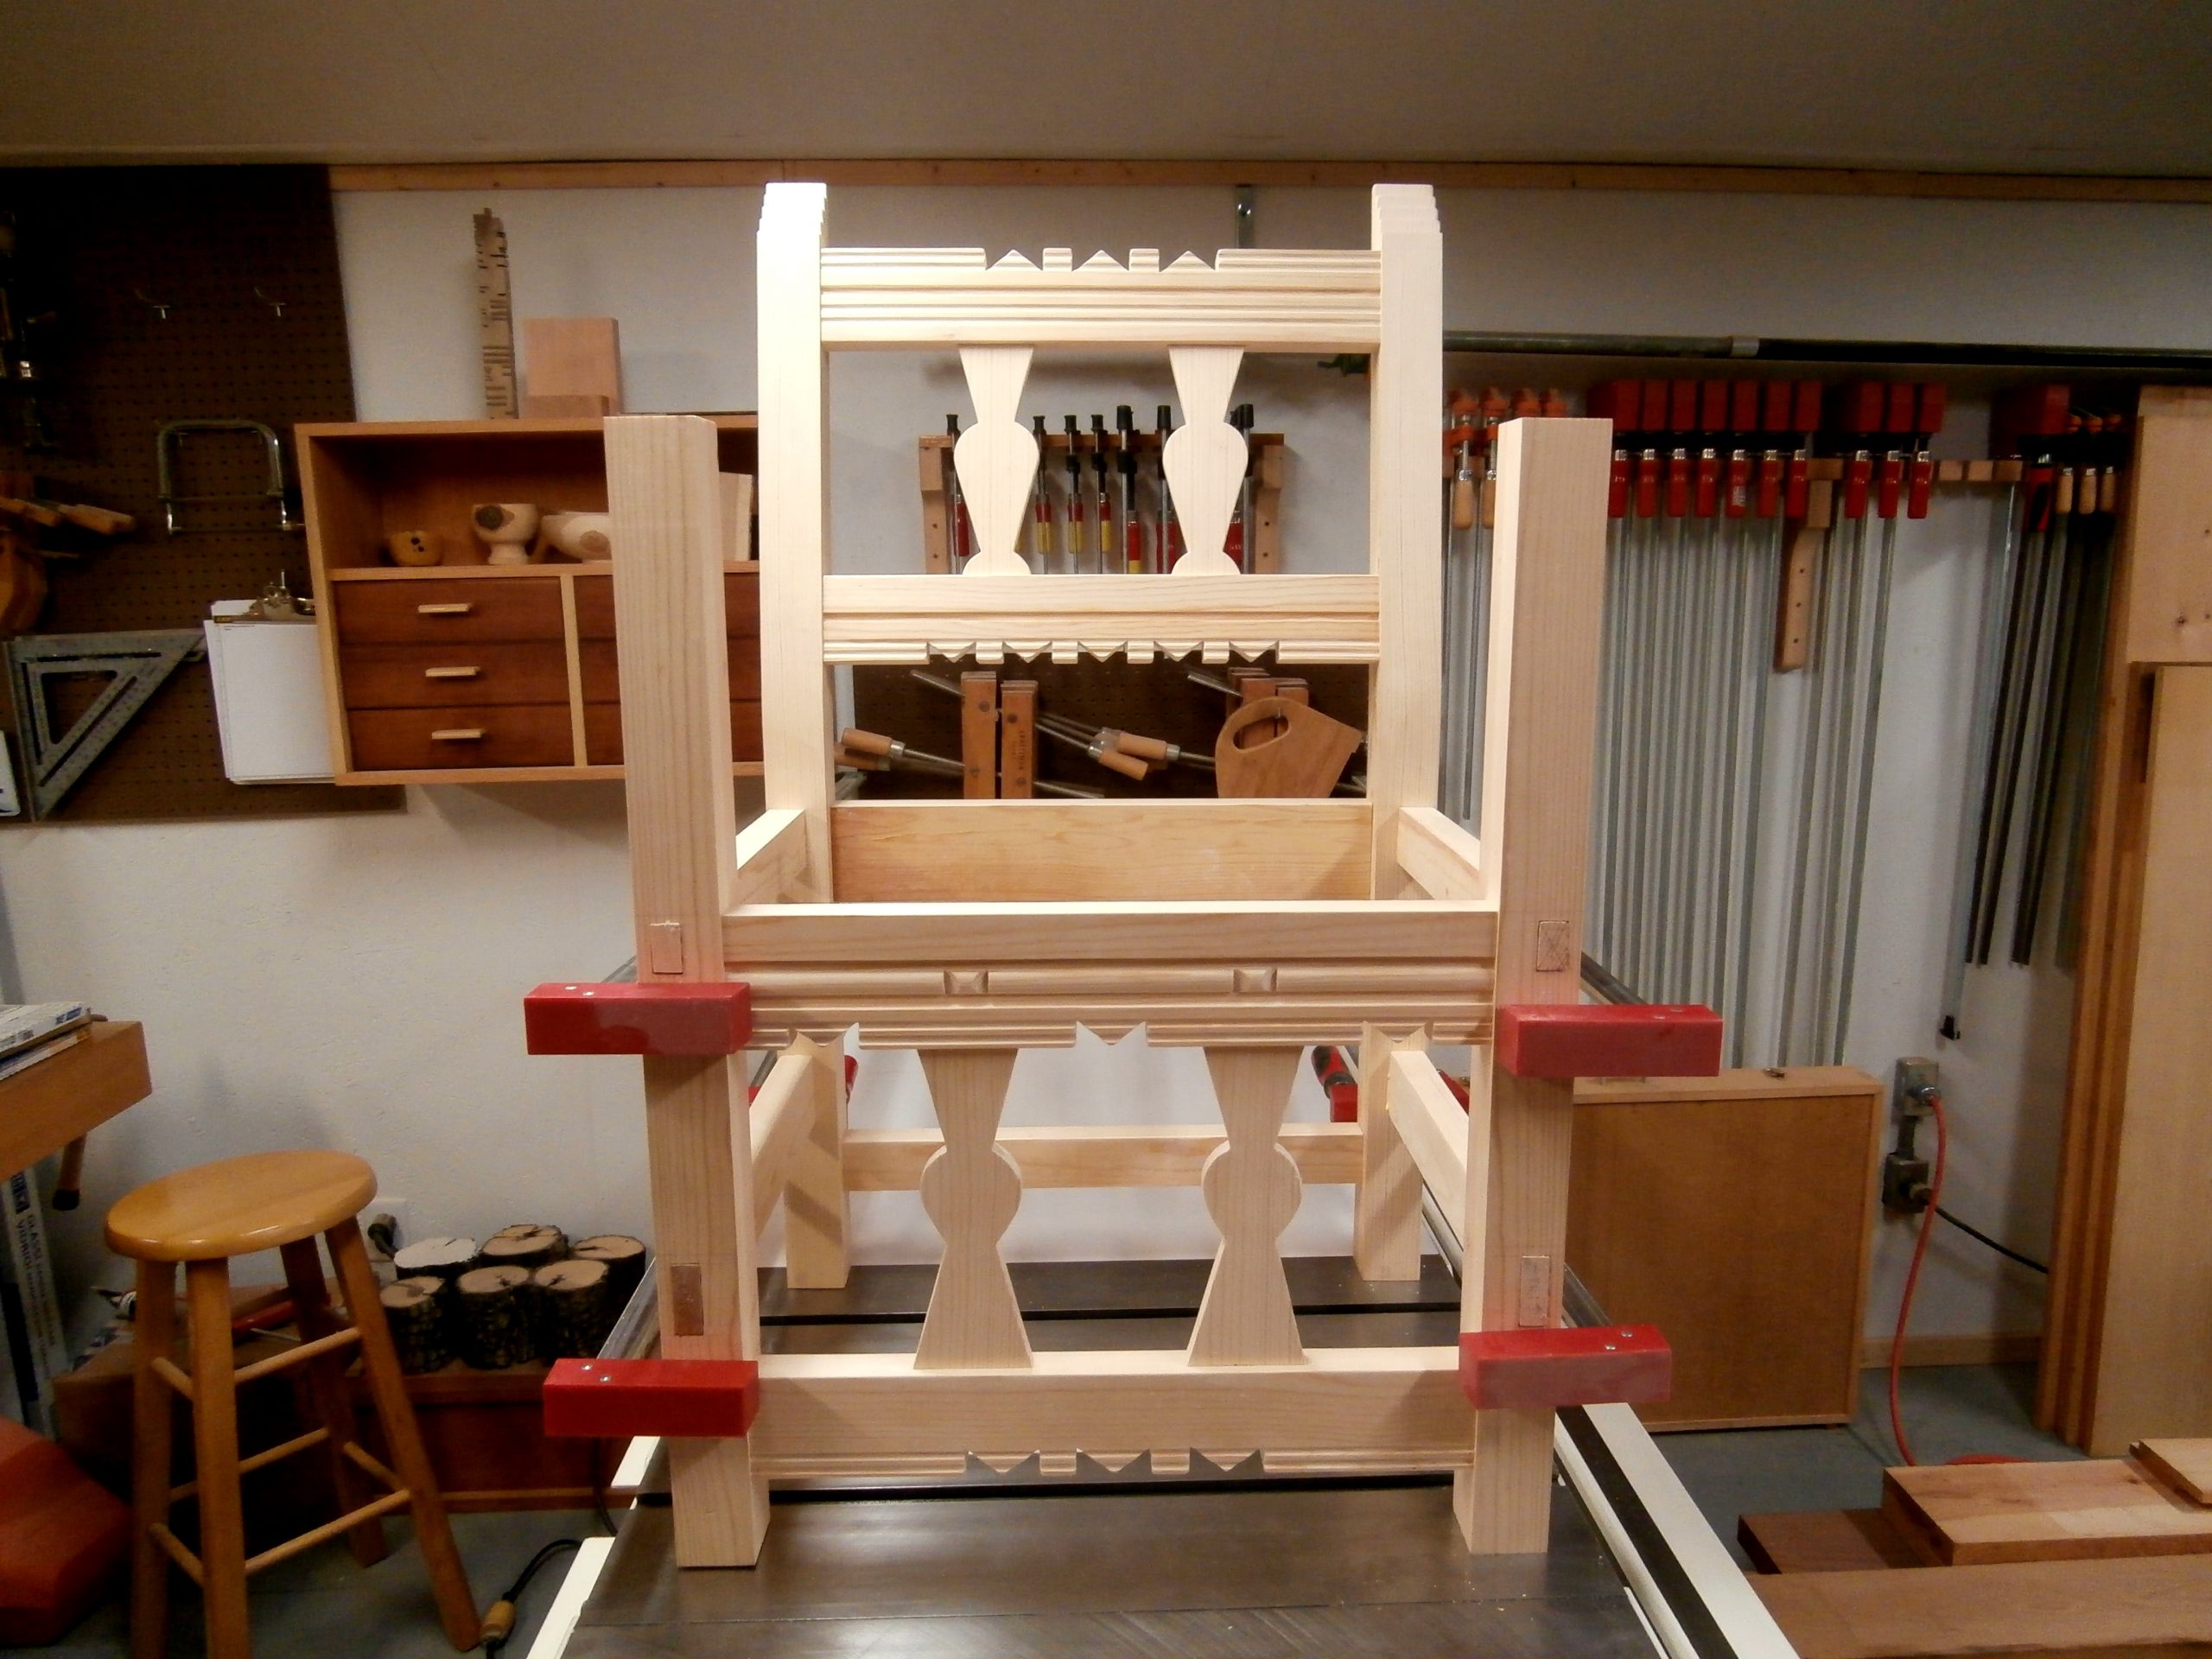
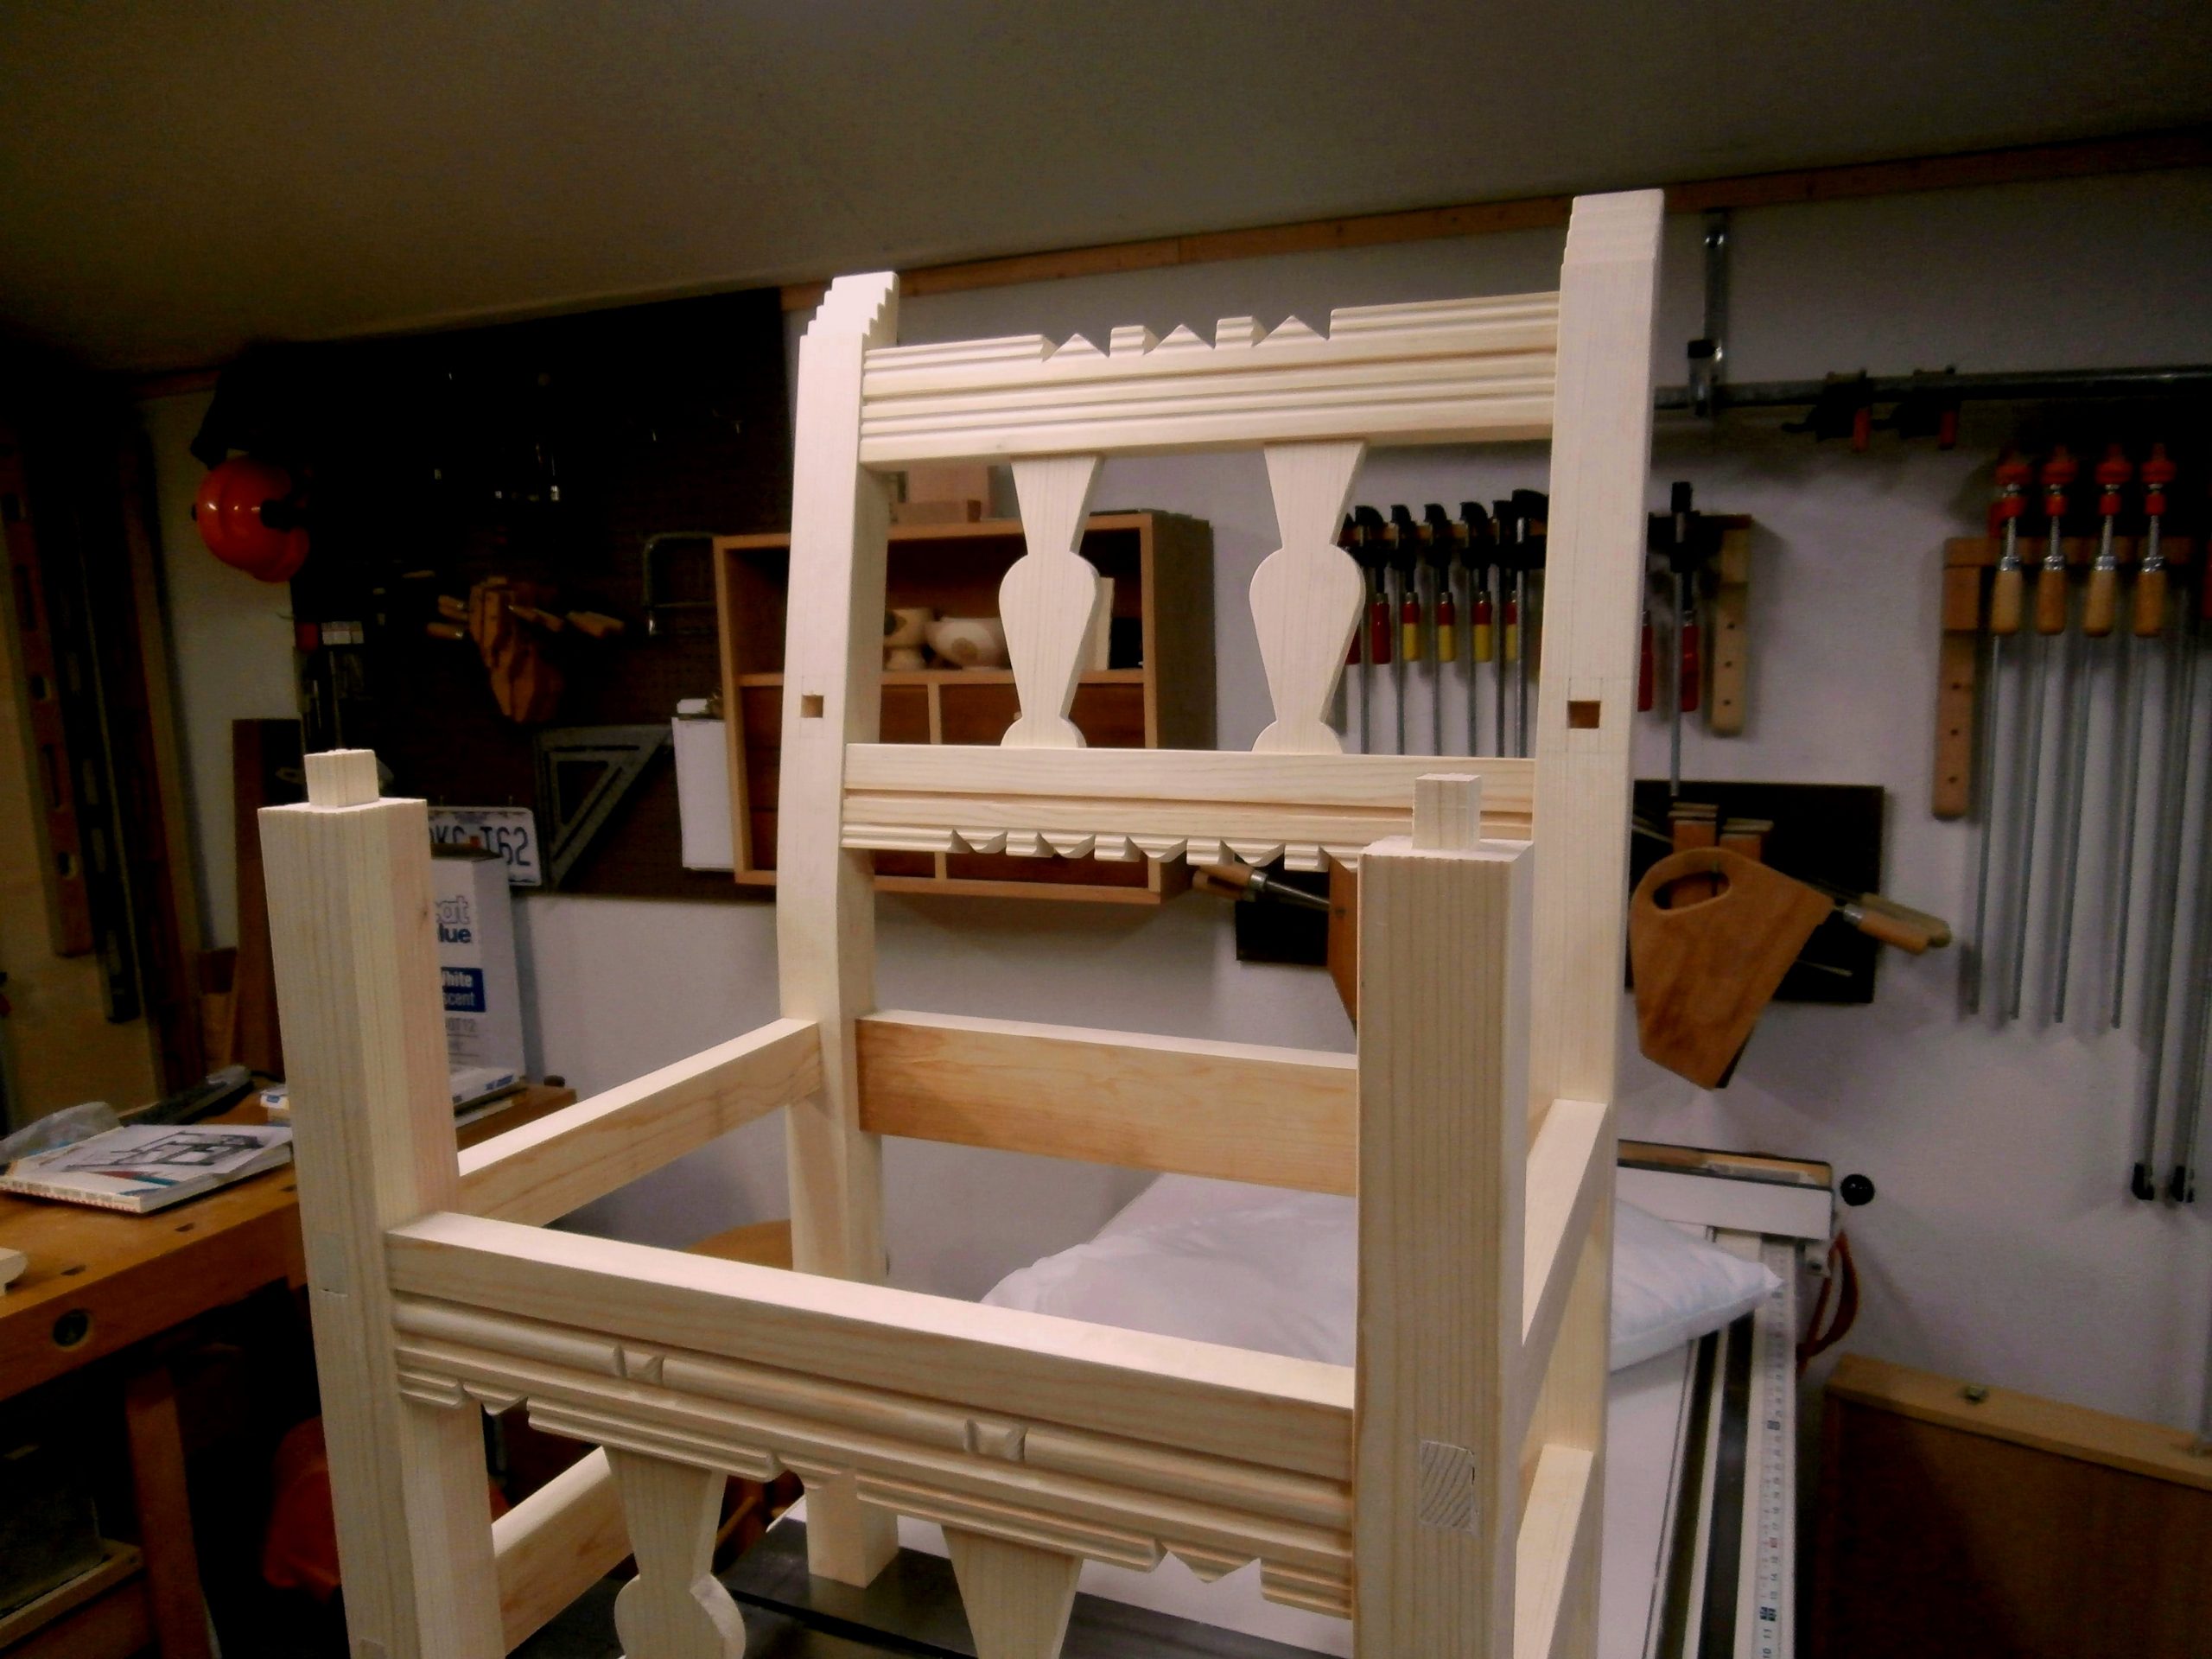
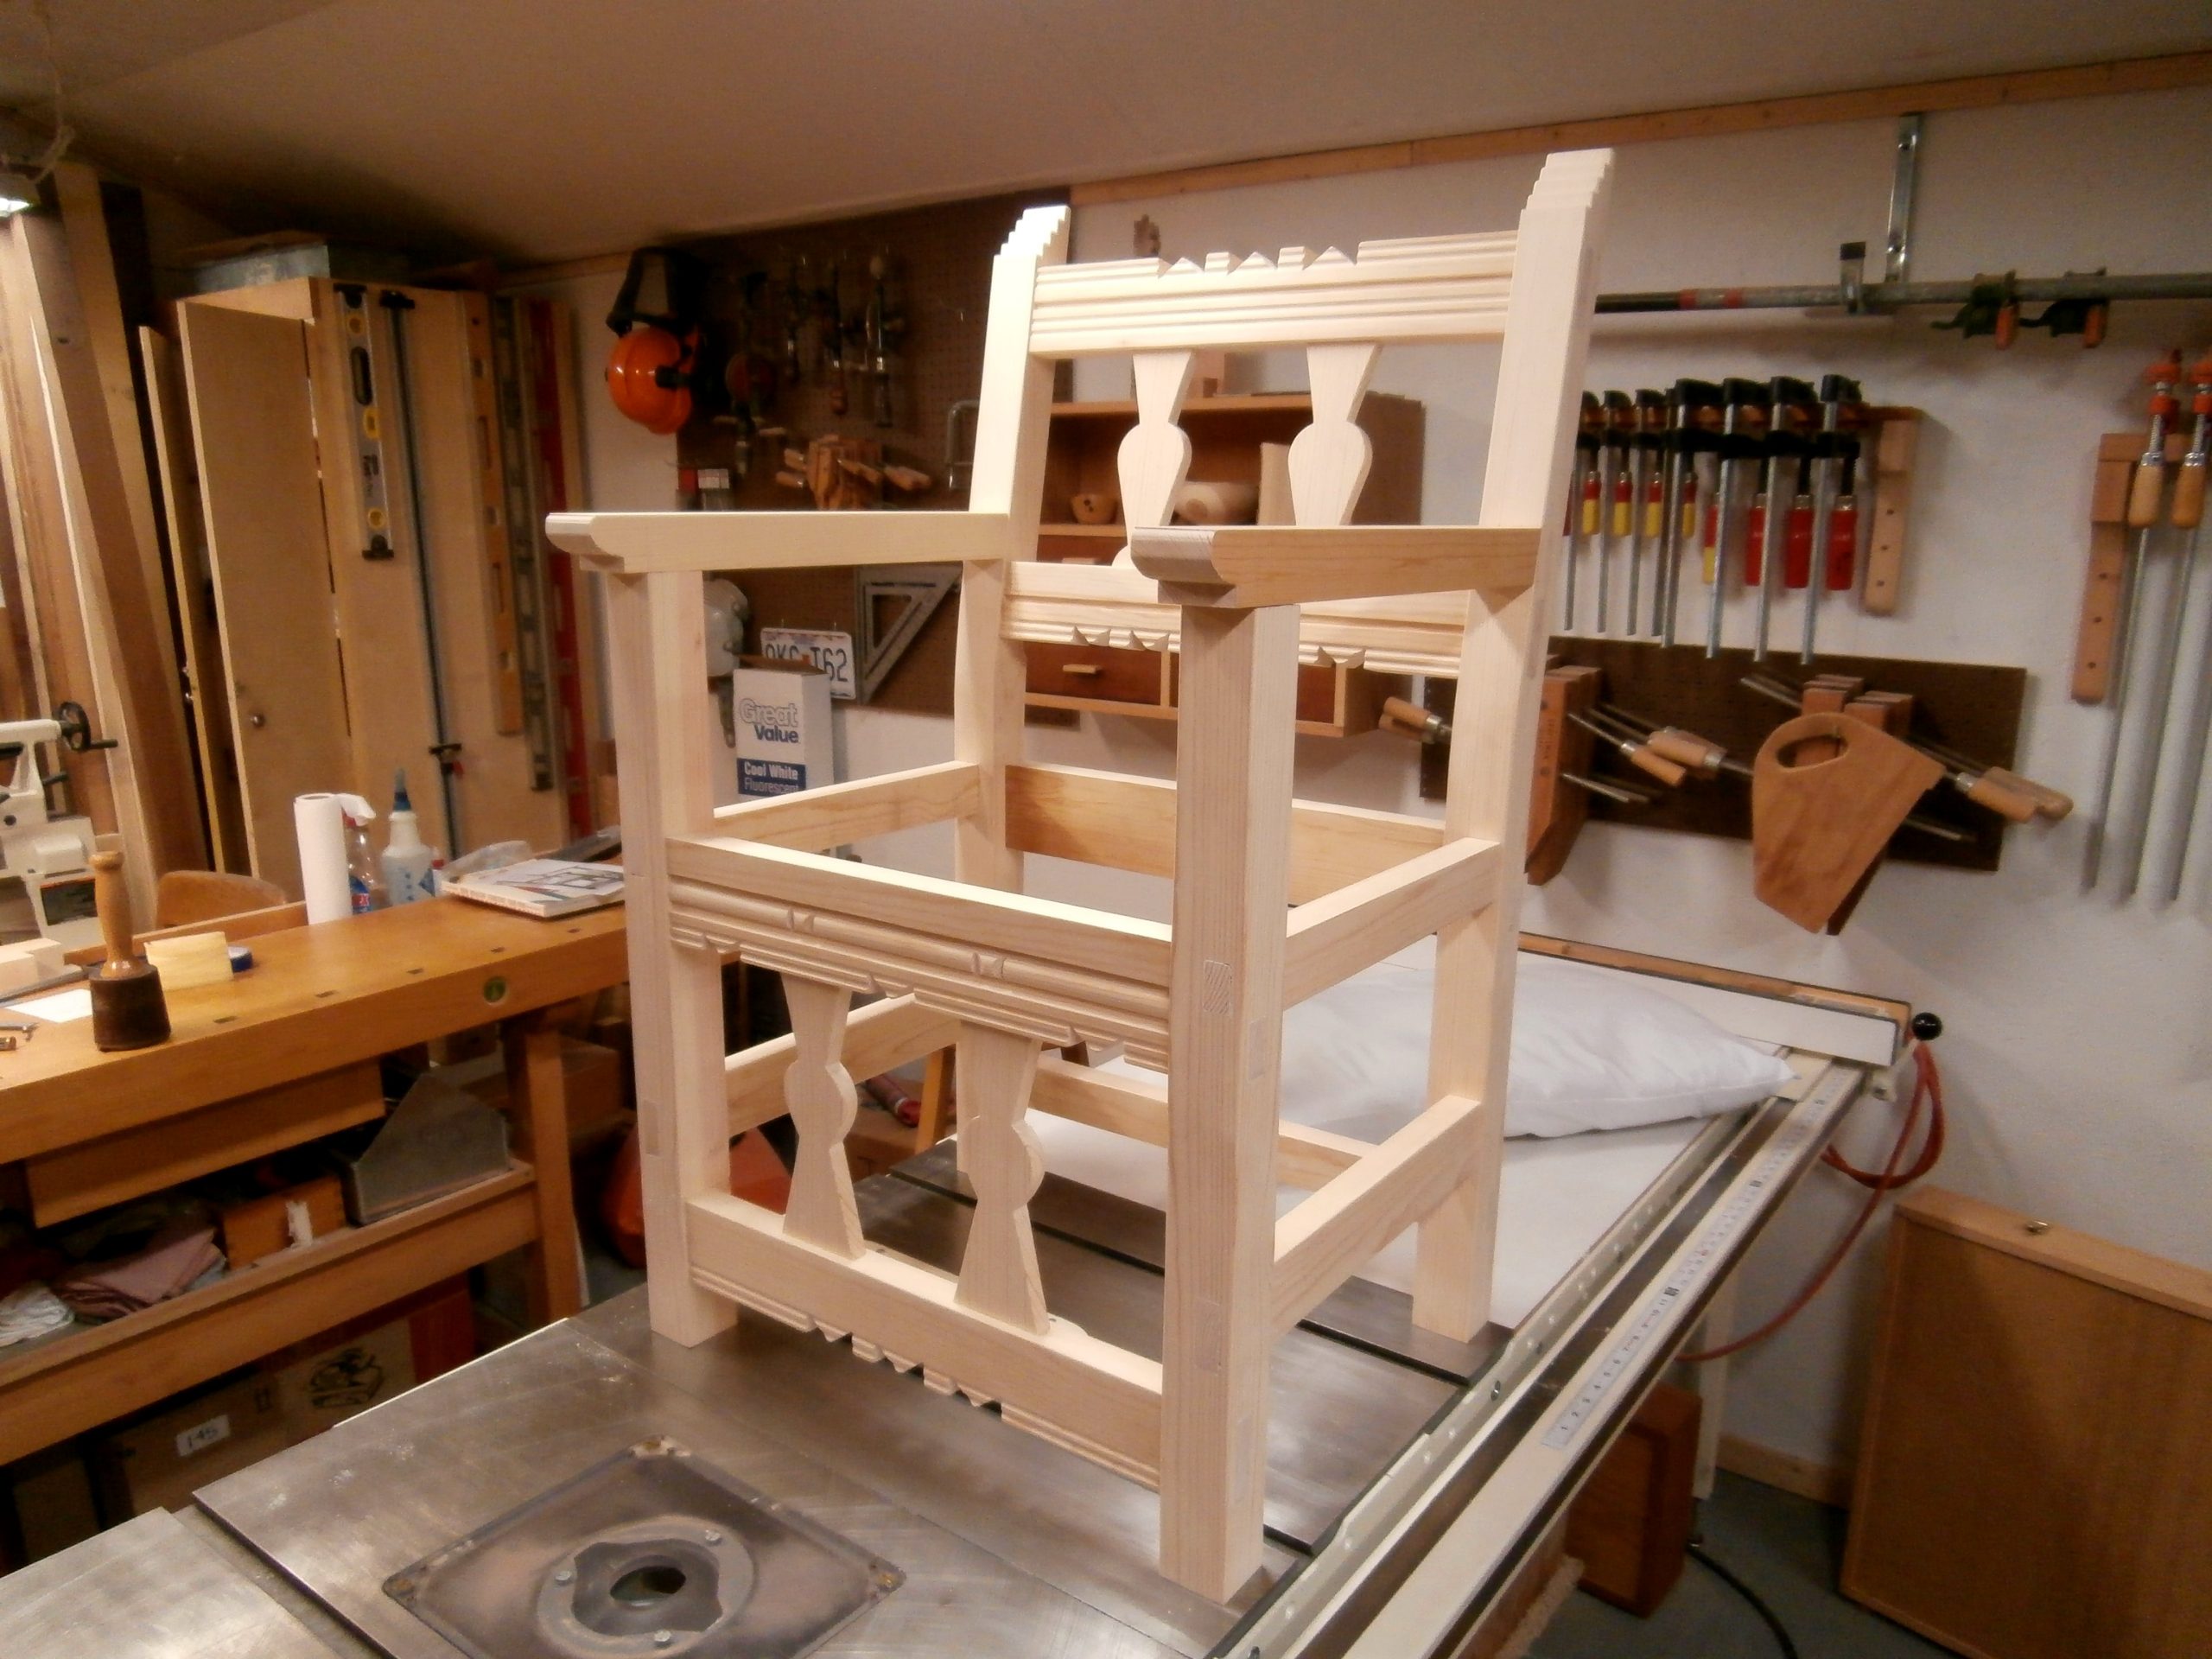
The front and back sub-assemblies for the chair, with carved details, looked like this.

I assembled the main chair components, leaving the armrests off at first so that I would be able to accurately locate them on the back legs of the chair.

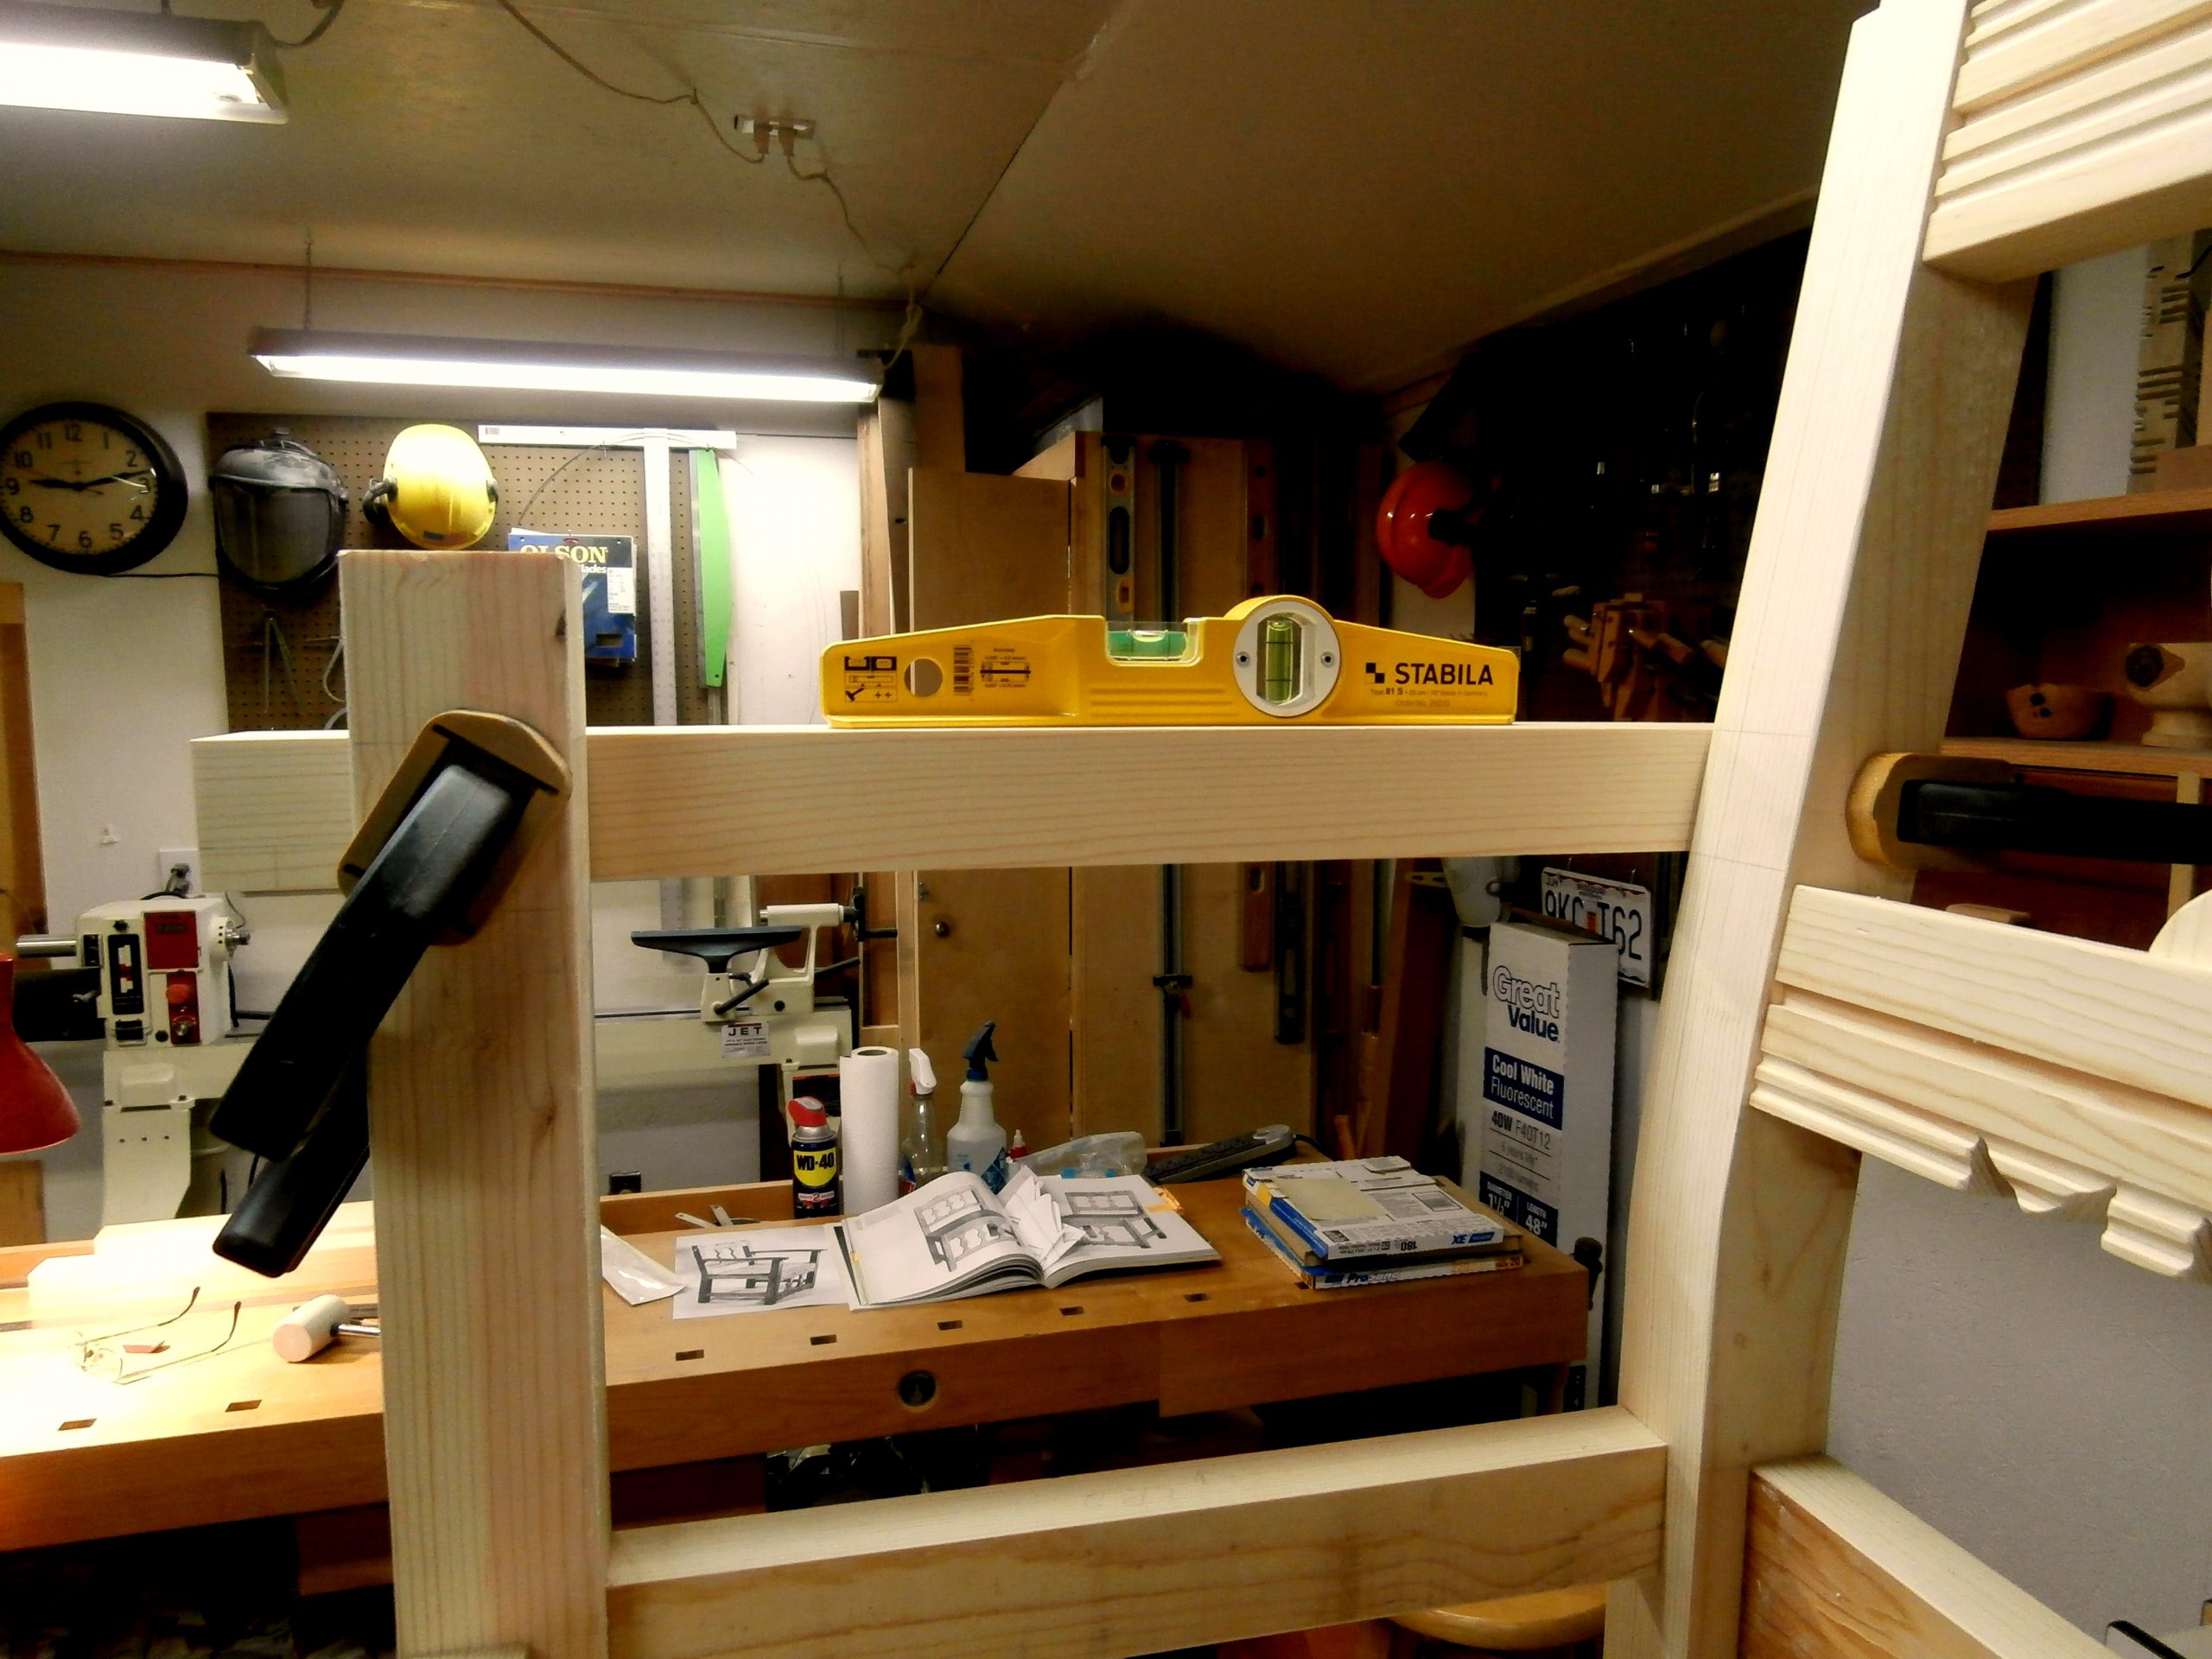
Locating the armrests was a little tricky.  I wanted them level with the ground and at a height that would be comfortable for someone seated in the chair.  I clamped the unfinished armrests to the front and back legs, marked their position, and then marked out the mortises in the back legs.

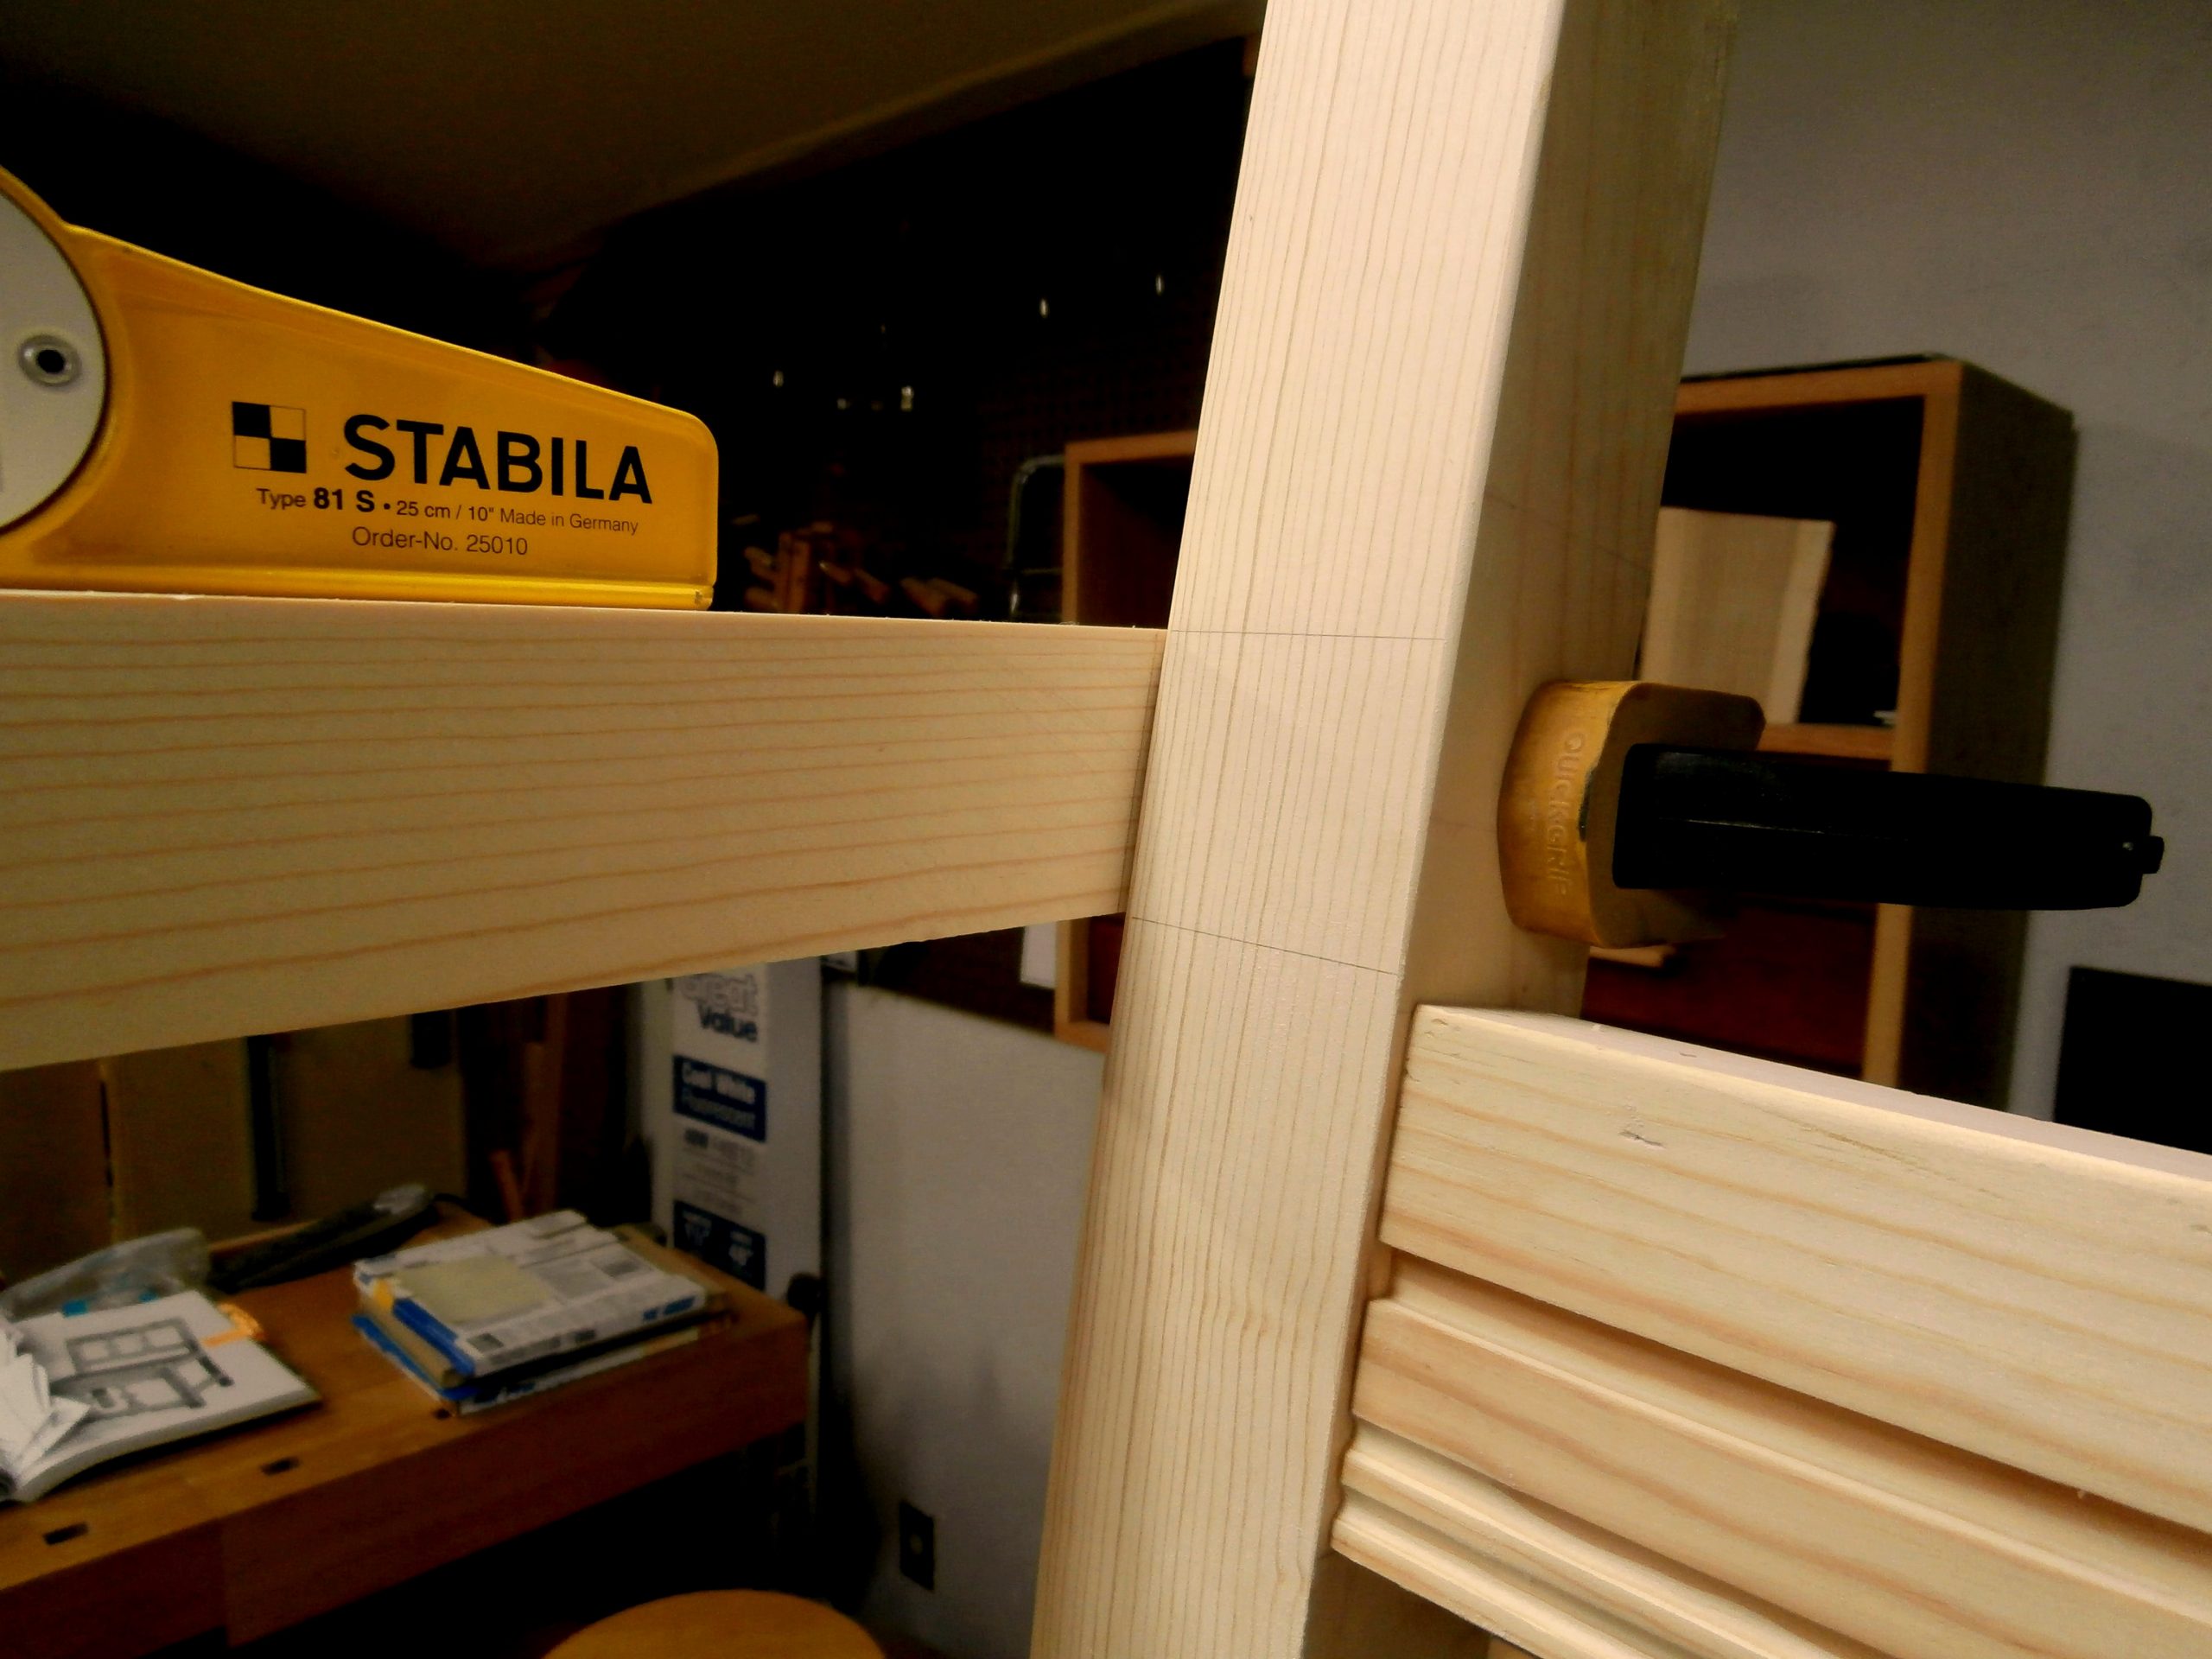
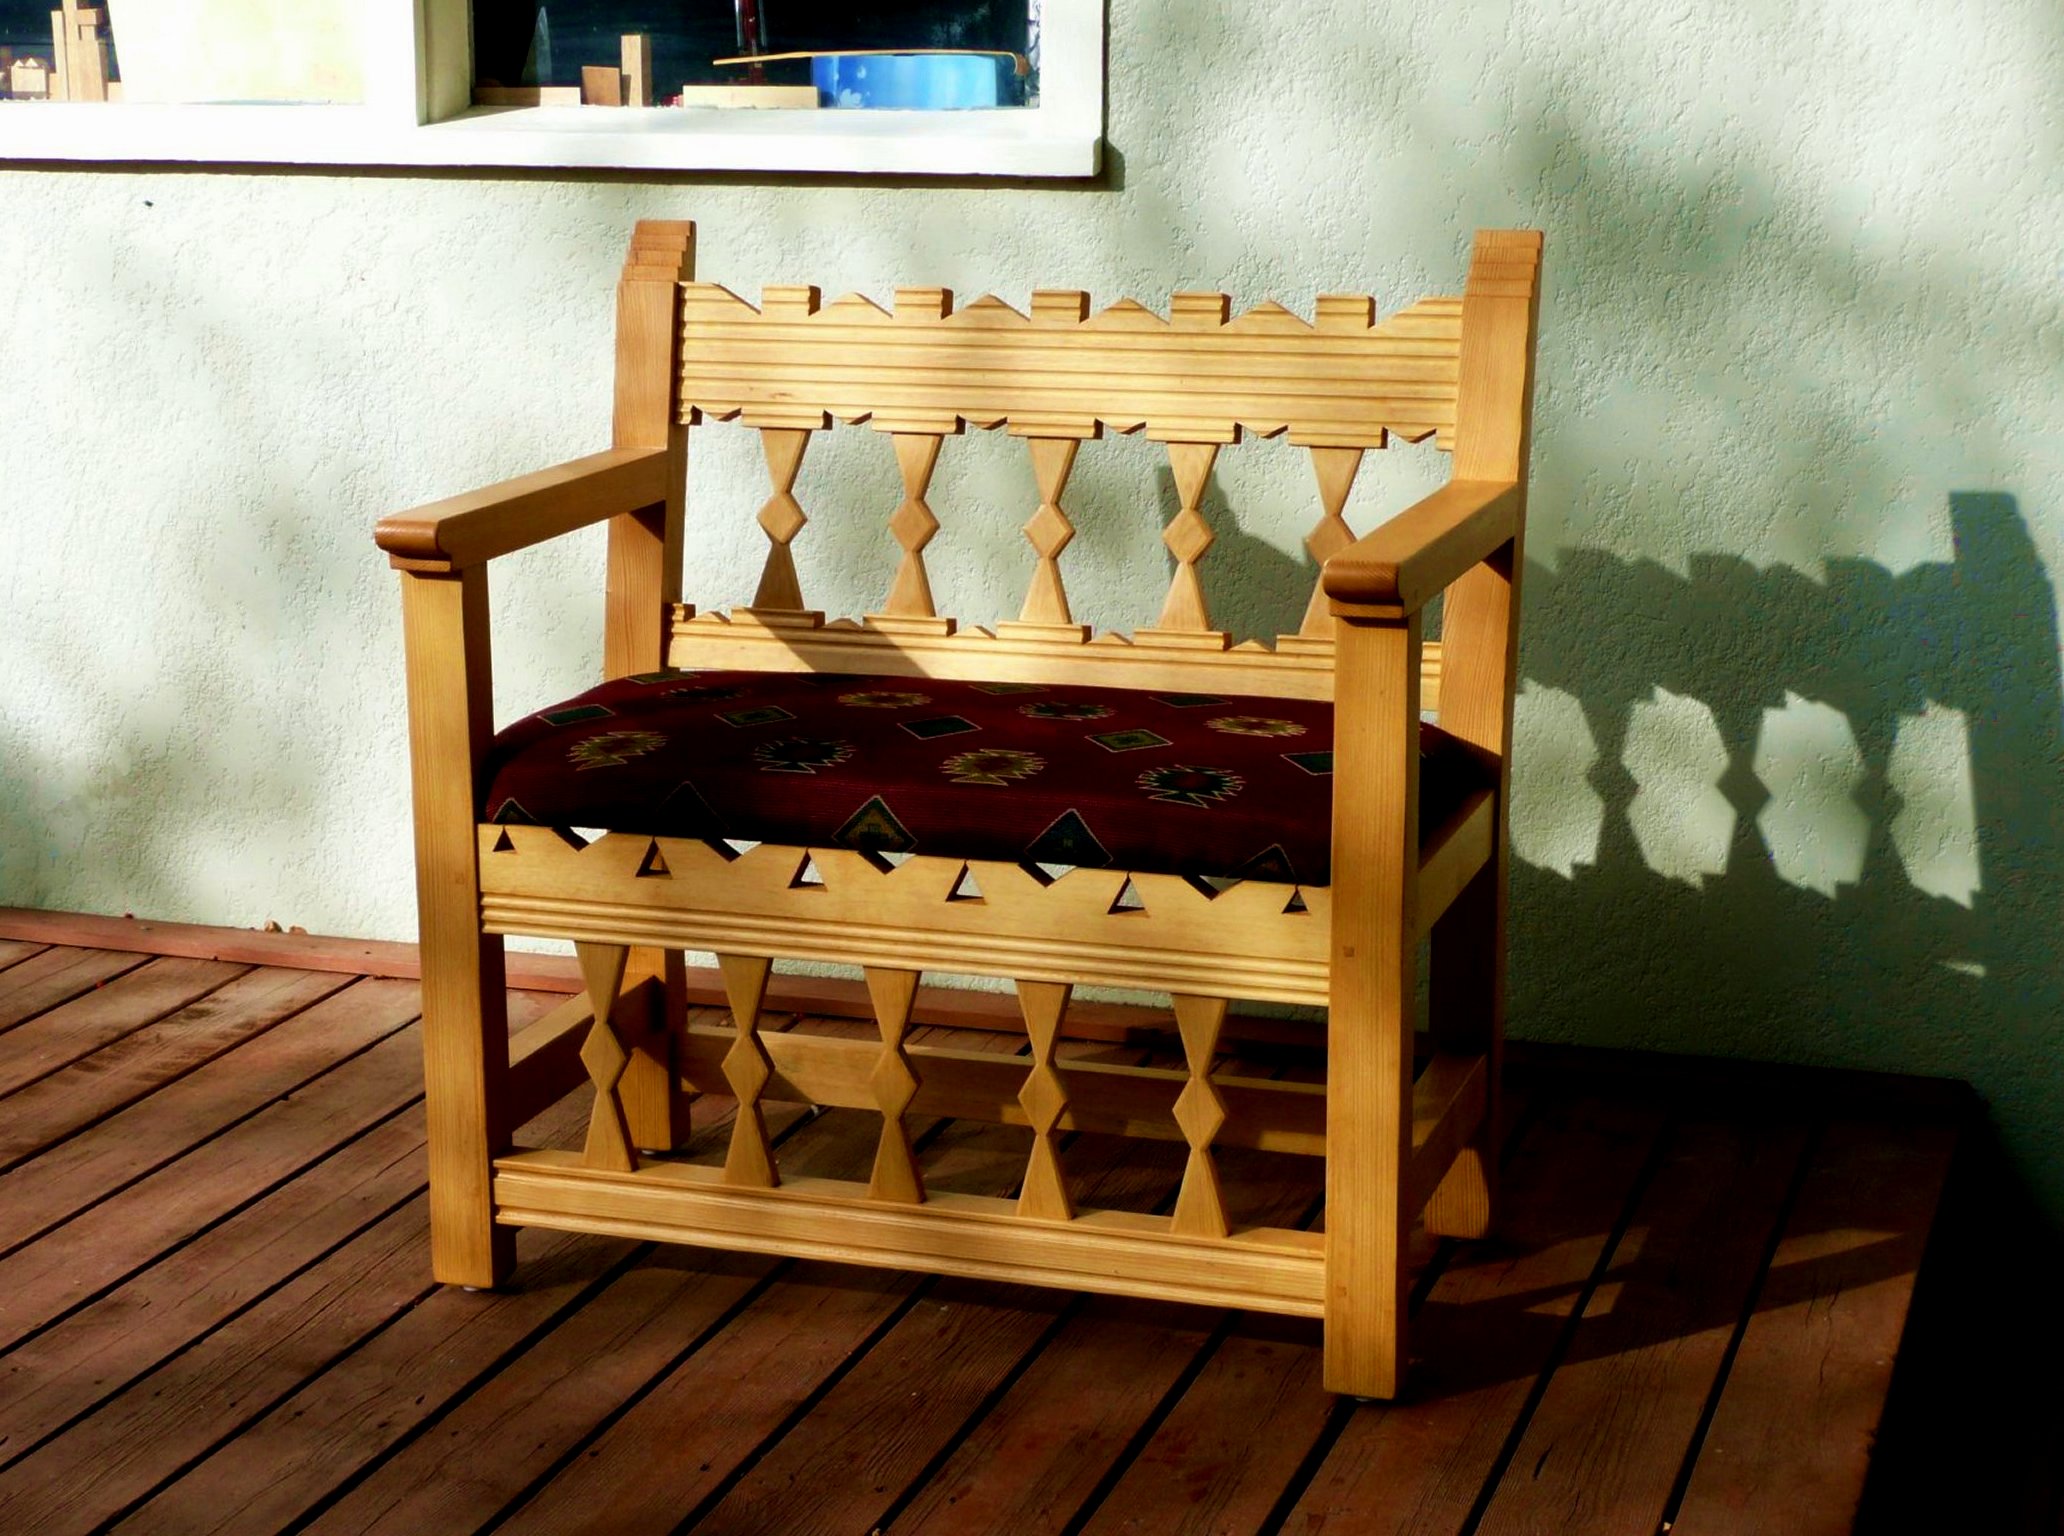
The location of mortises and tenons were marked on the armrests and the chair legs, cut as marked, and then all that remained was to attach them.

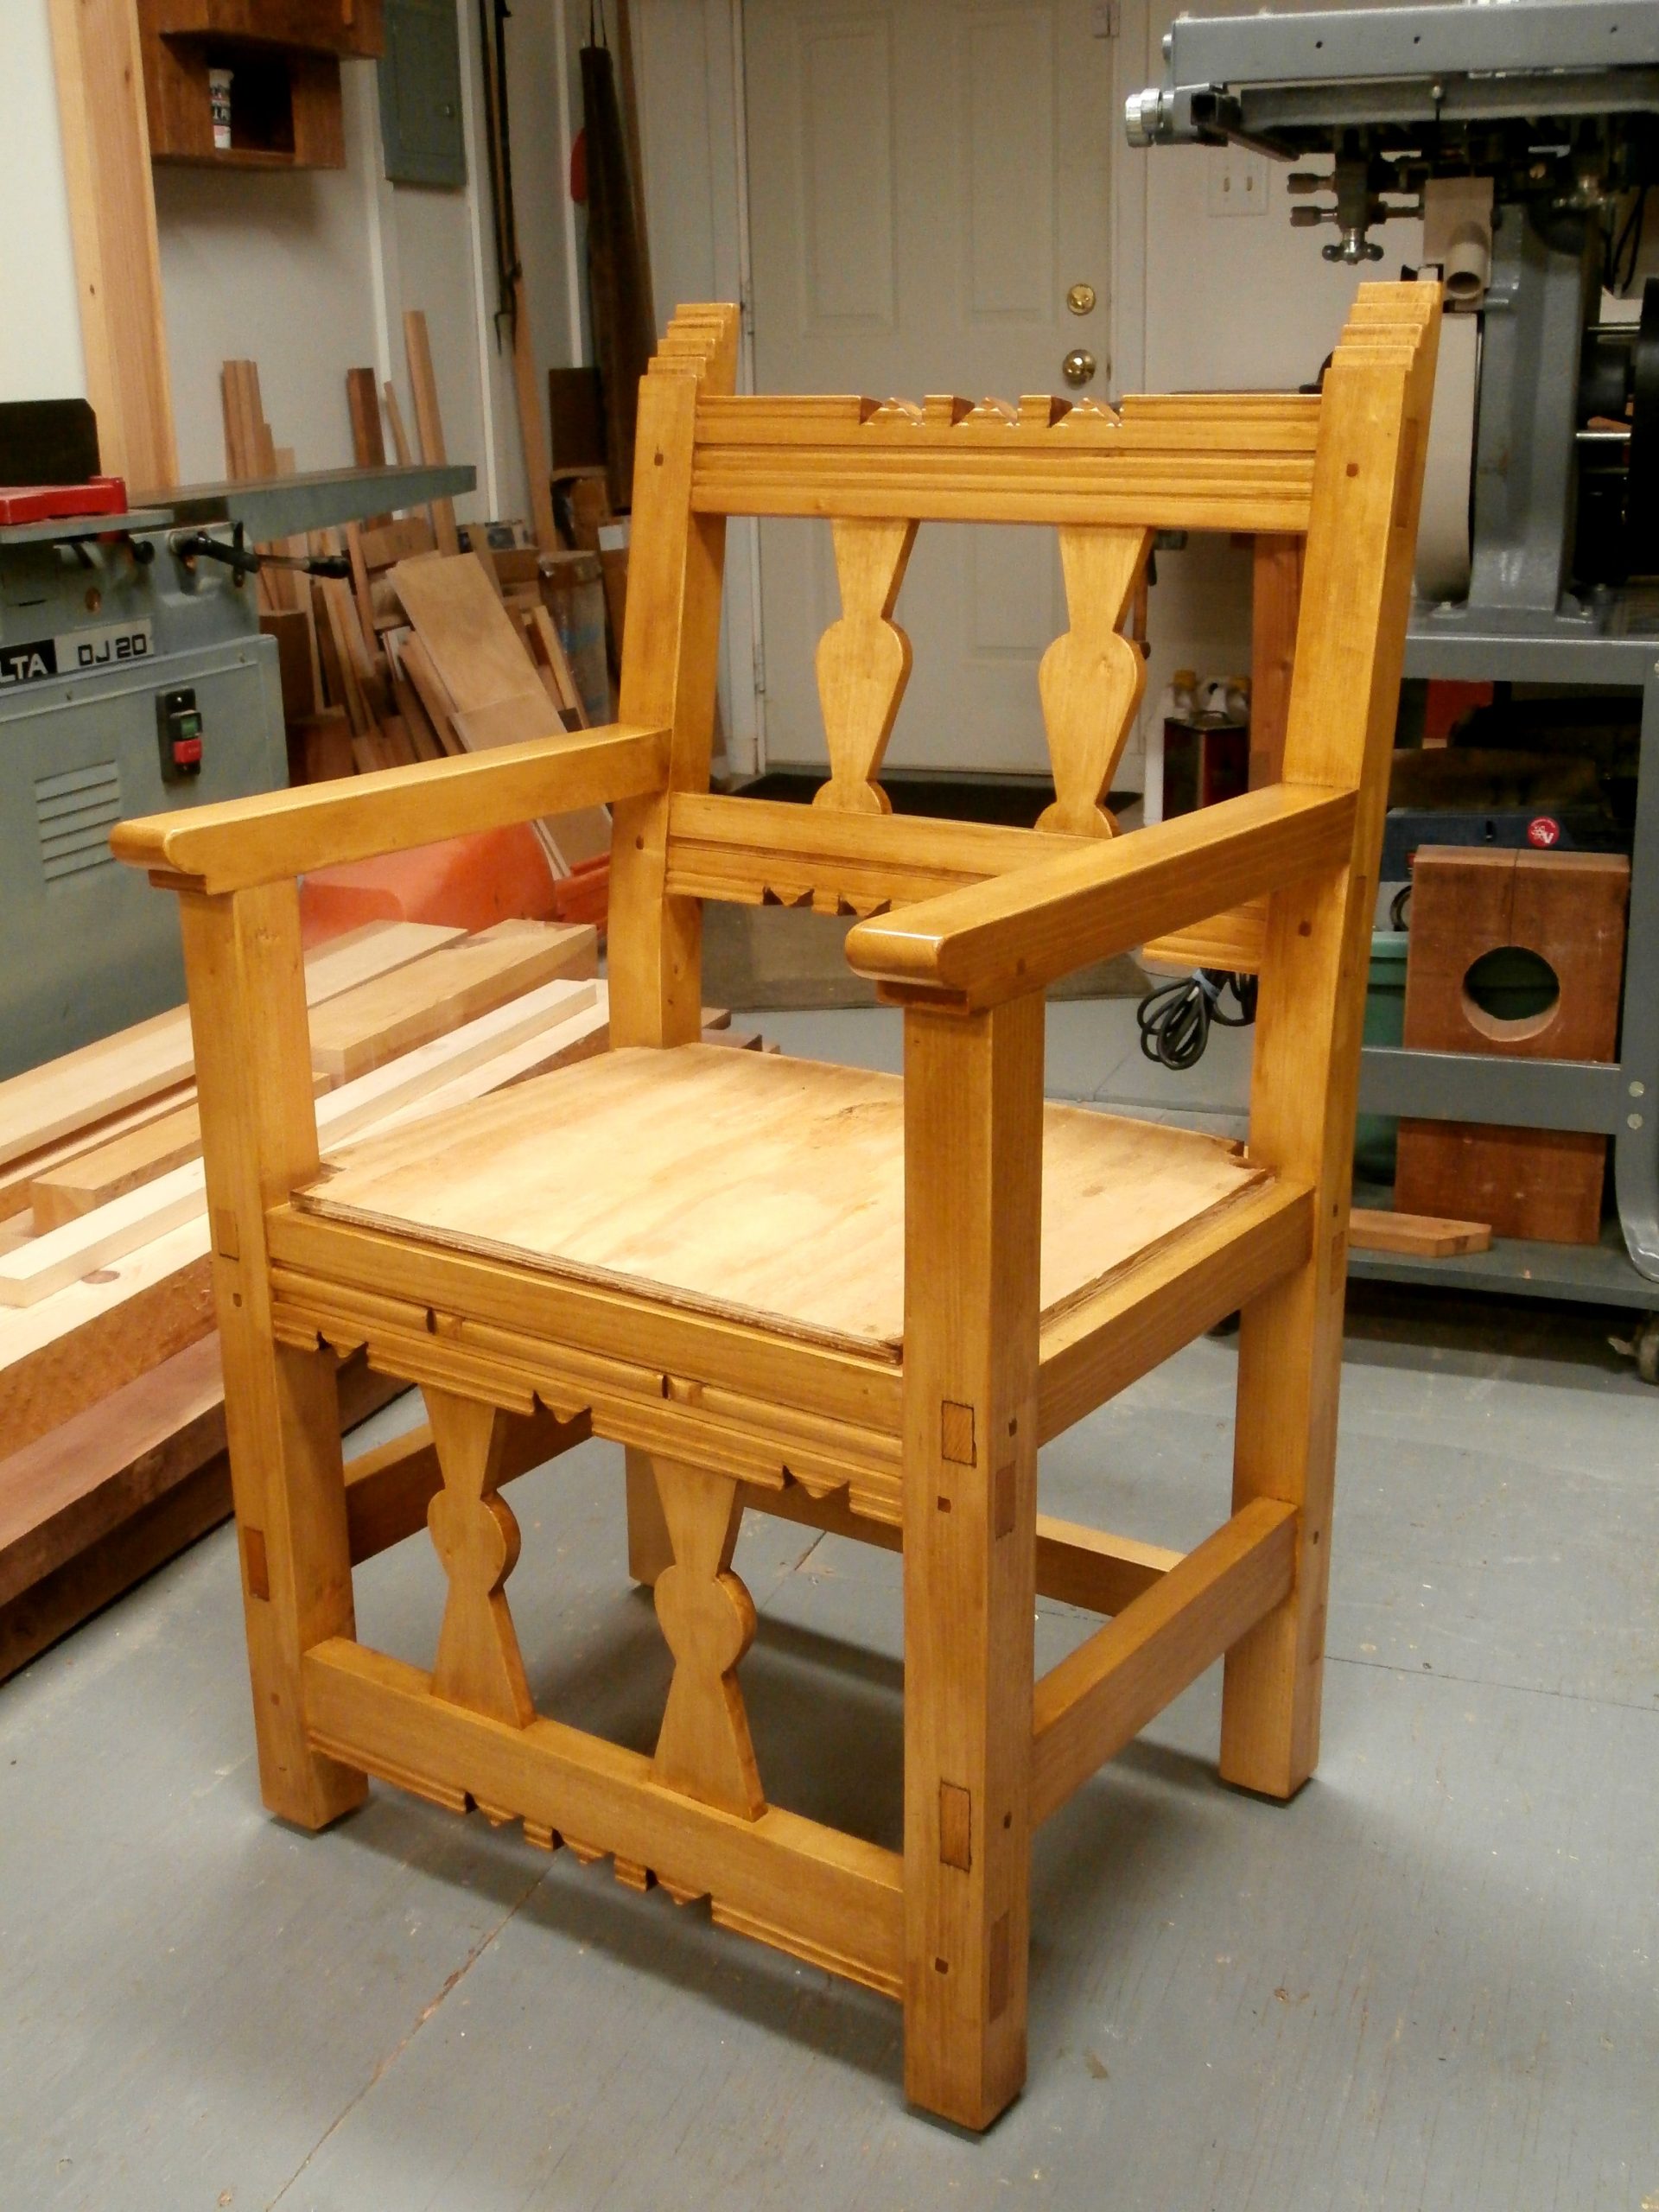
I sealed the pine with Minwax Natural and then made a blend of Minwax tinted sealers to darken the wood.  Finally, I attached a temporary plywood seat that will be upholstered when  I get the chance.


Hand Forged Hinges & Hasp

In 2006, I built a carved, aromatic cedar lined chest in Joseph, OR, that was inspired by an original “harinero” (flour storage chest) from northern New Mexico dating from the late 17th – early 18th century.  My chest, like the original, is constructed with Ponderosa pine and is scaled and proportioned using the historic Spanish “vara” system of measurement (one vara = 33 1/3 inches).  At the time I did not have my blacksmithing equipment set up so the chest went without hardware until 2018.  Here’s a photo of the chest without hinges and a hasp.  (All photos copyright symbol Max Vollmer,  Click on any Photo to Enlarge it.)

New Mexico style chest.

I made scale drawings of the strap hinges and hasp I wanted for the chest in the style of 17th~18th century, northern New Mexico.  I used mild steel to forge the parts and a hack saw to make cuts for the barrels/knuckles of the hinges.  The next four photos show intermediate steps in the forging of the scrolls for the two-part hinges and hasp.

Hot forged scroll work on the anvil.
Forging of scroll work.
Forging scroll work.
Hinge and hasp parts.

The next photo shows the design for the latch part of the hasp marked on the steel with magic marker so that I could rough cut and file that part before going to the forge to finish it.

Hasp

After shaping all the individual parts, I cut pieces of steel rod for the pintles (the pins) around which the the gudgeons (barrels or knuckles) of the hinge parts rotate.  The pins were held in the jaws of the post vise so that the gudgeons (yellow-hot at 1800 degrees F) of the hinge, straight from the forge, could be hammered/forged around the pins.  The next picture shows the hinge and hasp parts joined together, plus a 3″ square, hammer-textured plate and “staple” (U-shaped) to which the latch part of the hasp would attach.

Hinge and hasp parts.

The next photo shows the assembly of the 3″ square plate and staple to complete the second part of the hasp.  To do that, I drilled two holes in the 3″ square plate to match the U-shaped staple “legs” . . .  then in very rapid succession I heated the staple legs to yellow-hot in the forge, and holding the staple with tongs I cooled all but the tips in the slack tub, quickly clamped the staple  in the post vise with the hot tips pointed up, fit the plate (with drilled holes) over the staple tips, and upset (hammered) the tips so that they mushroomed down over the back of the plate into shallow recesses I had pre-drilled with an oversize drill bit.

Staple tips “upset” to anchor the staple into the plate.  The assembly is shown clamped in the post vise, bottom side up.

Here is what that part looks like sitting right side up on the anvil.

Staple and plate assembly.

All that remained was to forge some nails, drill the holes for the nails in the hinges and hasp, heat the parts to a black heat in the forge and coat the parts with Johnson’s Floor Wax while the steel is still hot.  This leaves a nice, semi-gloss surface finish that offers some protection from corrosion.  Obviously, the next step was to mount the hardware on my chest.  The next four photos show the mounted hinges and hasp on my chest as it sits in my living room.

Hinges and hasp attached to chest with clinched, hand forged nails.
Finished chest with hardware.
Hasp.
Closeup.

Hand Carved, Painted, Northern New Mexico Style Chest

Taos Style Chest 102

This chest is my original design, utilizing carved detailing characteristic of 17th and 18th century chests from northern New Mexico around the Taos area.  It is constructed of clear Ponderosa pine, the wood of choice for that area and time period.  (Click on any image to enlarge)

Taos Style Chest 104

The stepped motif in the four corners of the lid is a part of the southwestern pueblo iconography, and can represent either mountains or clouds.  The next three photos show the chest in its unpainted state.  All four sides of the chest employ true framed, hand planed, raised panels, with the front made up of two such panels.

Small NM chest 001

Small NM chest 004

Taos Style Chest 100

In order to keep any wood end grain from showing on framing for the relief carved lid, I used some carefully executed joinery, with blind tenons as the main connective element.  This and other refined details on this chest are not commonly found in the original more rustic chests of the 17th and 18th centuries.

Small NM chest 003