All posts by Max Vollmer

I began my journey into building solid wood, traditionally joined furniture while in law school 35 years ago. After a career in agricultural finance, law and business, I felt an irresistible call to do something different with the next chapter in my life. Building furniture was a natural fit. I begin each new project with a commitment to the highest level of craftsmanship. Machines can do the "heavy lifting" but can't duplicate the human quality, the subtle "fingerprints" of the artisan. For that reason, I employ traditional hand tools in shaping every piece. The hand plane, chisel and scraper each play a part in creating a fit and finish that says, "hand built." Every piece that comes out of my shop is designed to serve the practical needs of my clients. But furniture should also be a source of quiet satisfaction . . . an invitation to the hand and eye to come again.

Hayrake Table – In the Style of Sidney Barnsley

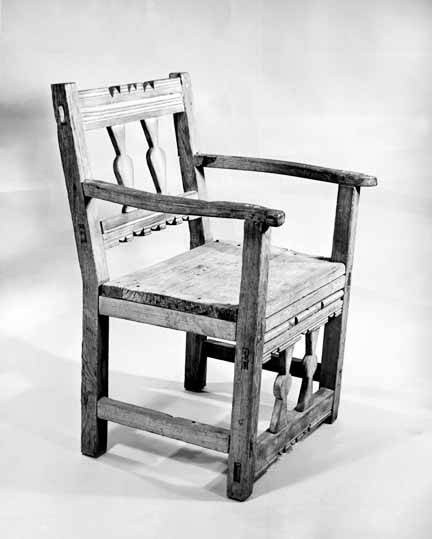
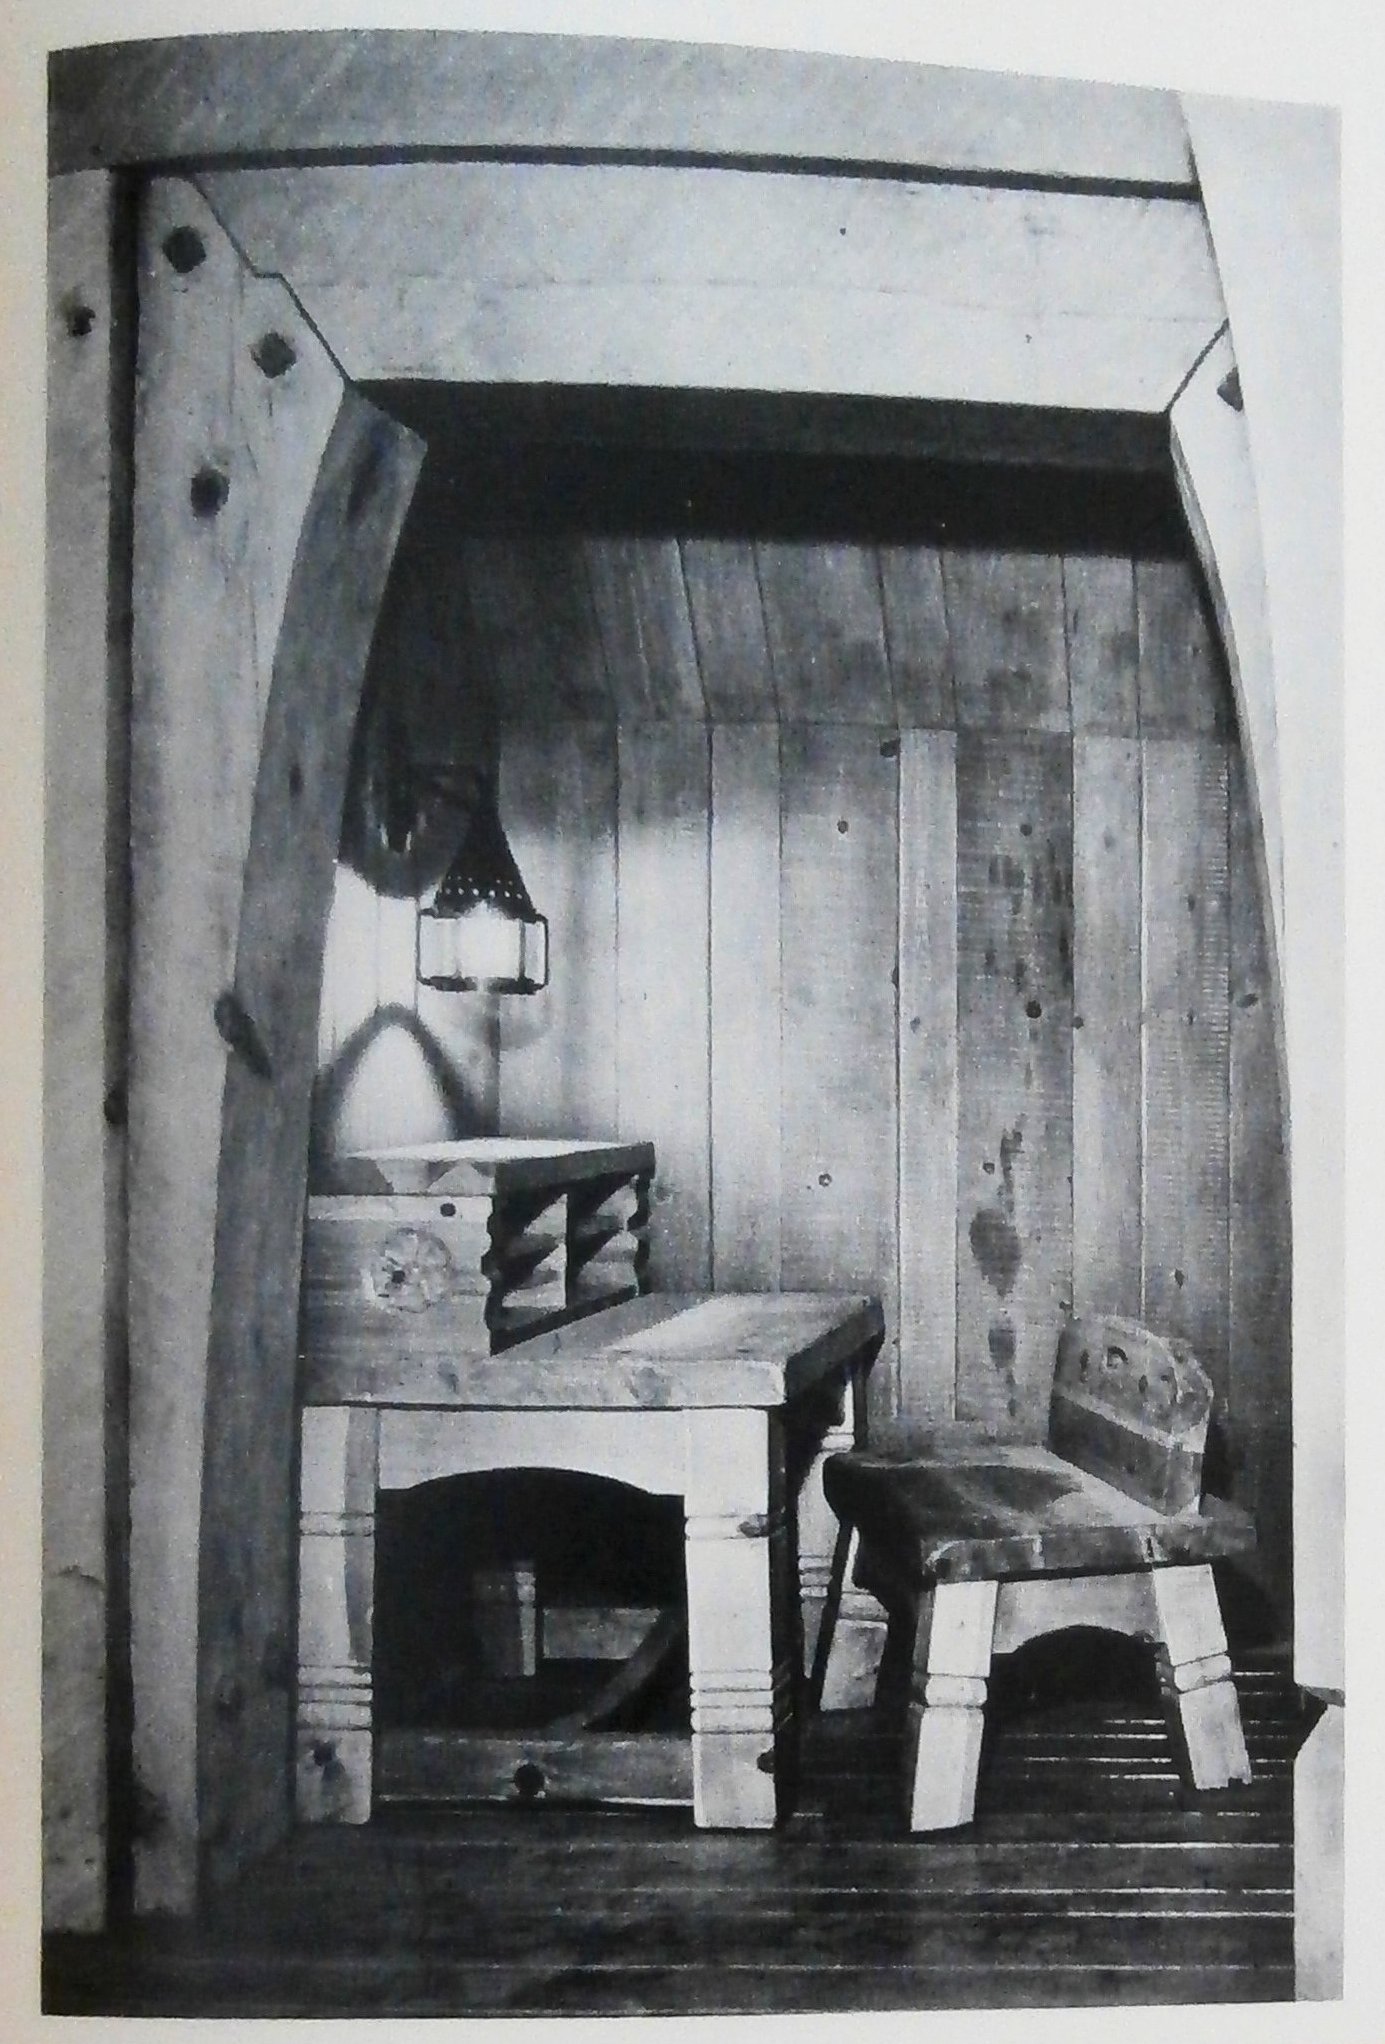
Sidney Barnsley (b.1865-d.1926), was an important and influential Arts and Crafts designer-maker who hand crafted furniture for his family and for clients.  He had previously trained as an architect and worked in London before moving to the rural Cotswolds region of England, Pinbury Park and Sapperton in Gloucestershire.

In early 2019, I decided to build an oak dinner table for myself with a leg set that incorporated a “hay rake” or “heel rake” stretcher, a feature that Barnsley had adapted for one of his tables from a traditional wooden rake used by farmers to rake hay in their fields into windrows.  Below is a photo of one of these 18th~19th century rakes showing the joinery used to create the handle.  It is a marvel of traditional, rural woodworking that is very strong but lightweight . . . a perfect example of form following function.  [Click on any image to enlarge.]

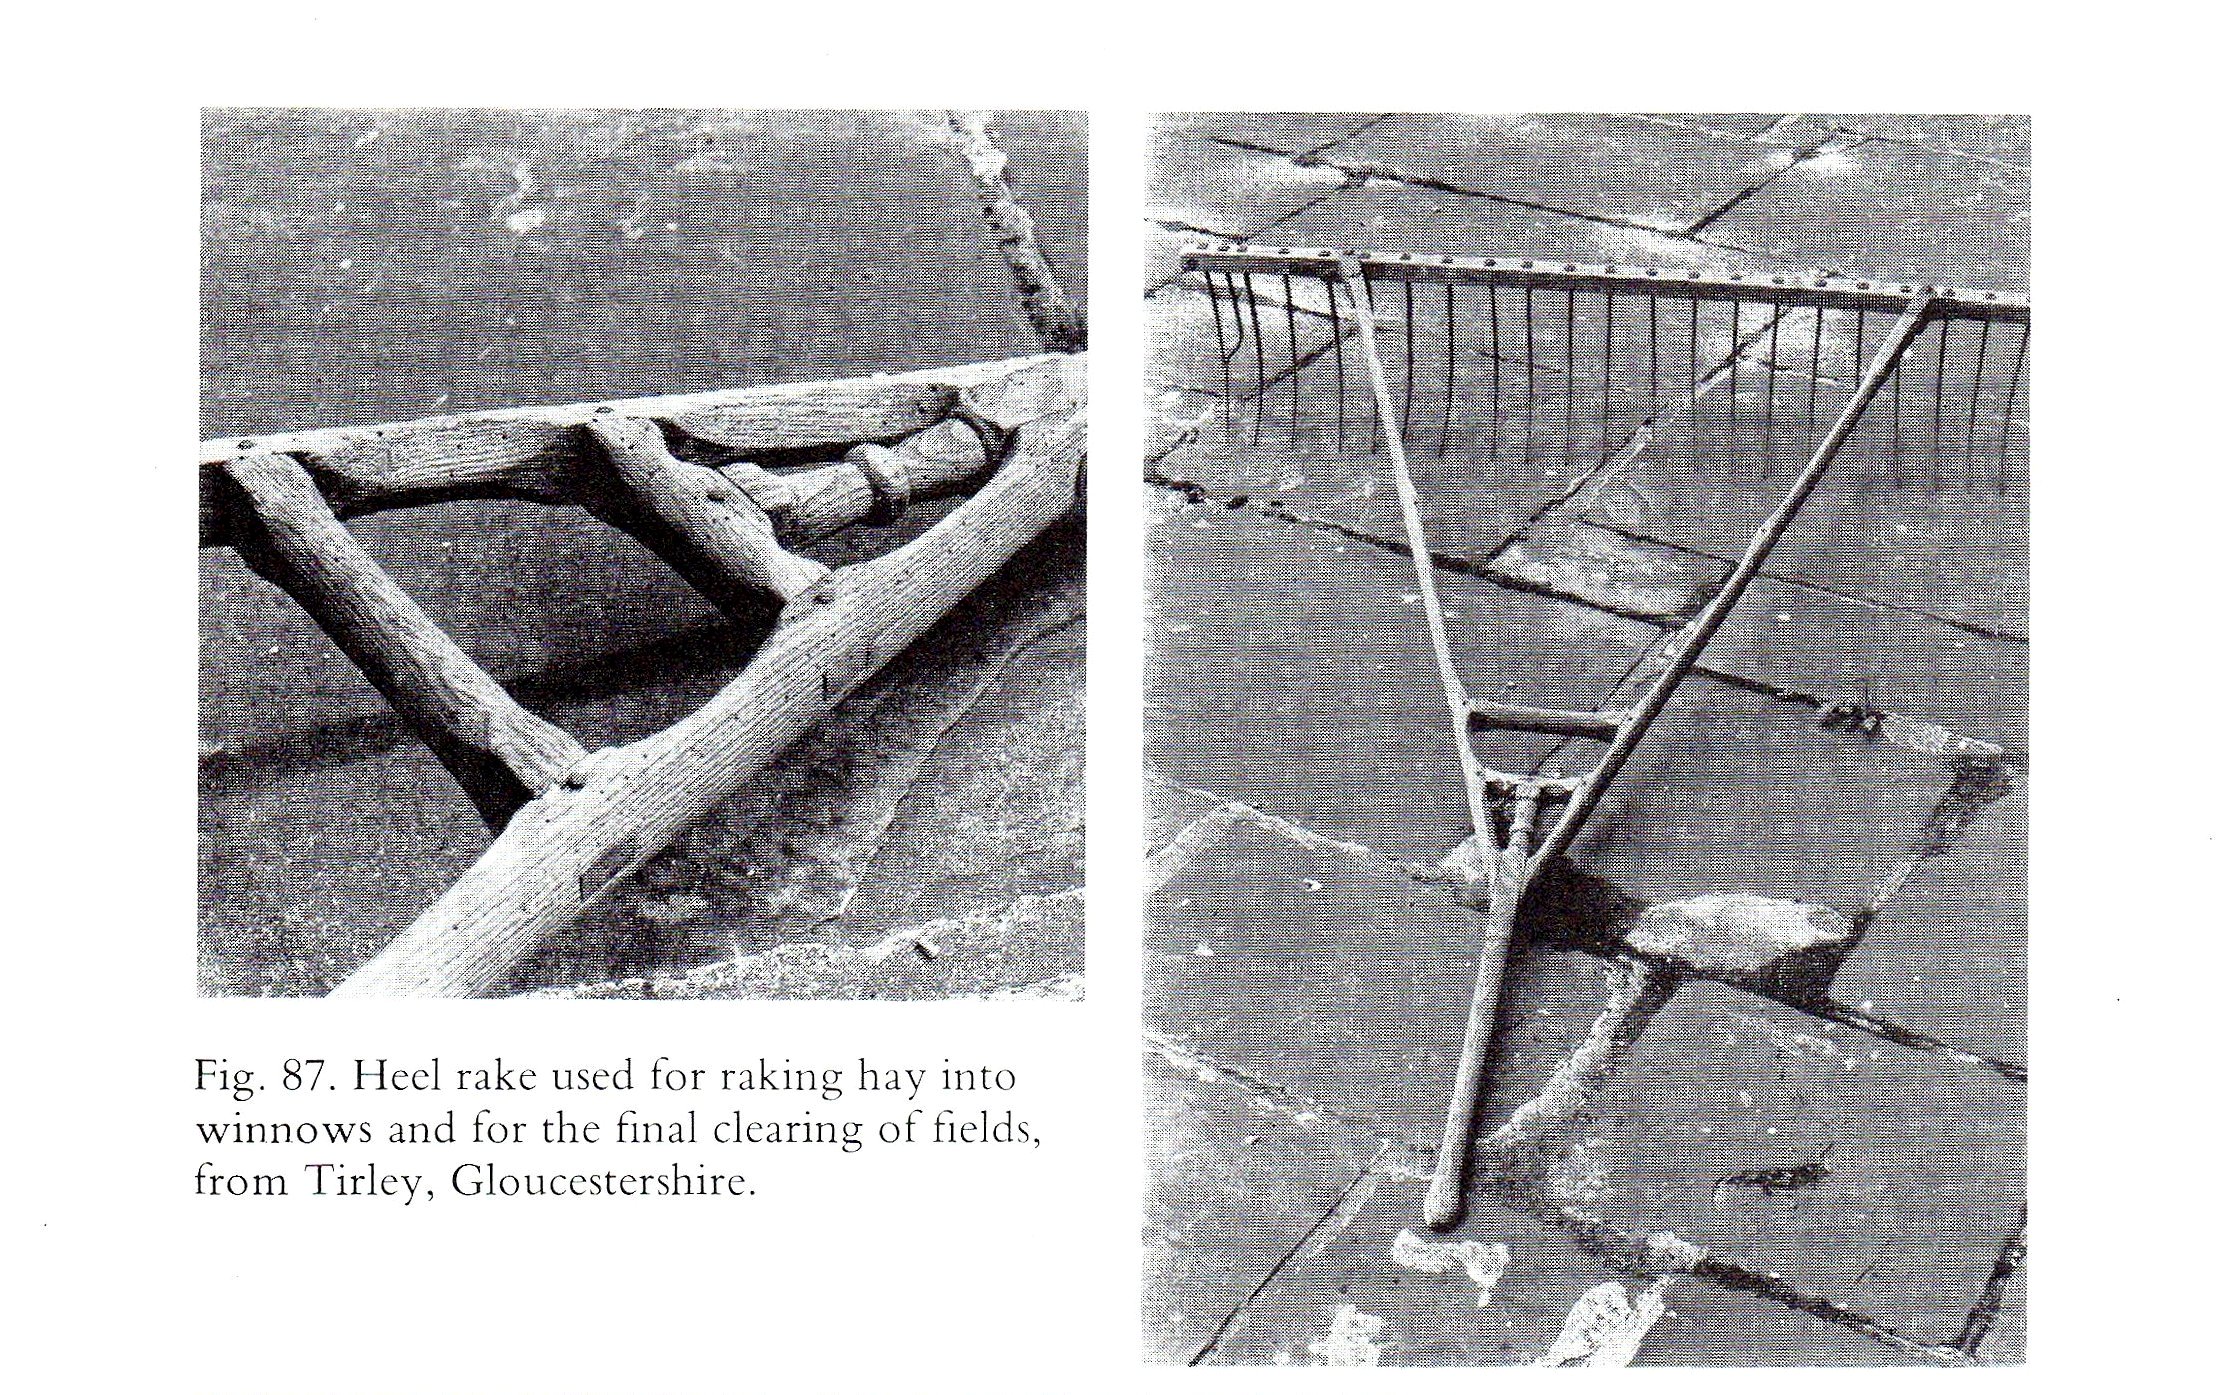
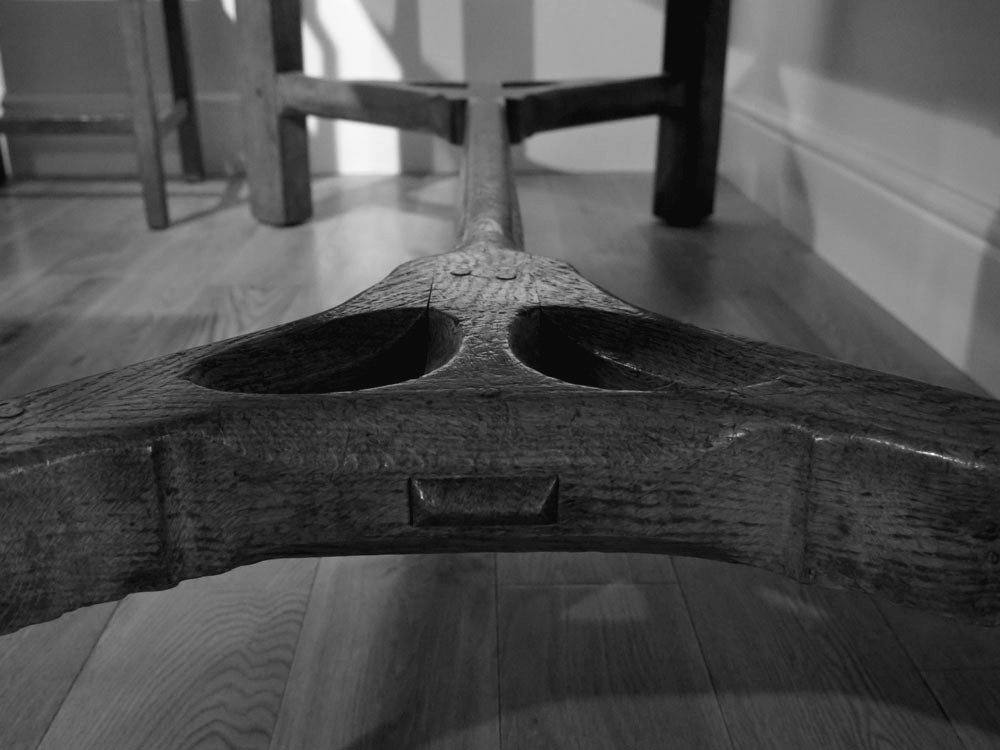
Barnsley used the essentials of the rake joinery to create the stretcher (see below) for his table, circa 1900.  All three b&w photos are taken from Gimson and the Barnsleys by Mary Comino (Van Nostrand Reinhold Co., 1980).

Sidney Barnsley: hay rake table
Sidney Barnsley: hay rake joinery

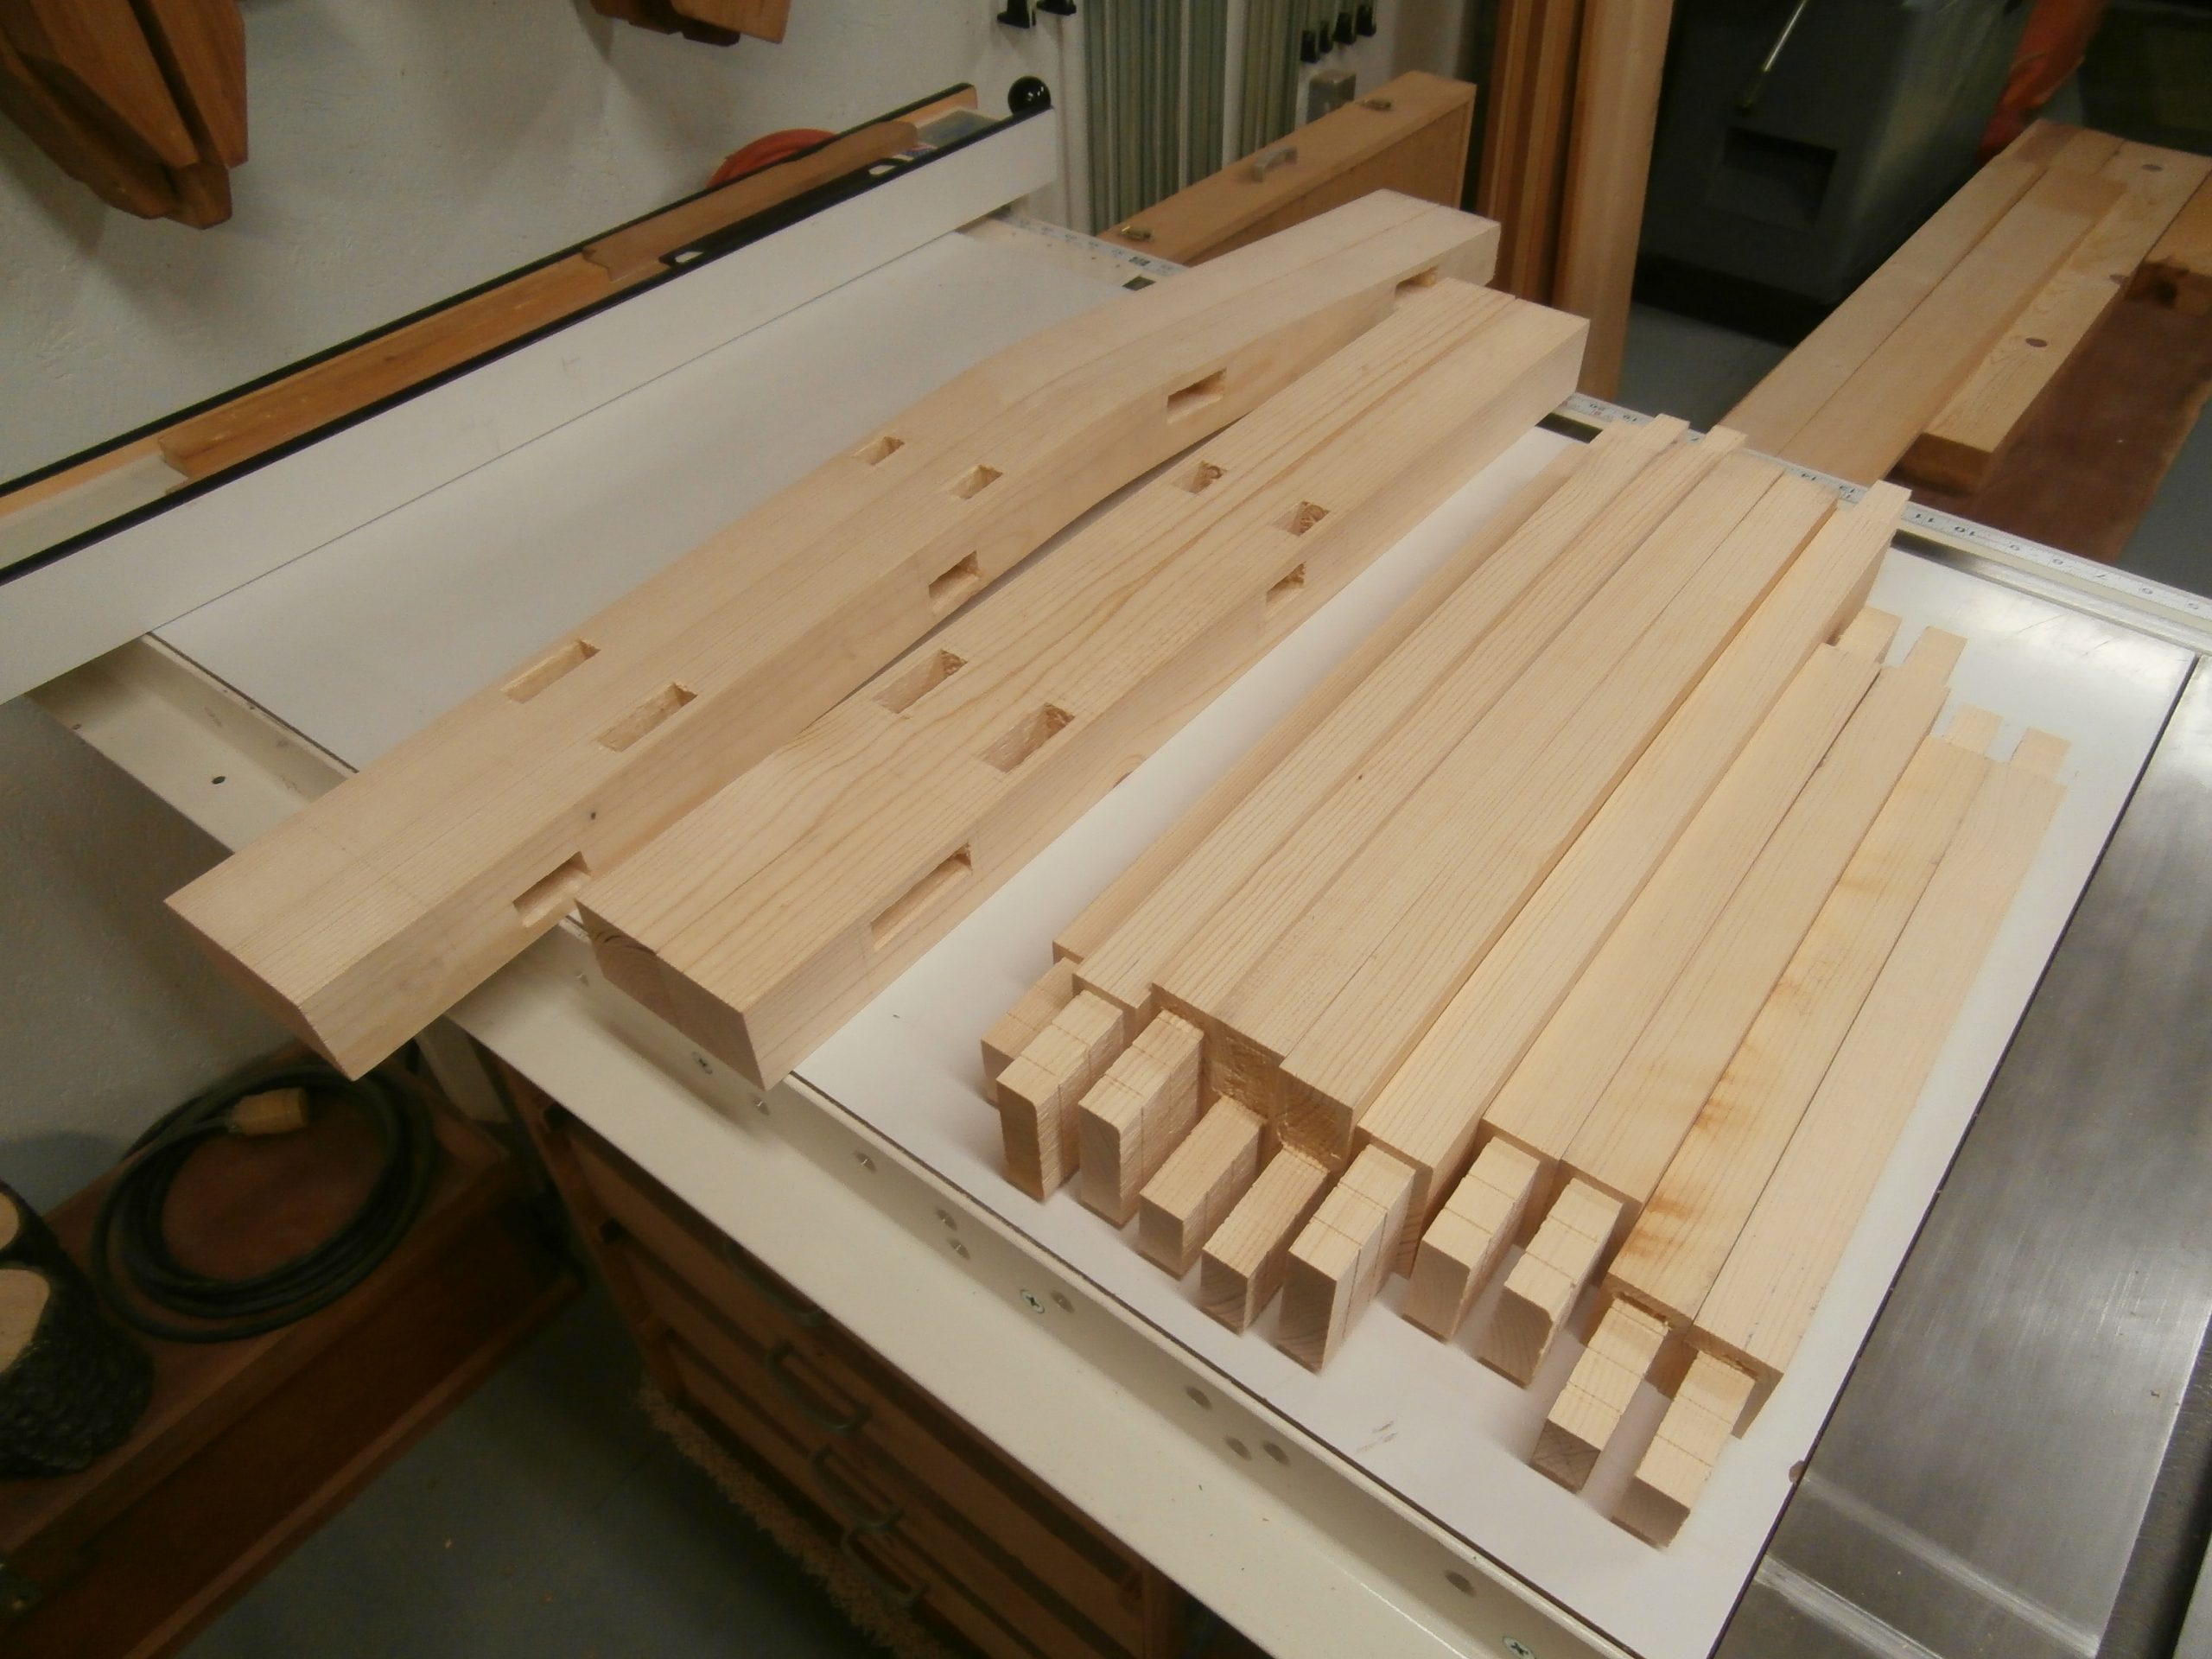
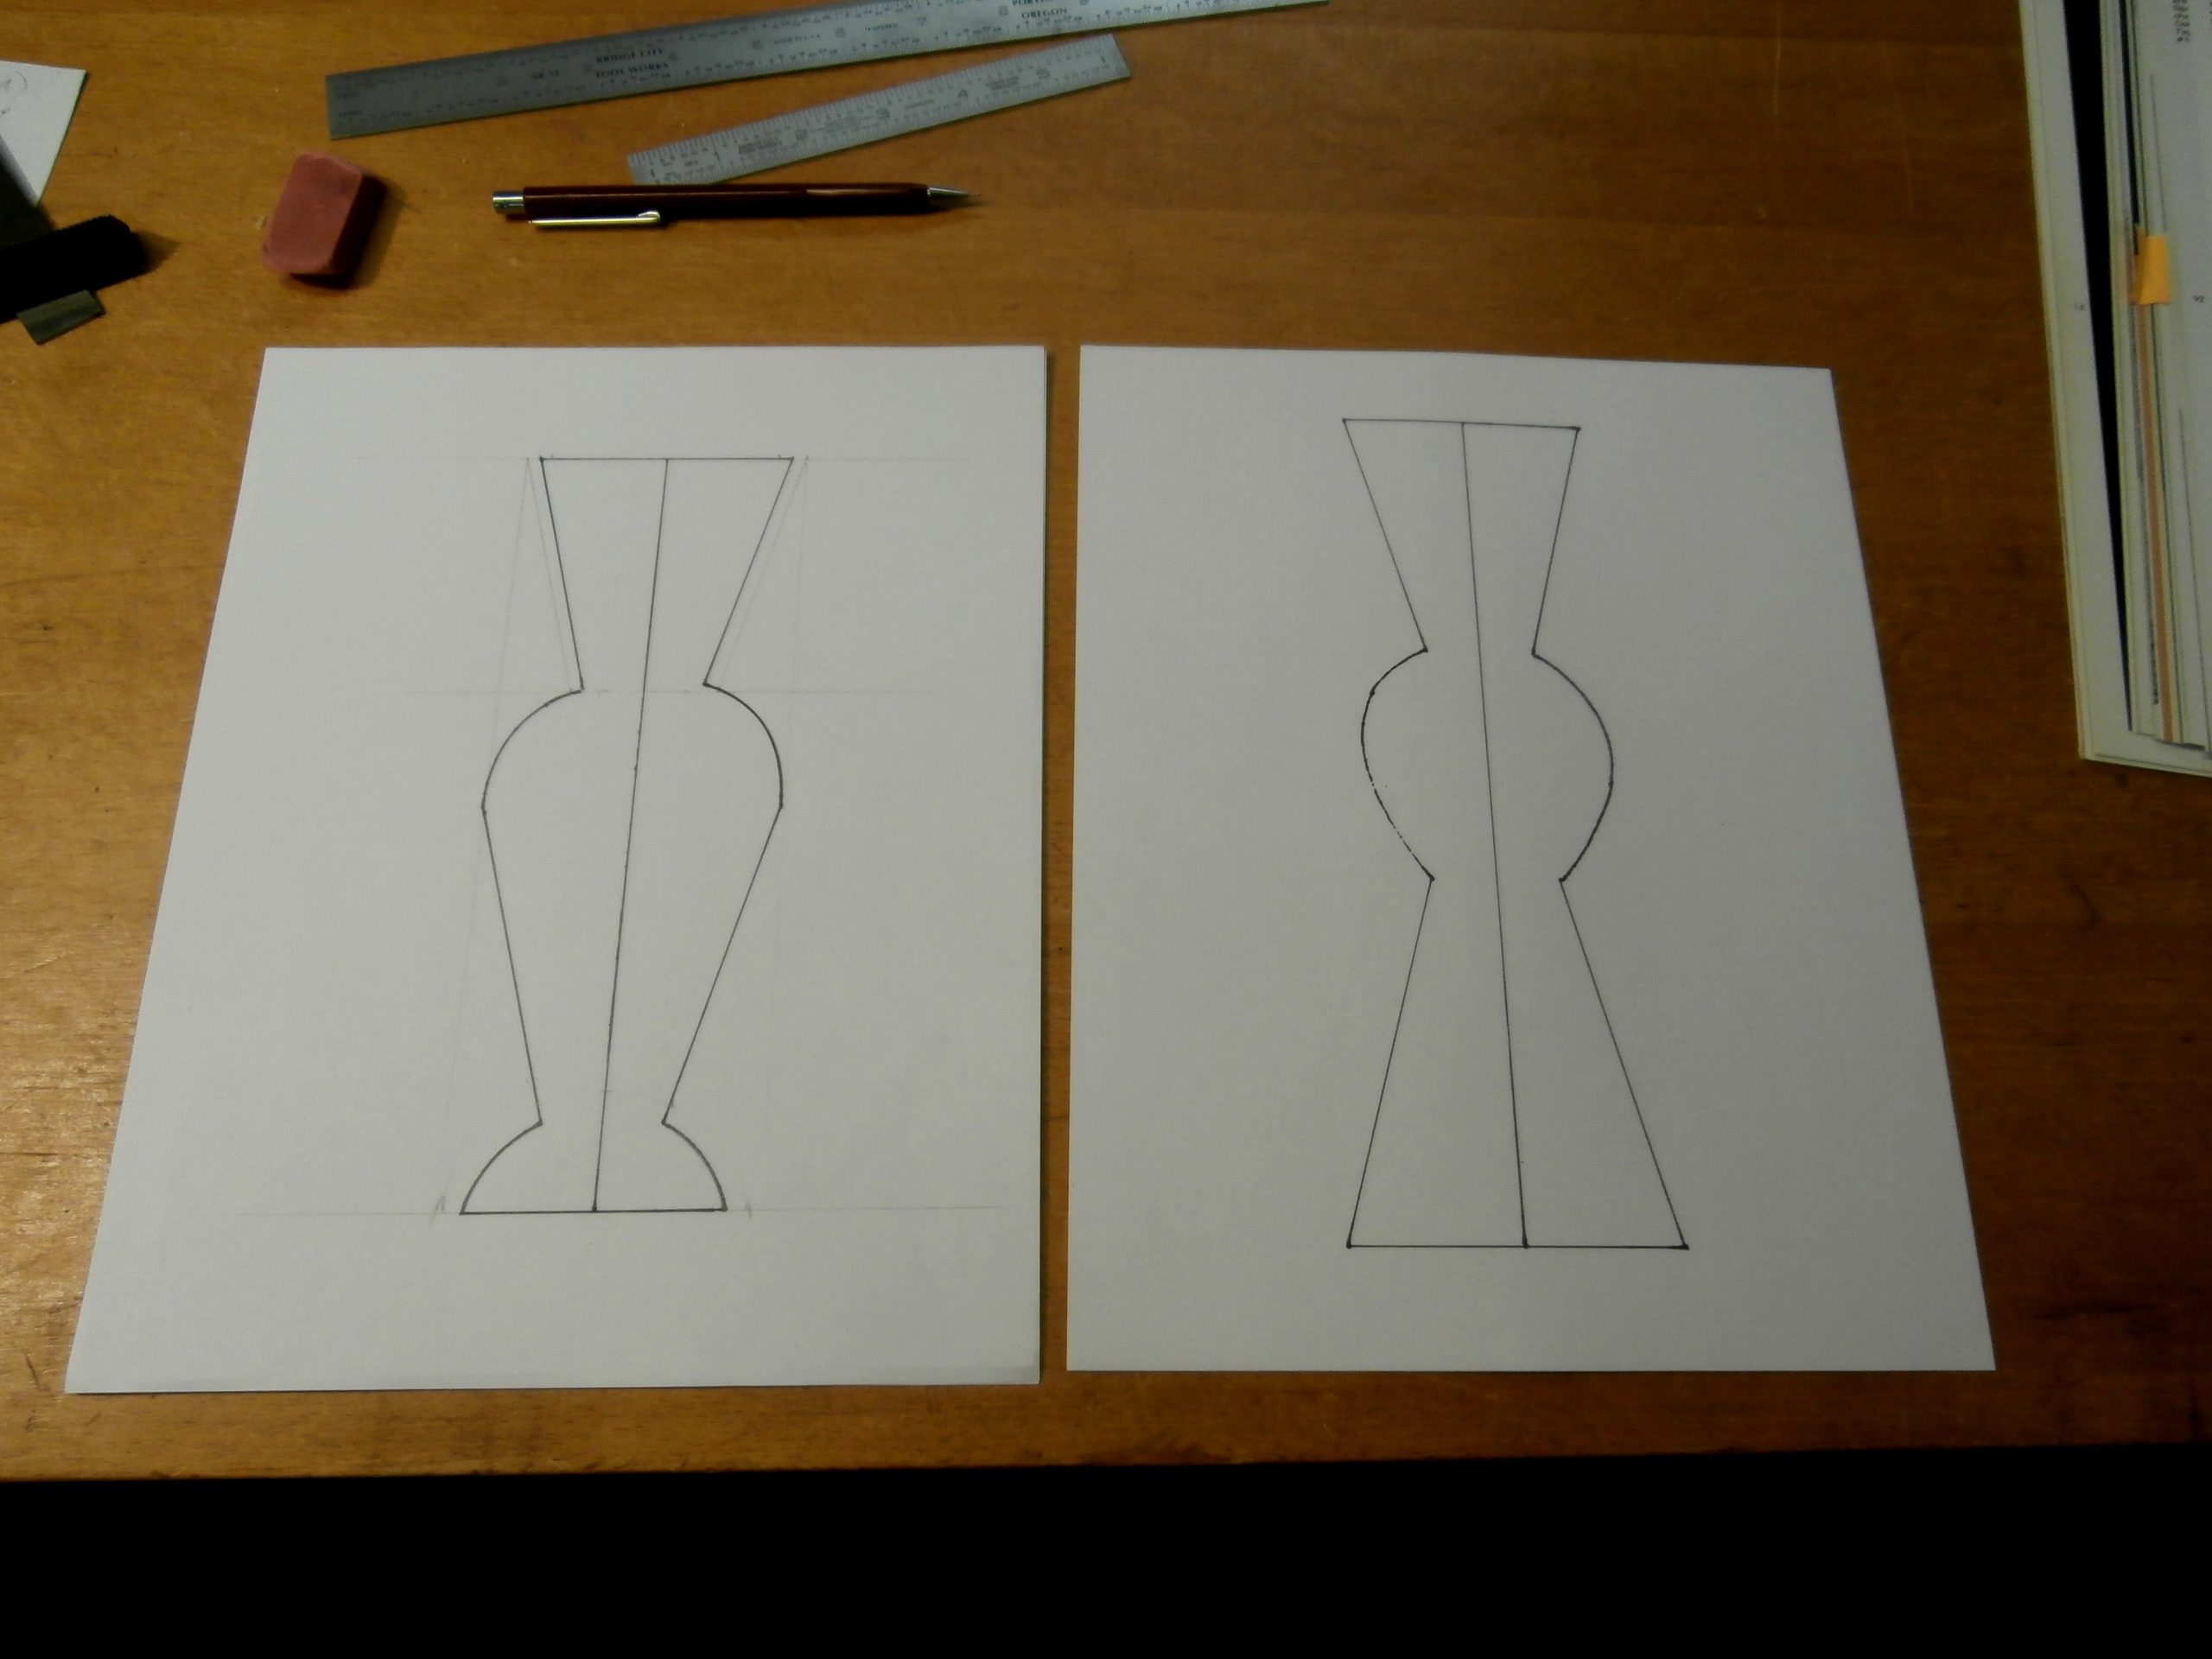
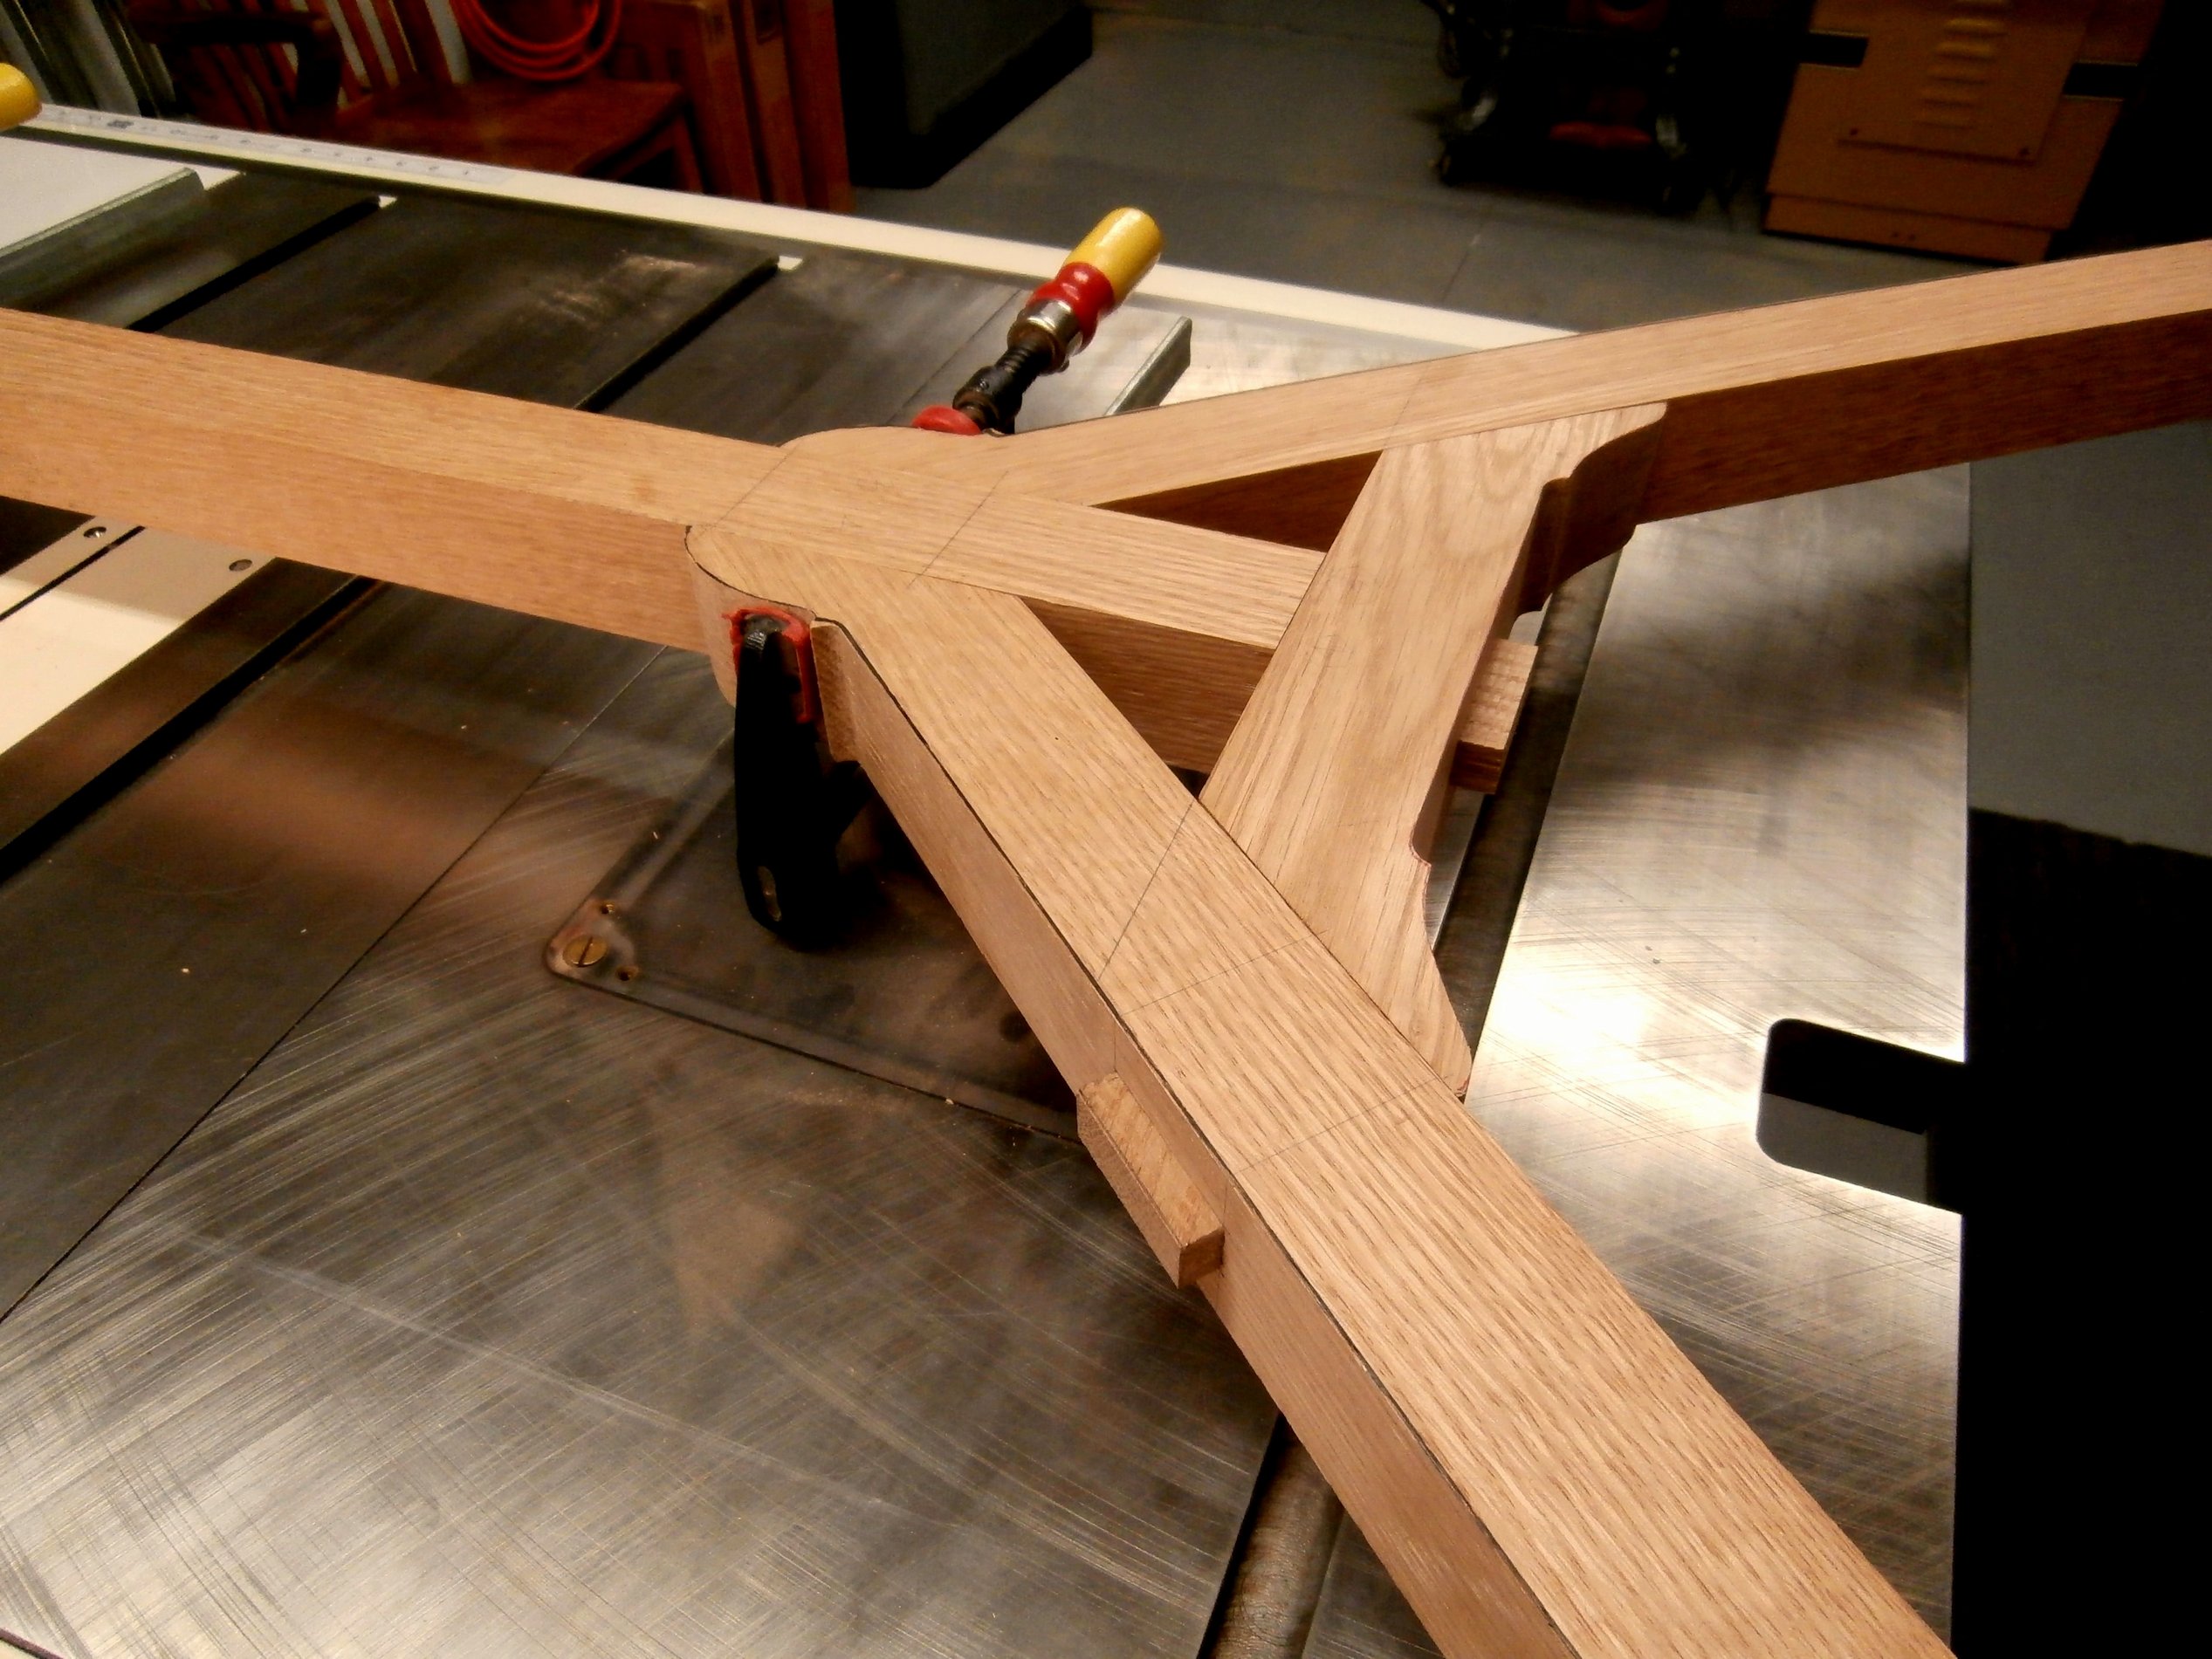
With no original drawings to go by, I made my own full size, scaled plans and set to work on the “Y” shaped joint only to find that my first effort was not going to be satisfactory.  It ended up going in my wood stove.  I revised the plans based on my experience and started over.  [Click on any image to enlarge.  All following photos copyright symbol Max Vollmer]

Revised plans.

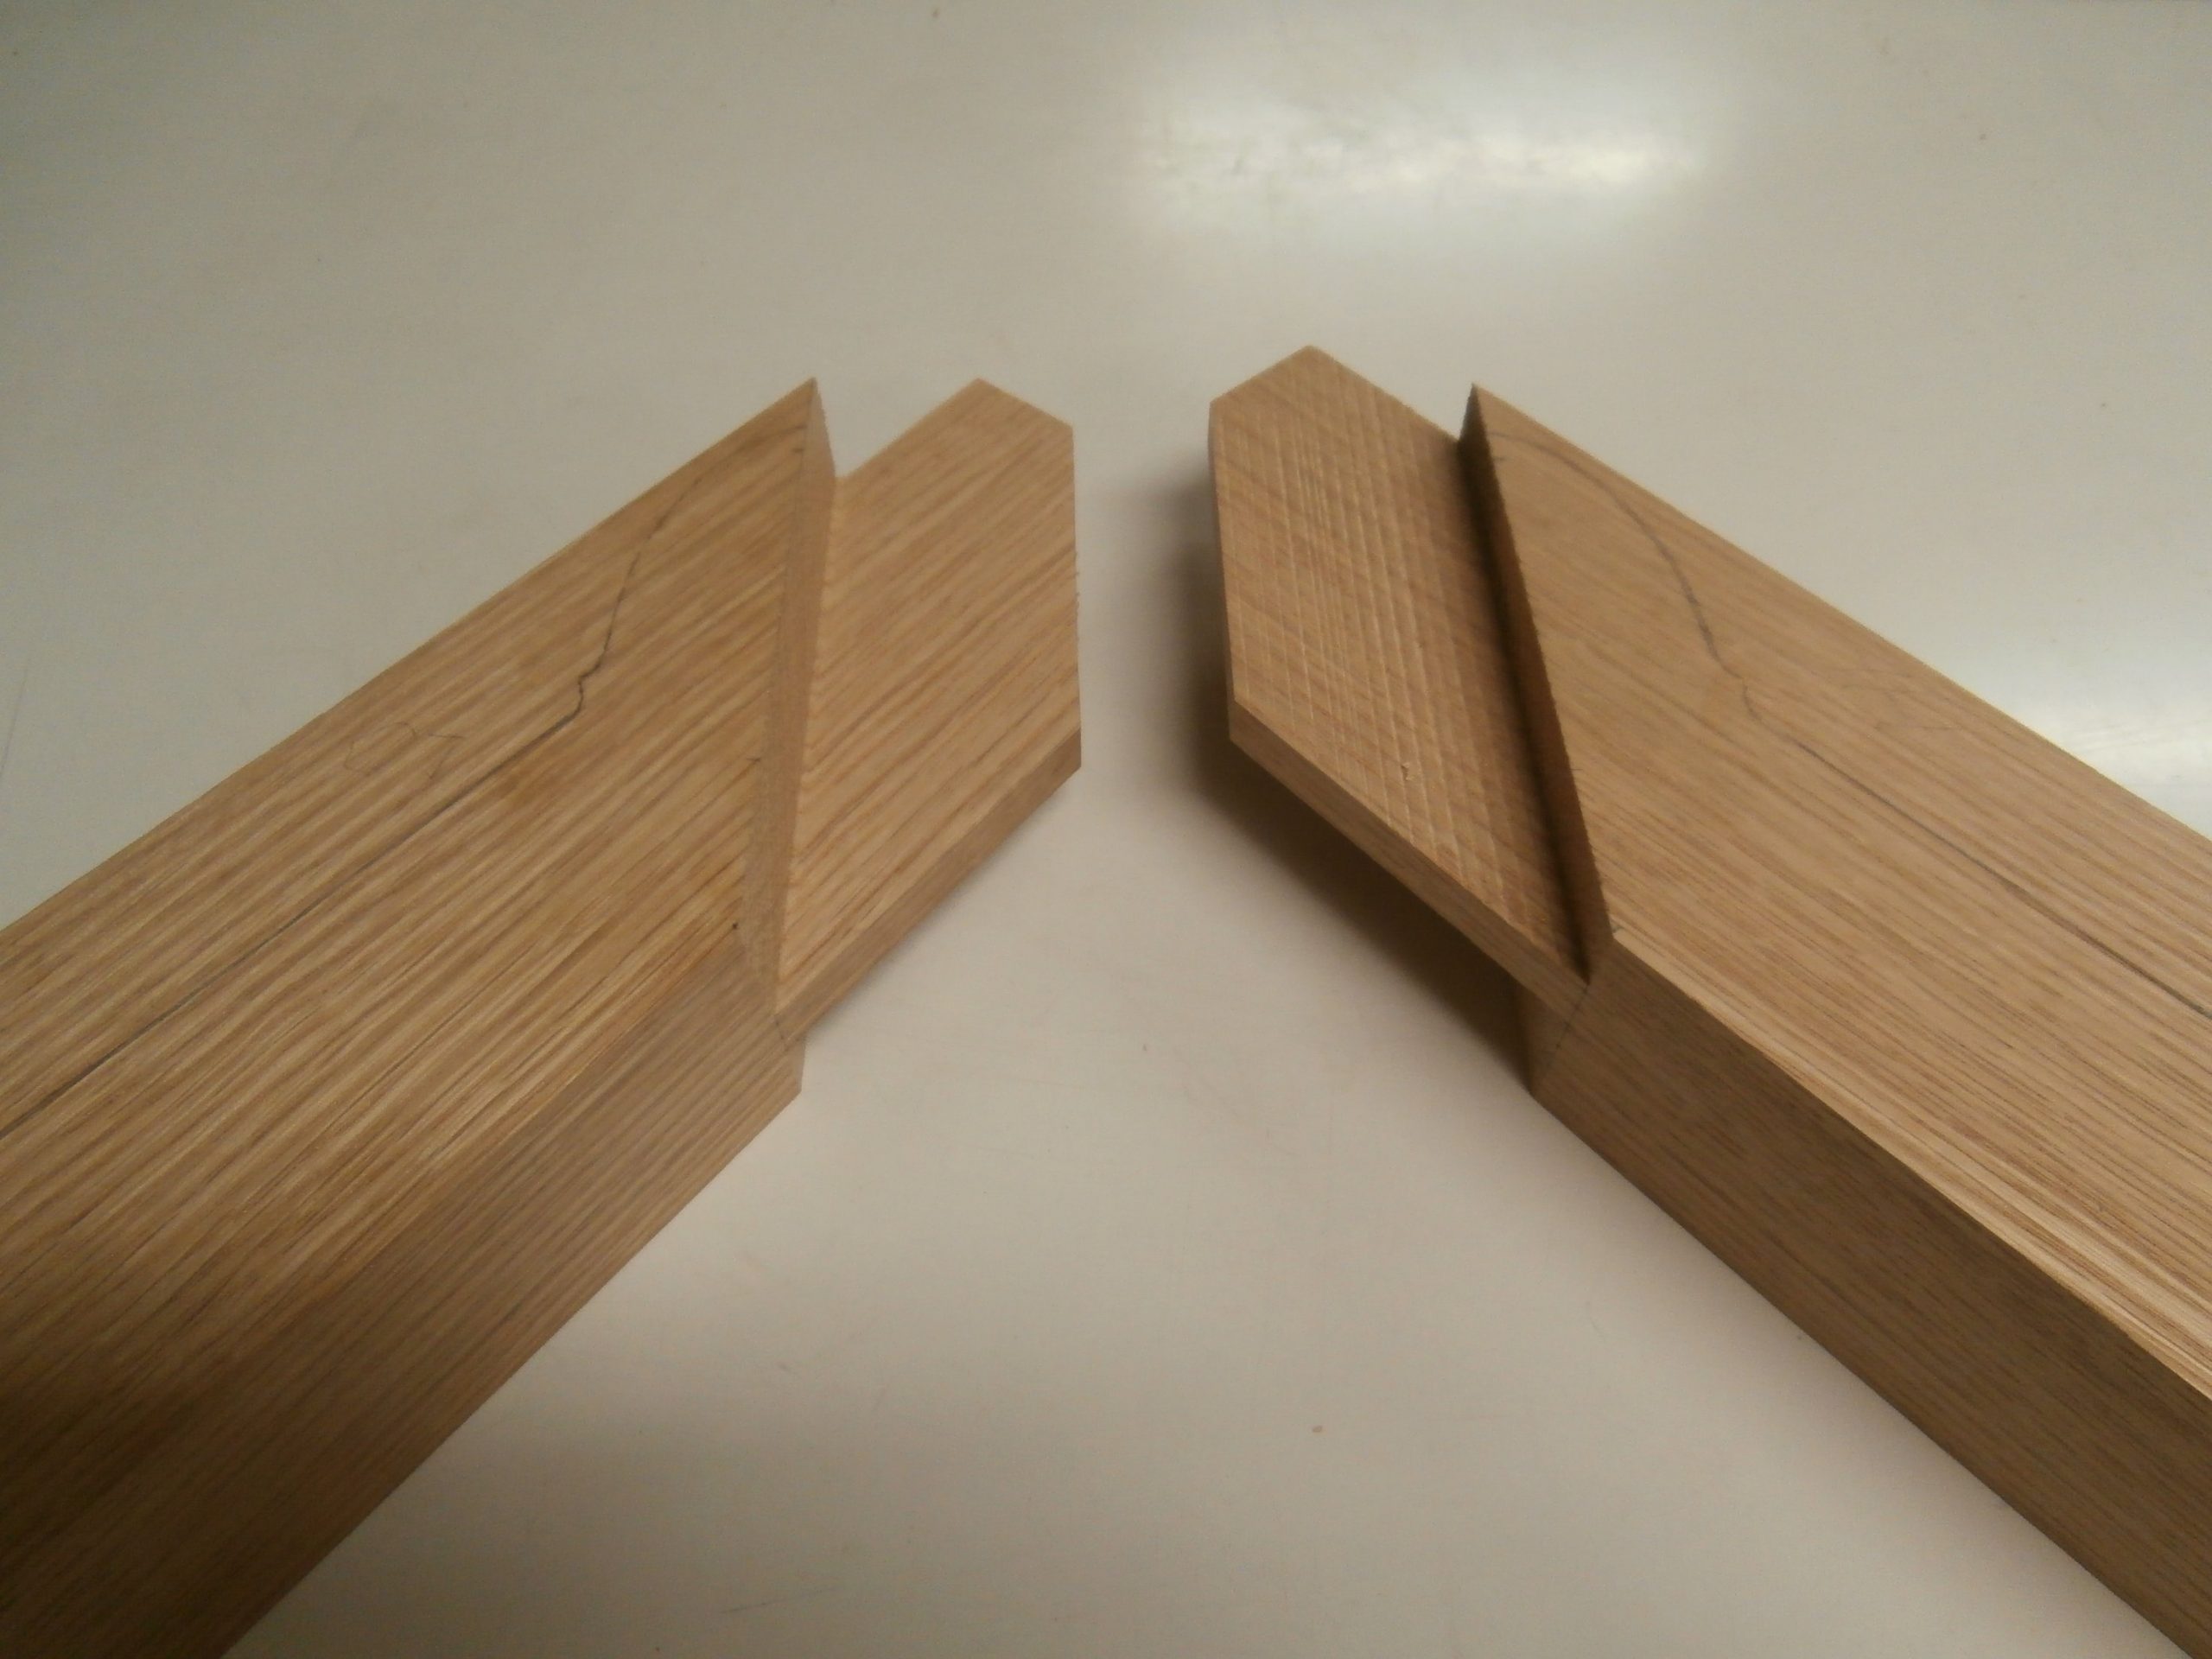
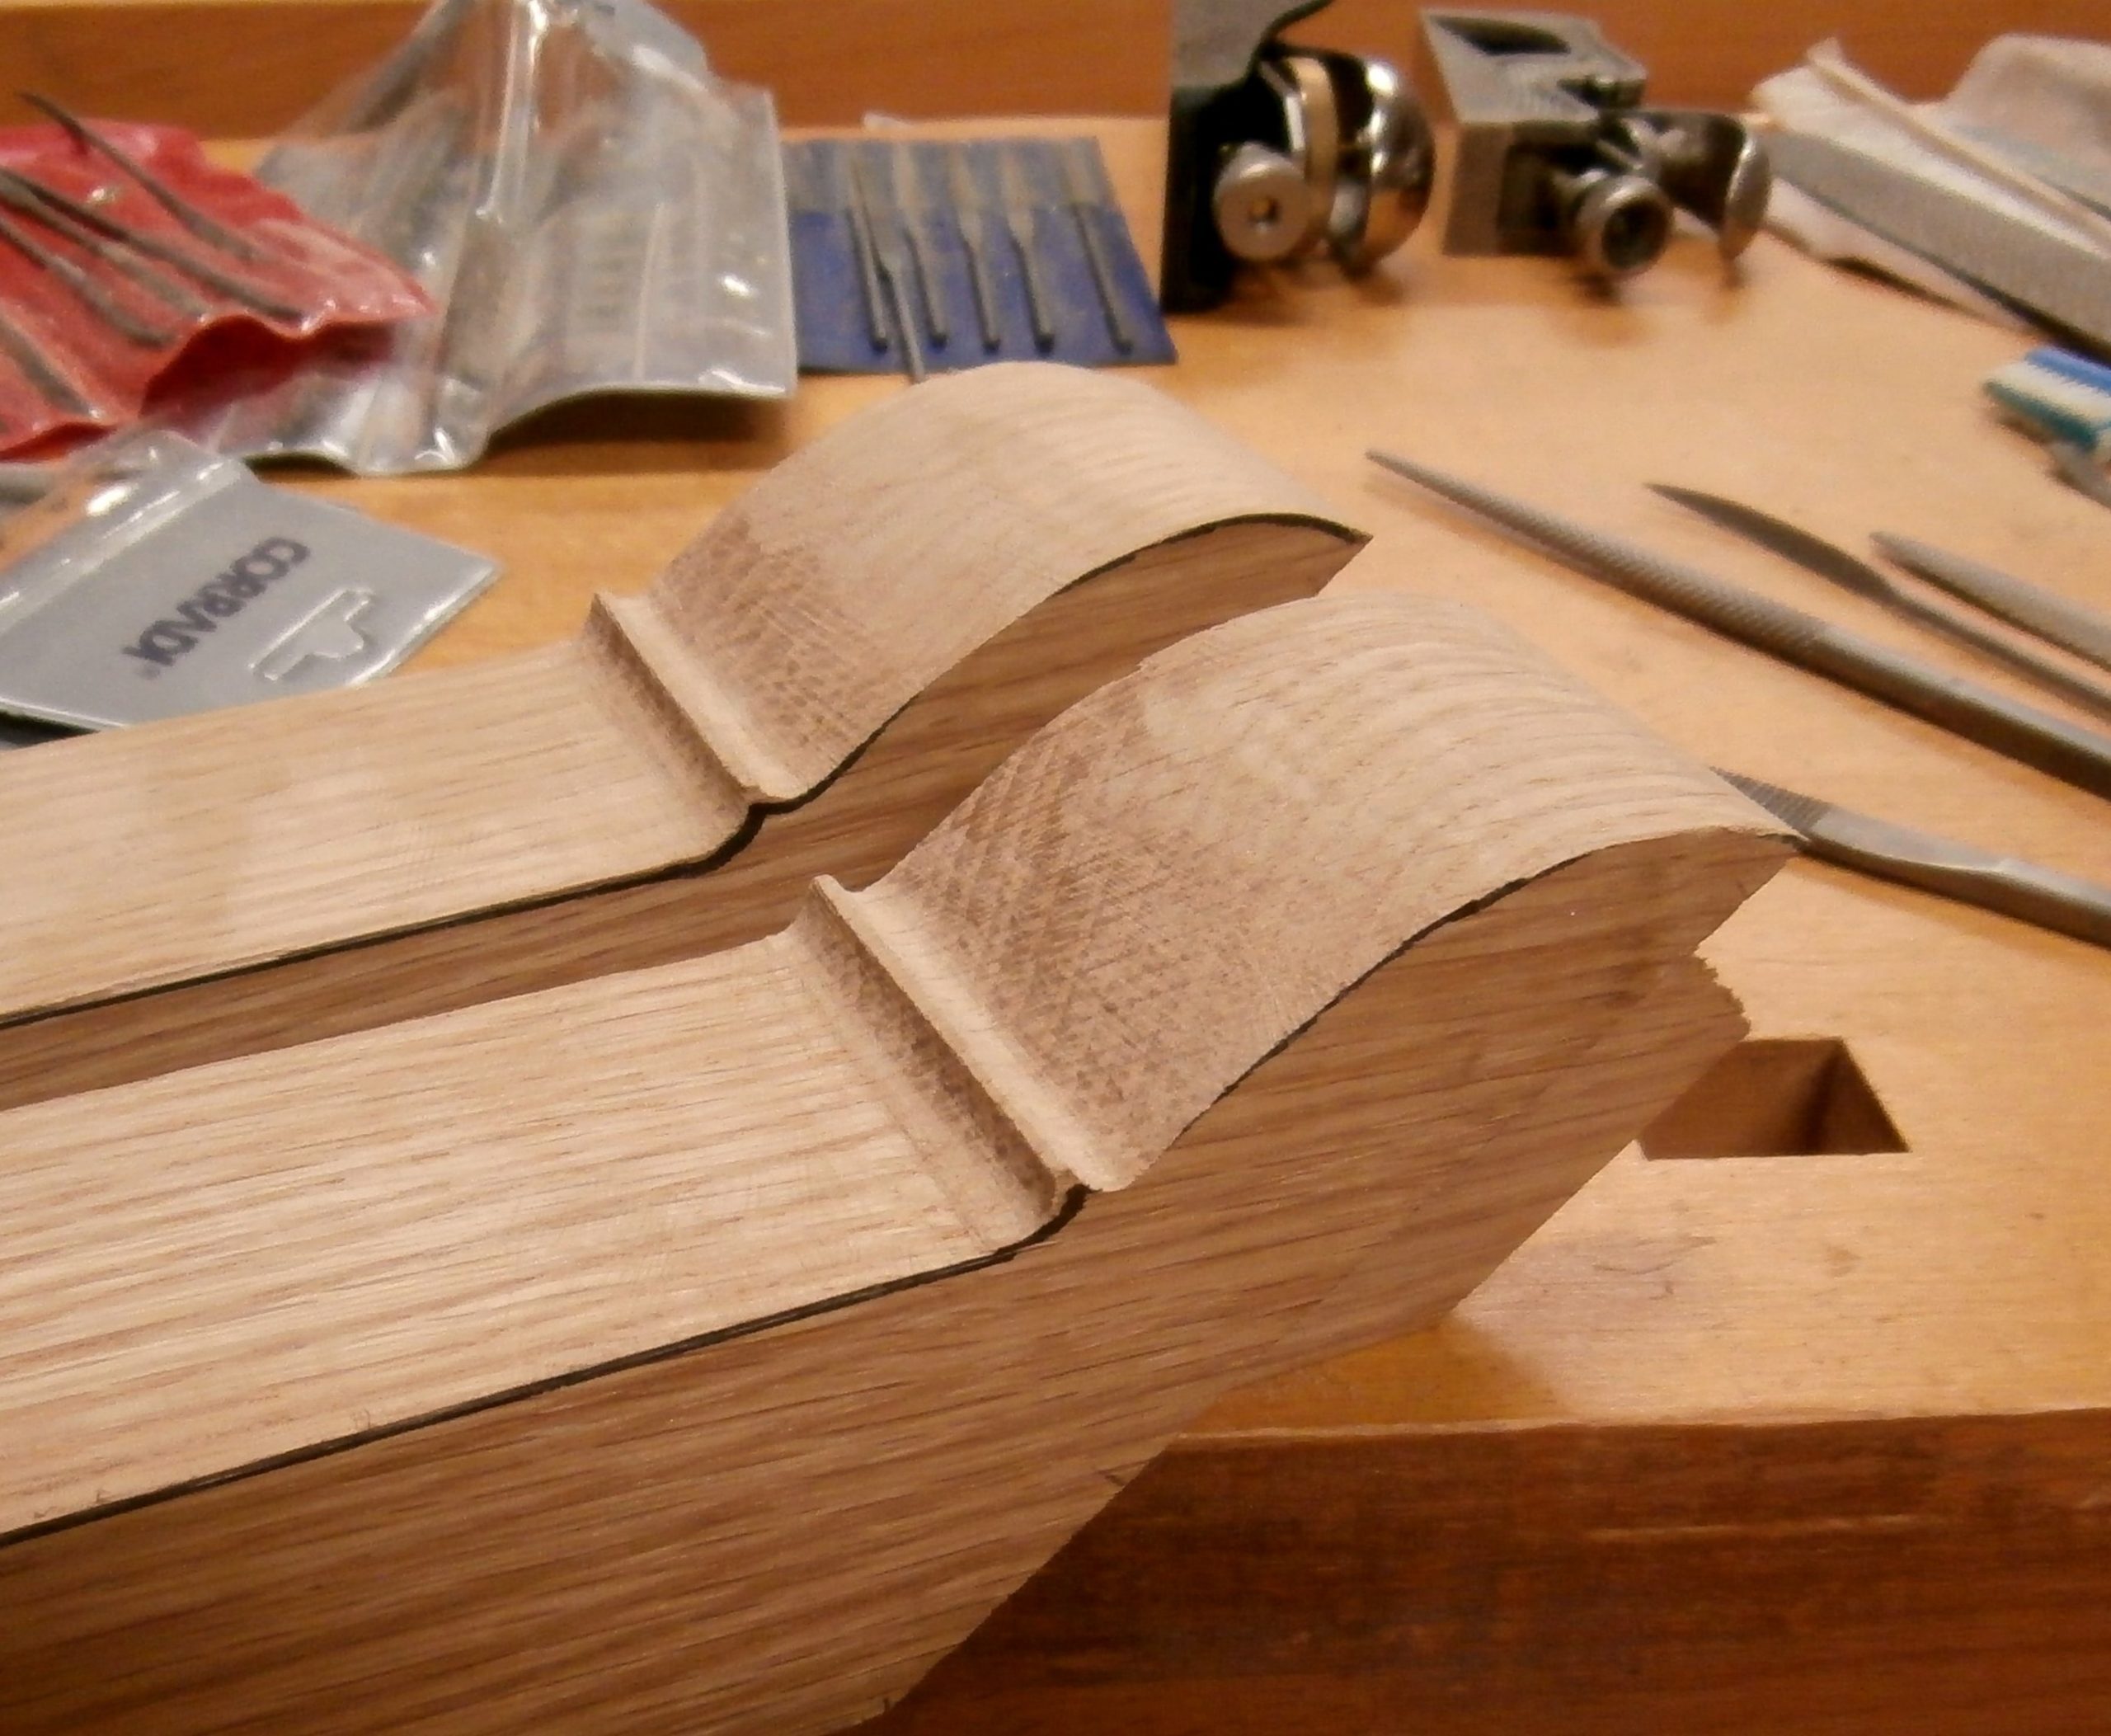
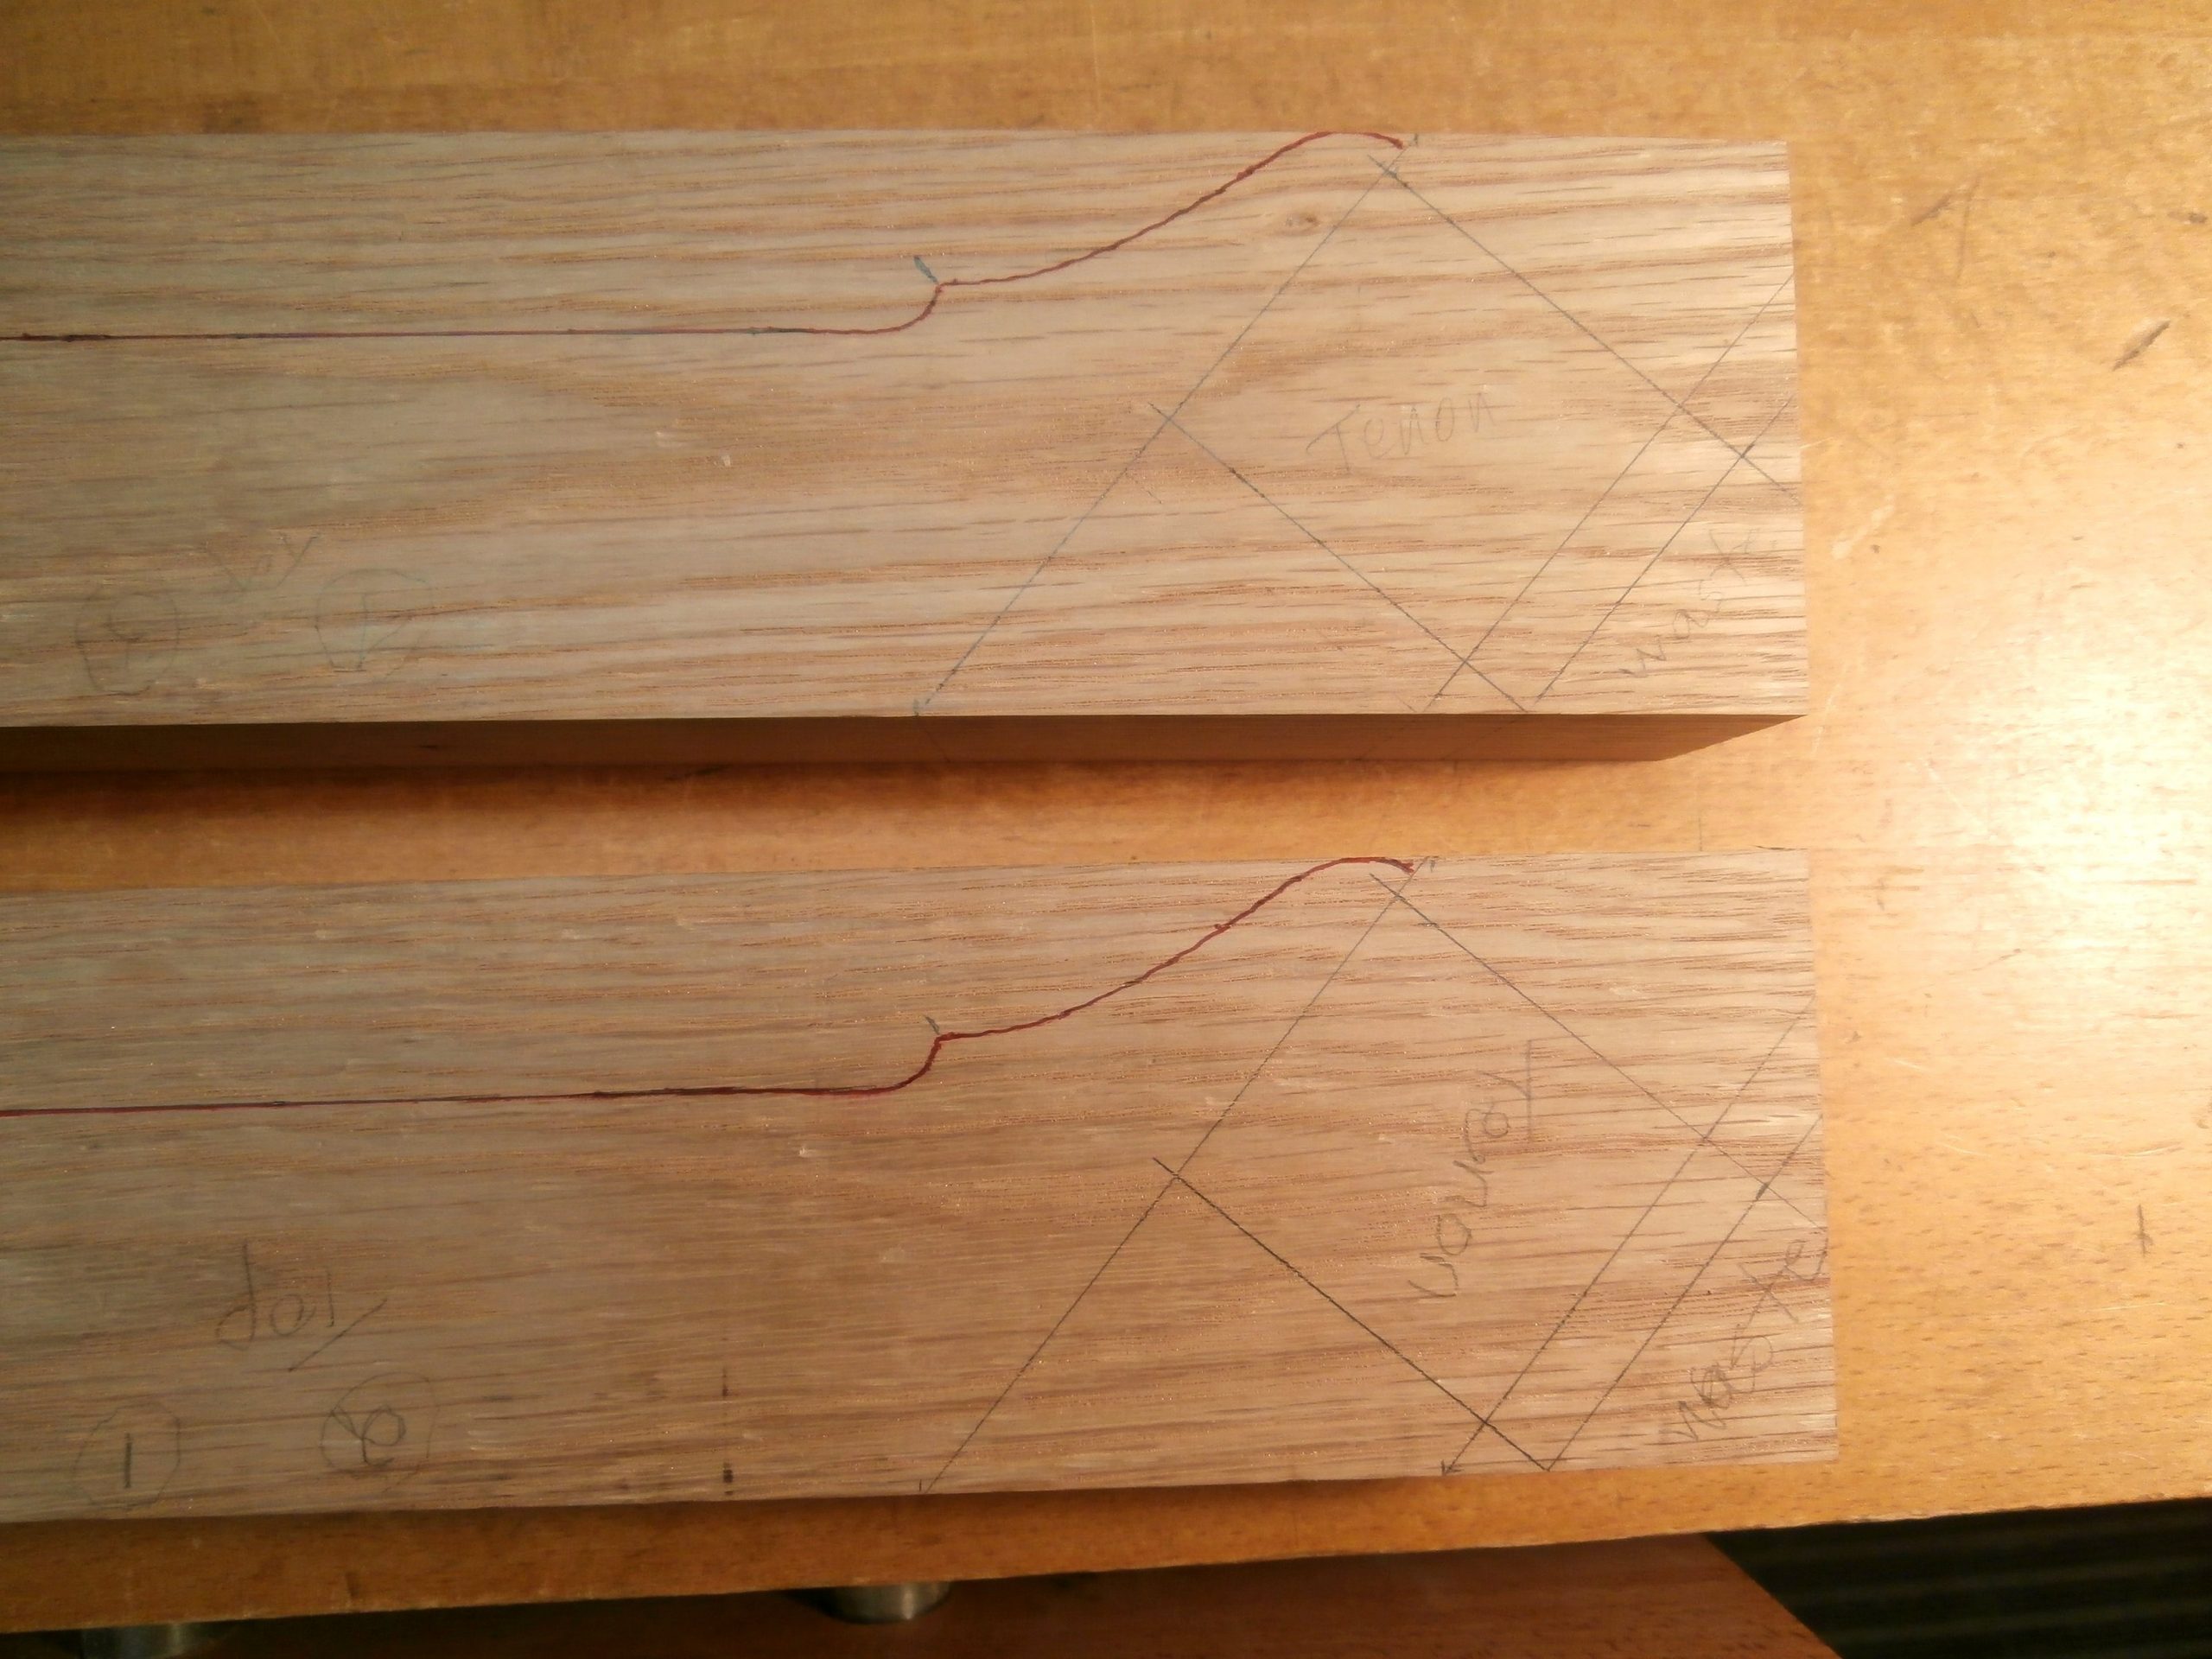
For aesthetic reasons I reduced the acute angle between the arms of the “Y” and the main, longitudinal stretcher from 45 degrees to 40 degrees.  I used overlapping tenons on the arms where they intersect and join the main stretcher.

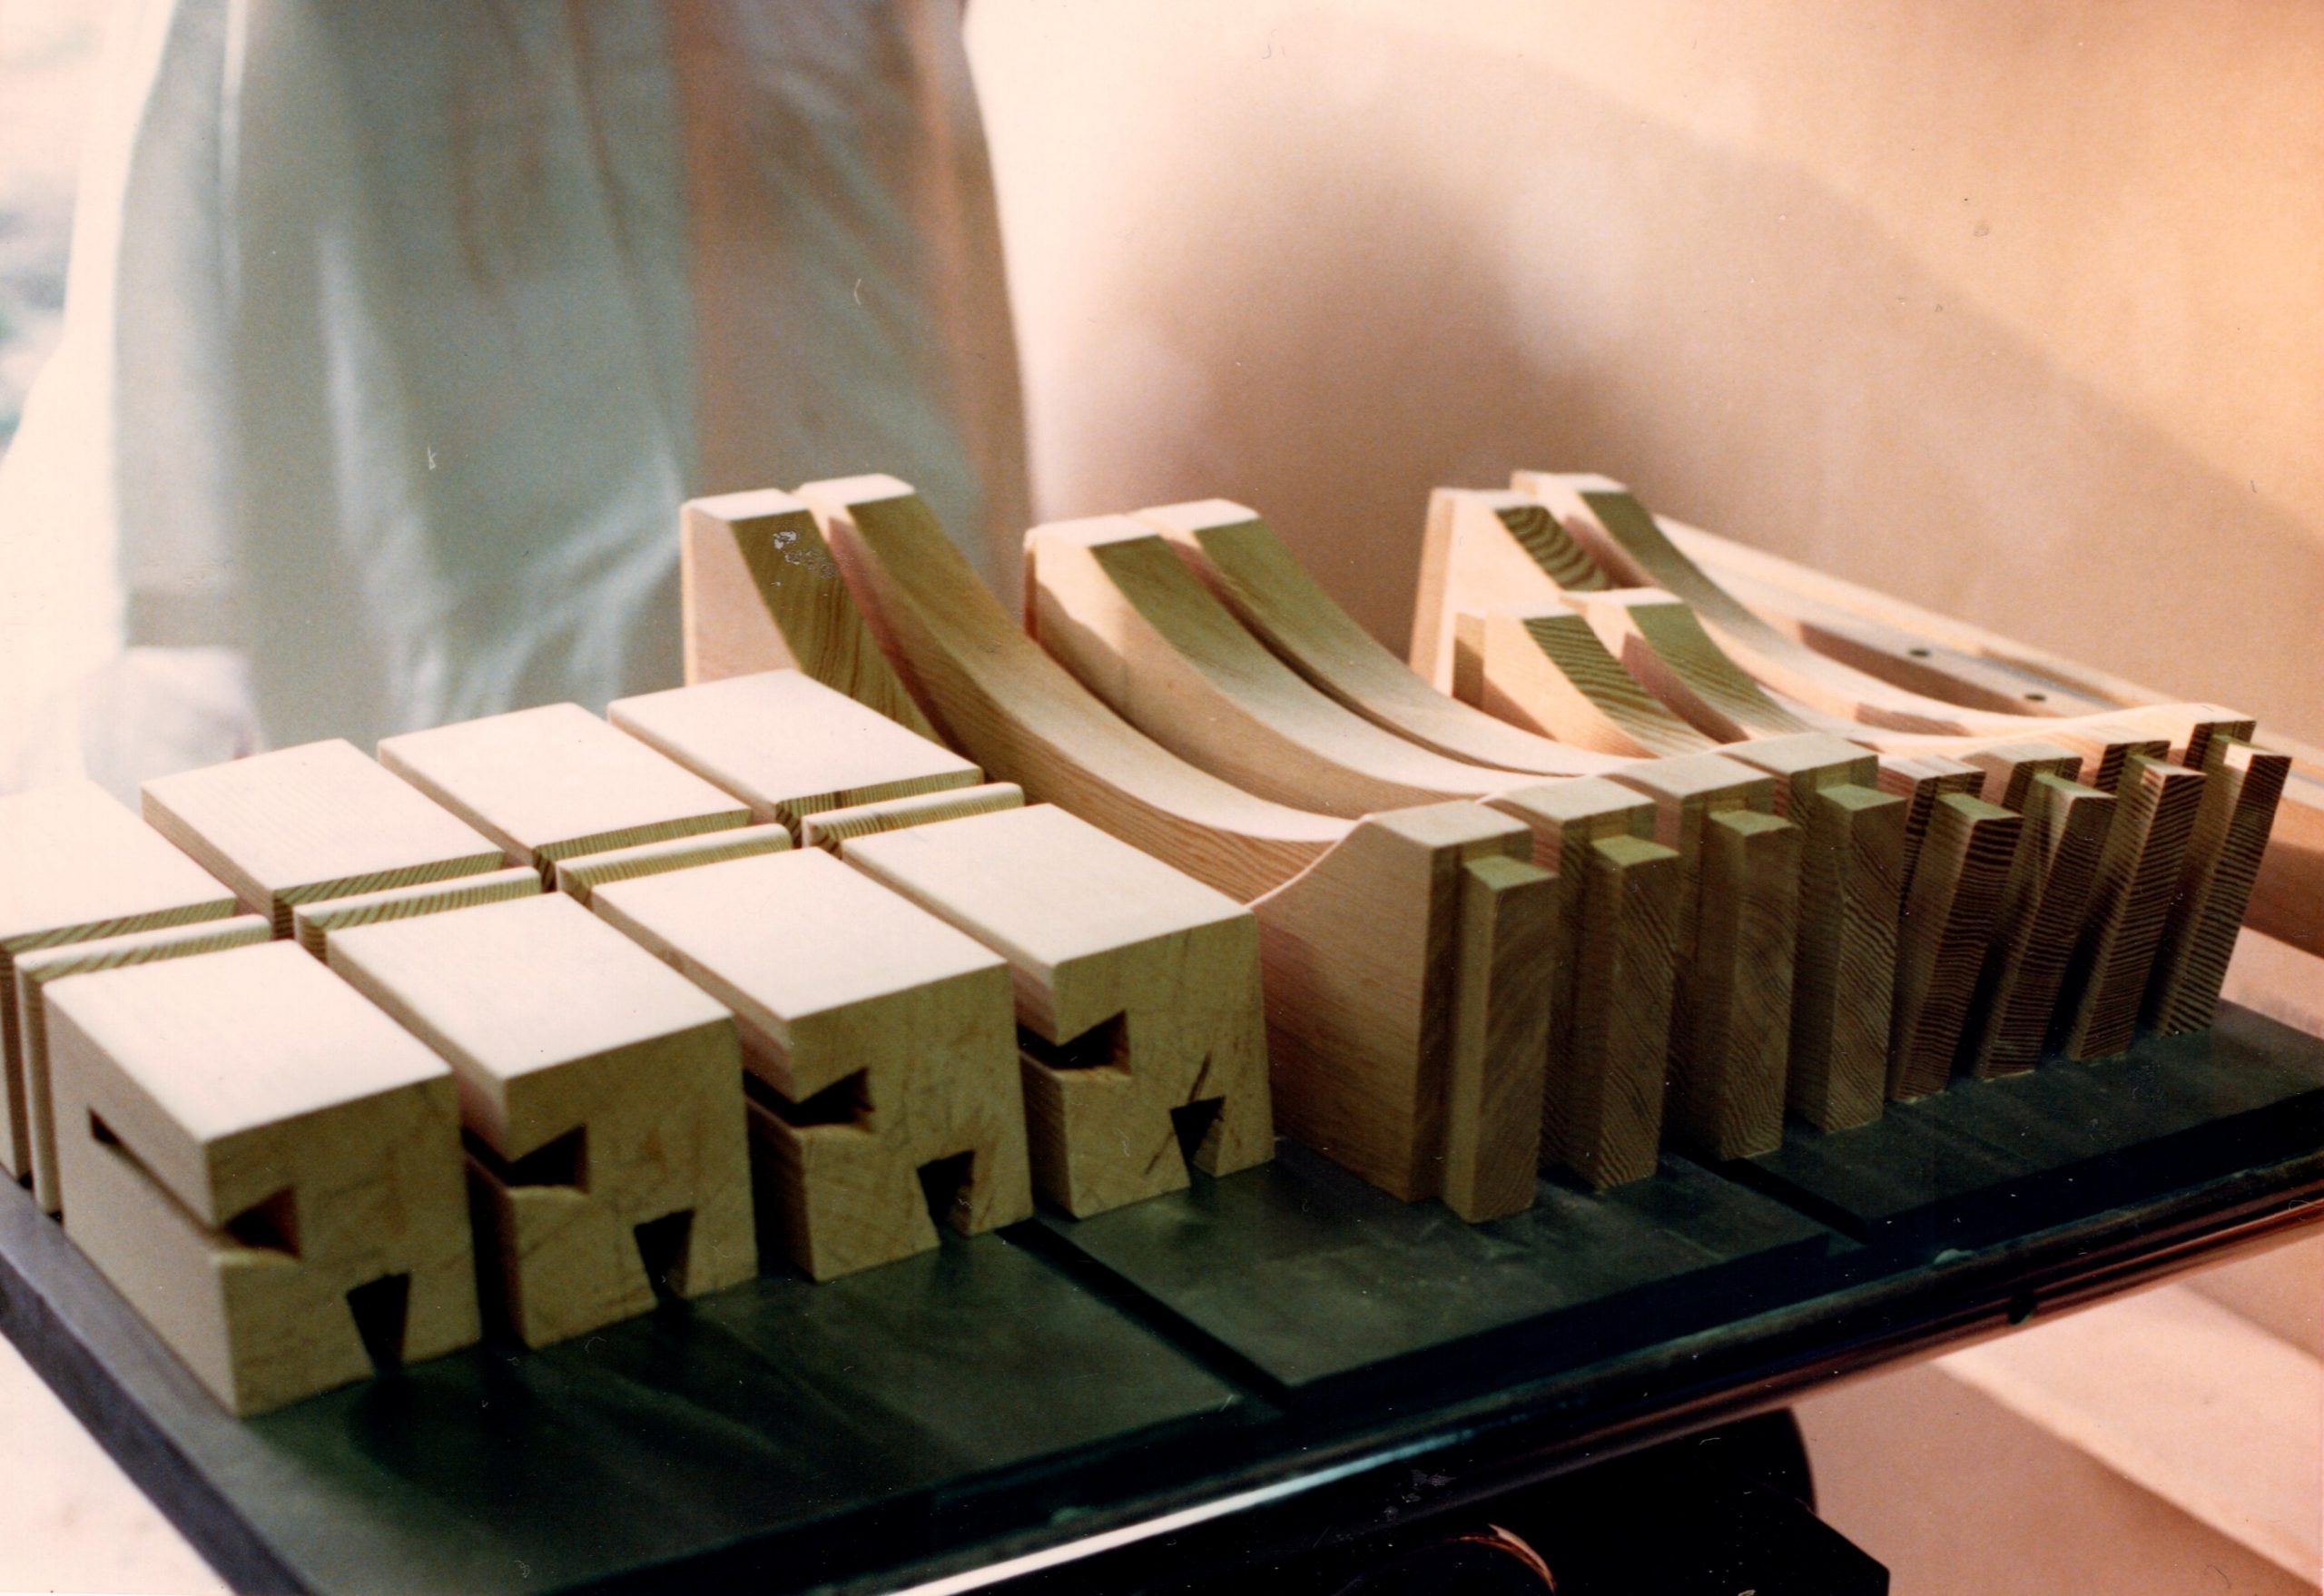
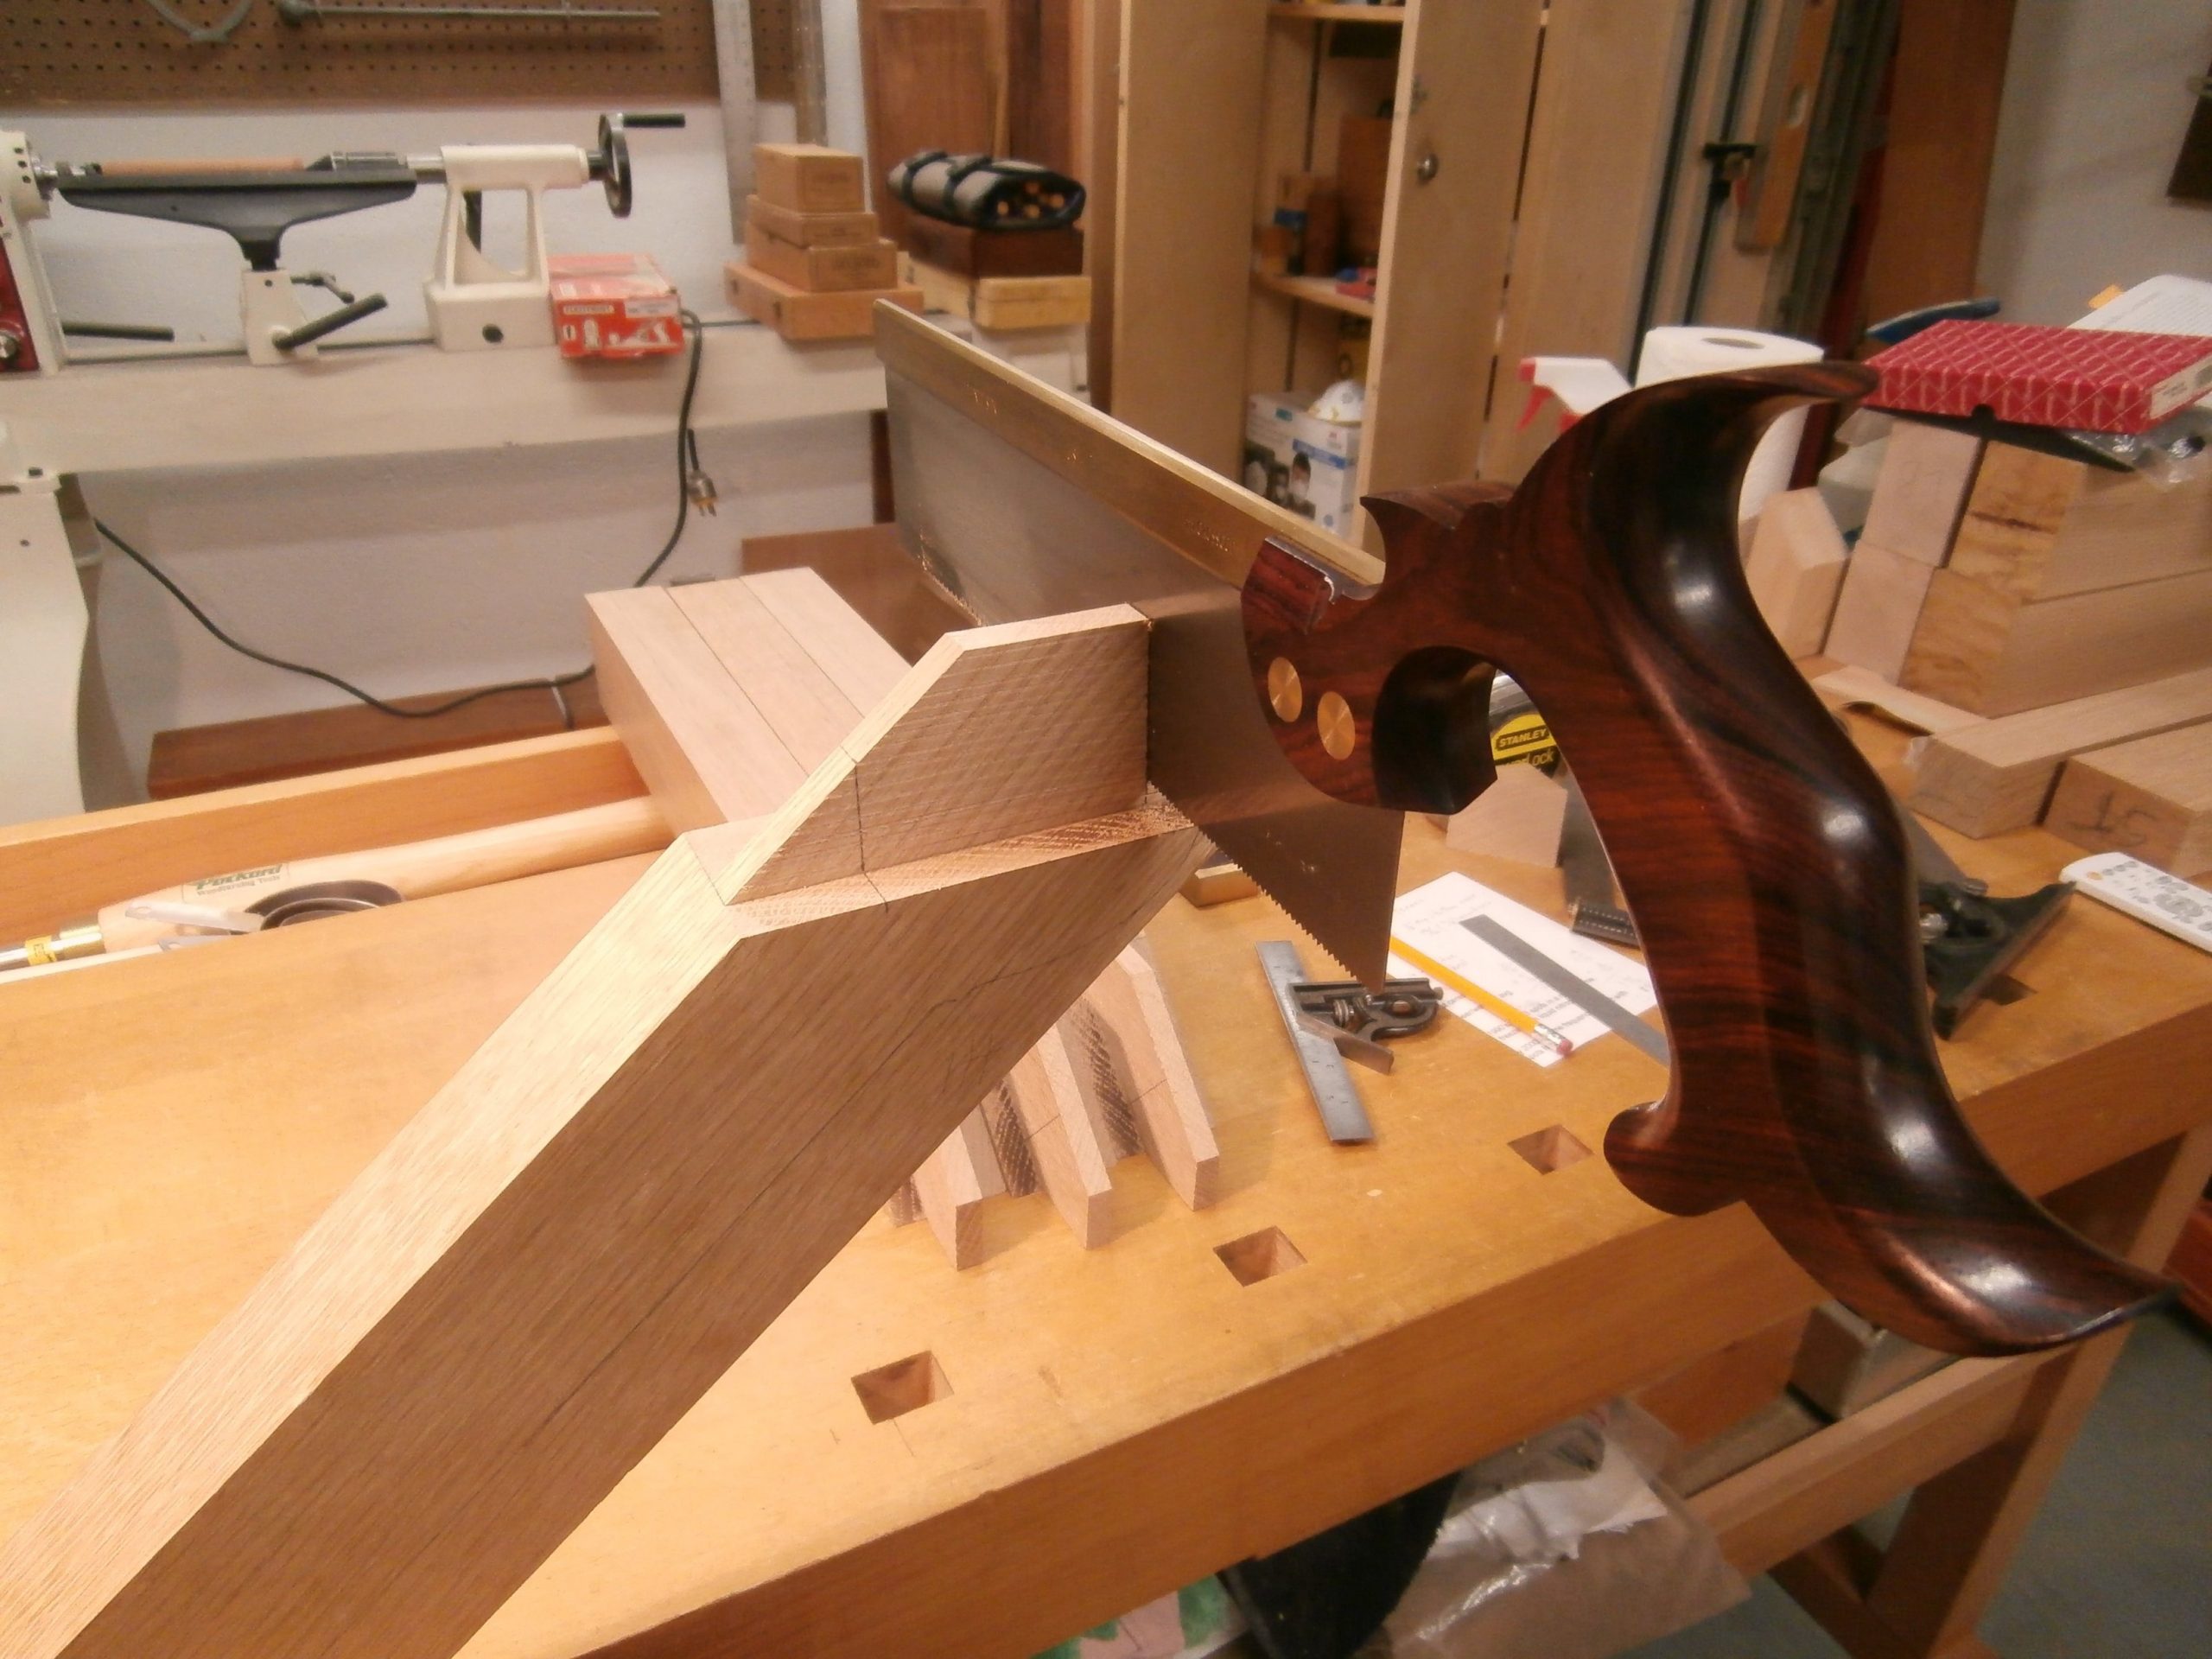
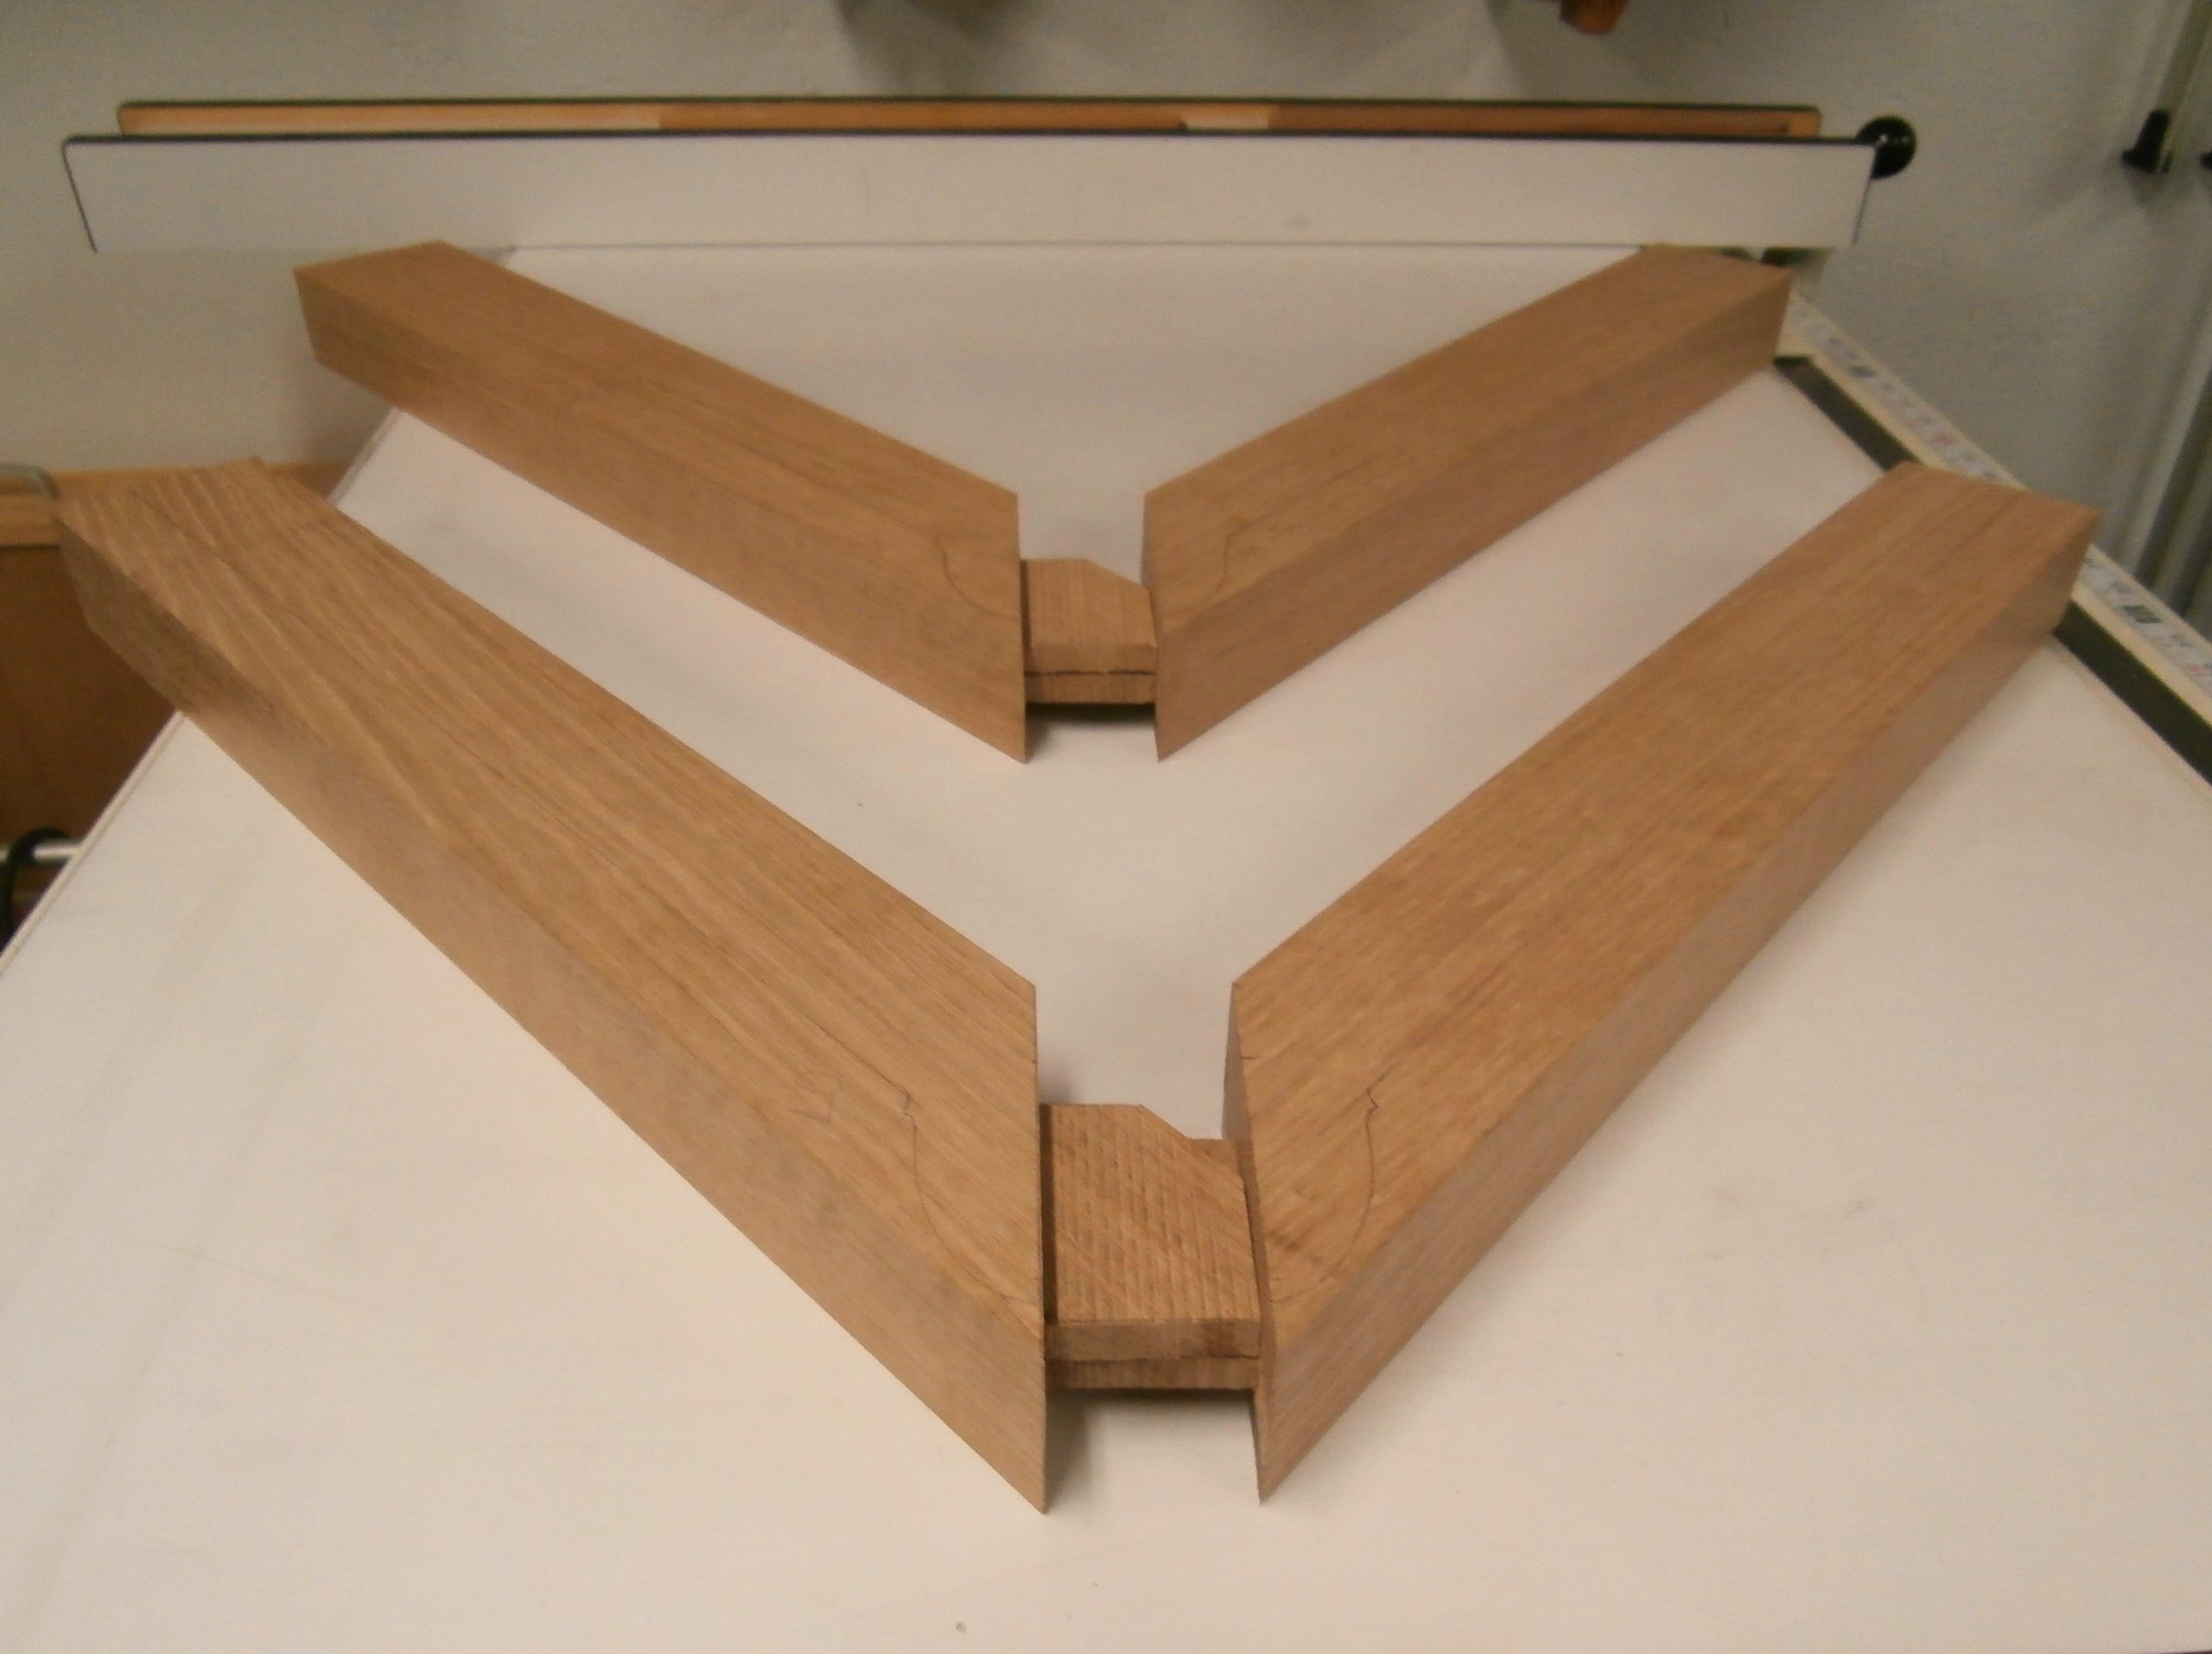
And, based on my first failed effort, I also redesigned the tenons on the “spanner” or brace that connects the two arms of the “Y.”  This allowed me to cut “through” mortises in the arms that were perpendicular to the axis of the arms rather than  mortises cut at a 40 degree angle.  This way I could use straight tenons on the spanner.  Not only was this redesign equally strong, it was much easier to cut the mortises. The following series of photos illustrate my approach.  [Click on any image to enlarge, All photos copyright symbol Max Vollmer]

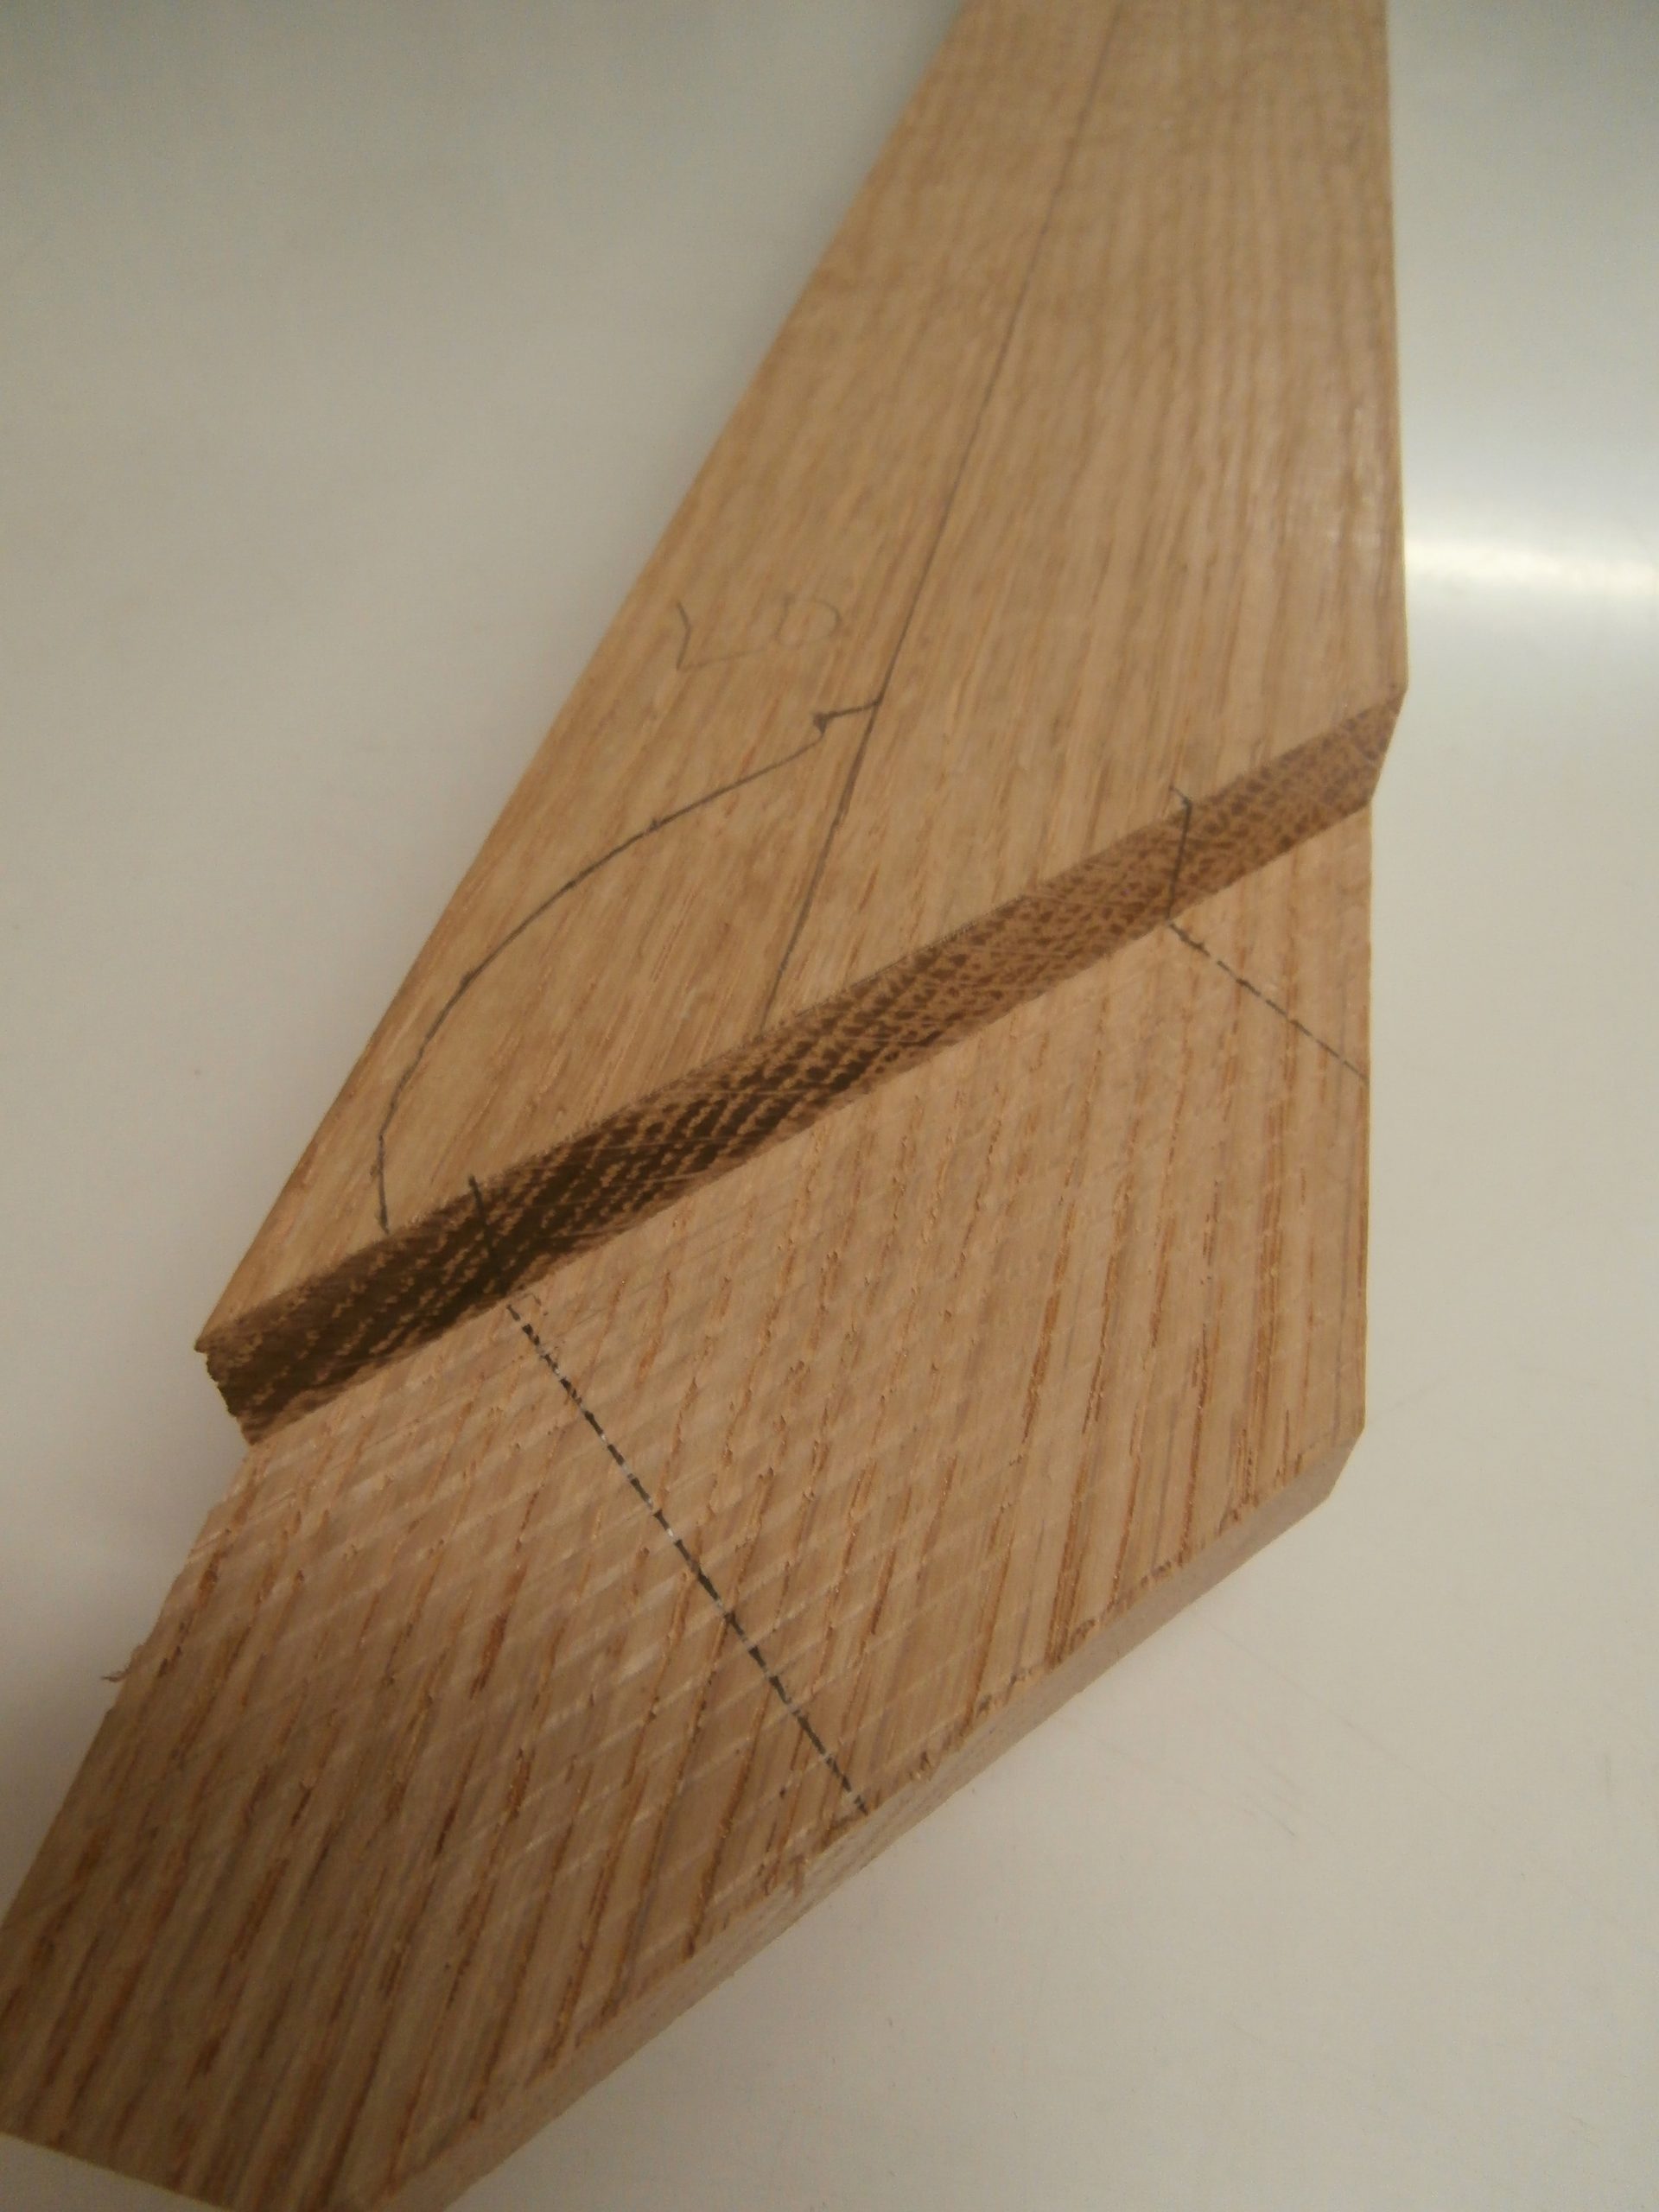
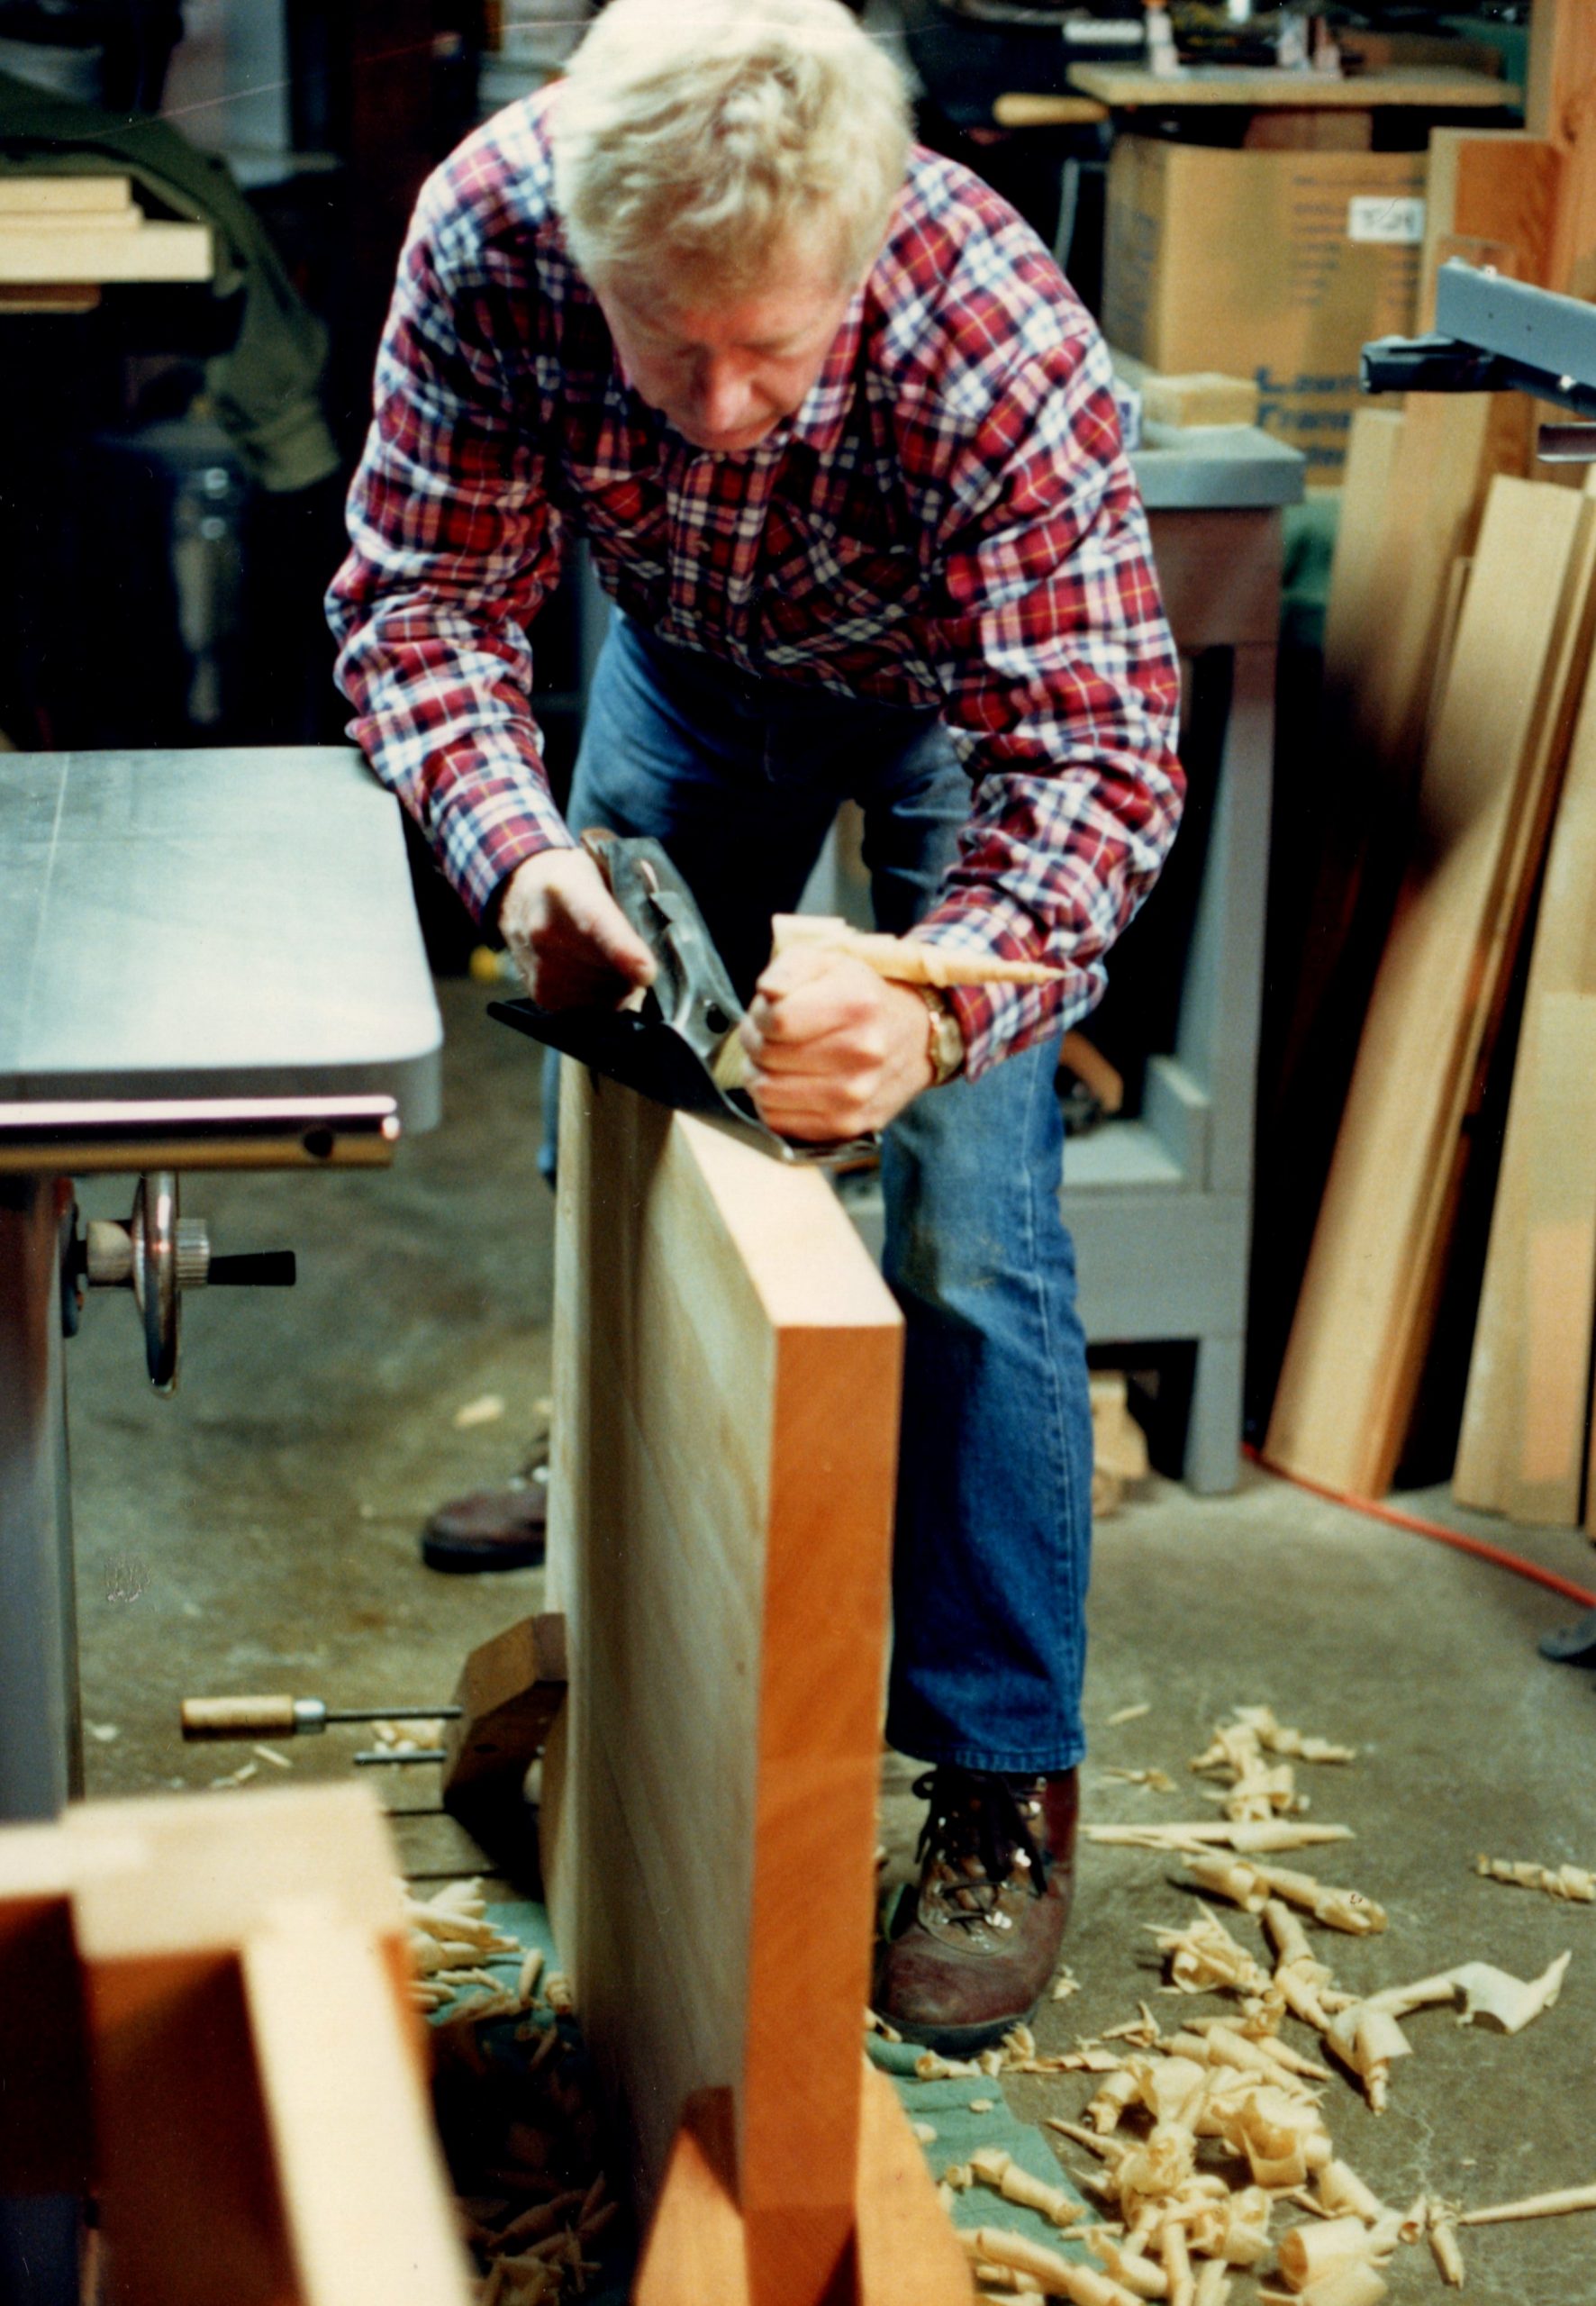
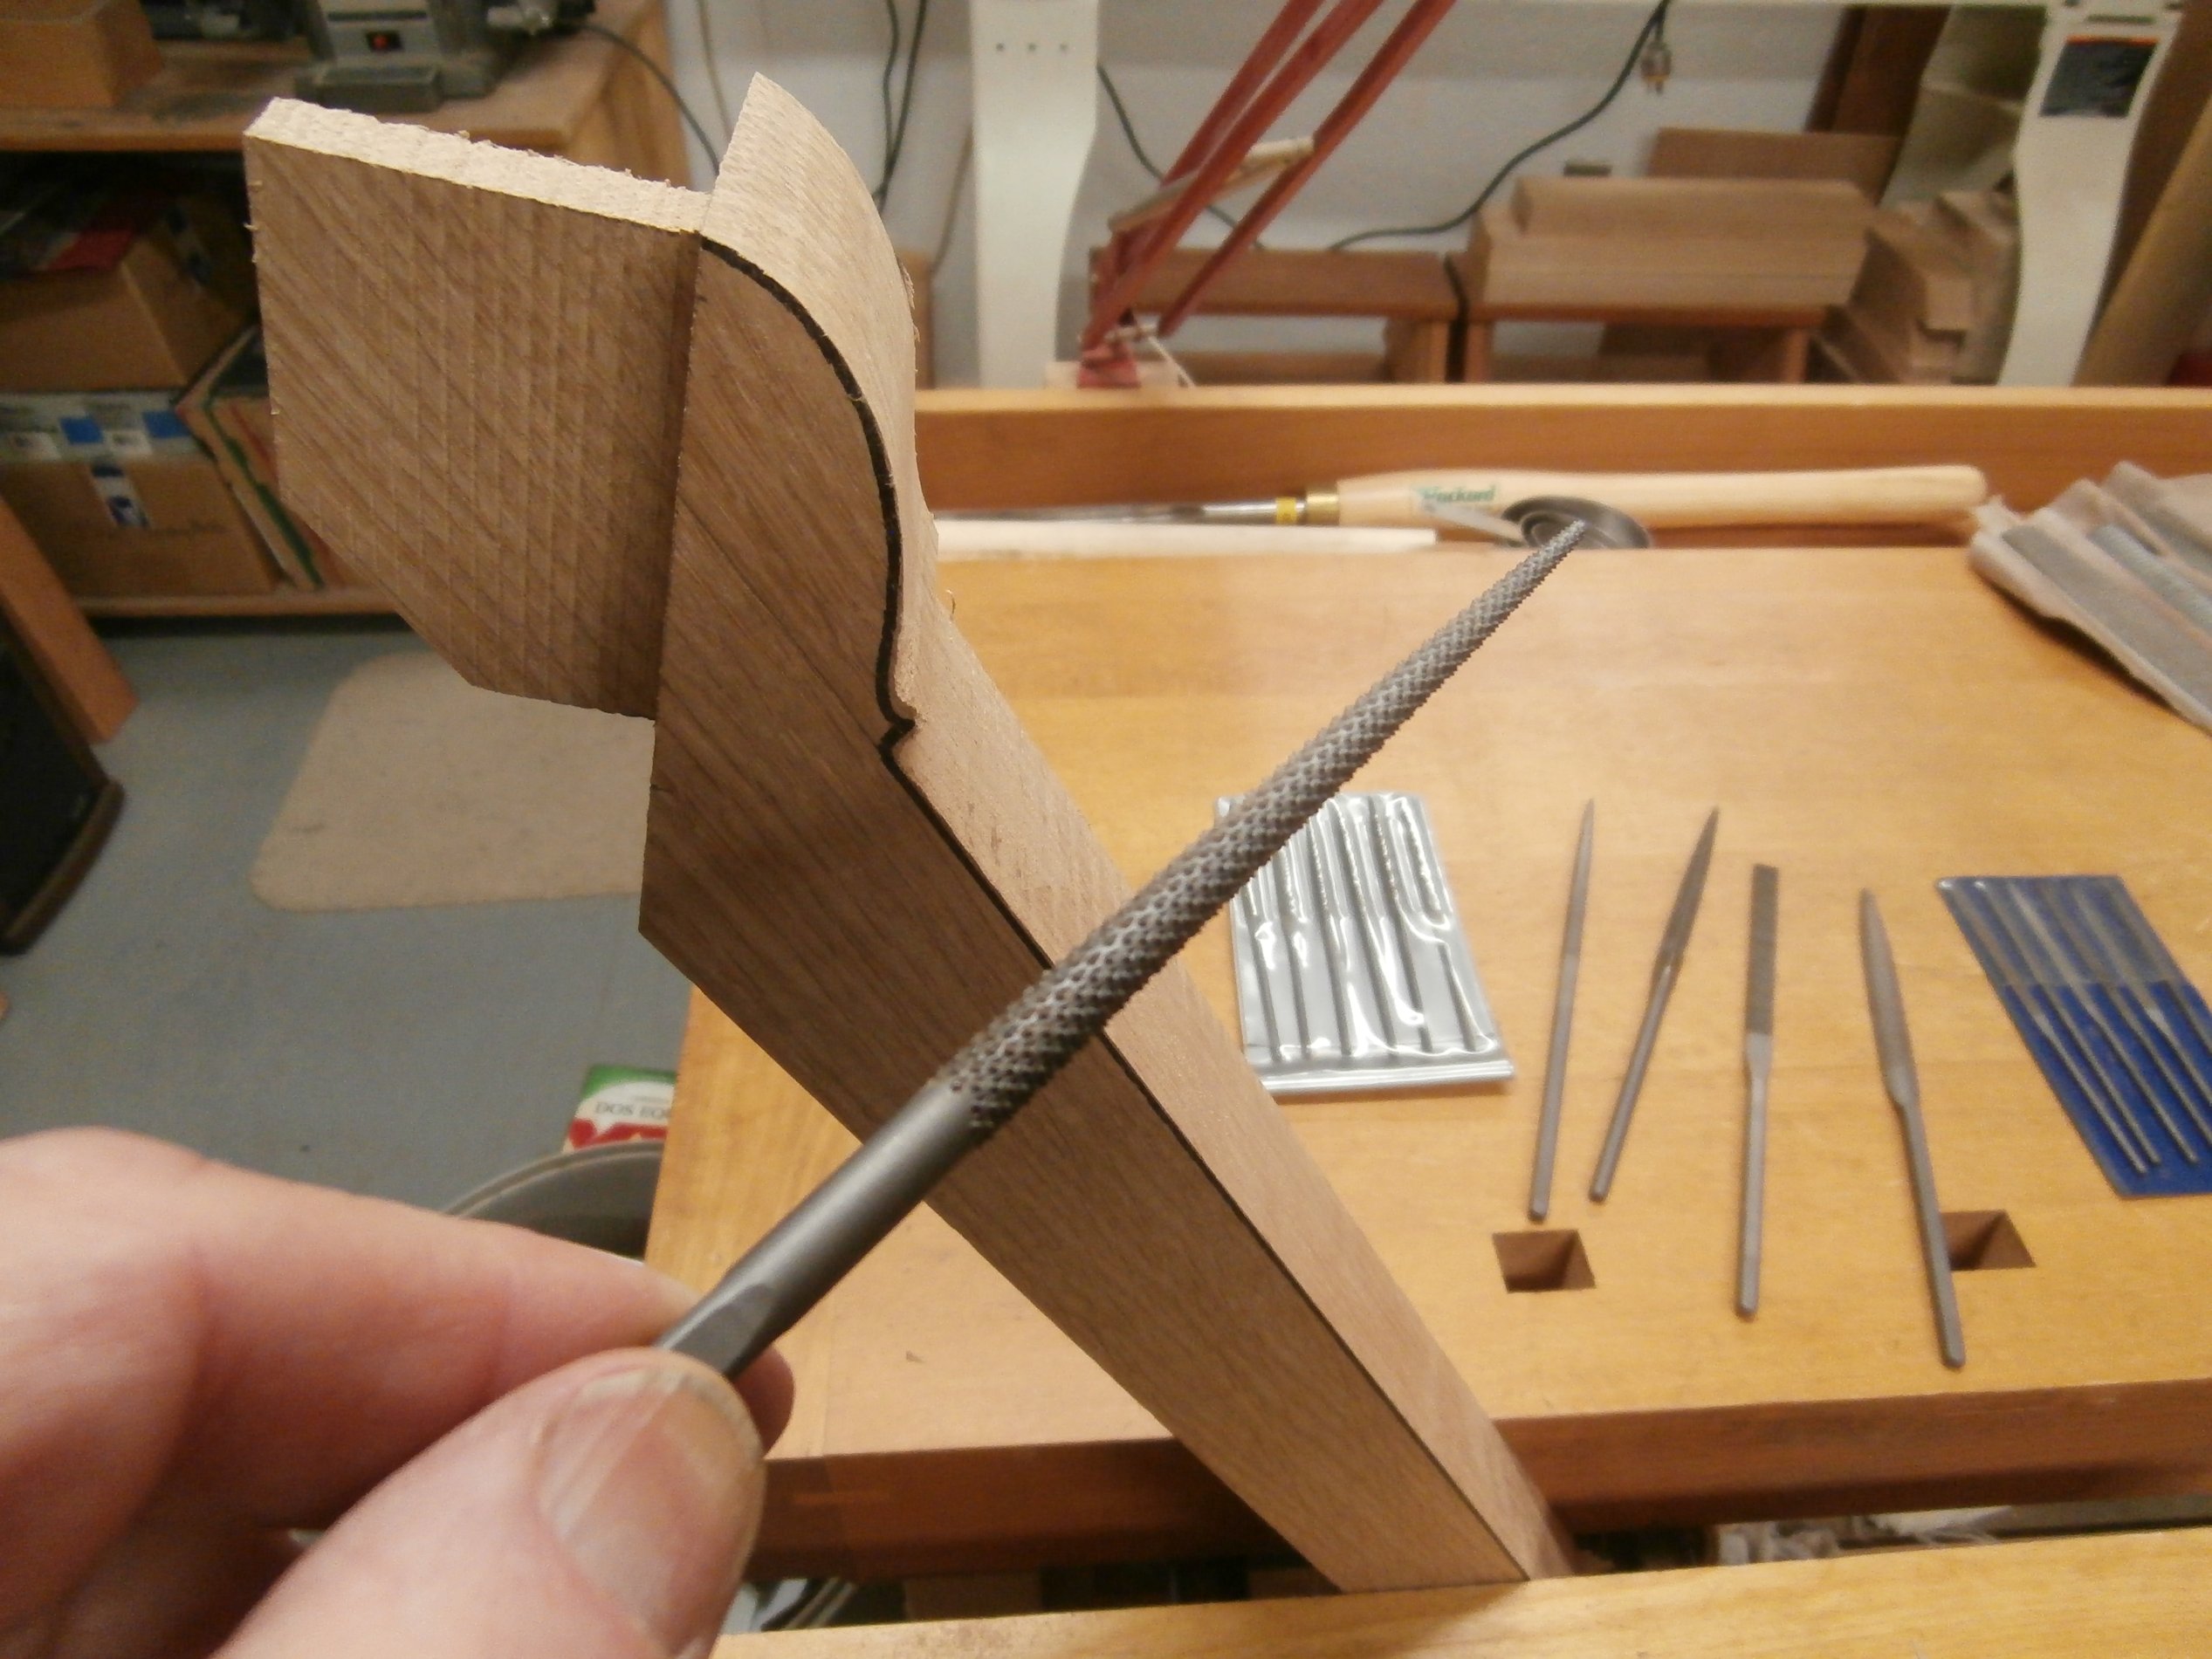
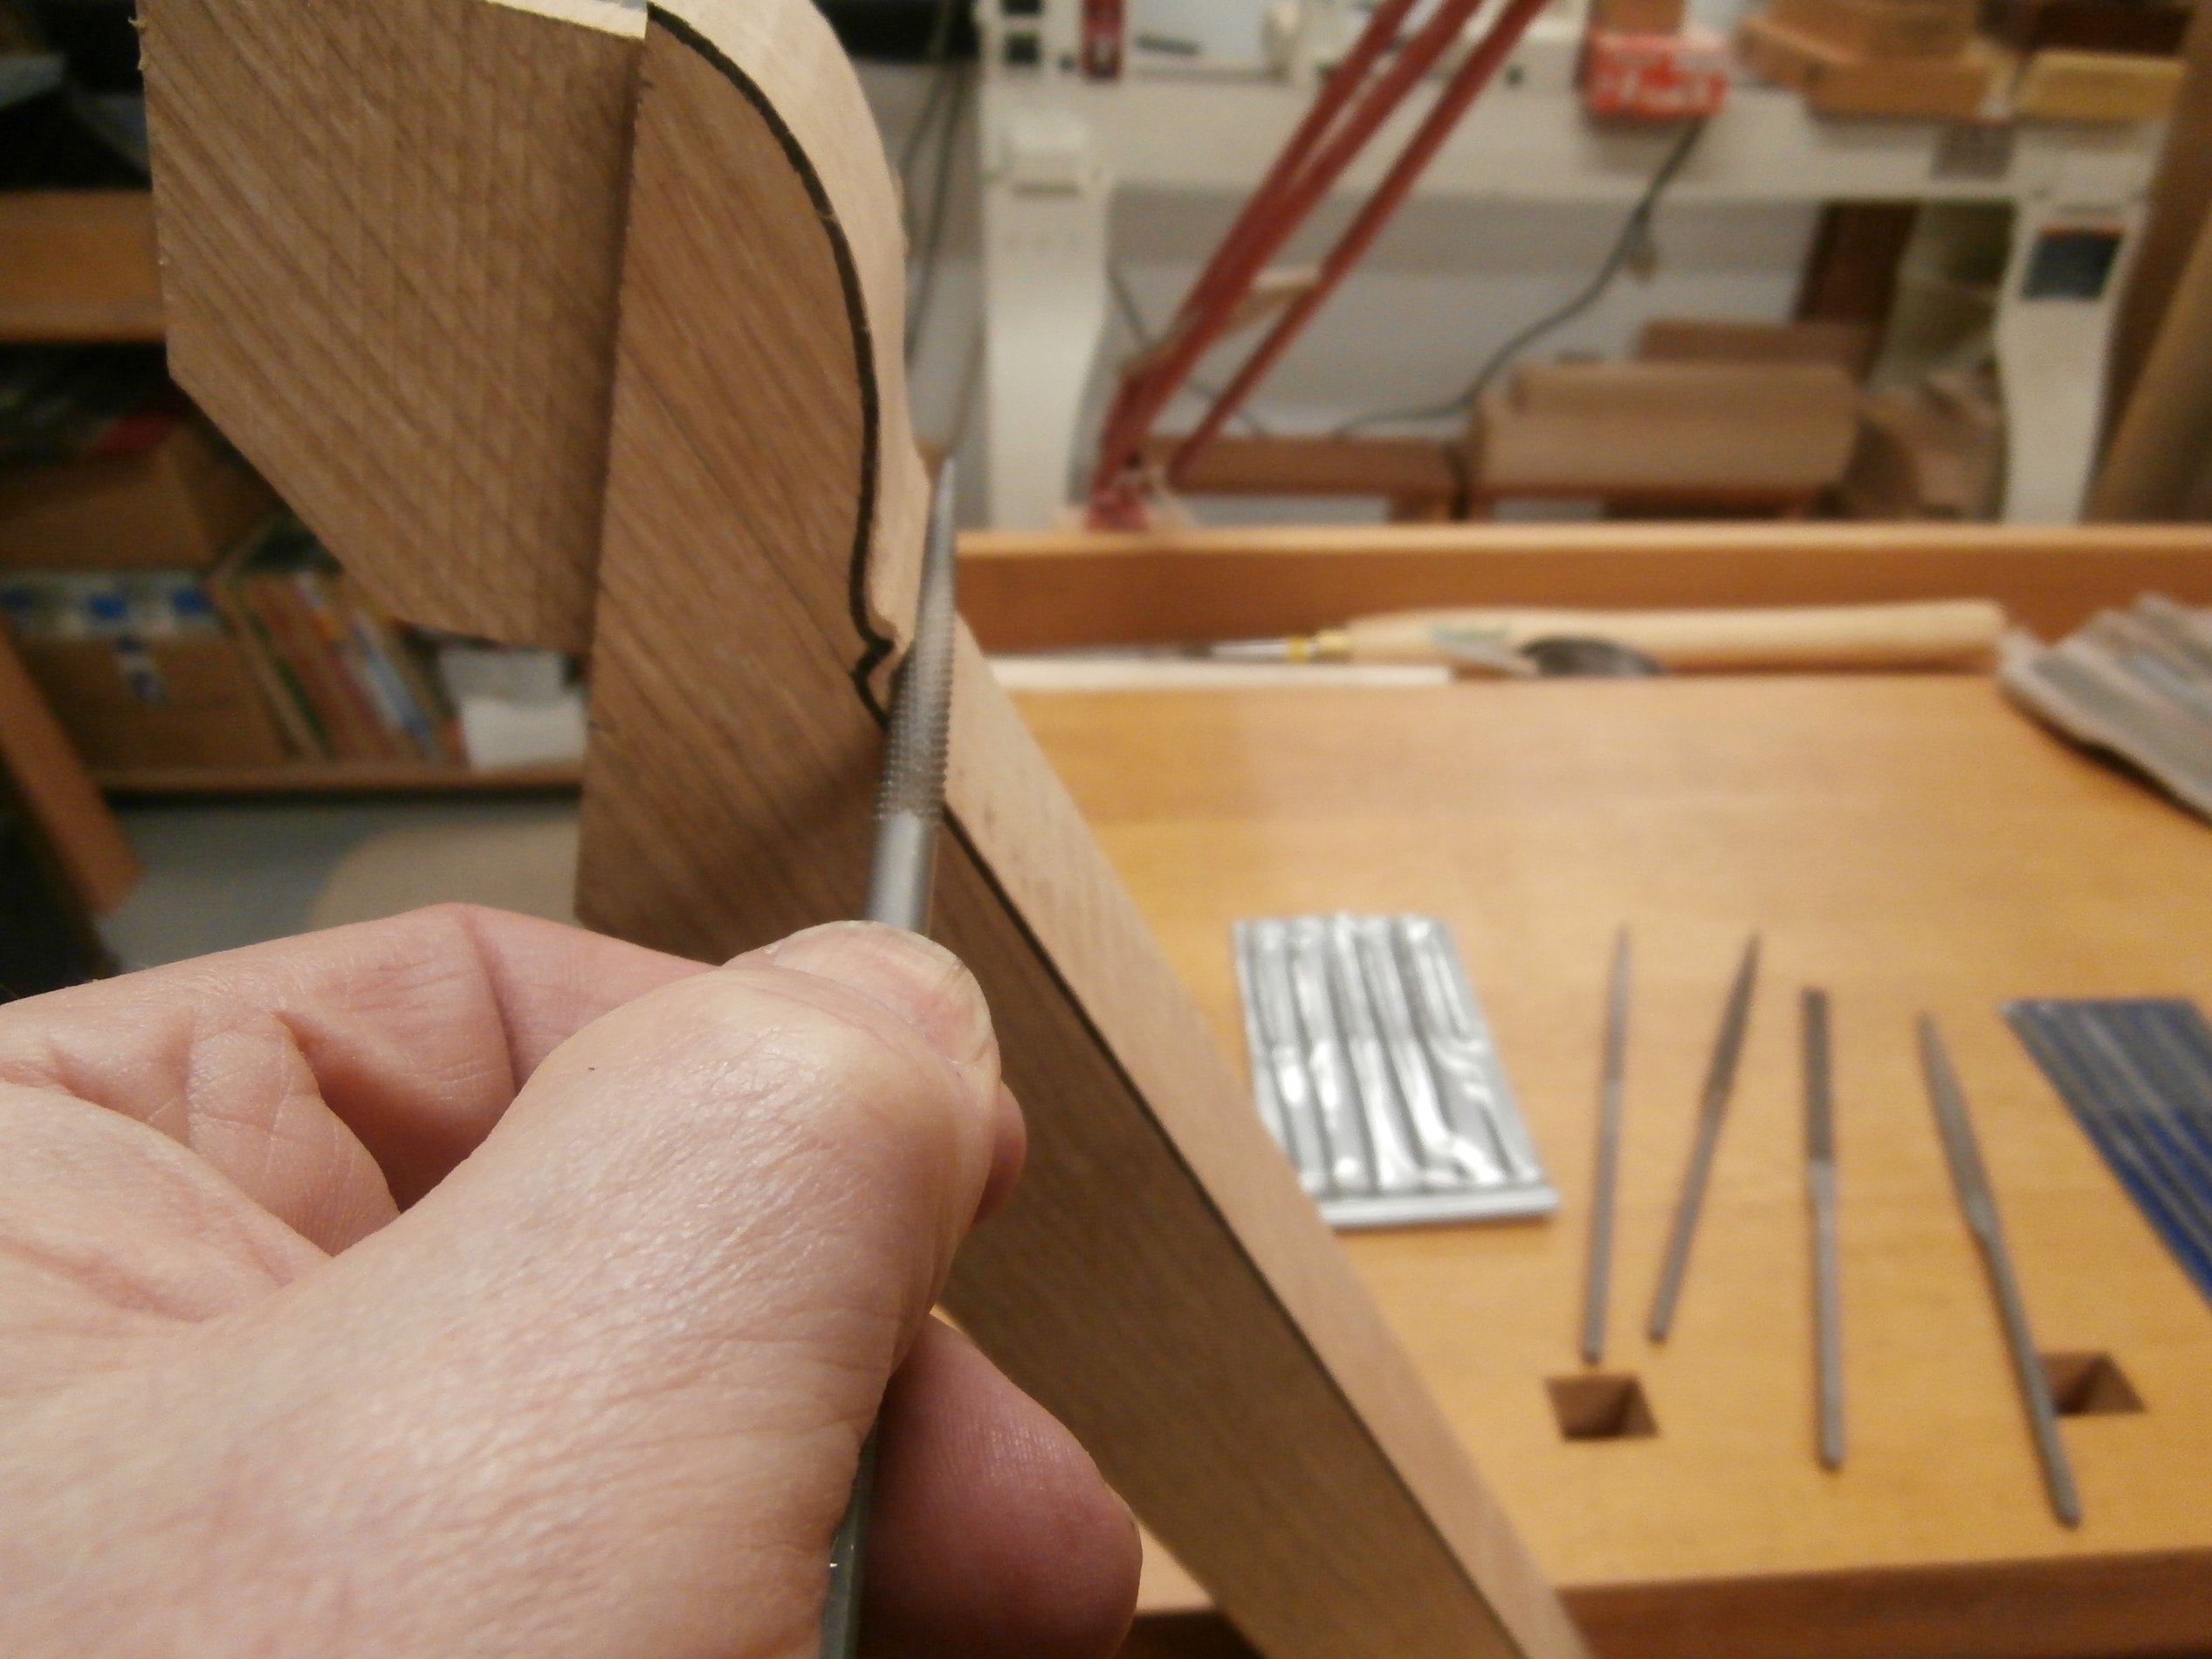
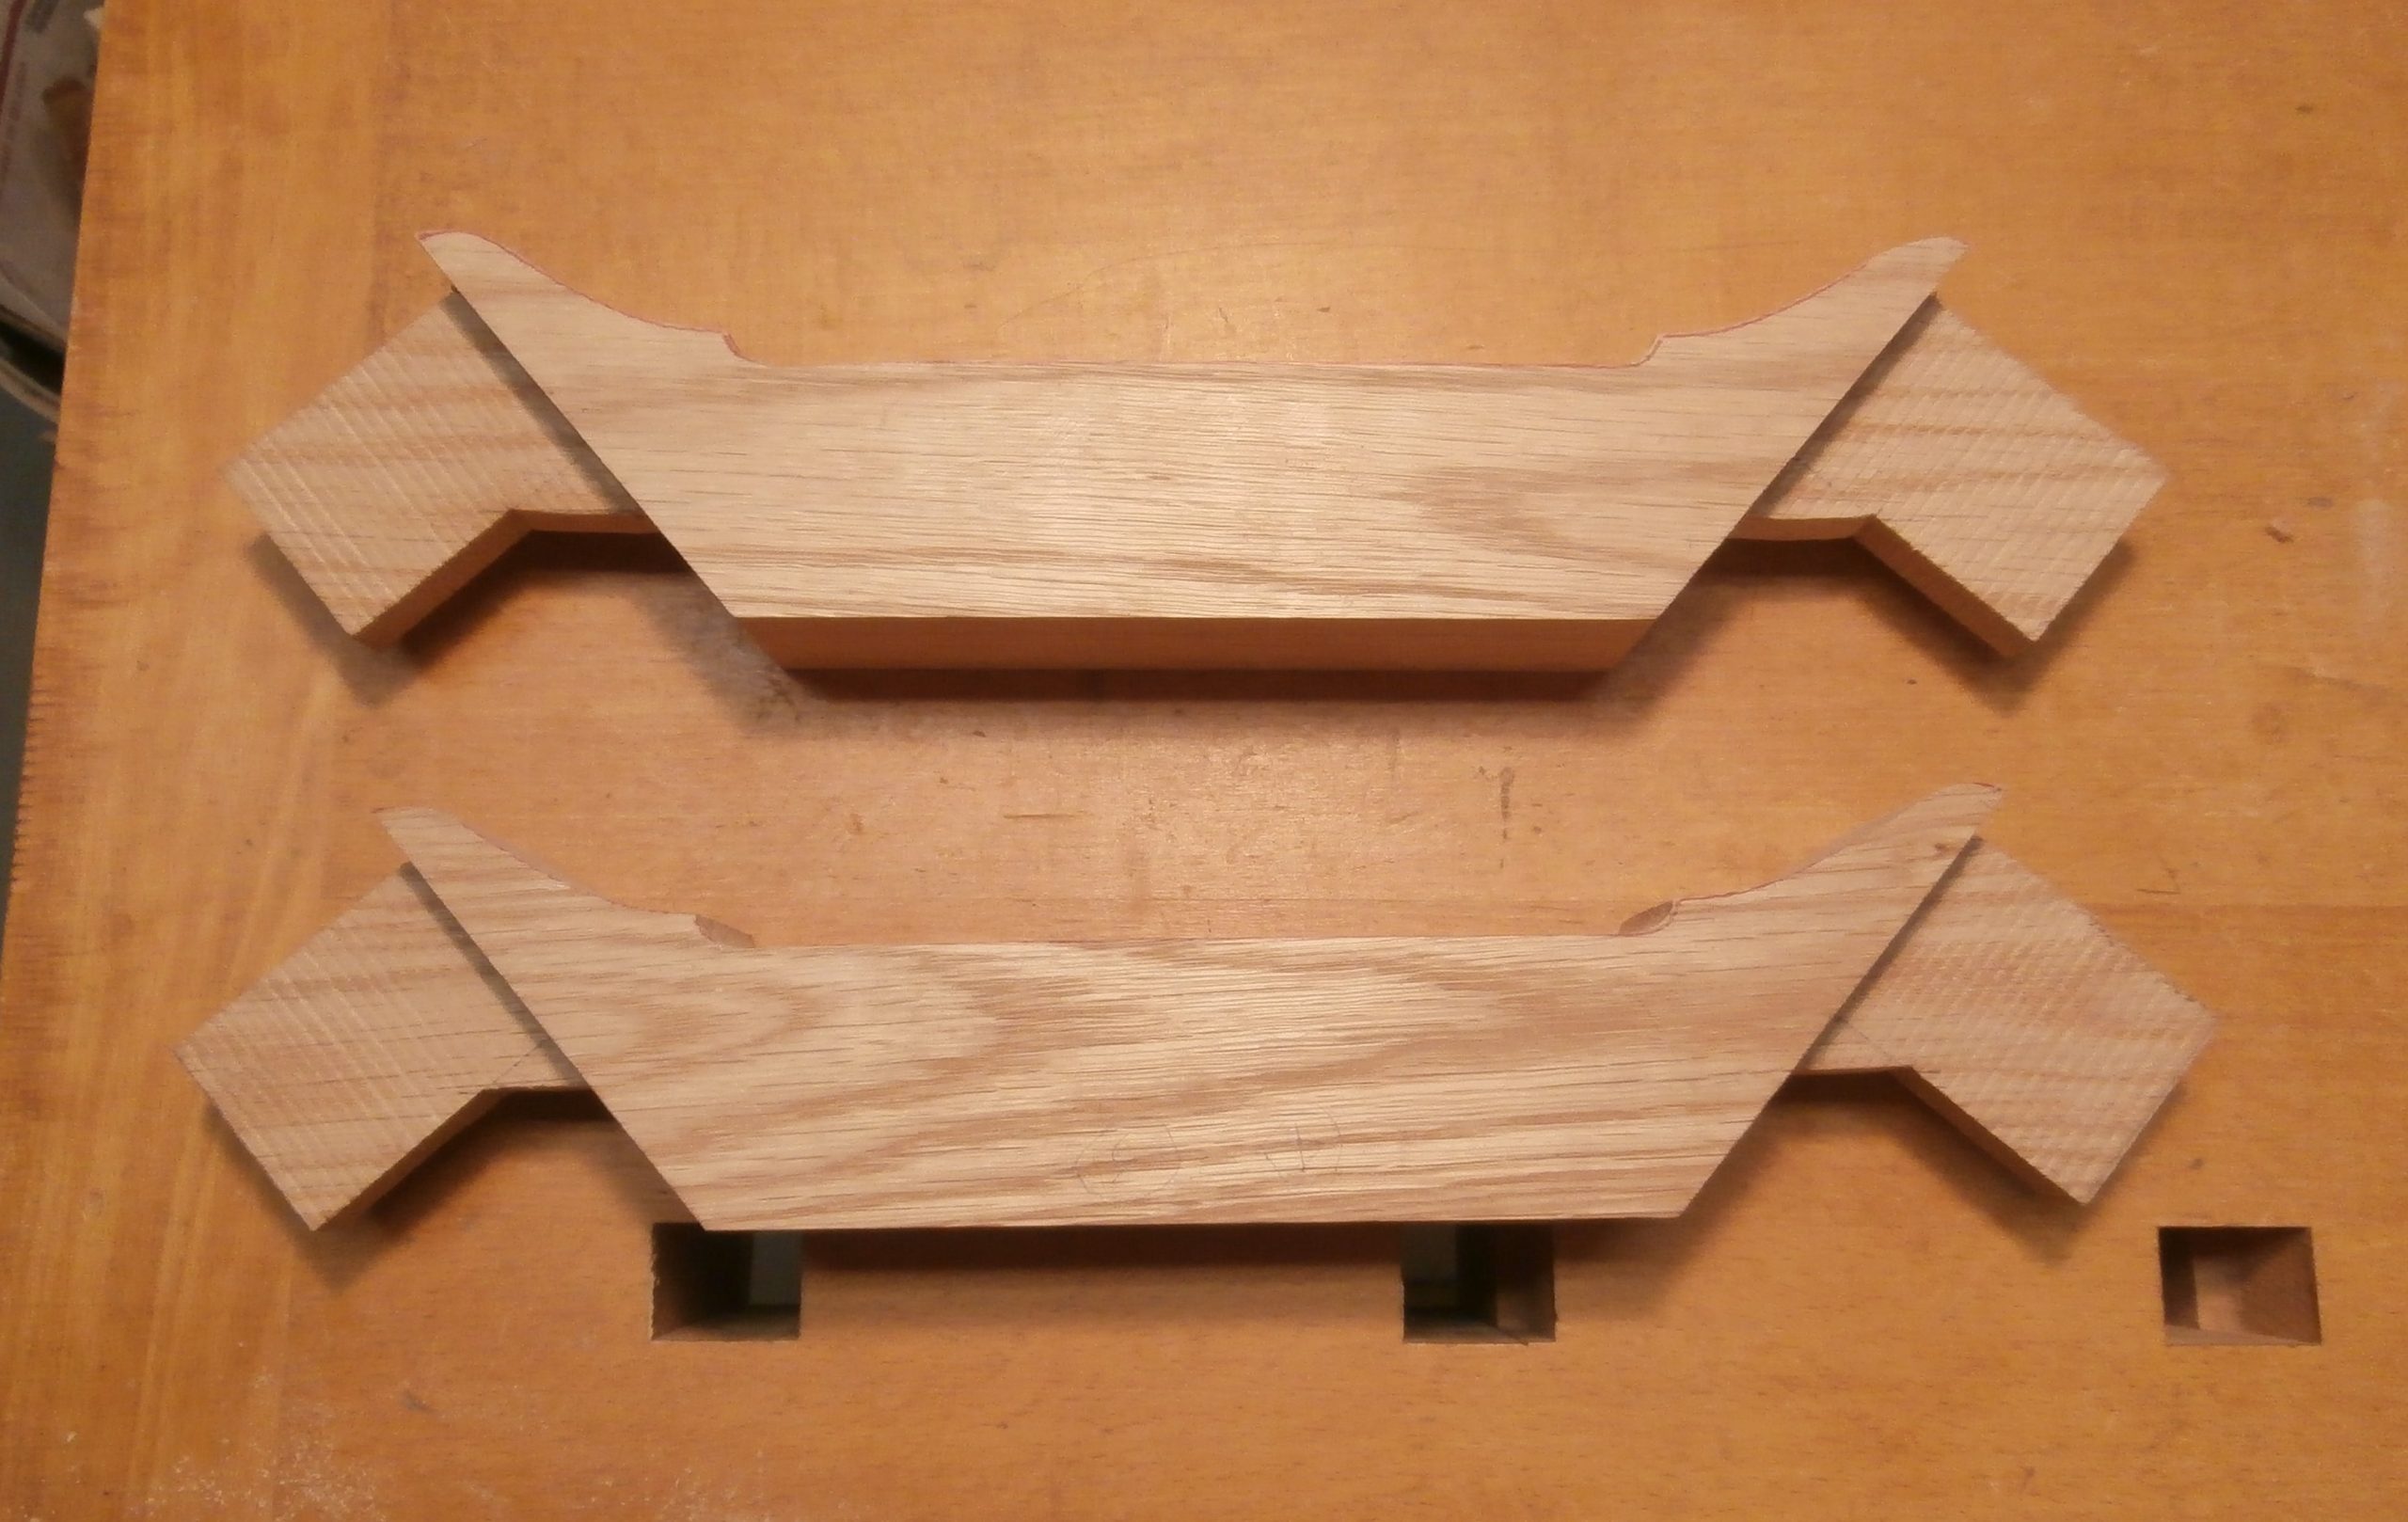
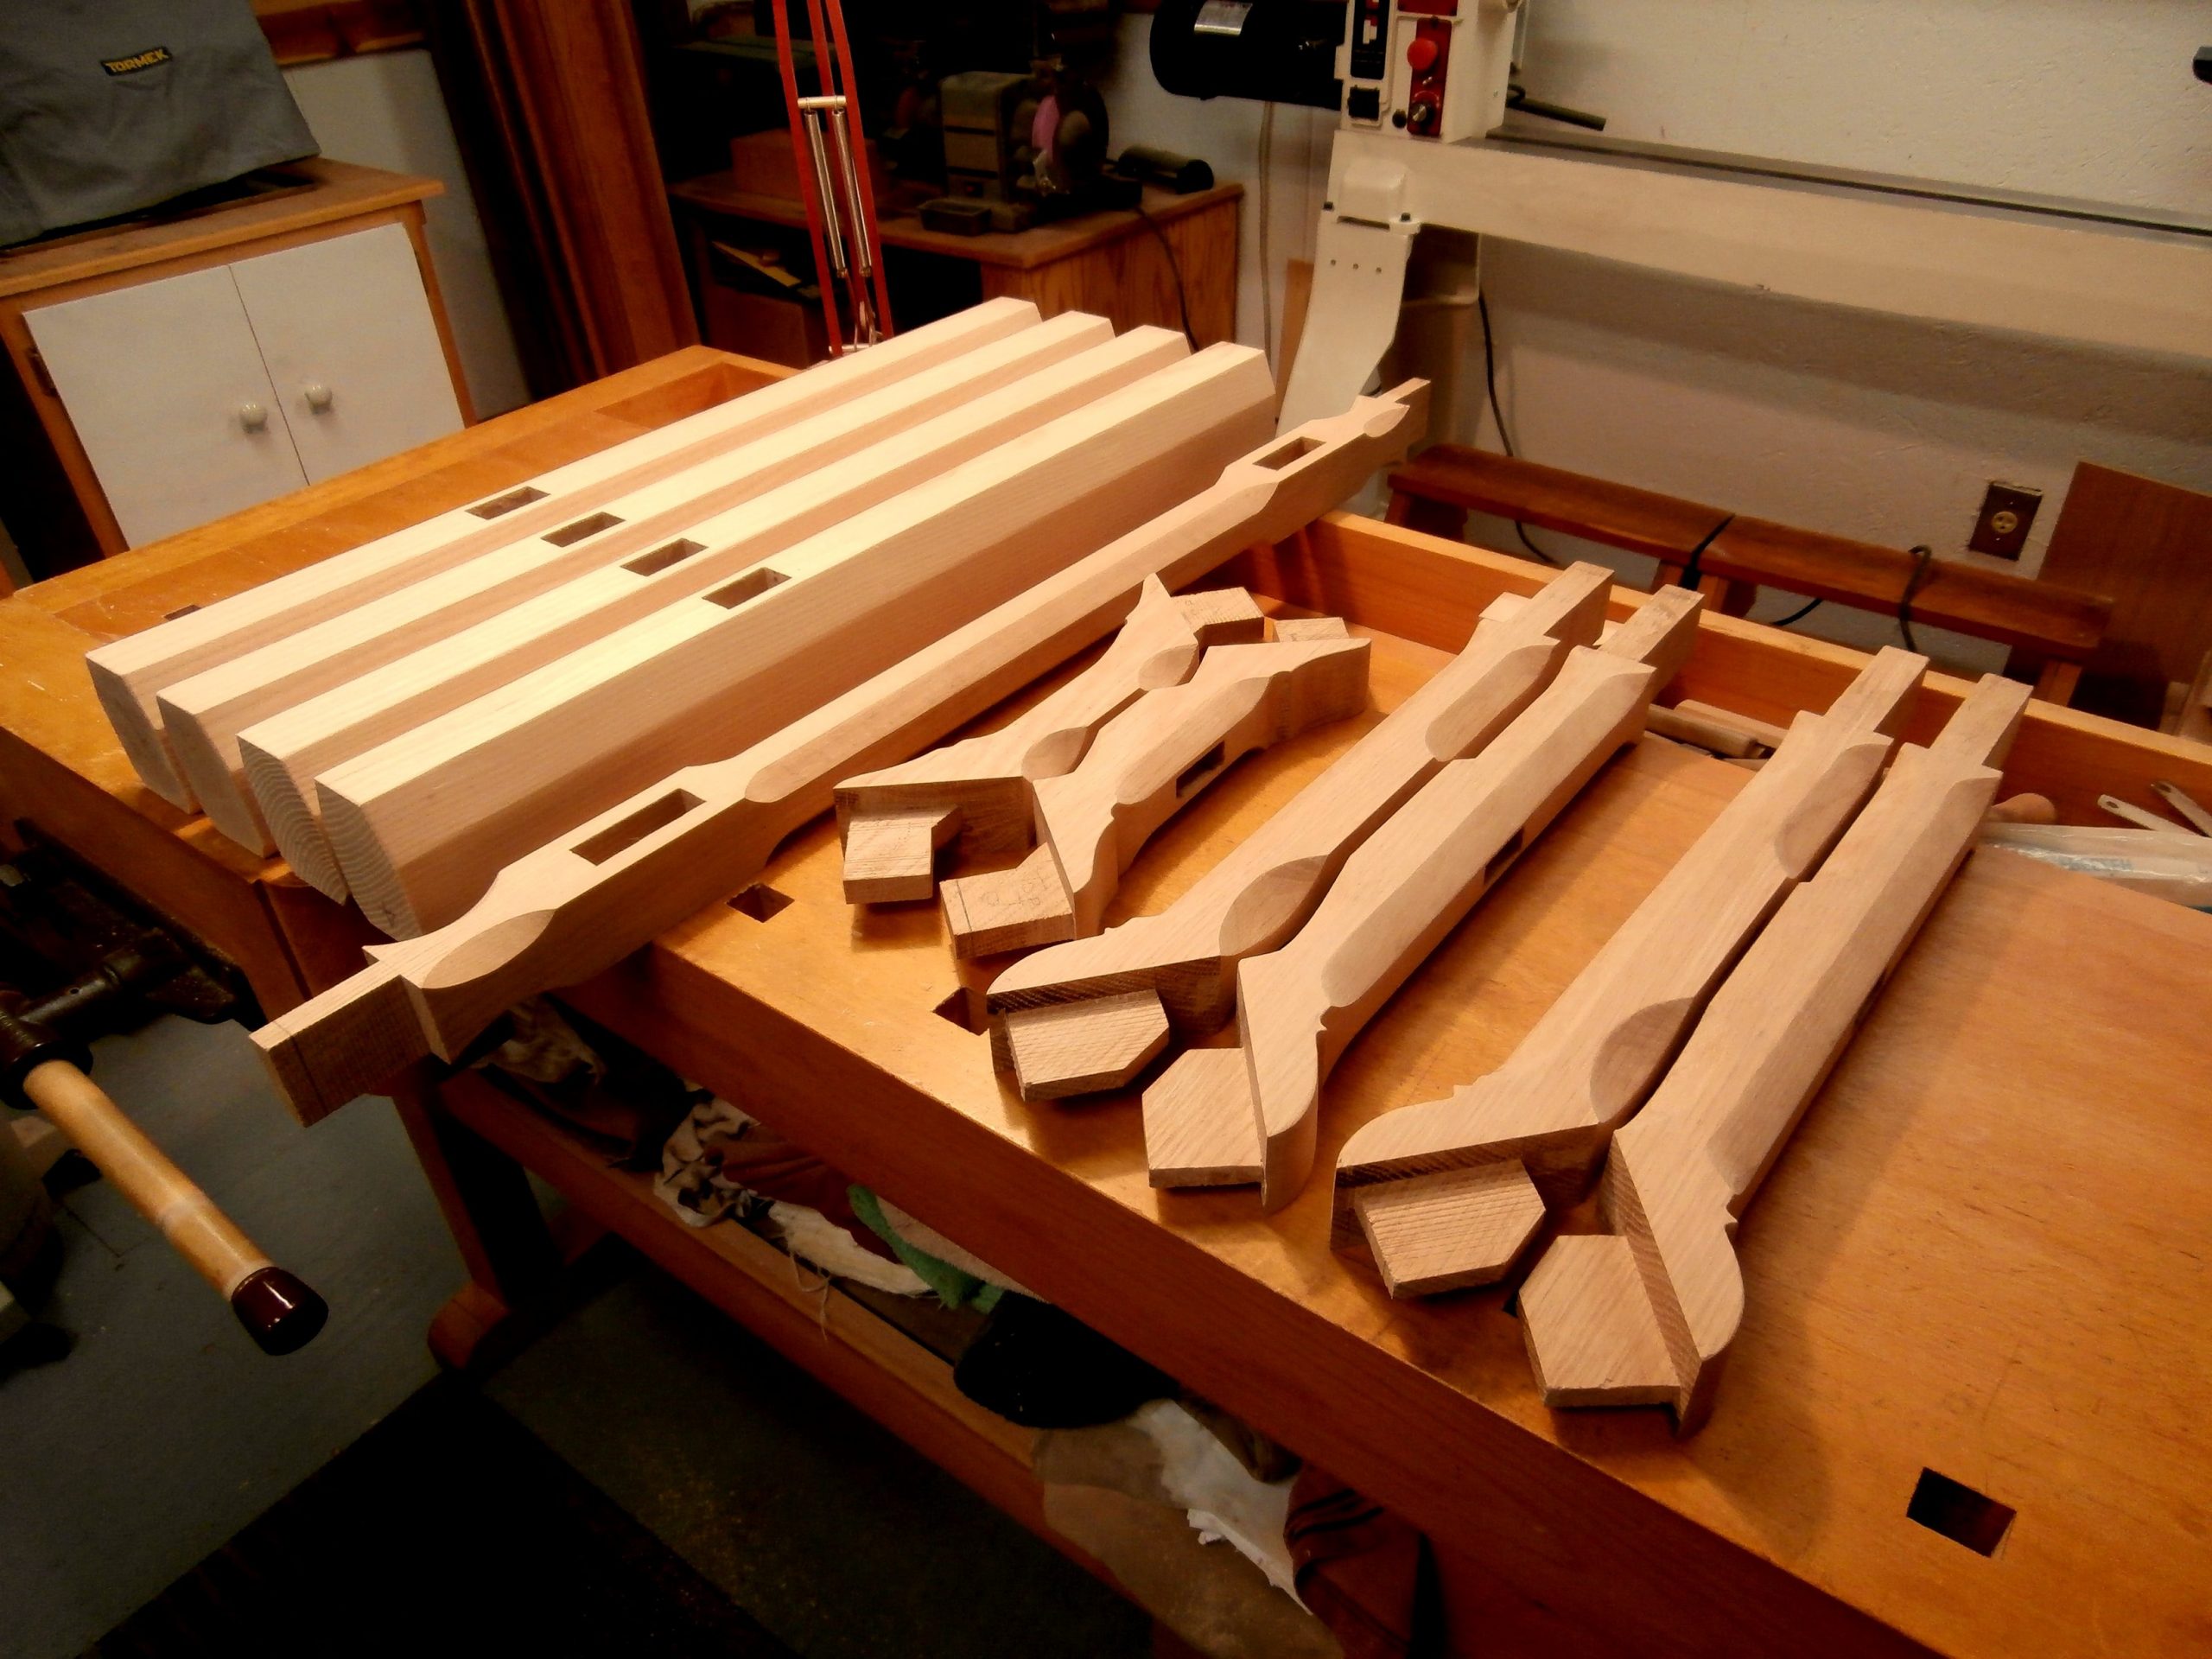
In the next stage, I used a felt tip pen to outline the reduced size of the arms with their curved detailing where the arms meet the long, center stretcher and then used the bandsaw to rough out the shapes.  Following that I used an assortment of rasps, files, planes and sandpaper to refine the curved details.  The following sequence takes you through the steps.  This was a very time consuming process, and one that cannot be duplicated with finesse by any other means.  This is what hand work is all about.

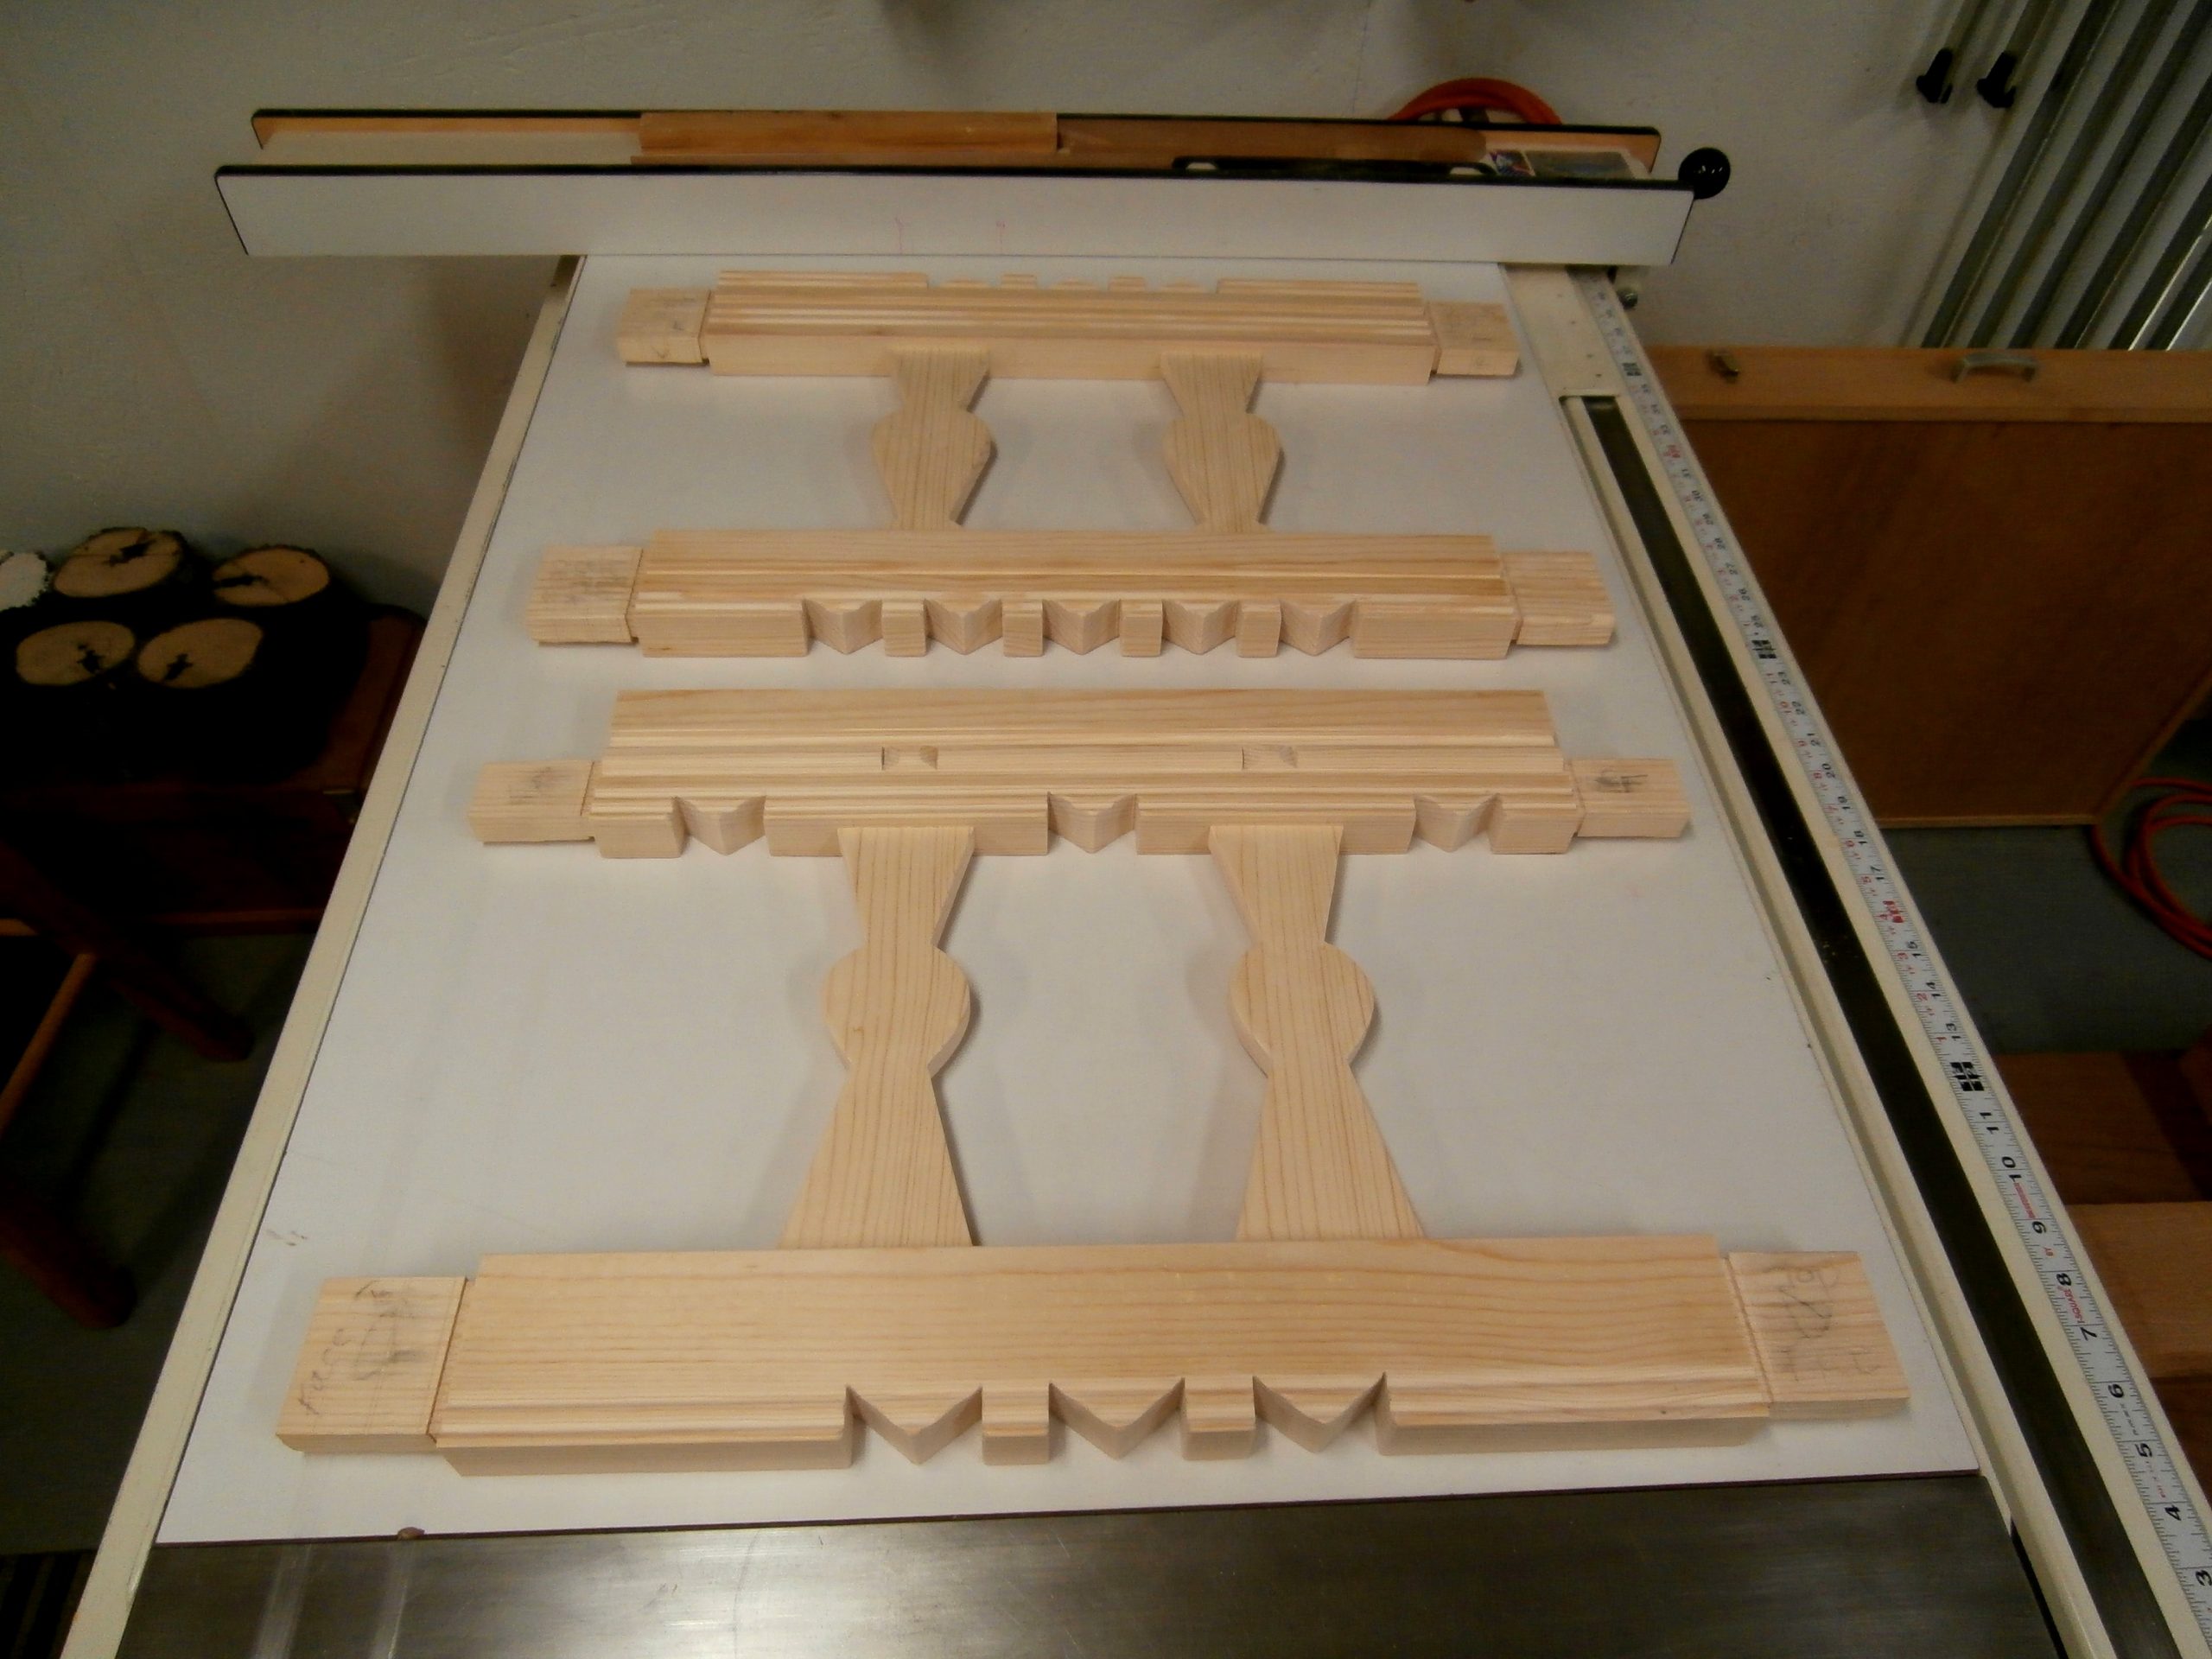
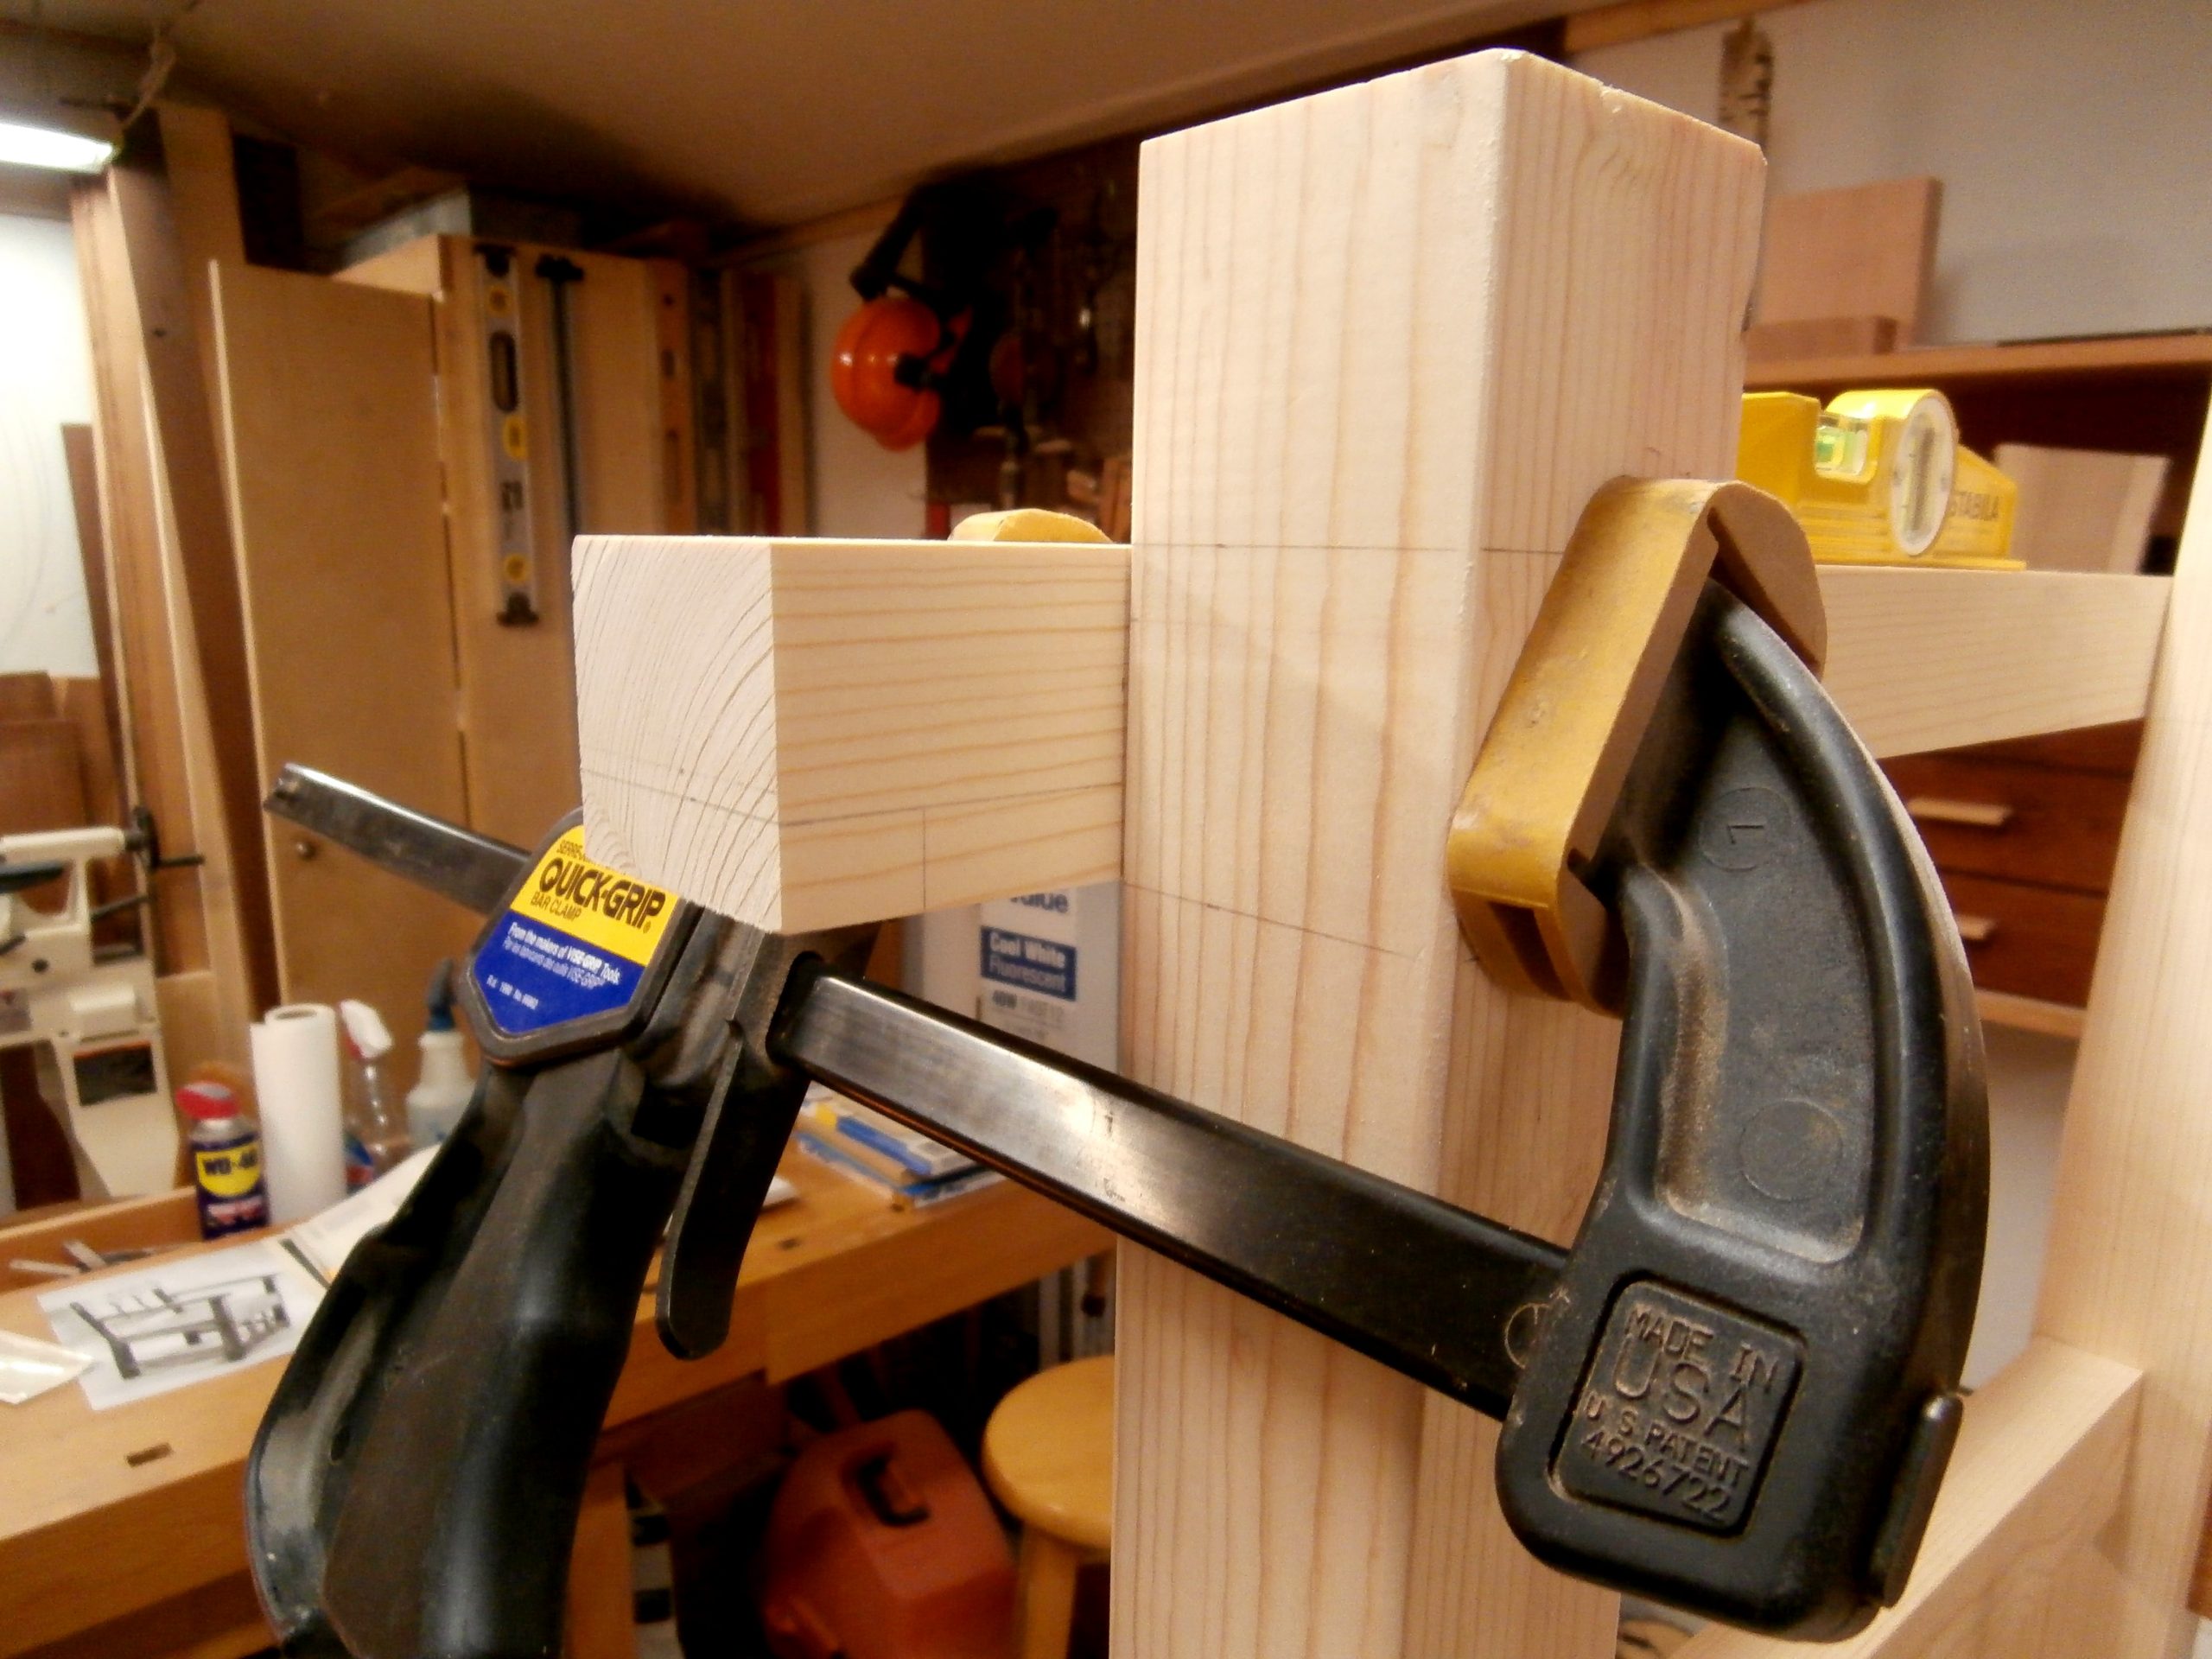
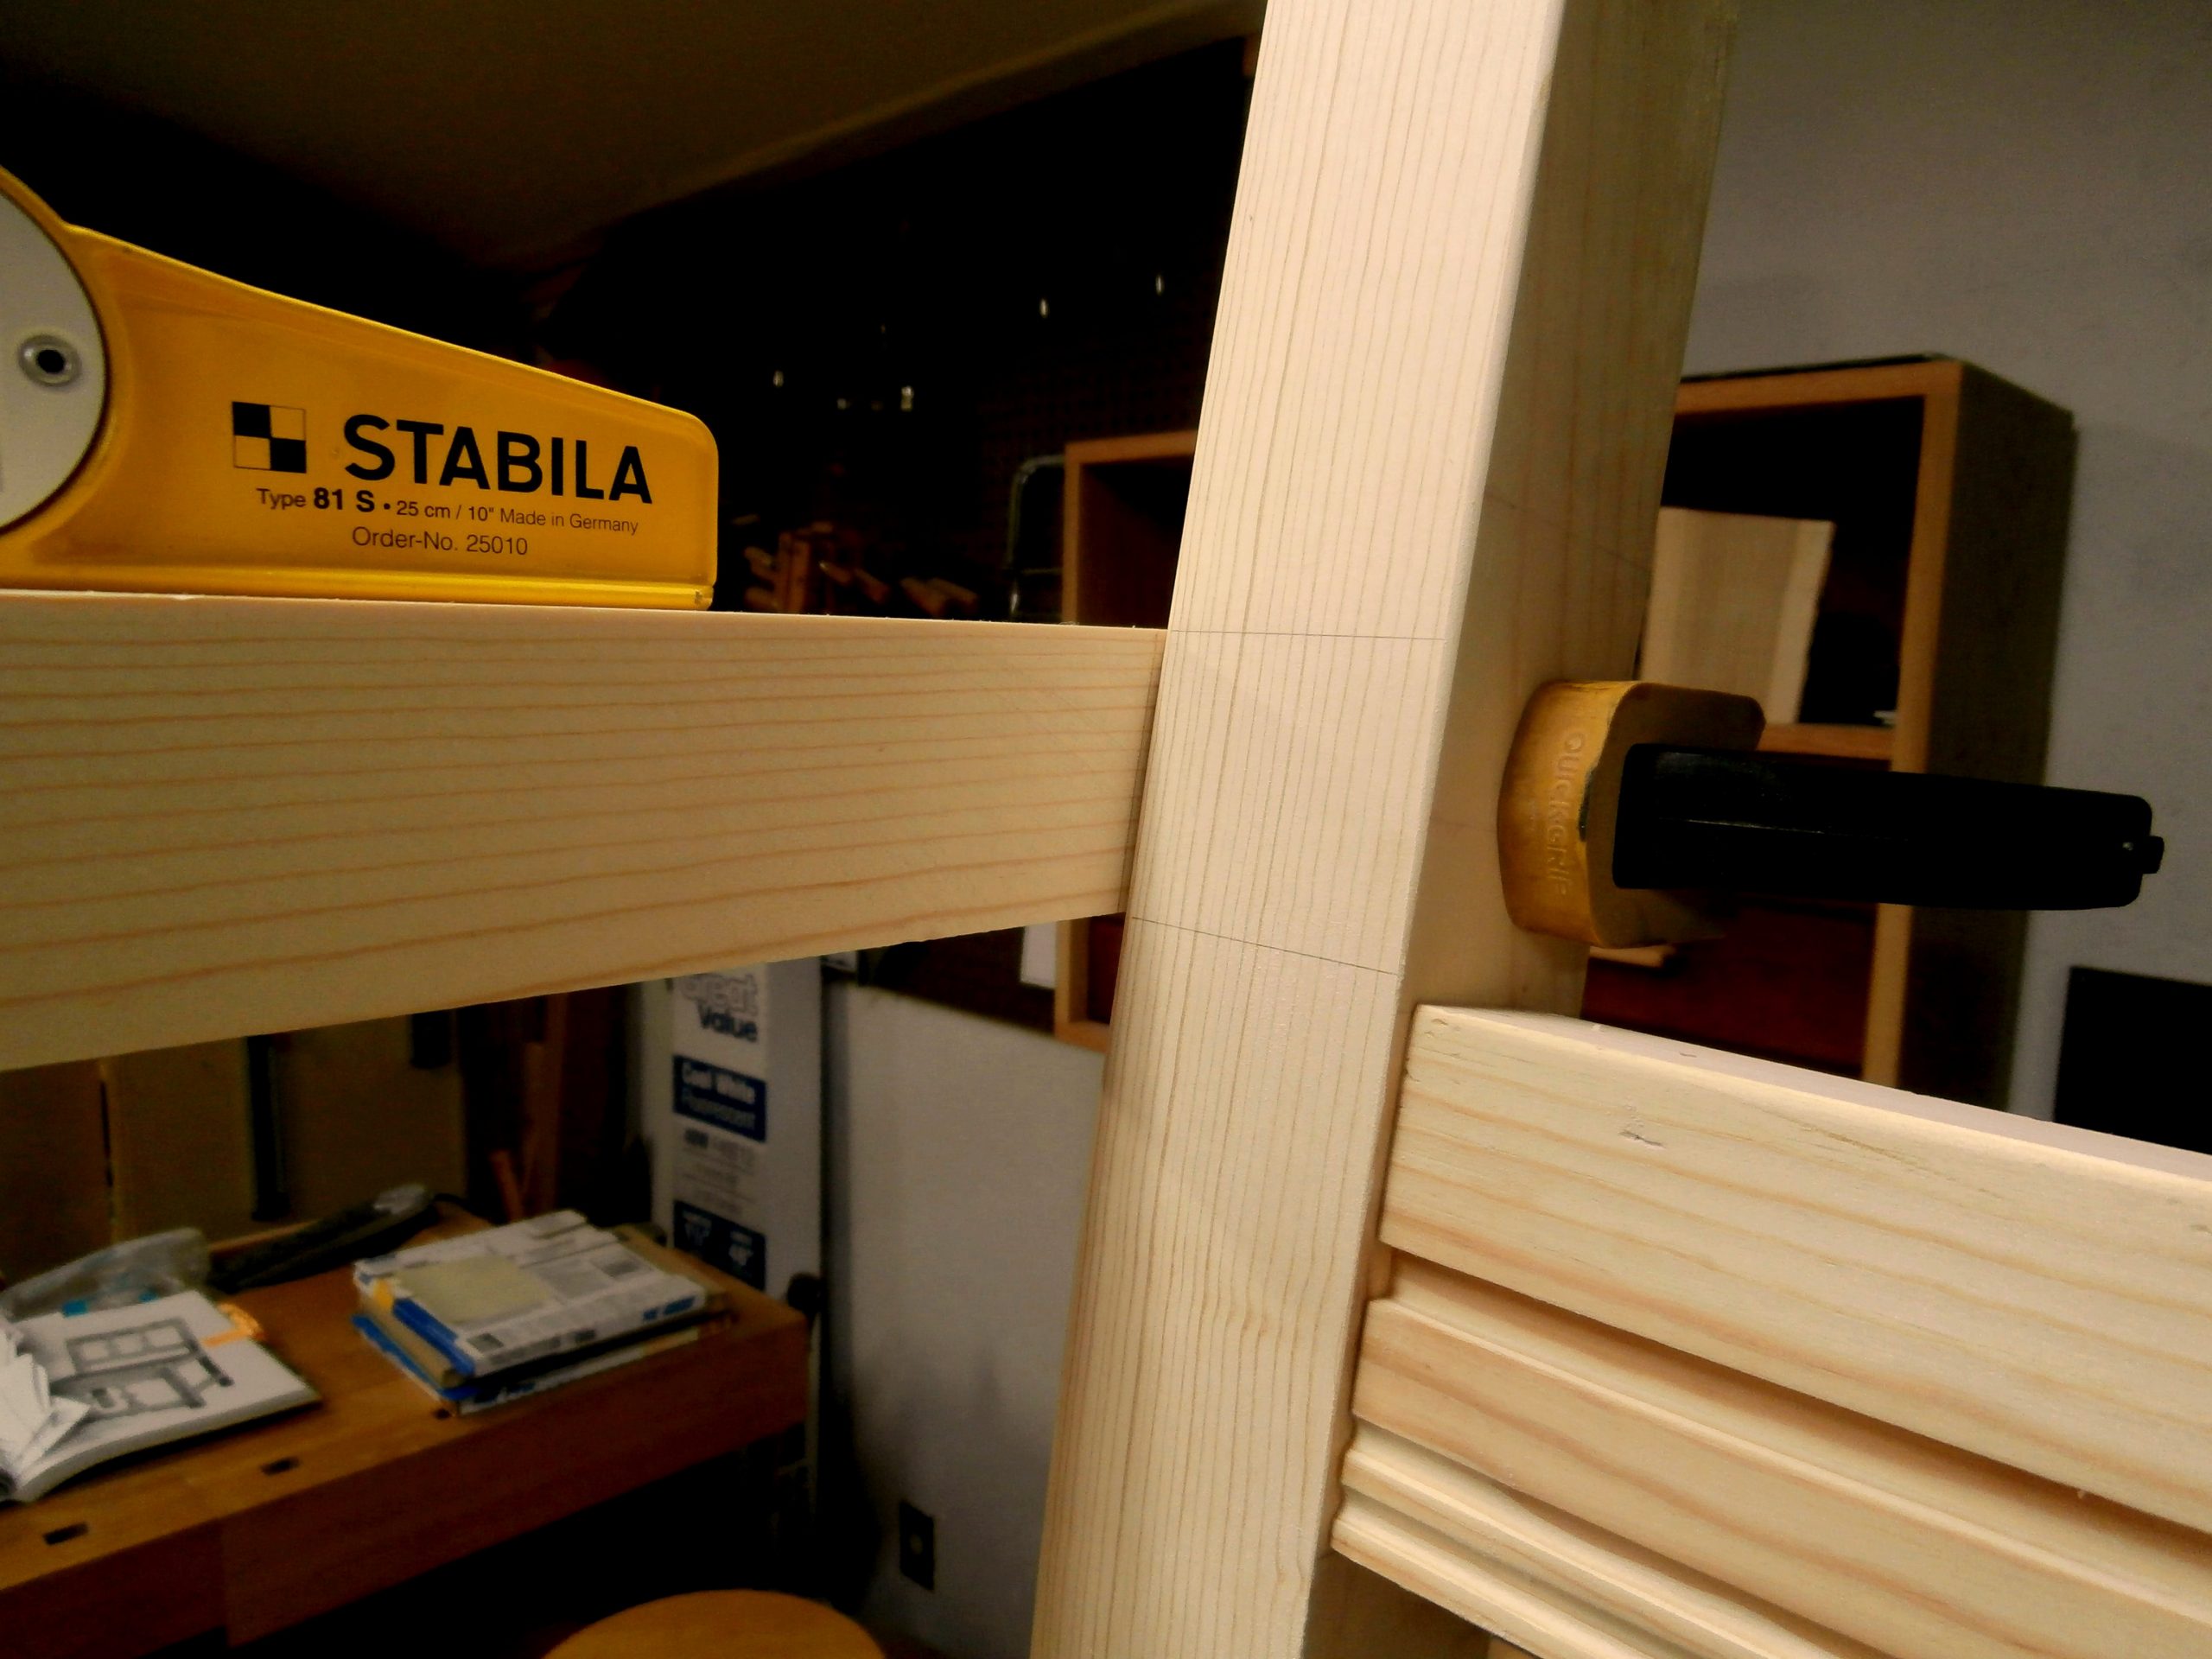
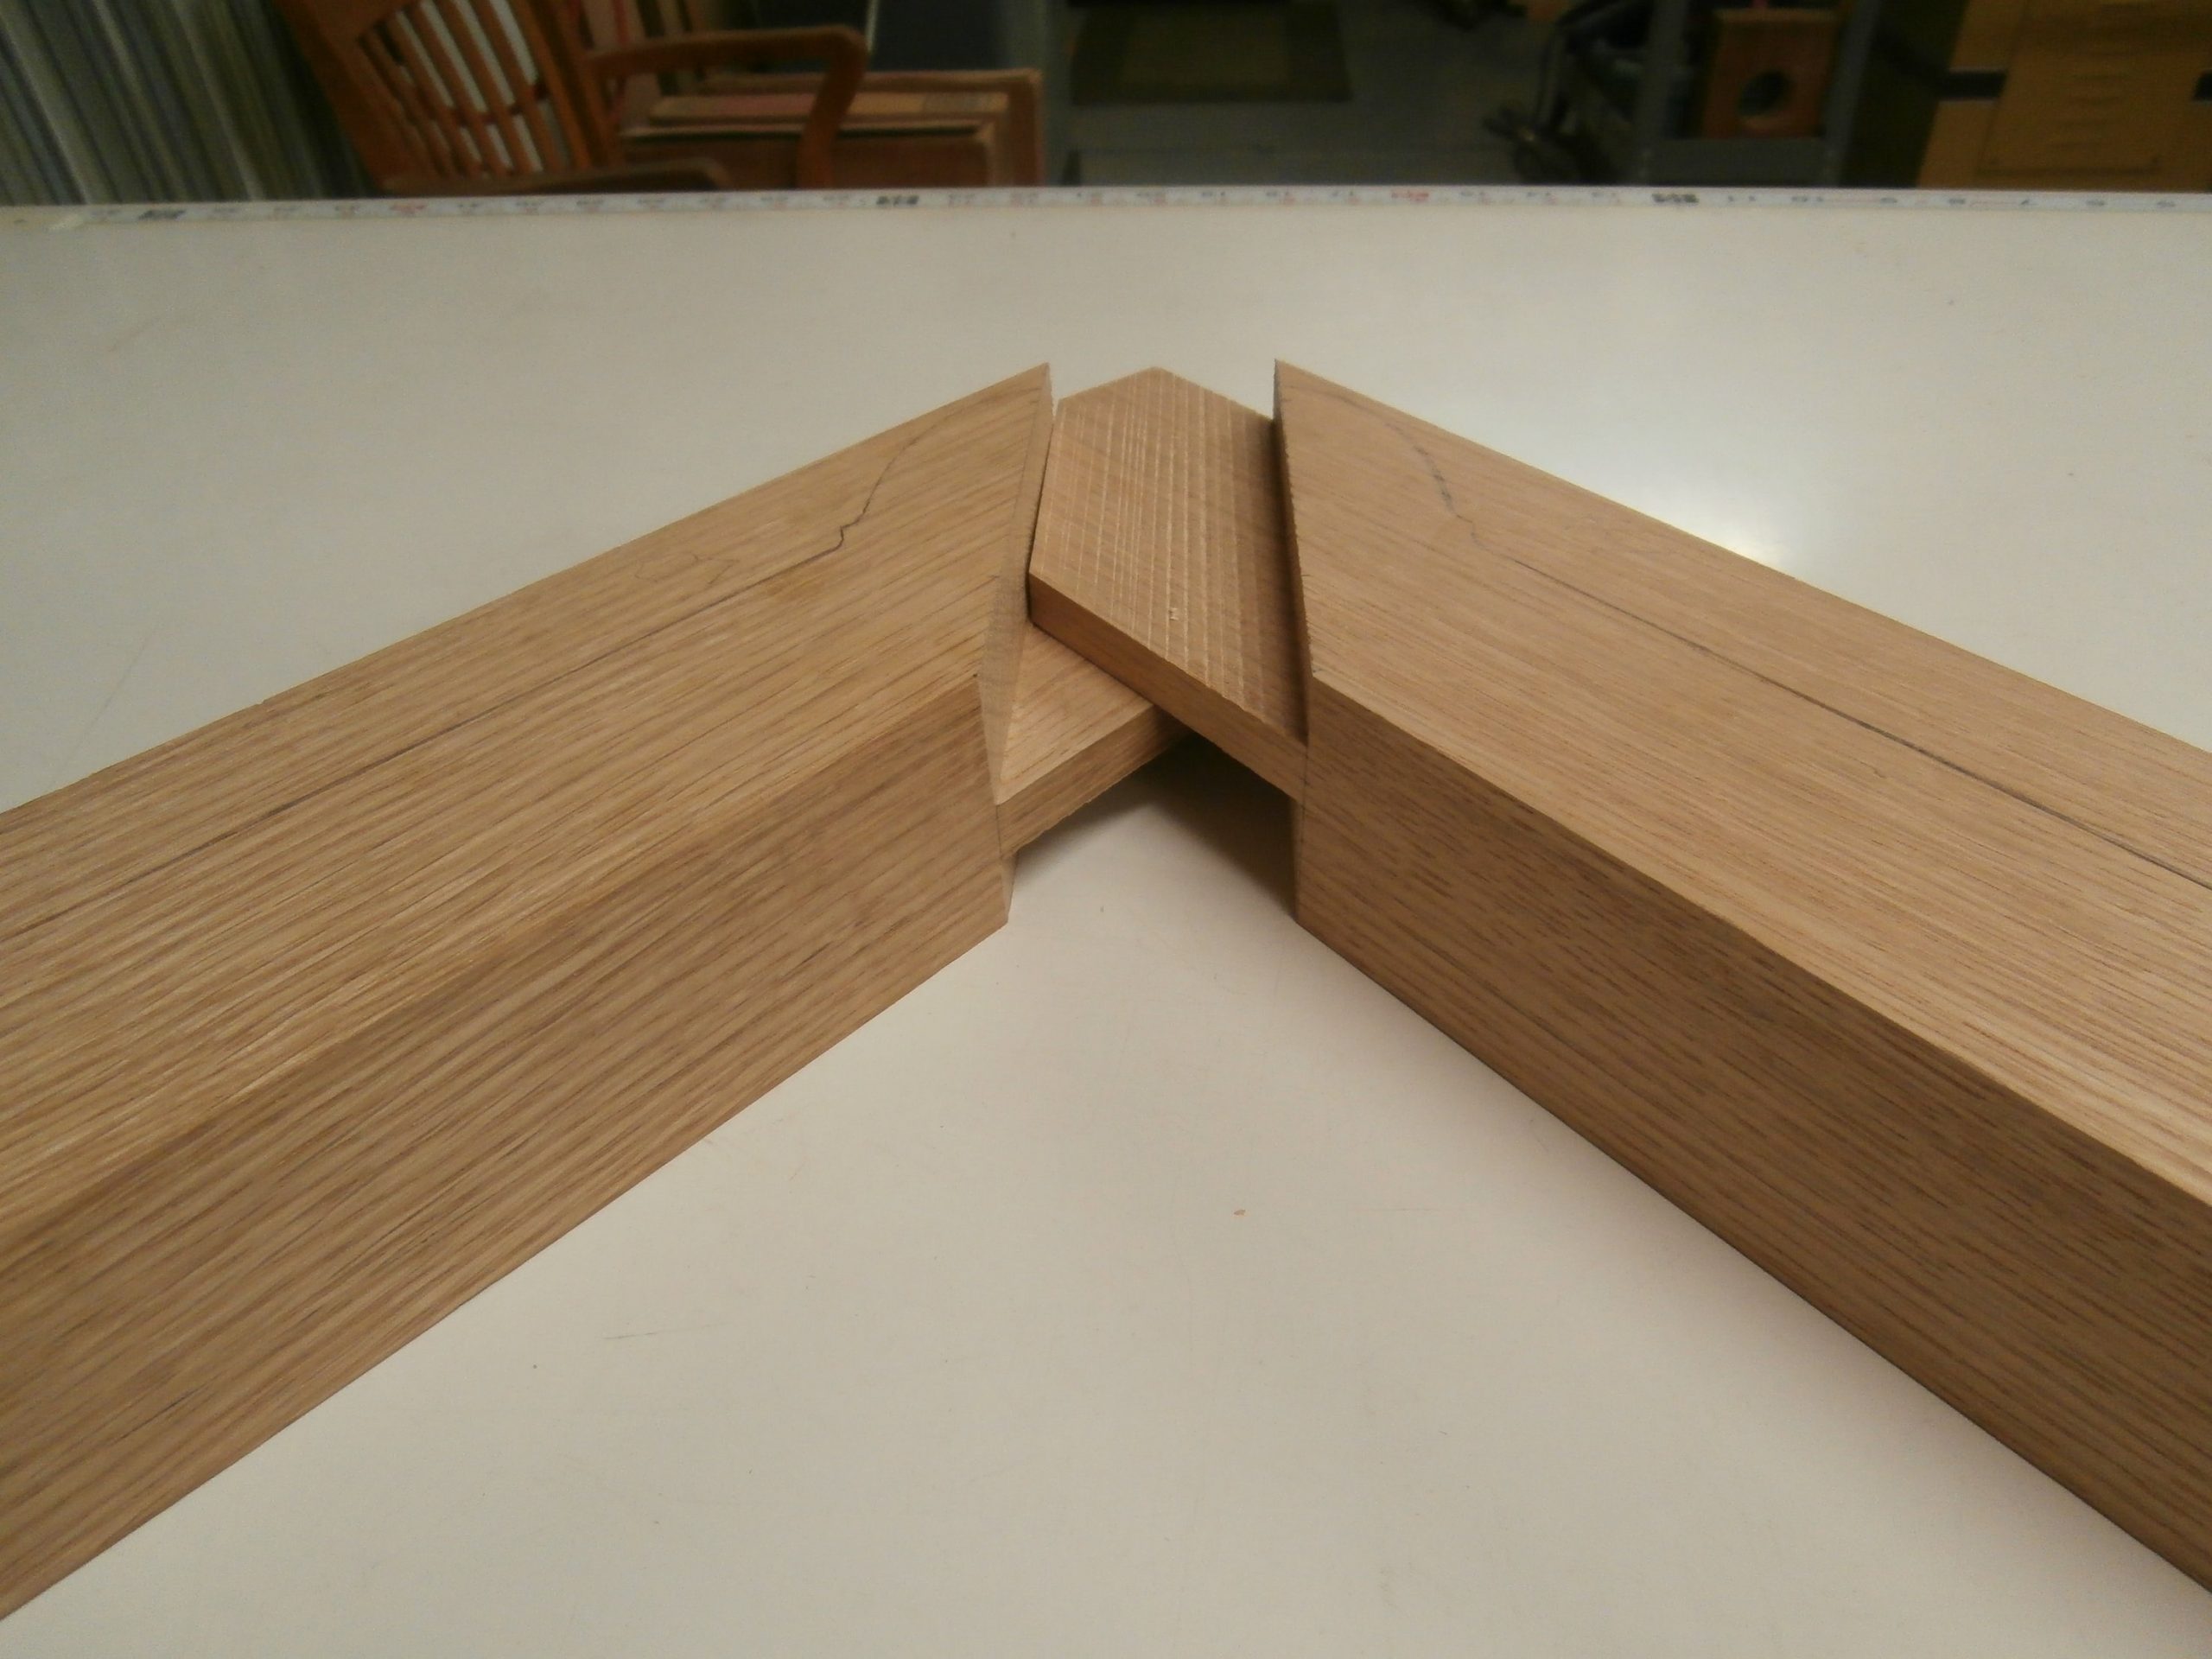
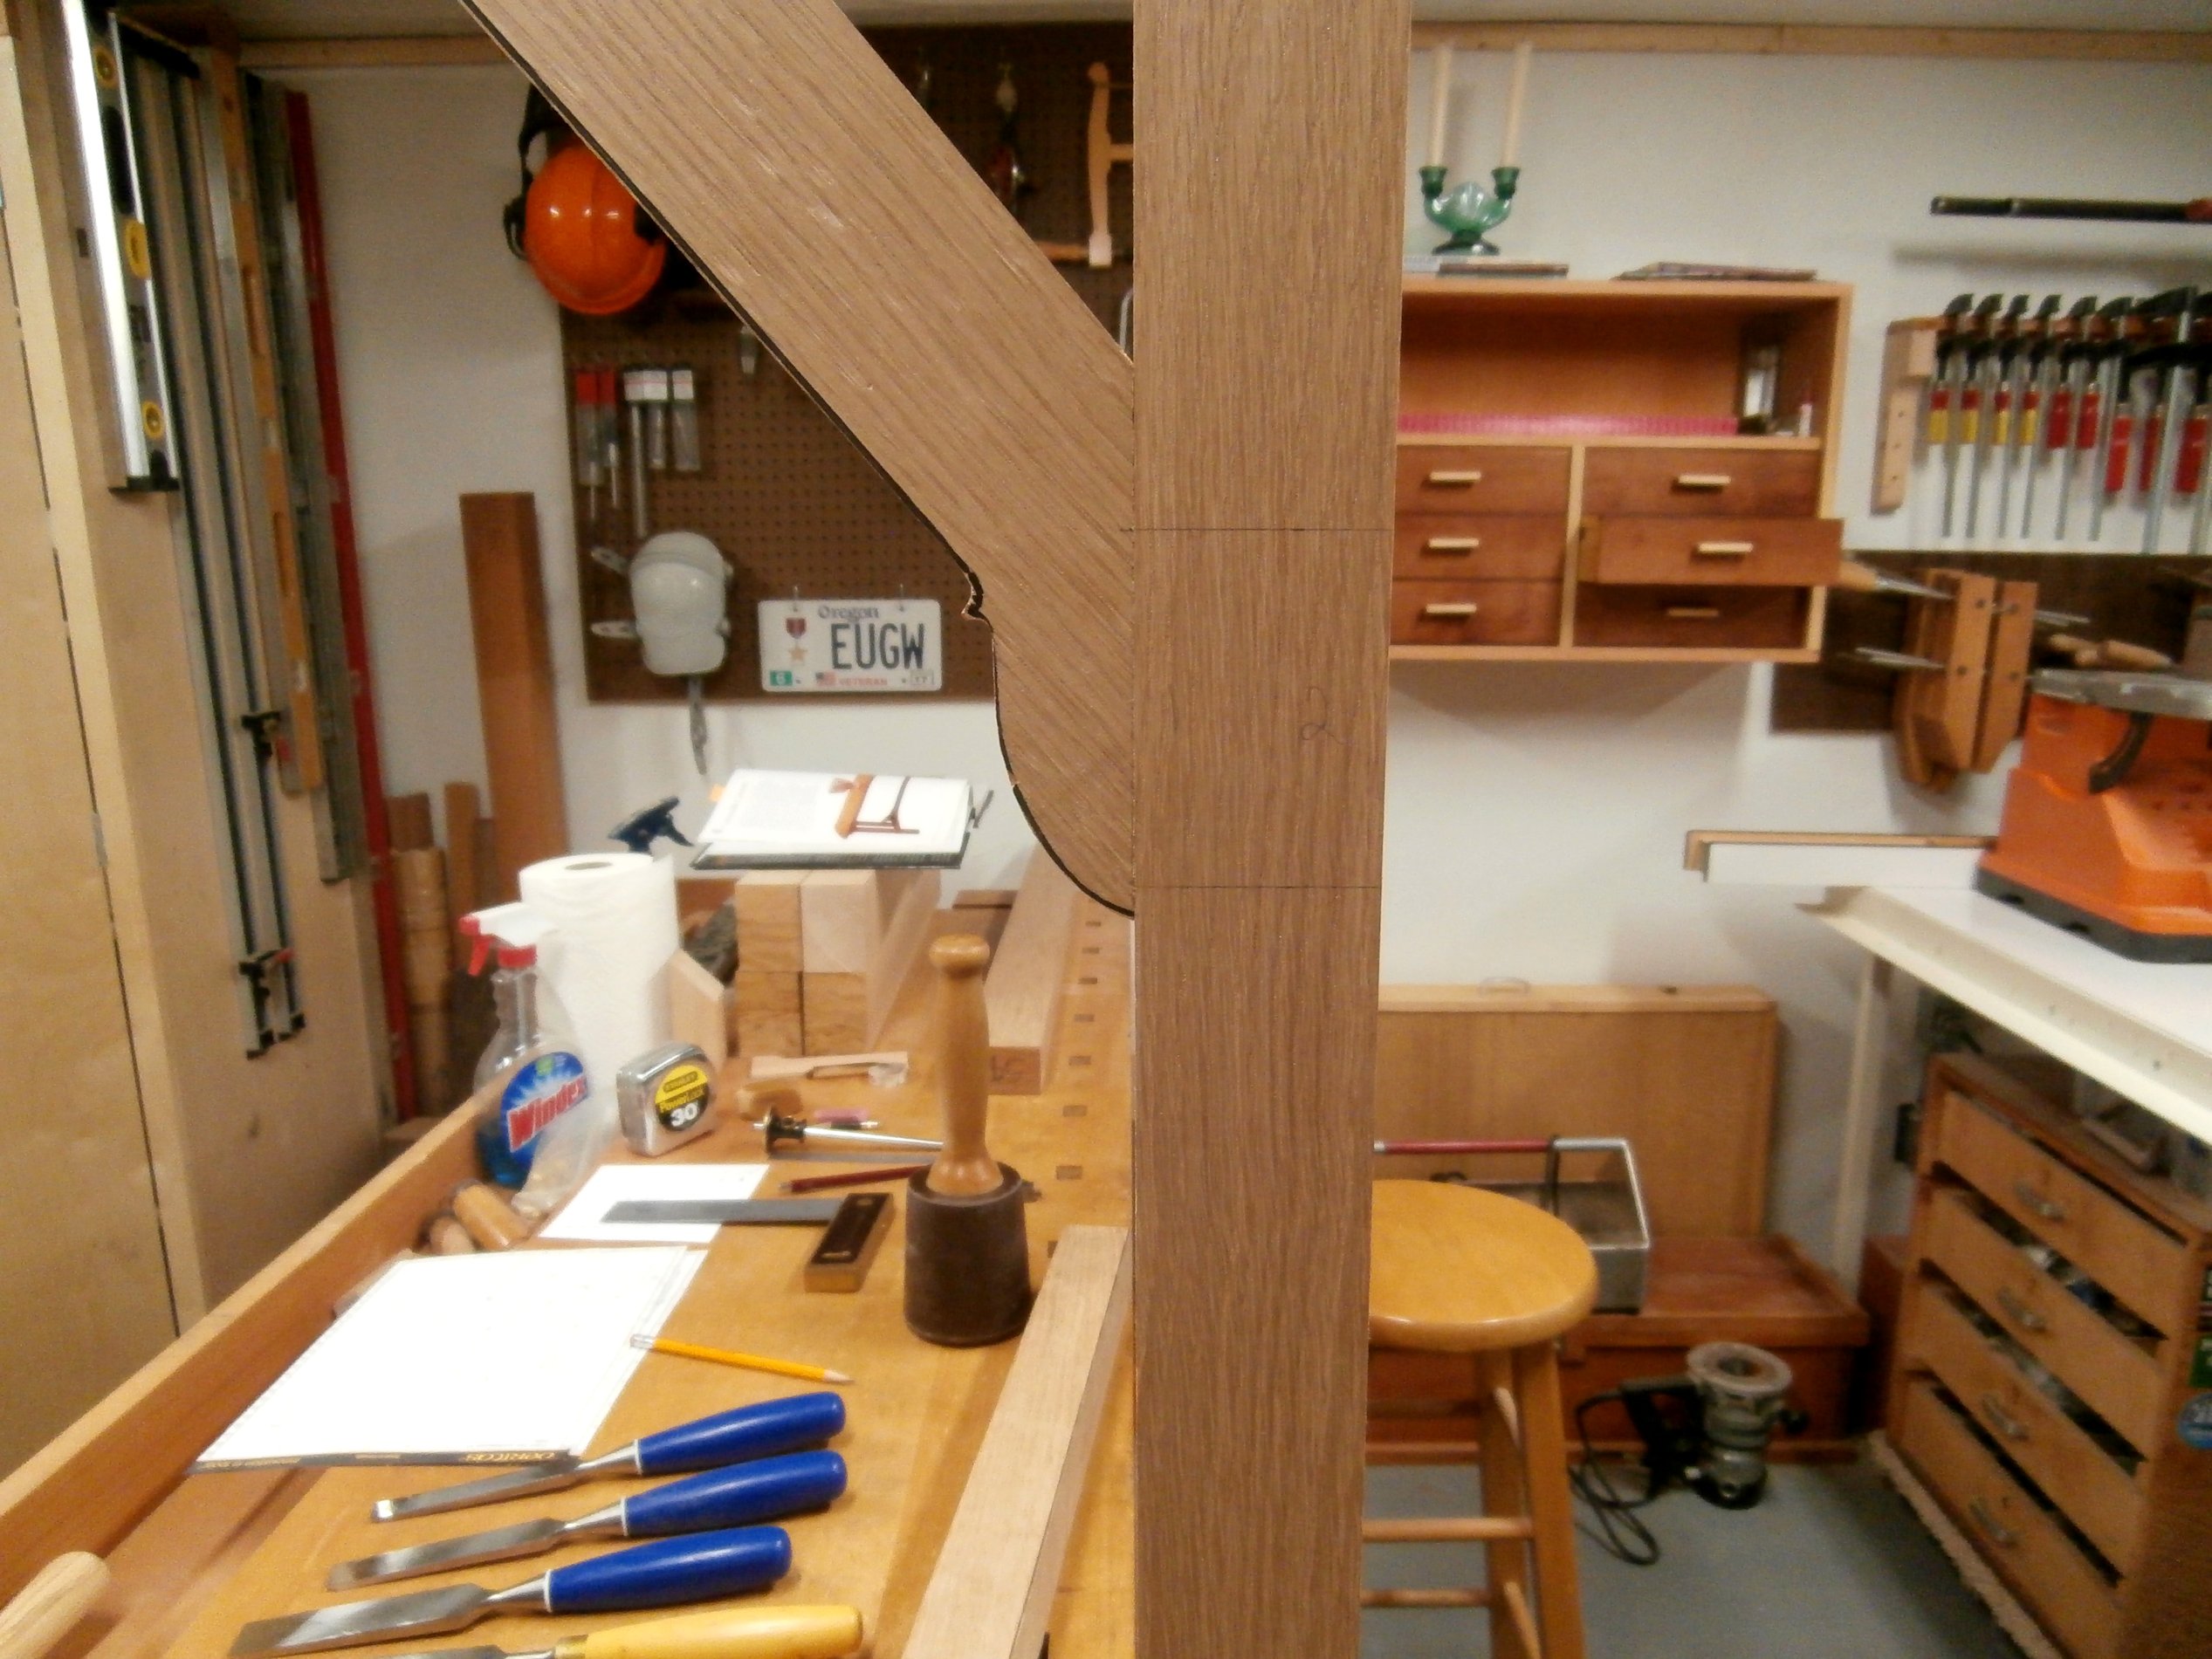
Next I dry fit the arms to the center stretcher to check my clearances.  See below.

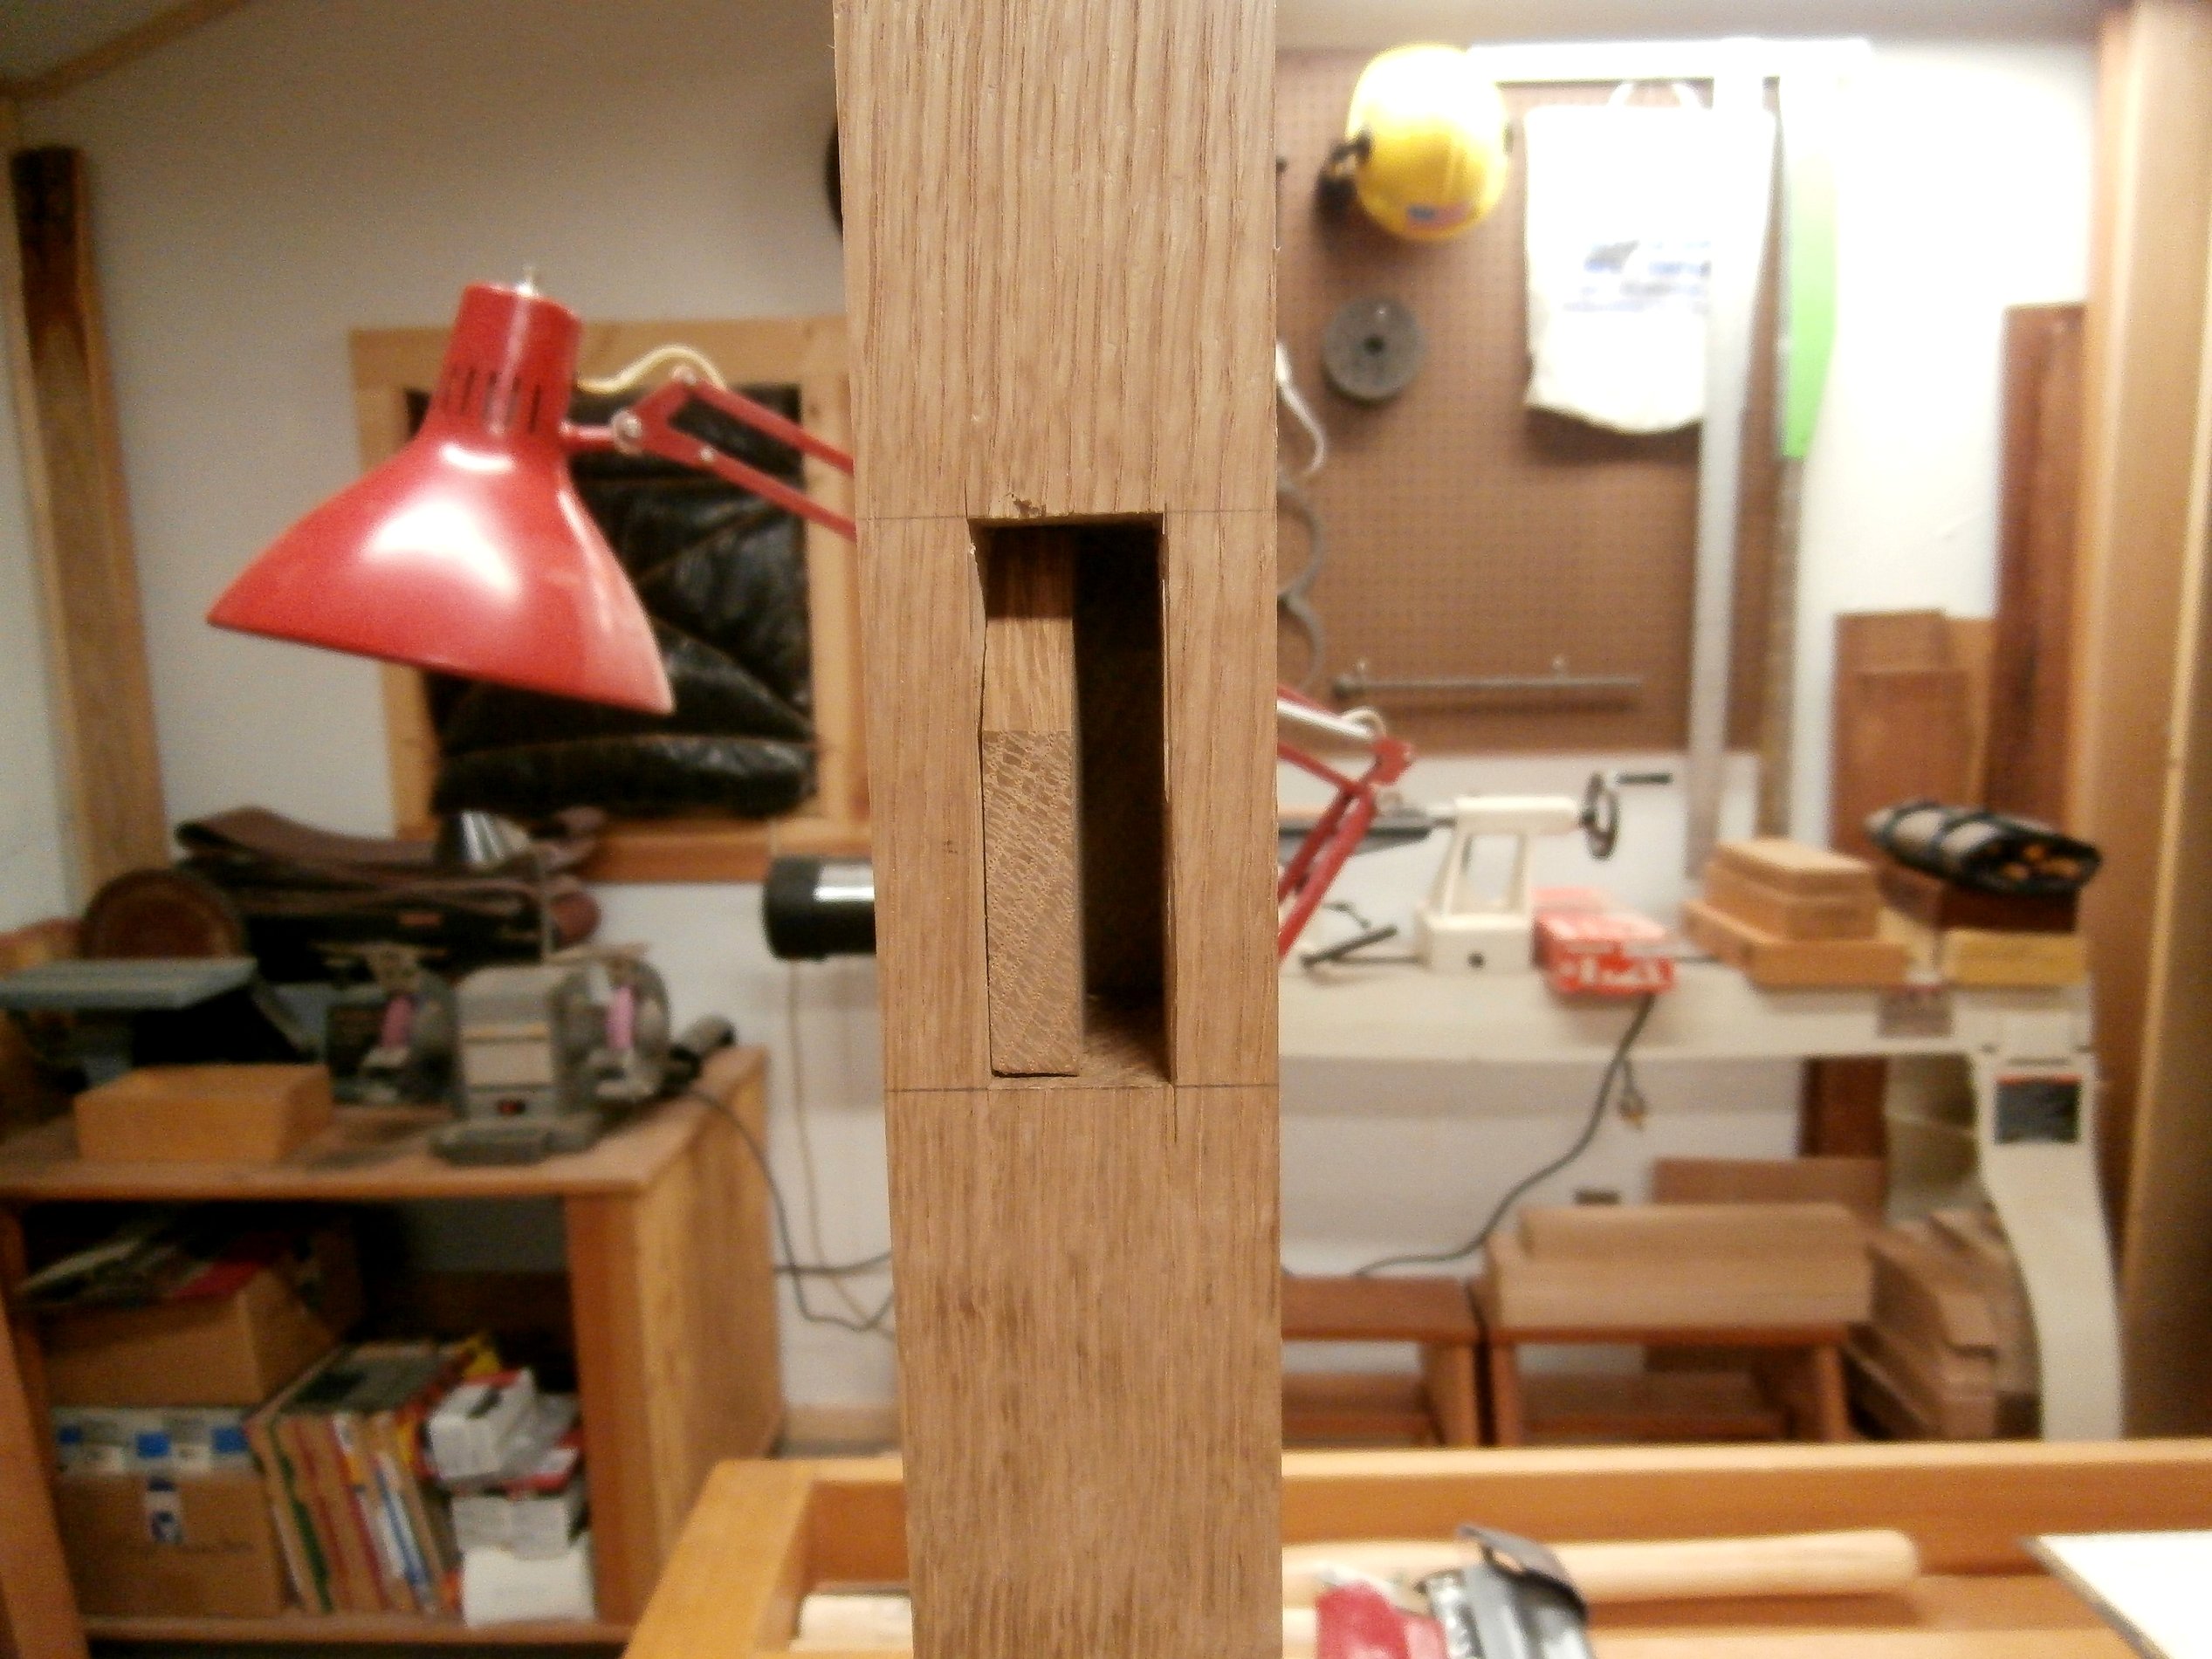
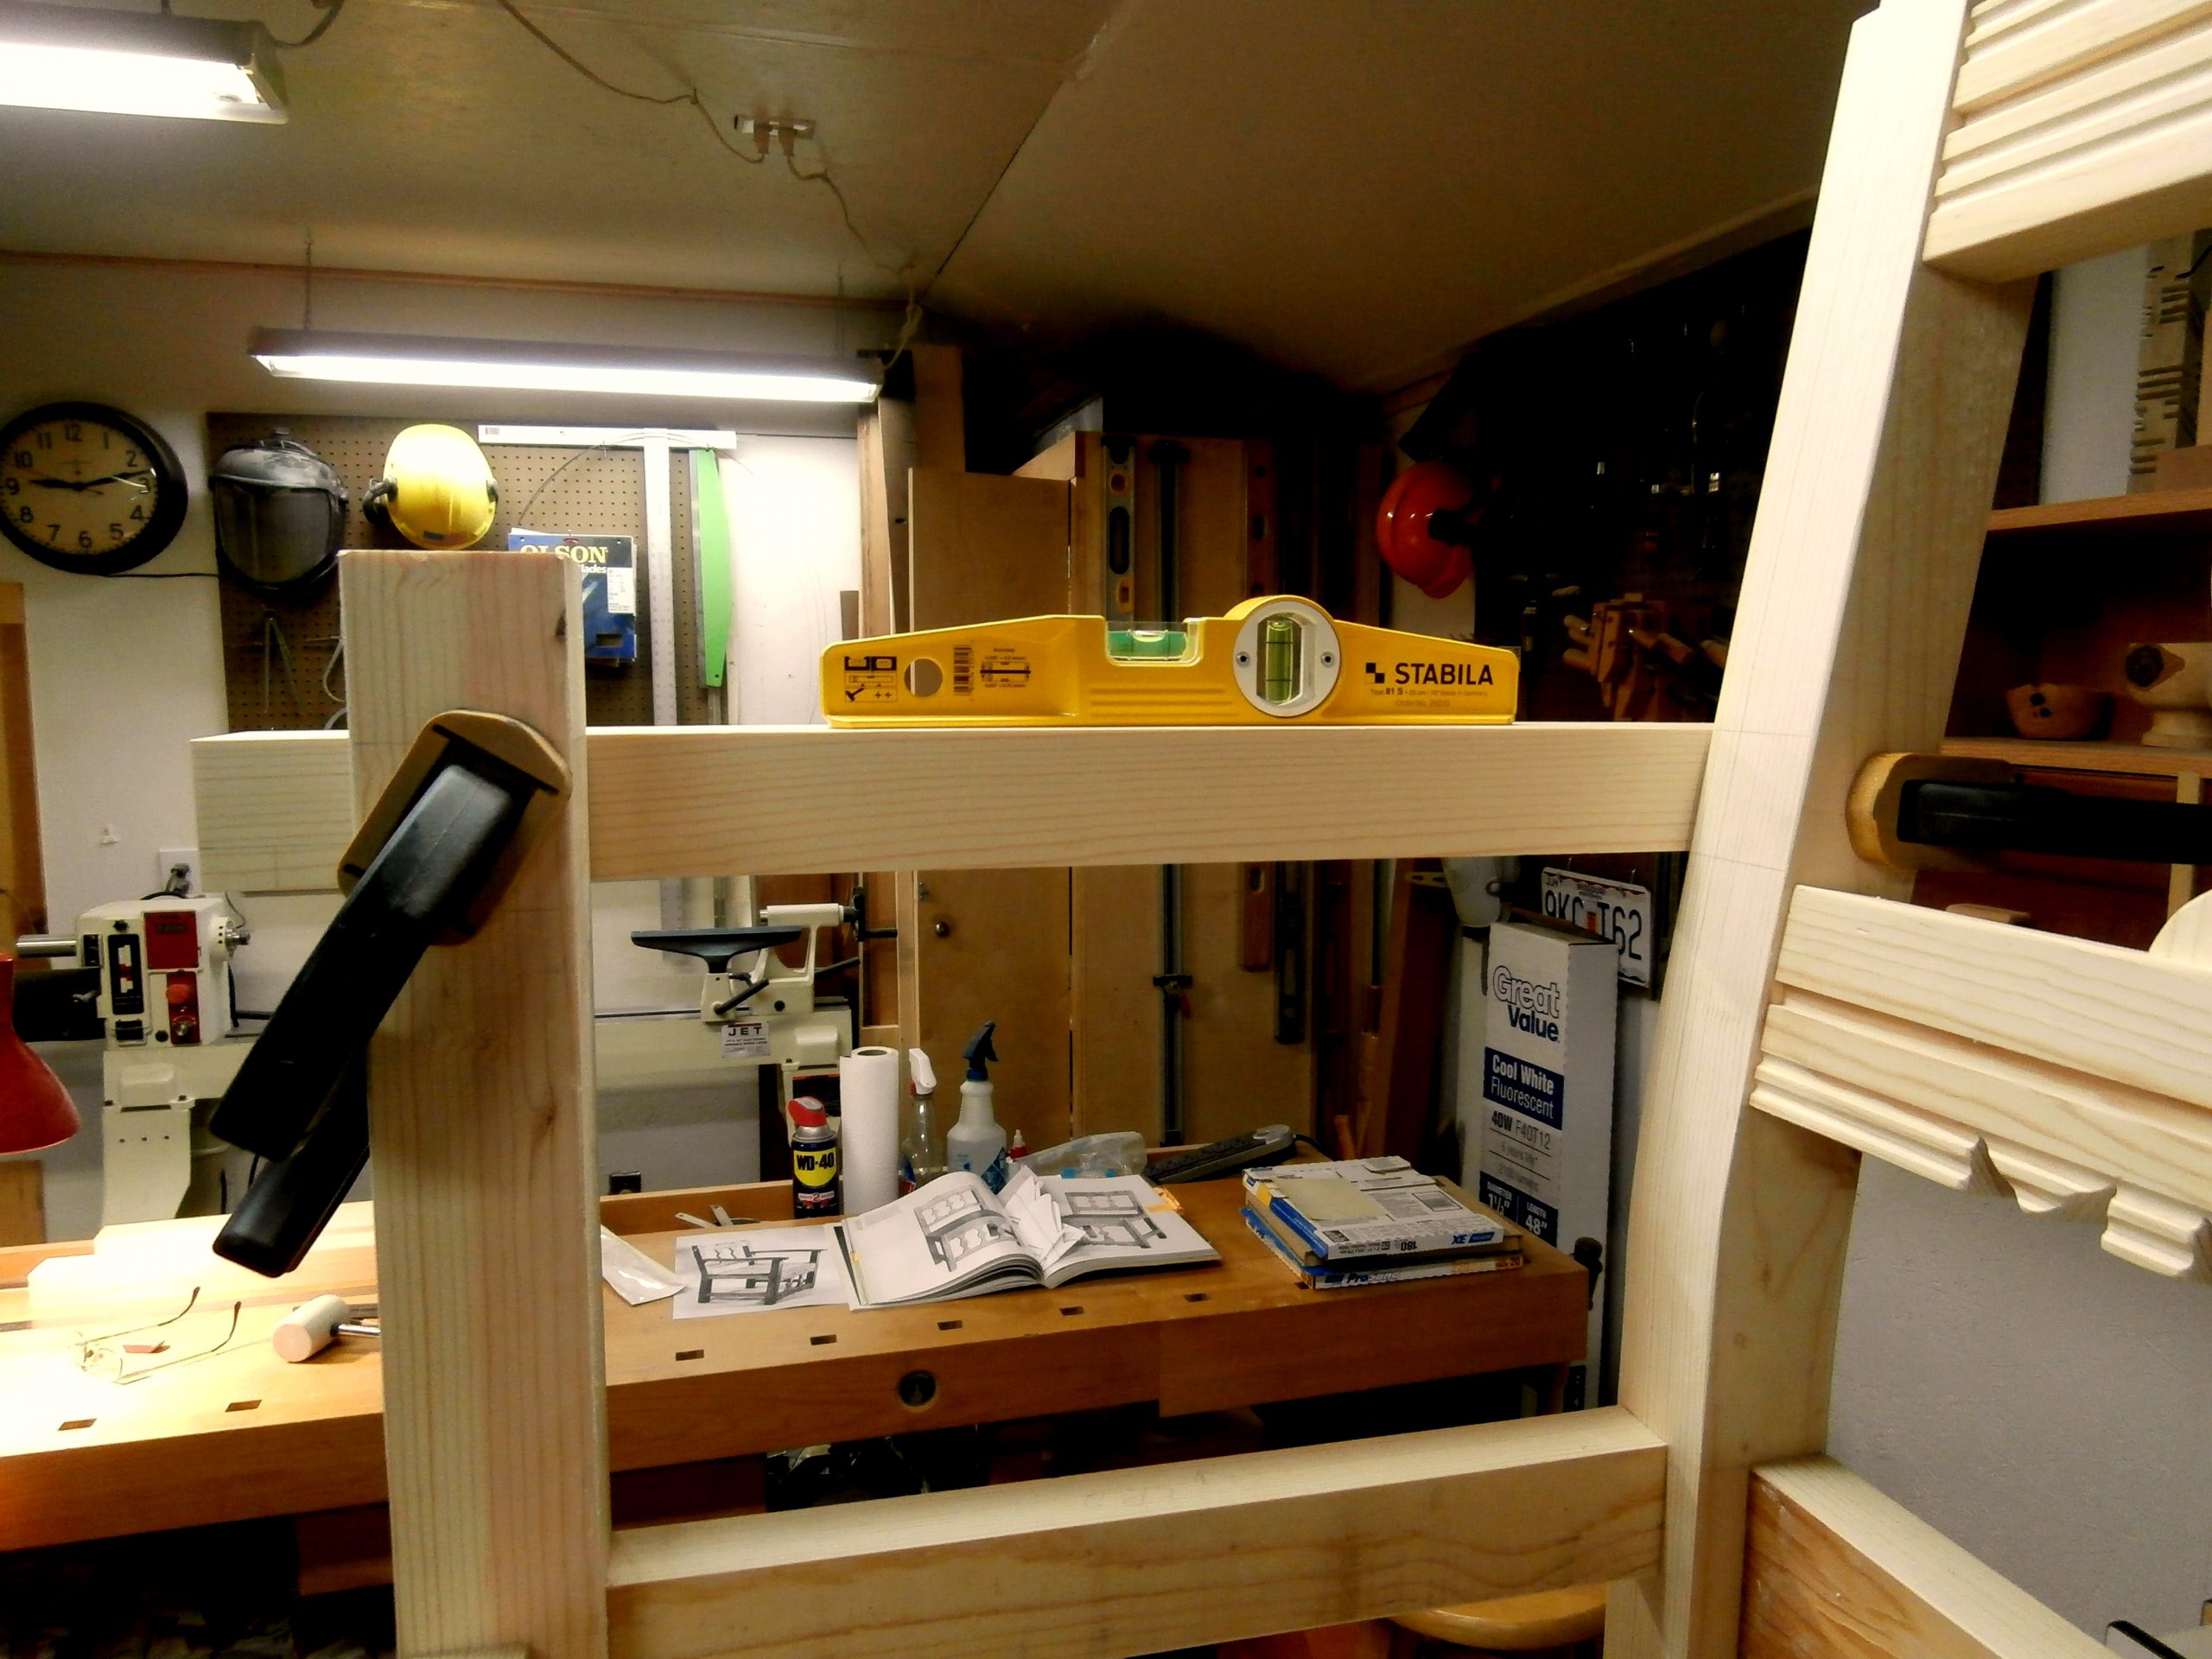
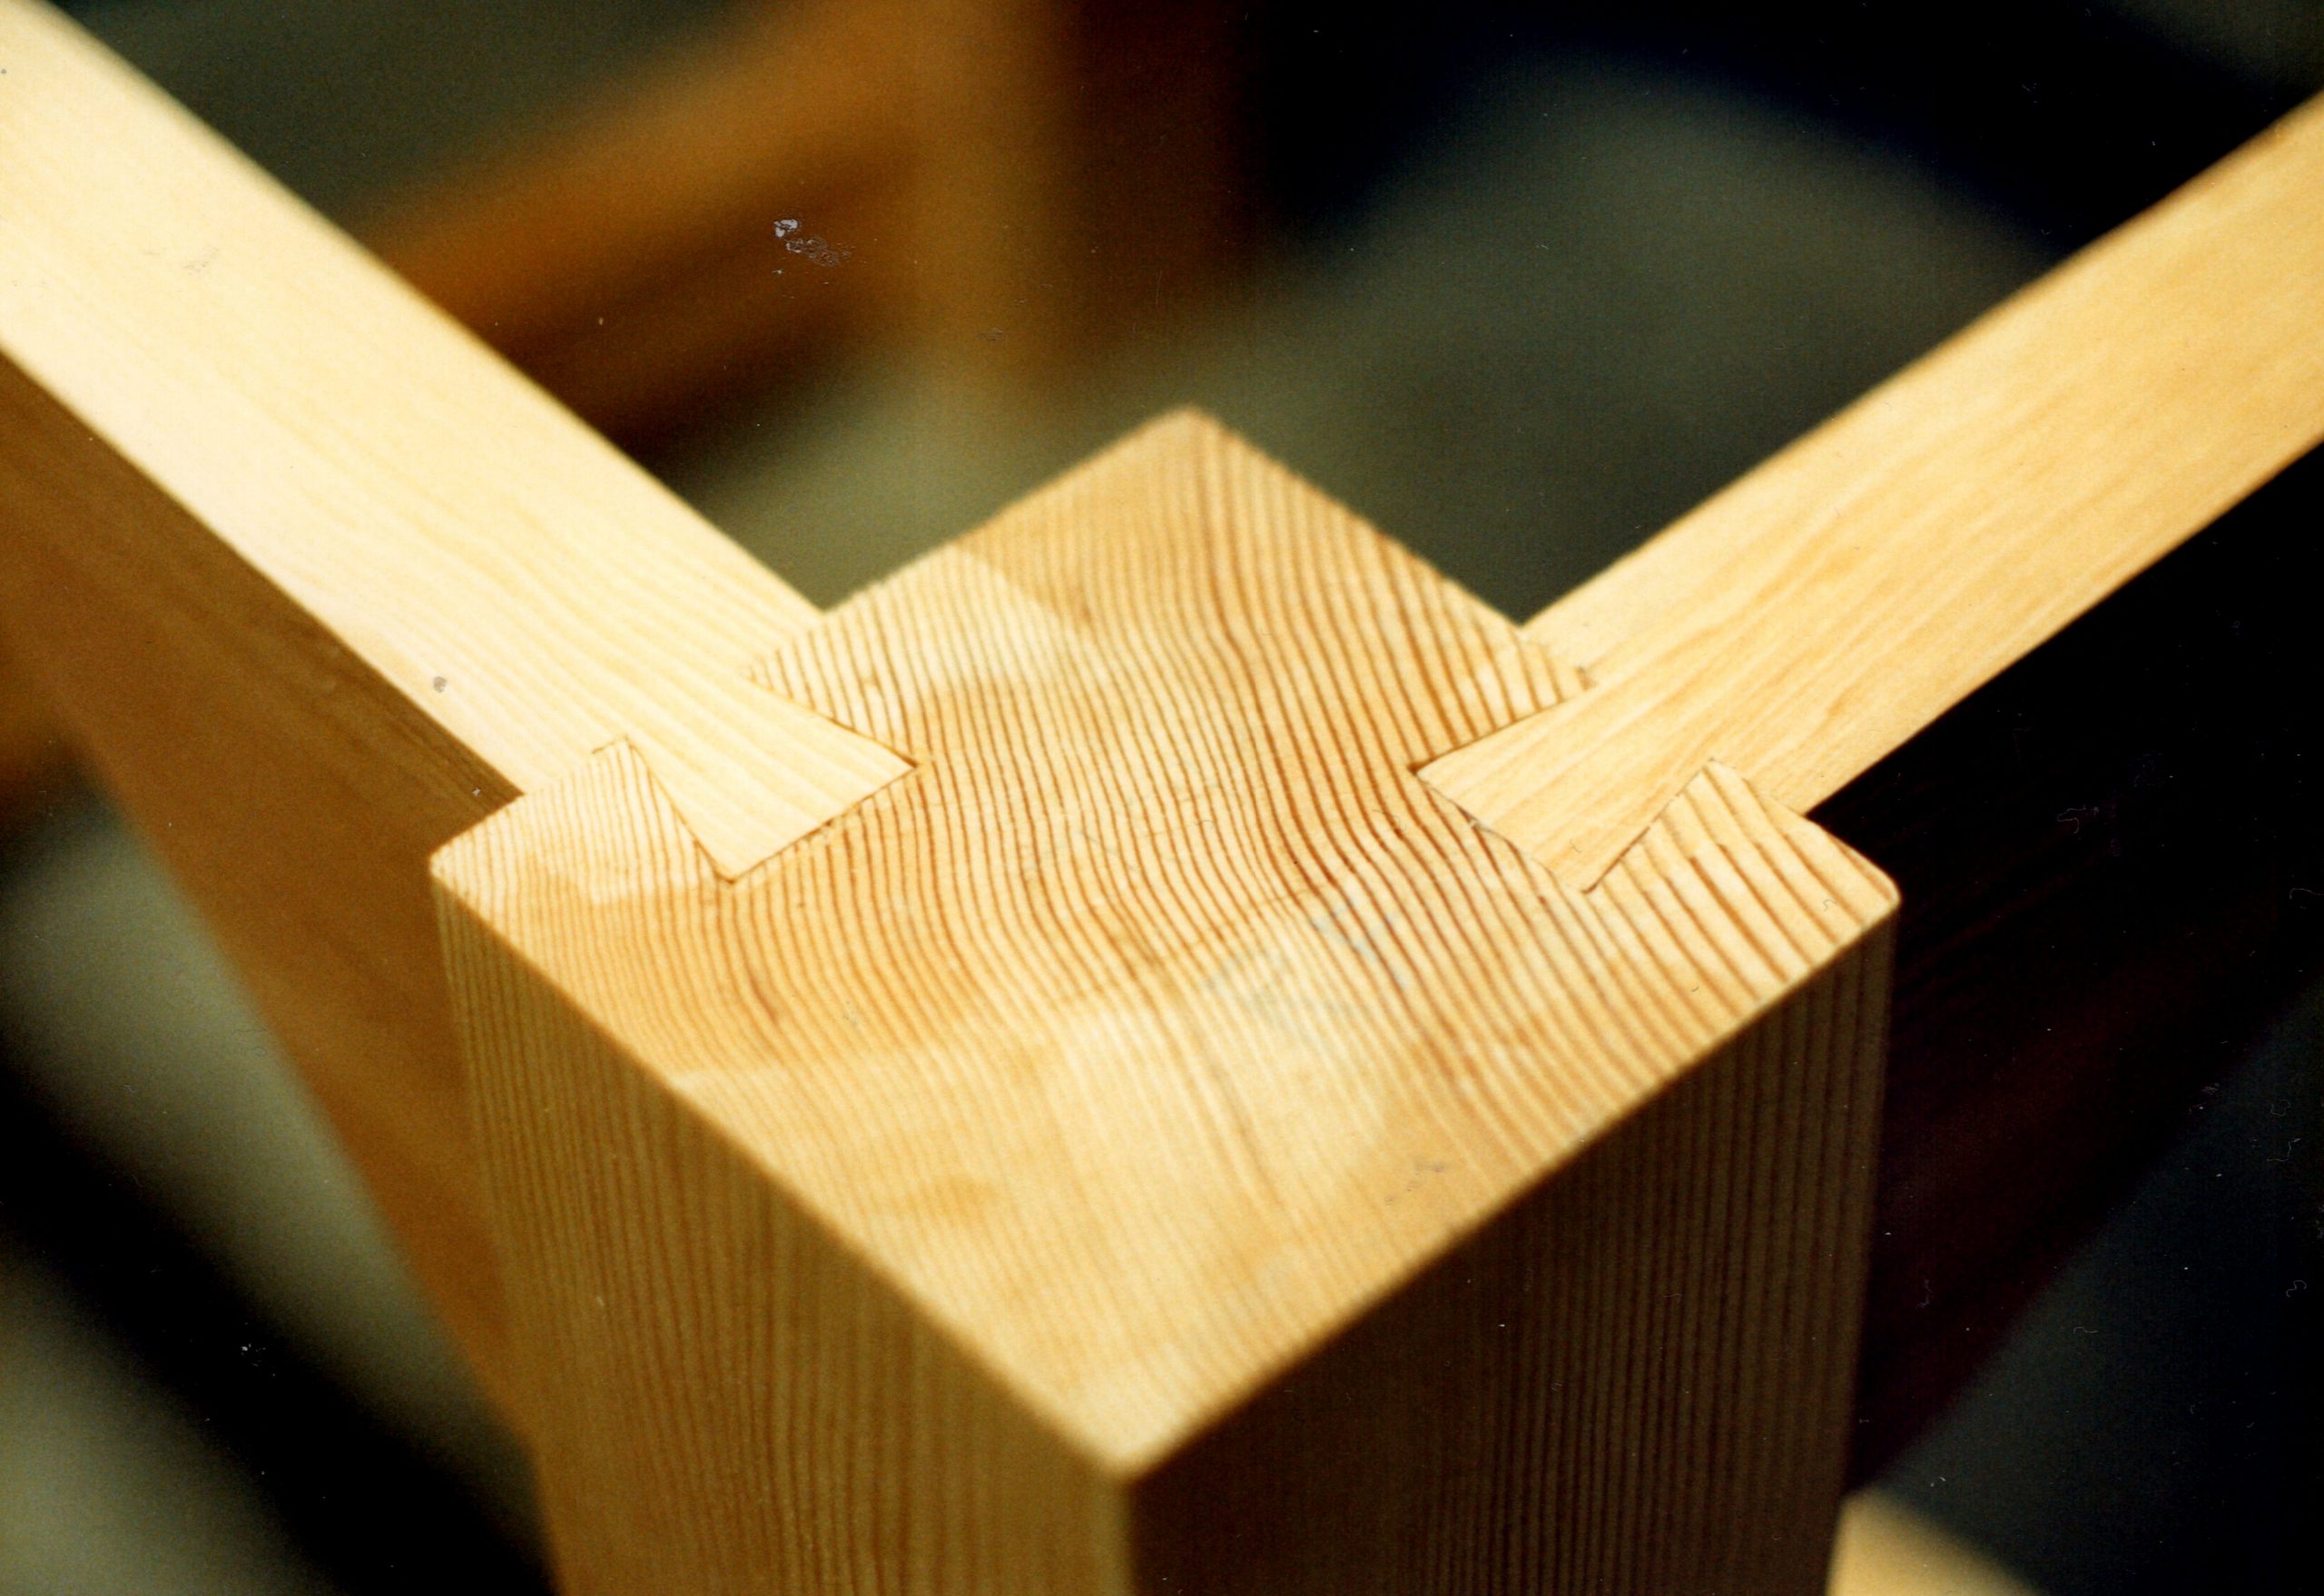
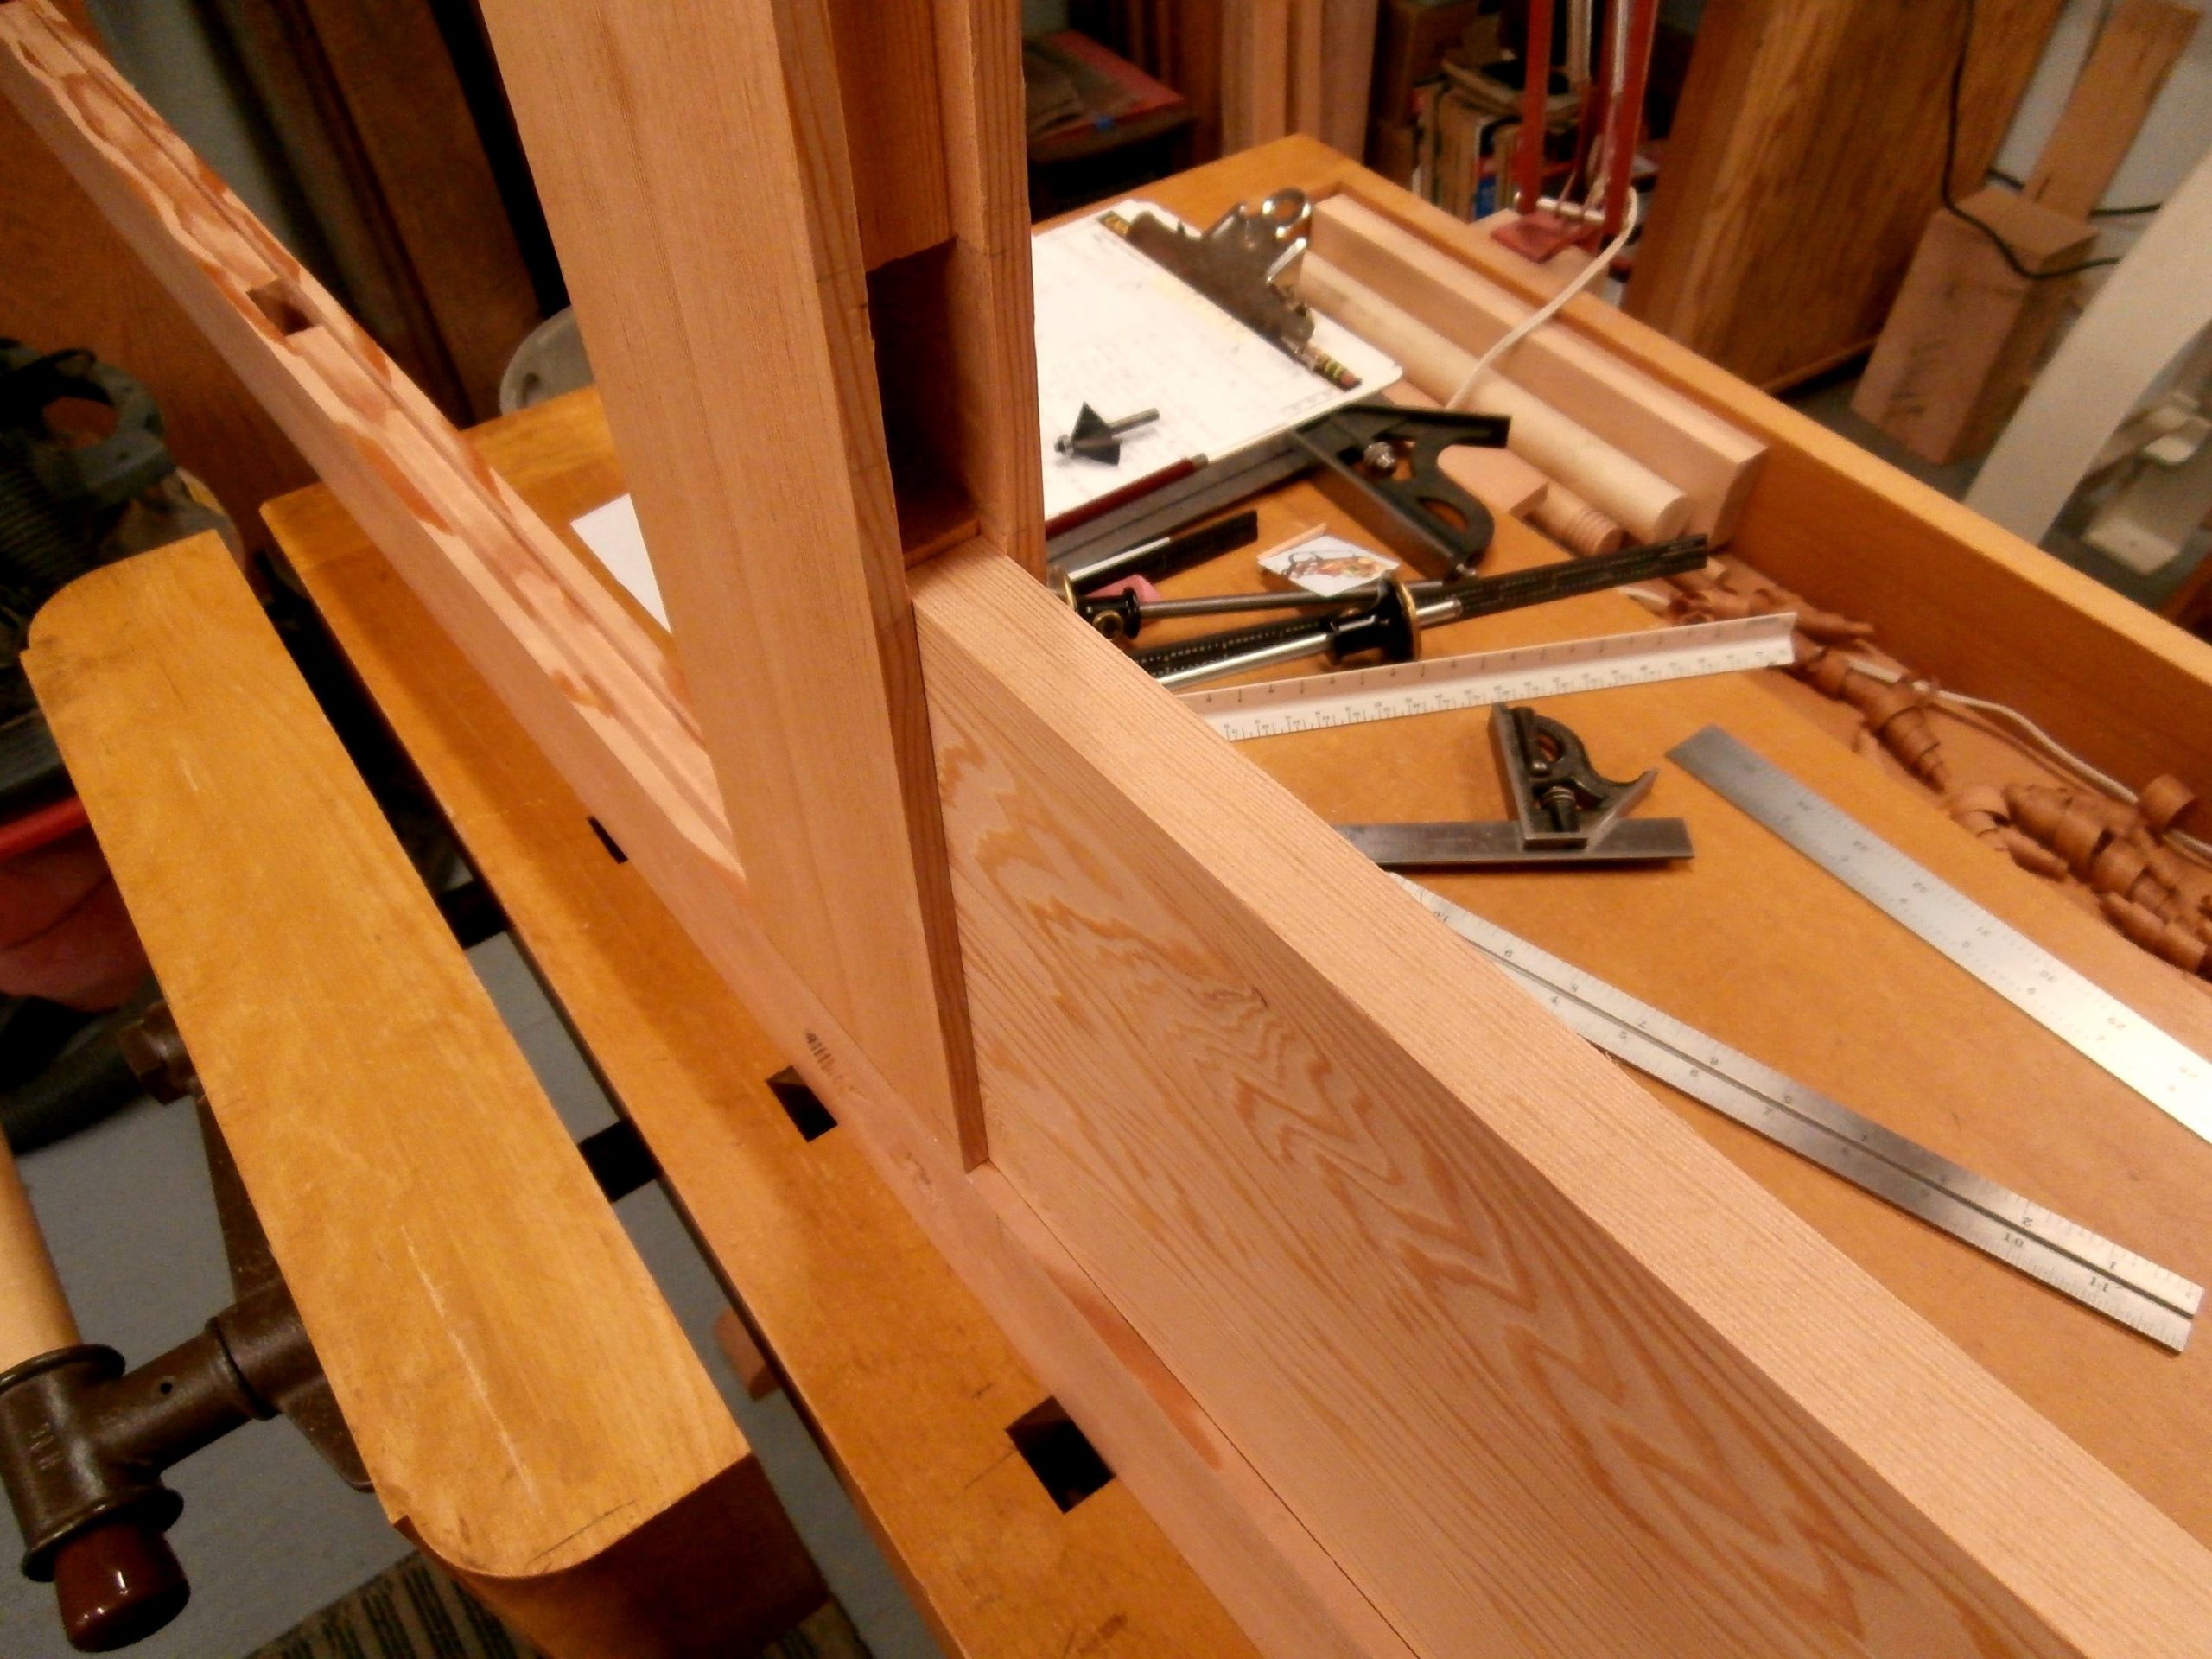
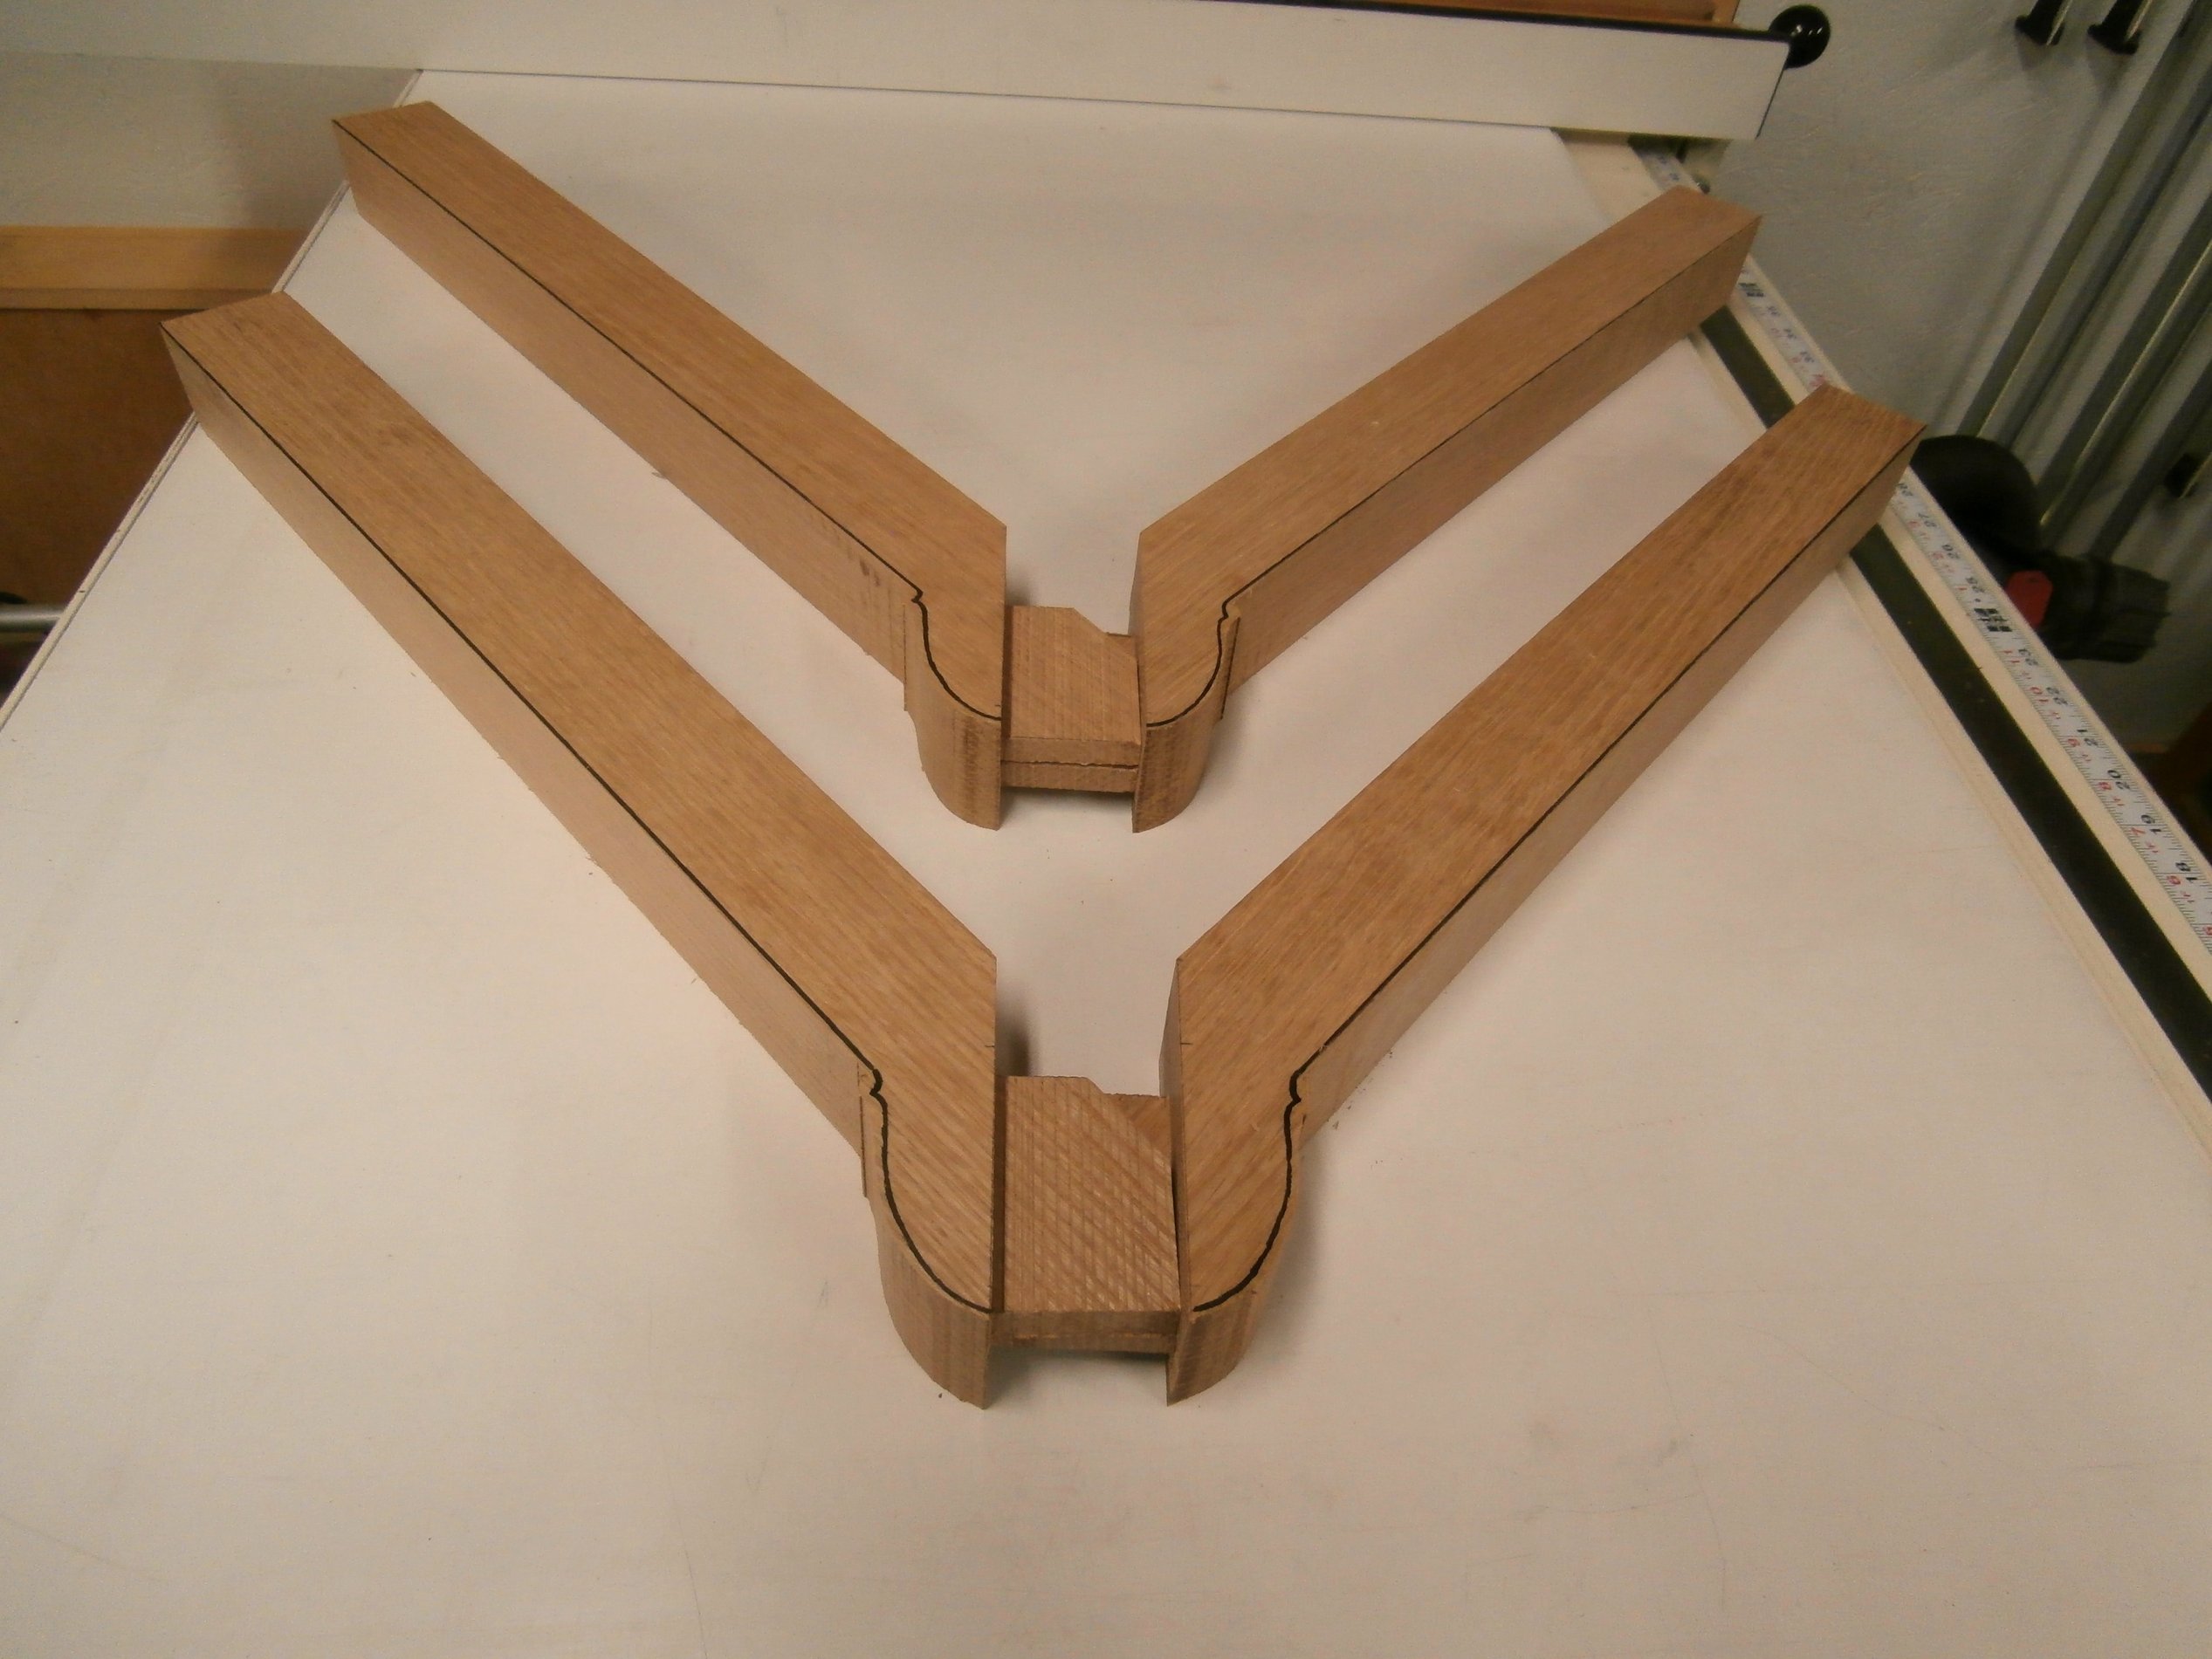
From there I consulted my full size, scaled plans for the spanner that connects the two arms and interlocks with the center stretcher.  All measurements, markings, and cuts on the spanner must be extremely precise in order for all four pieces to fit together with tight joints.  It is an added challenge  to have all the through tenons  emerge  flawlessly where they are visible on the outside faces.   Here is the sequence.

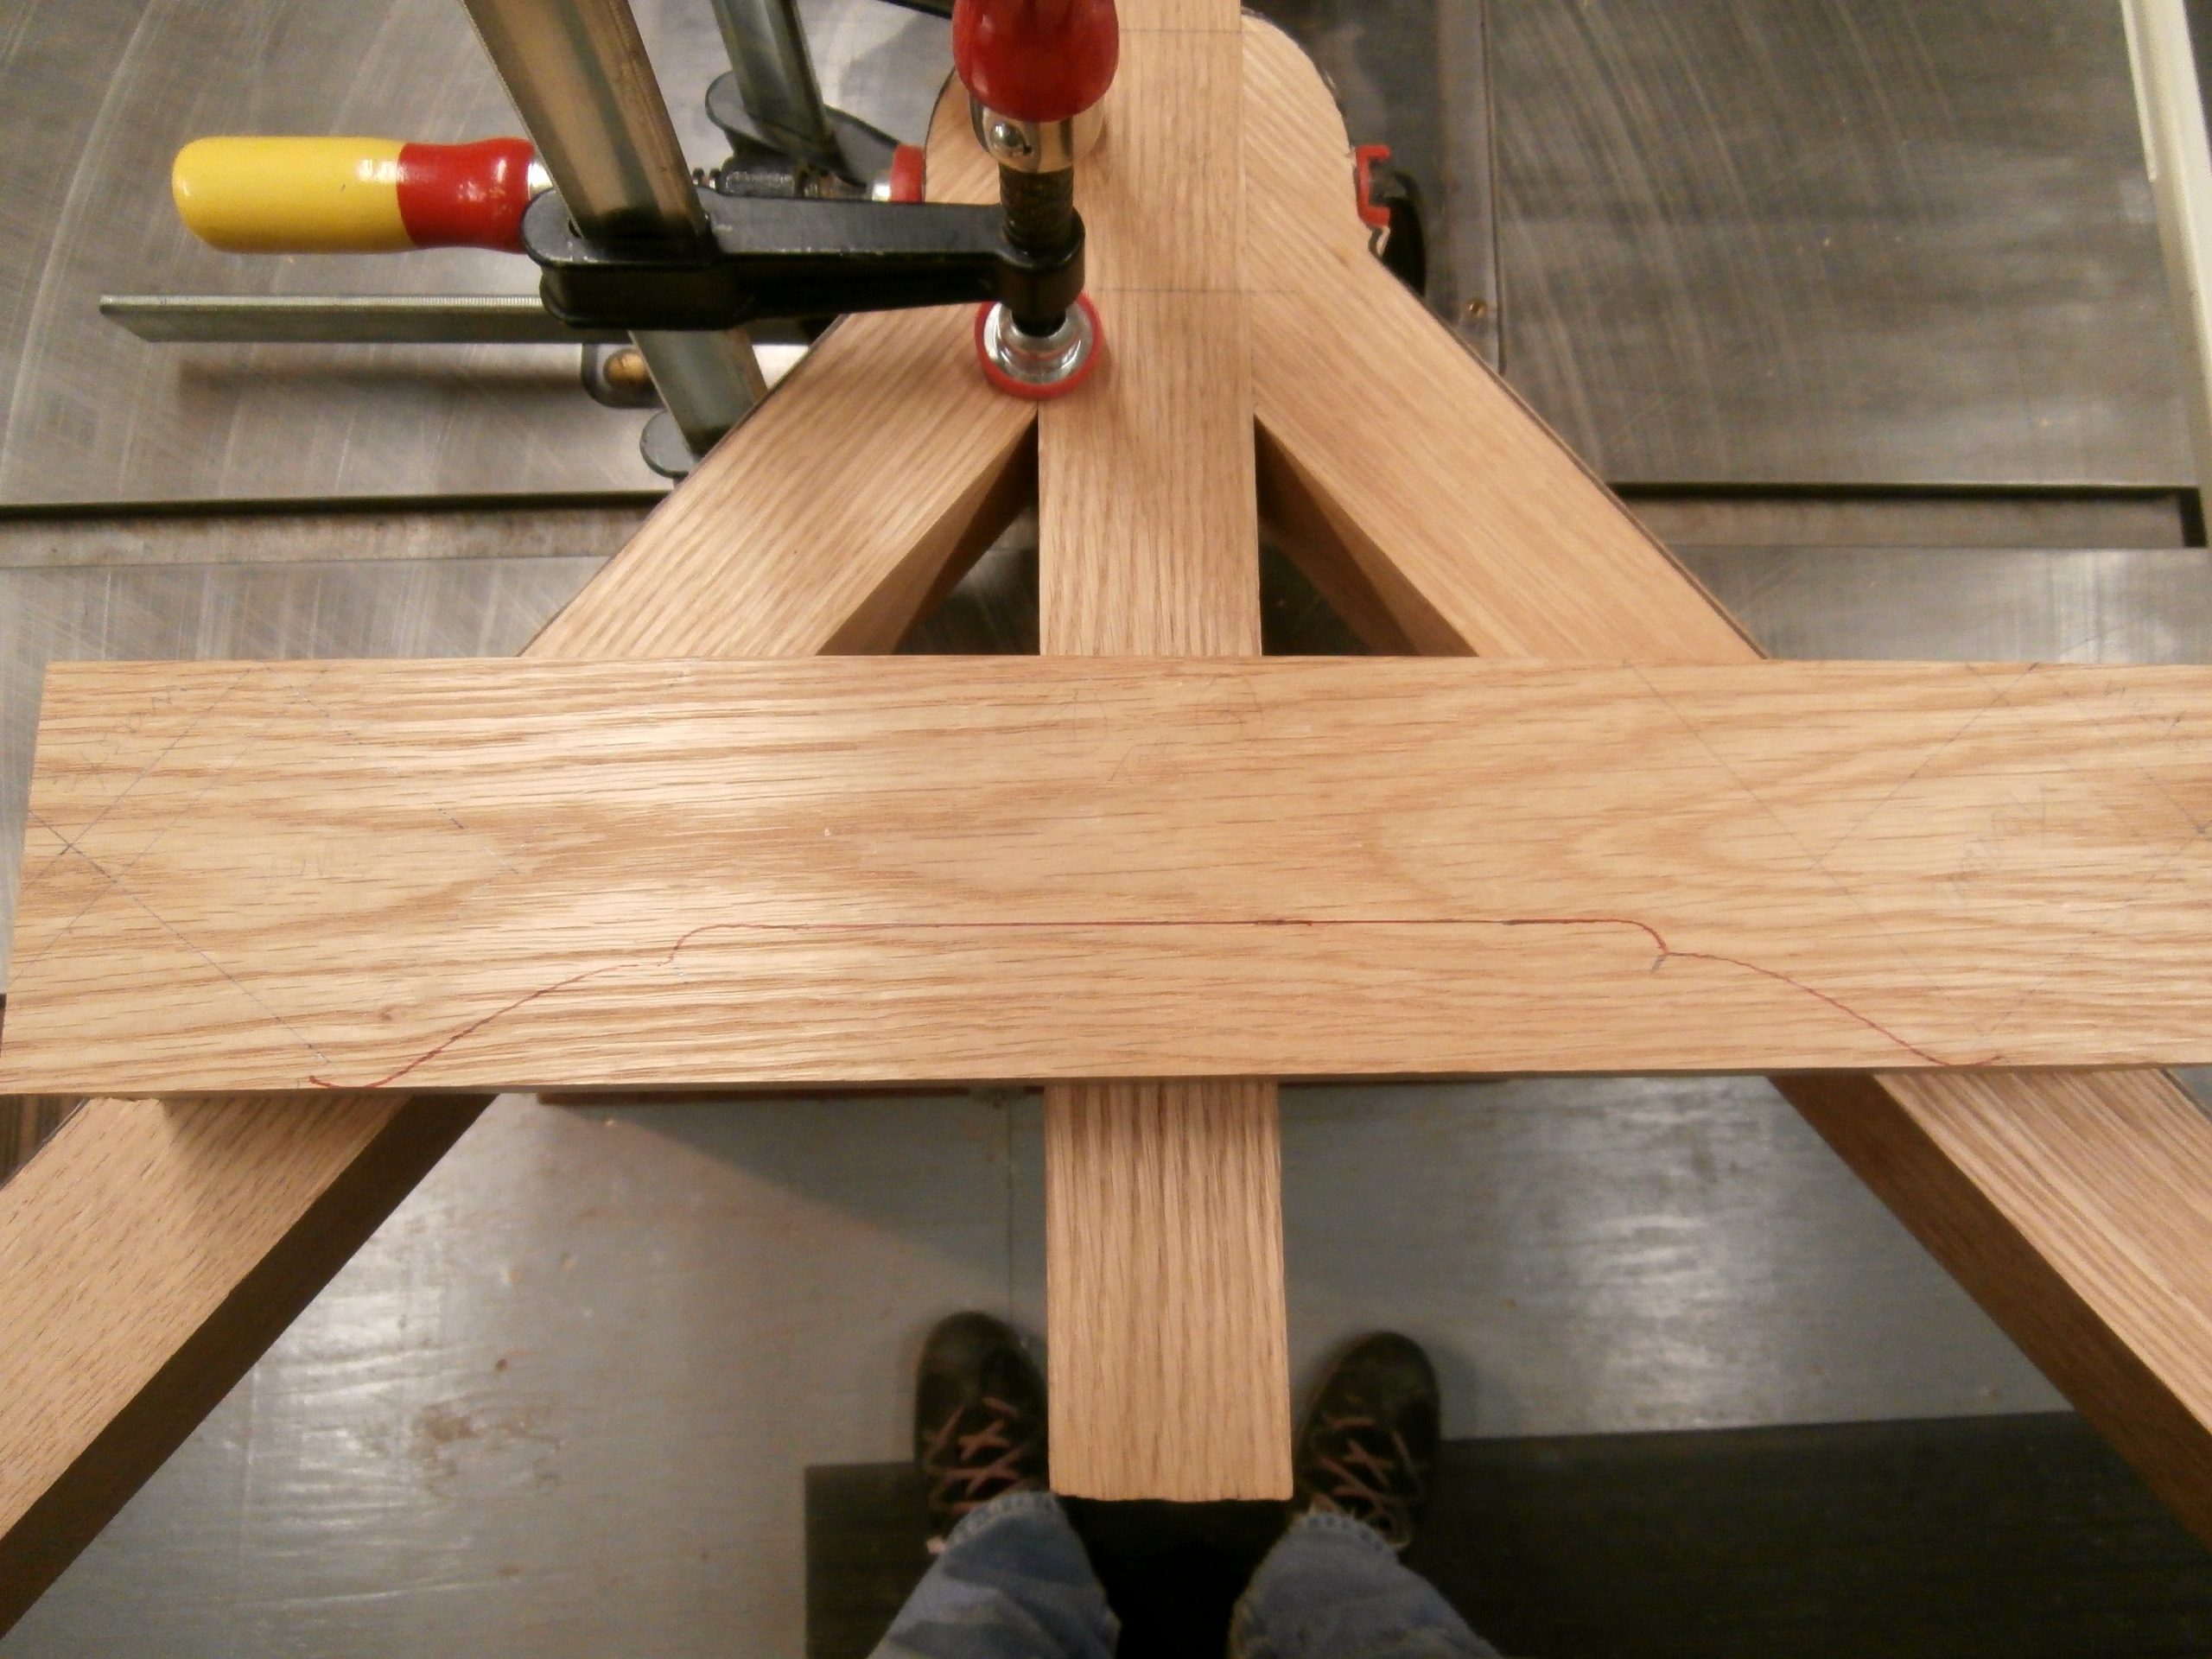
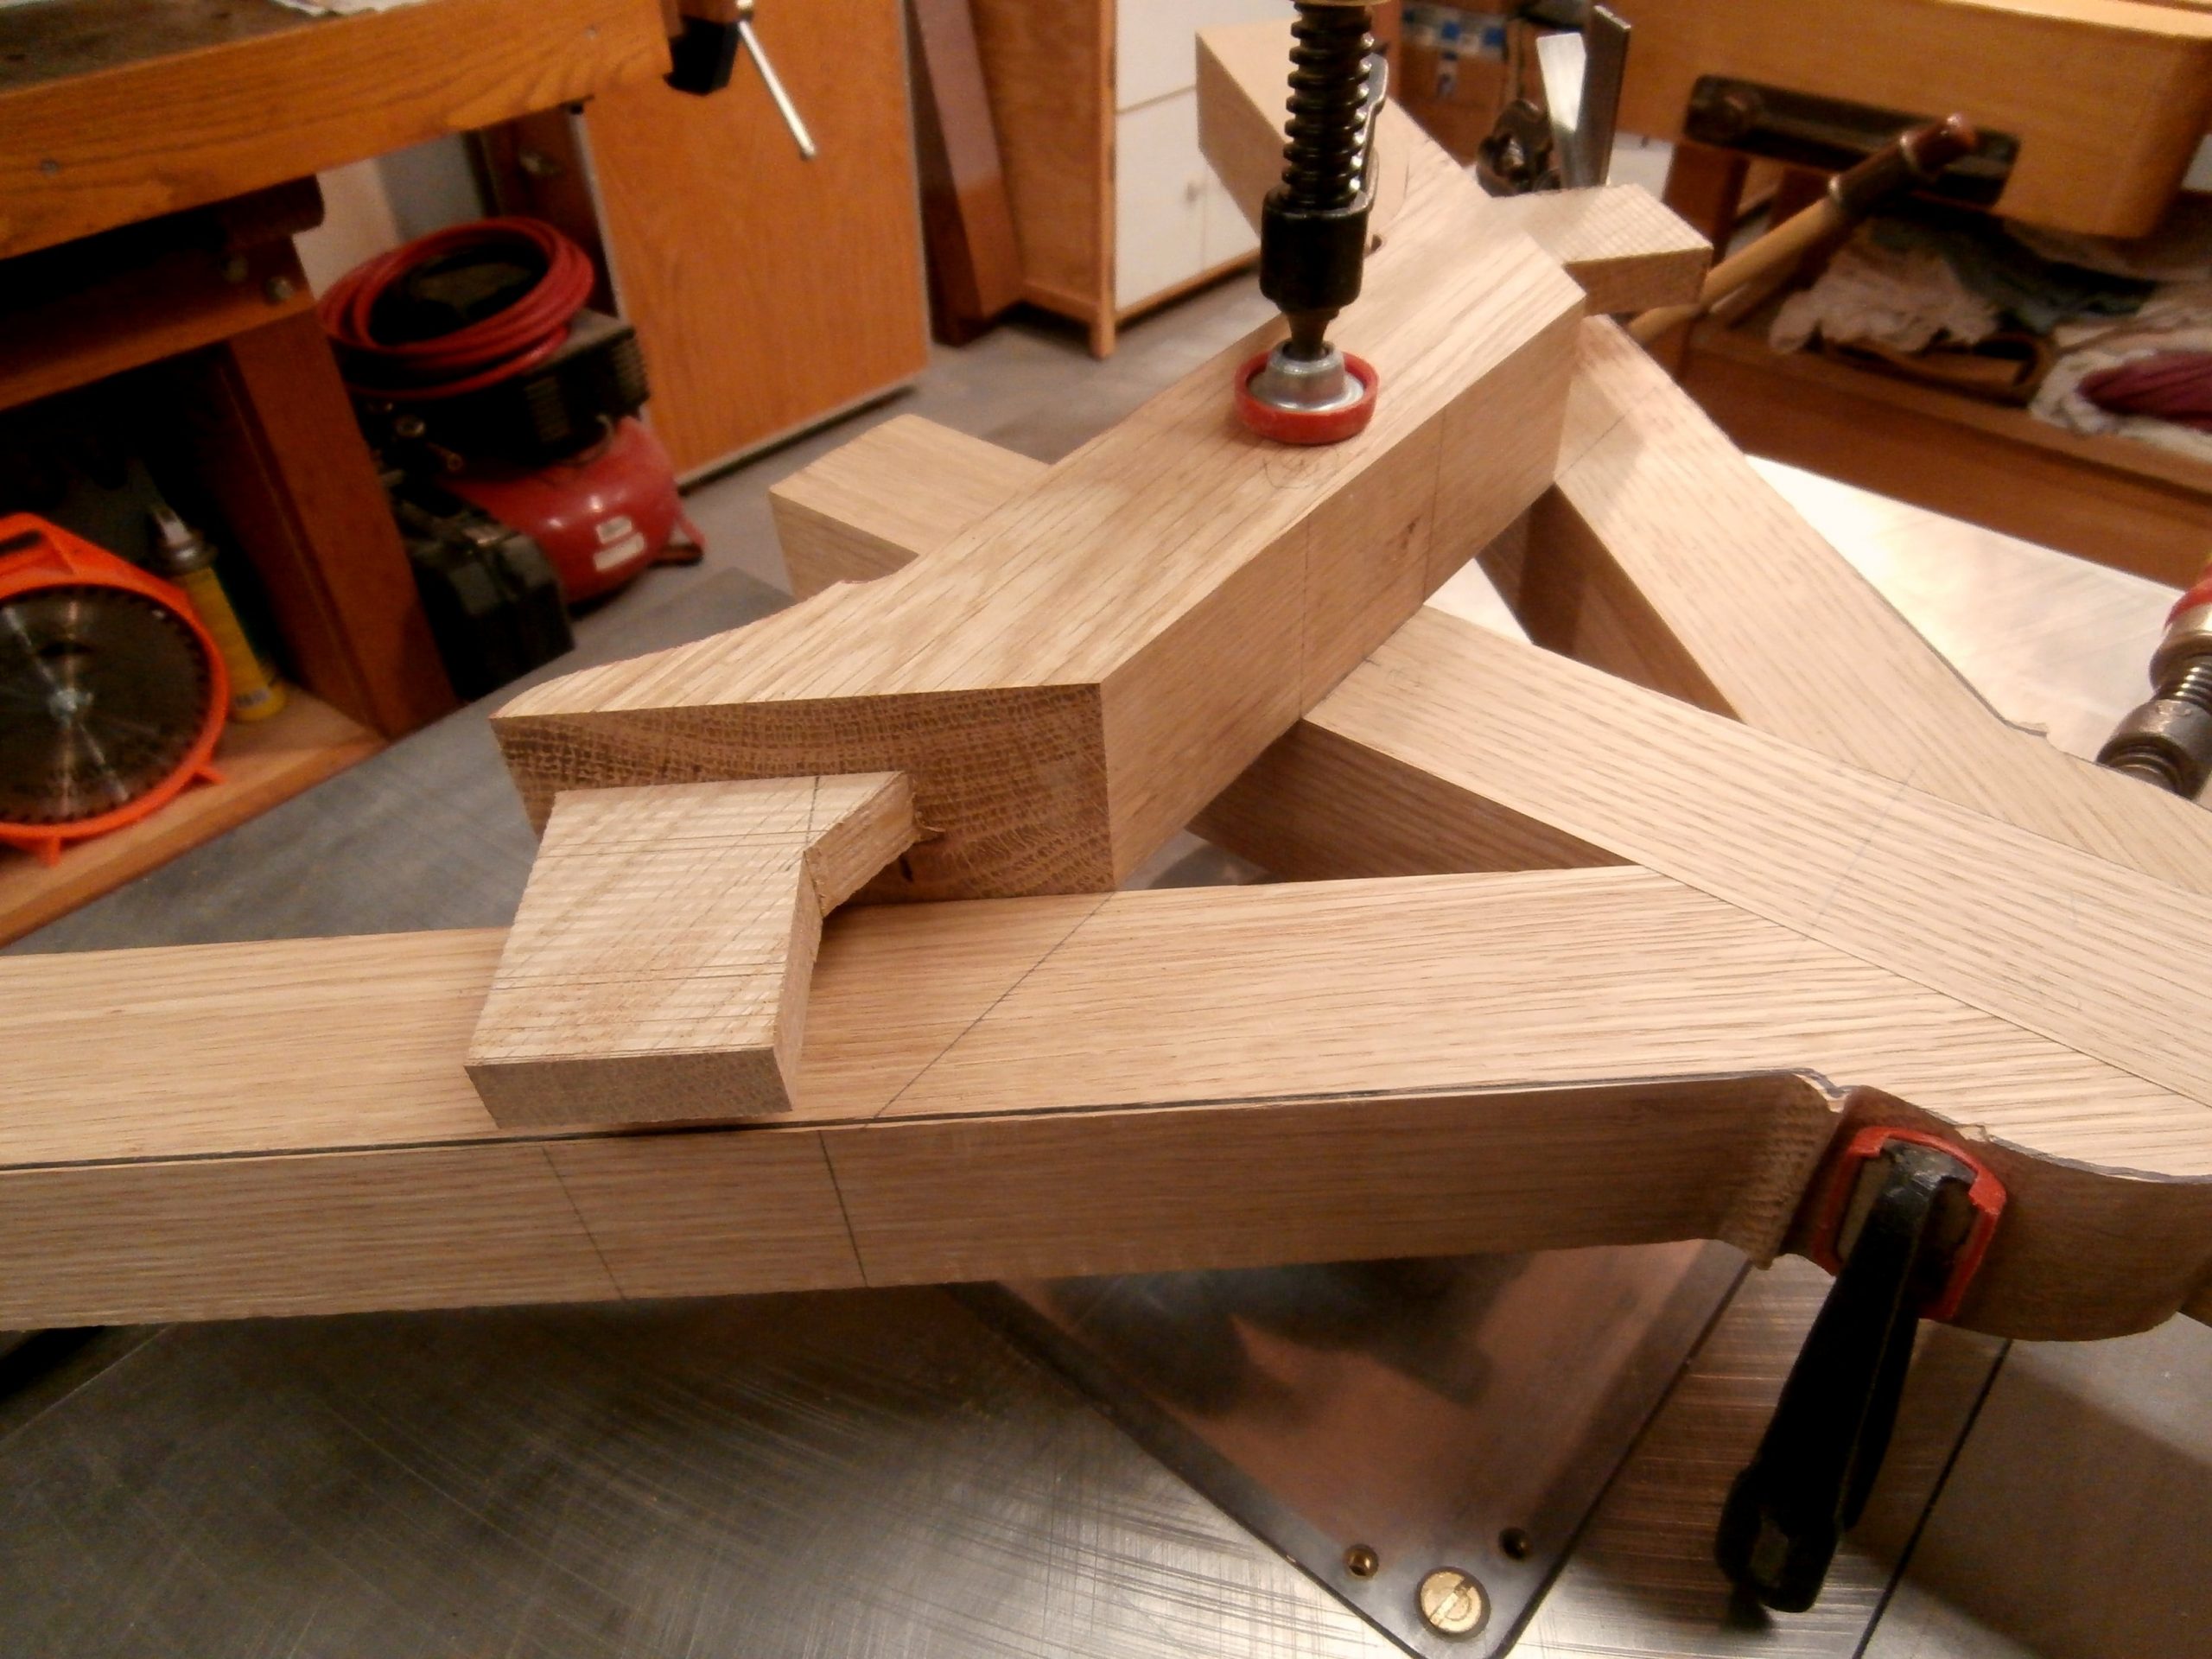
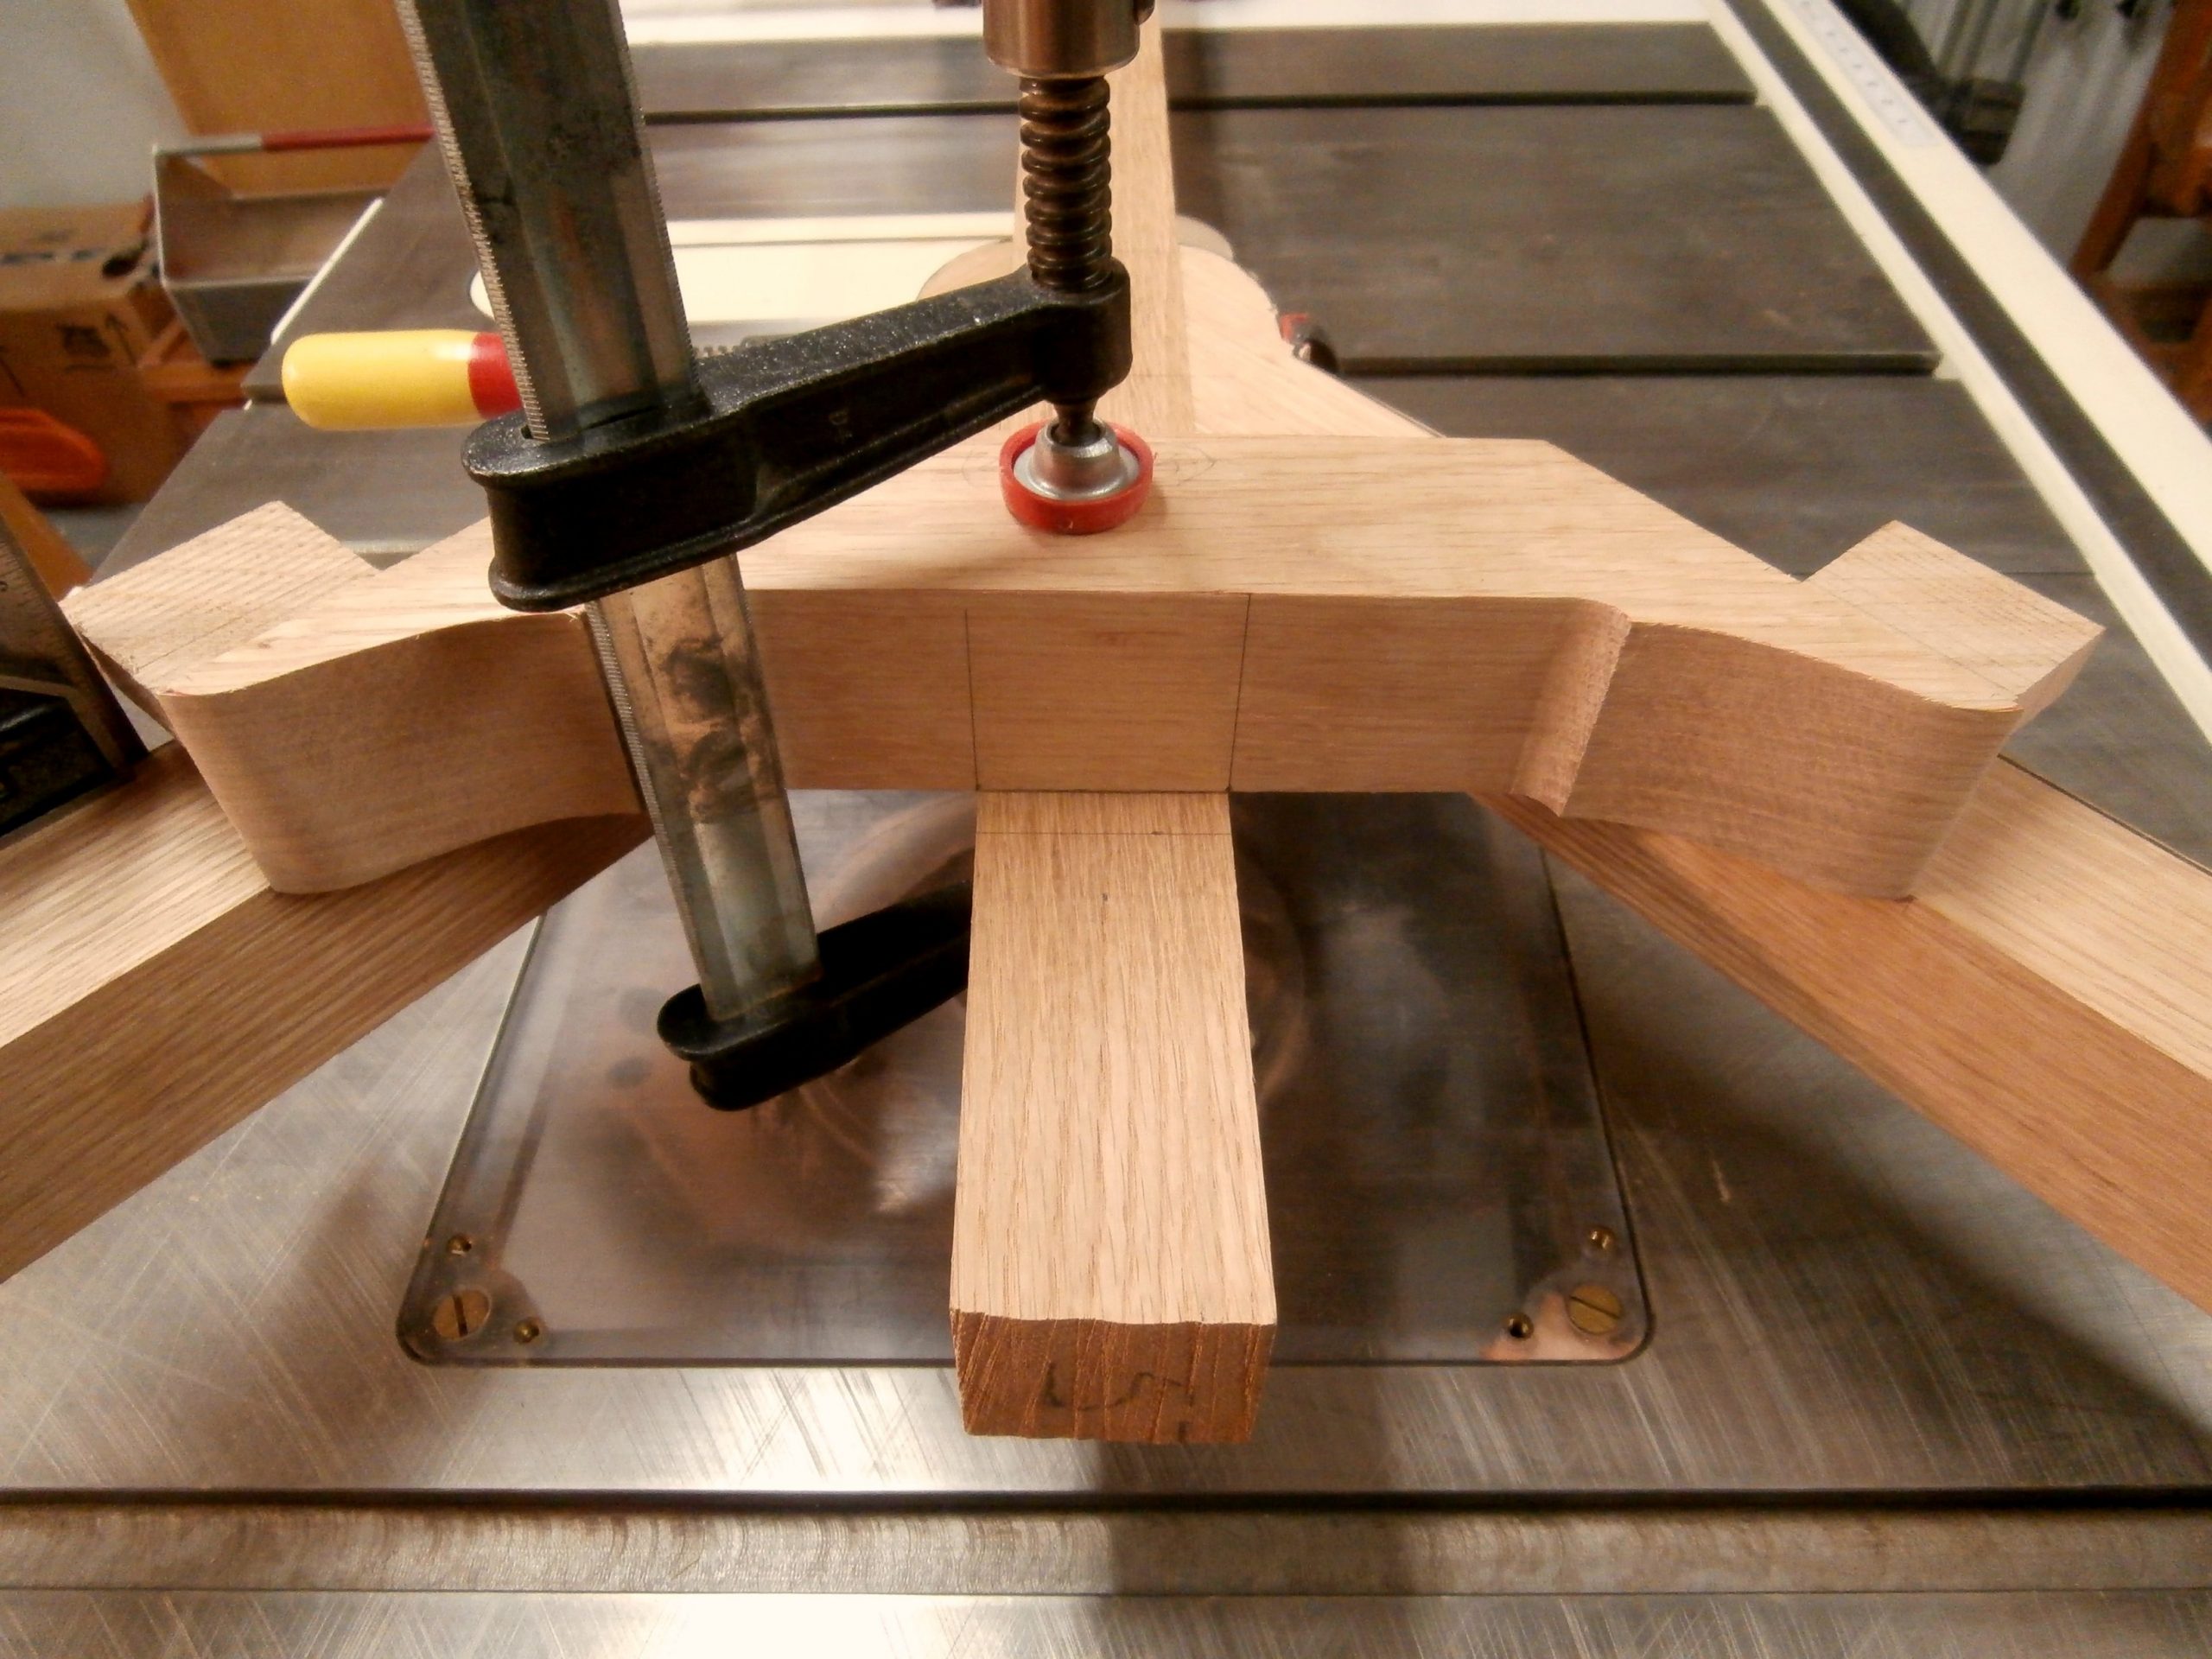
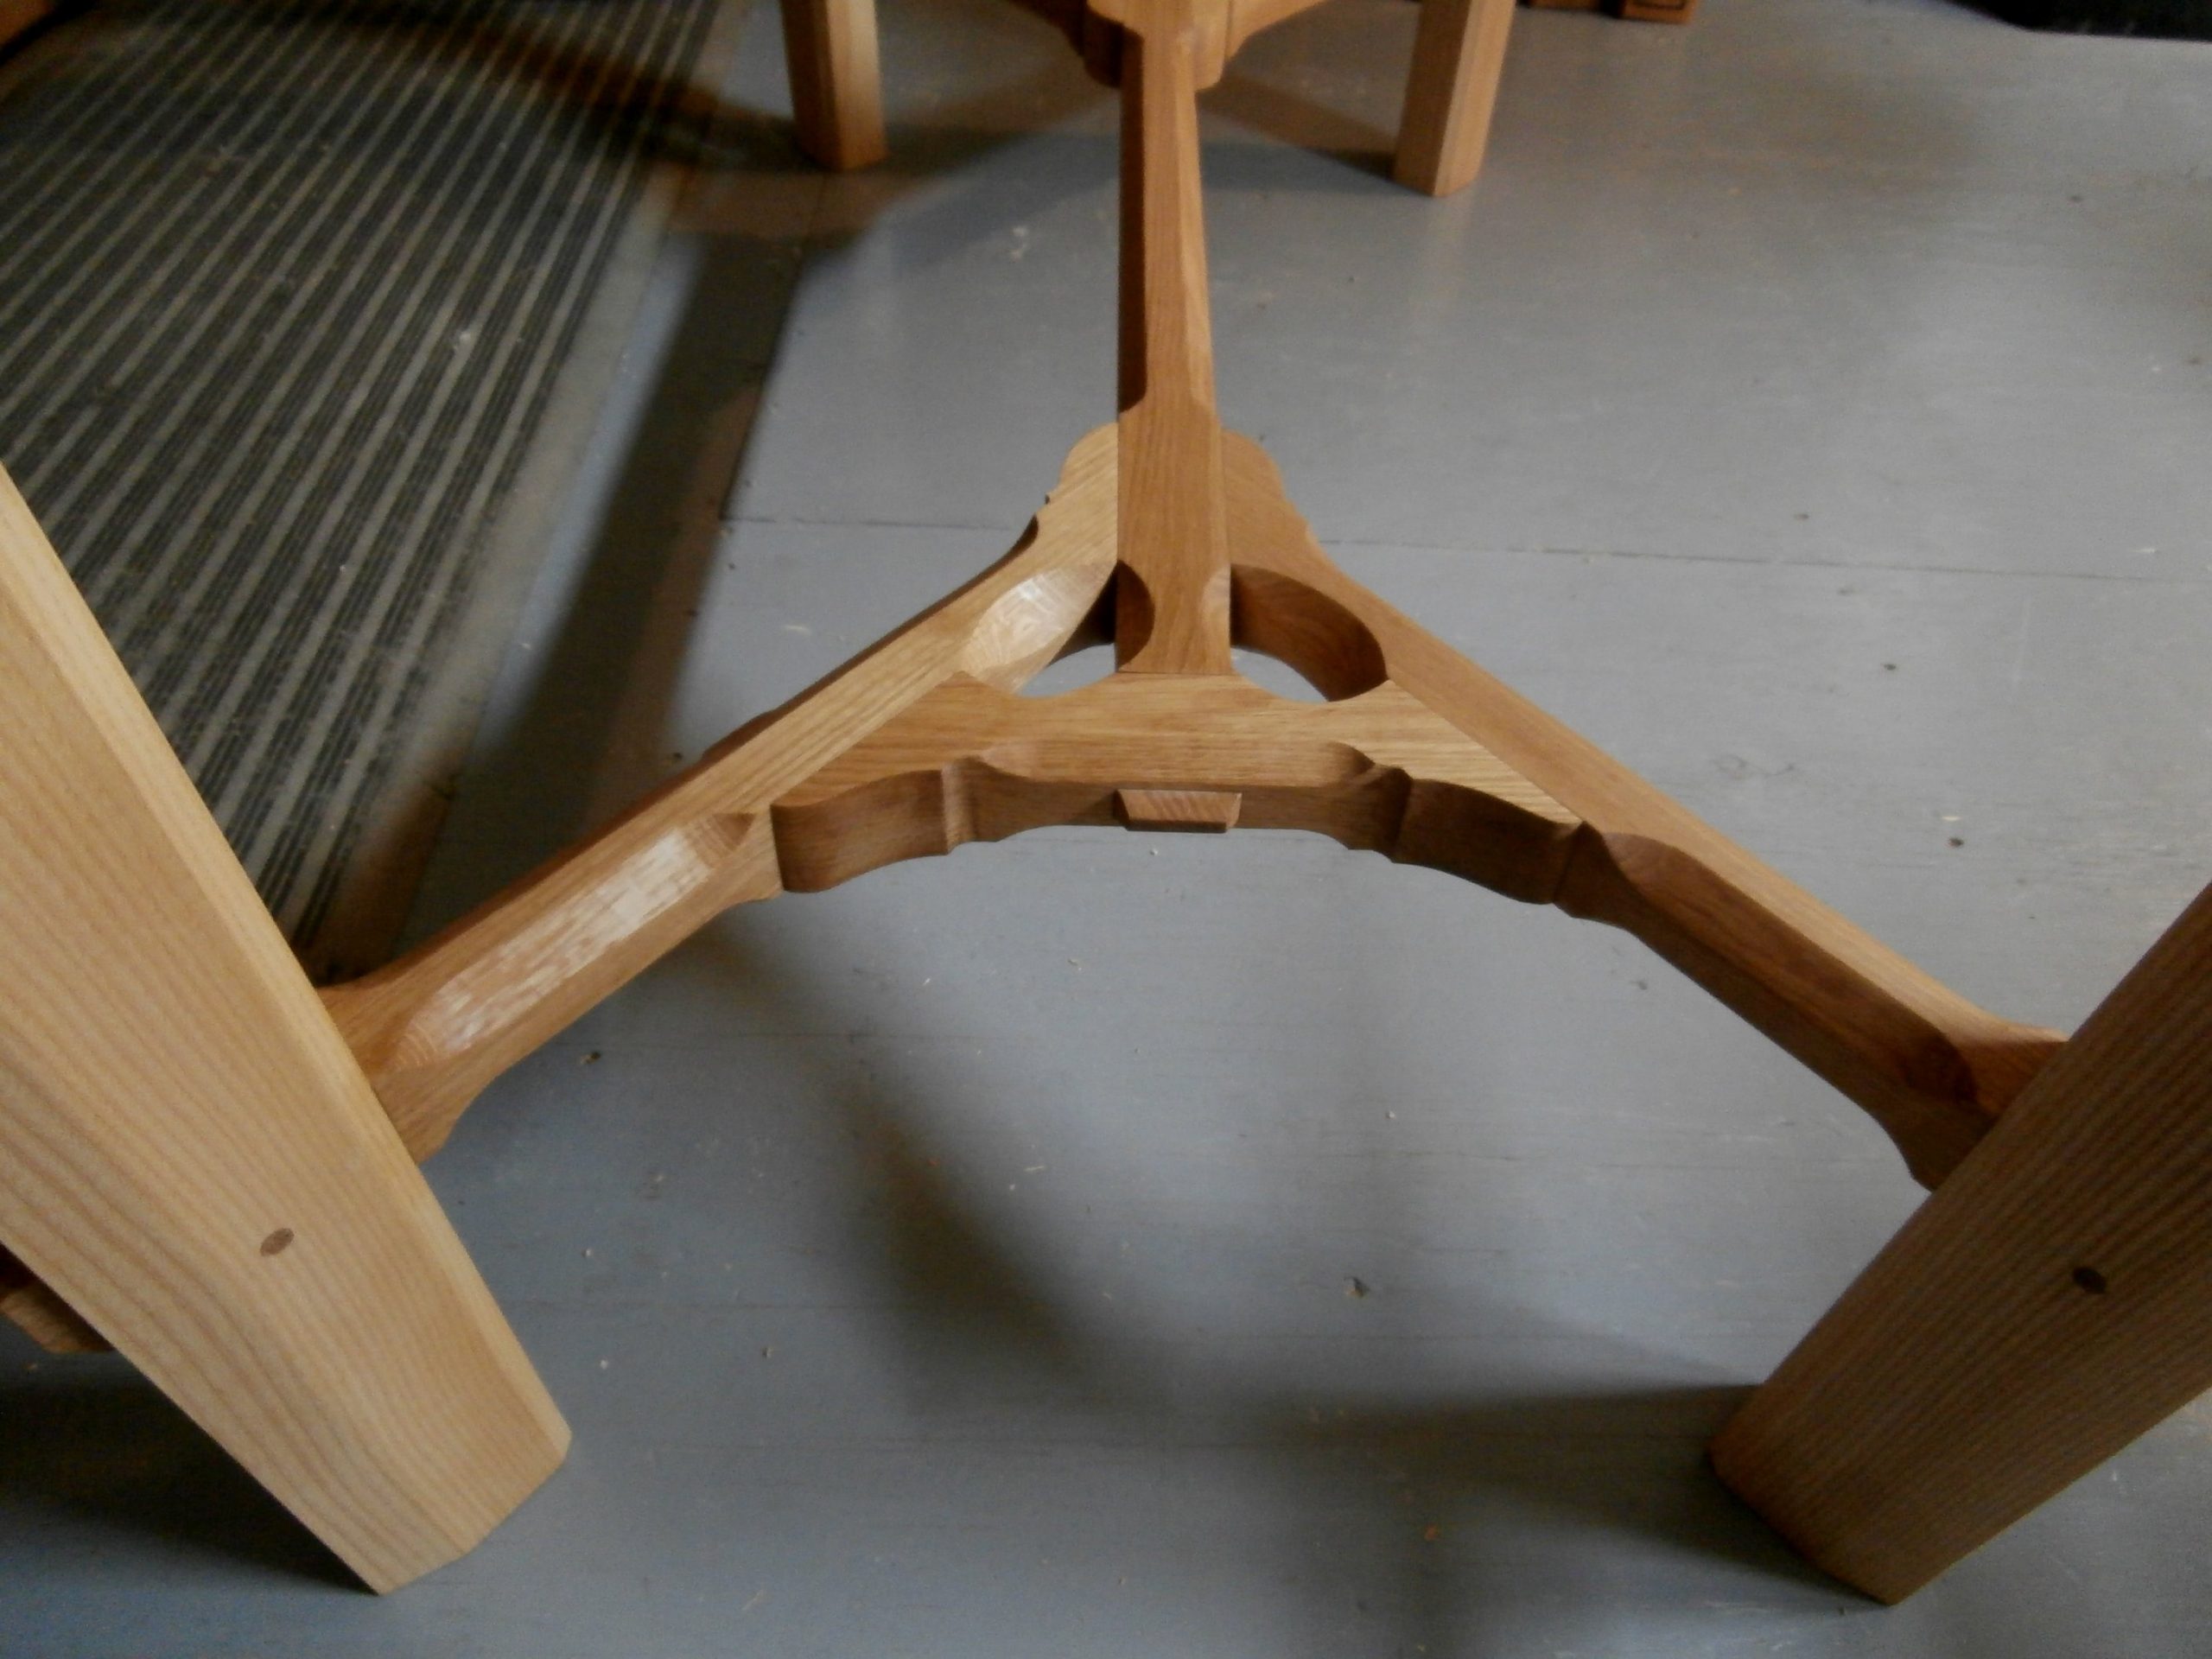
Assembled it looks like this.

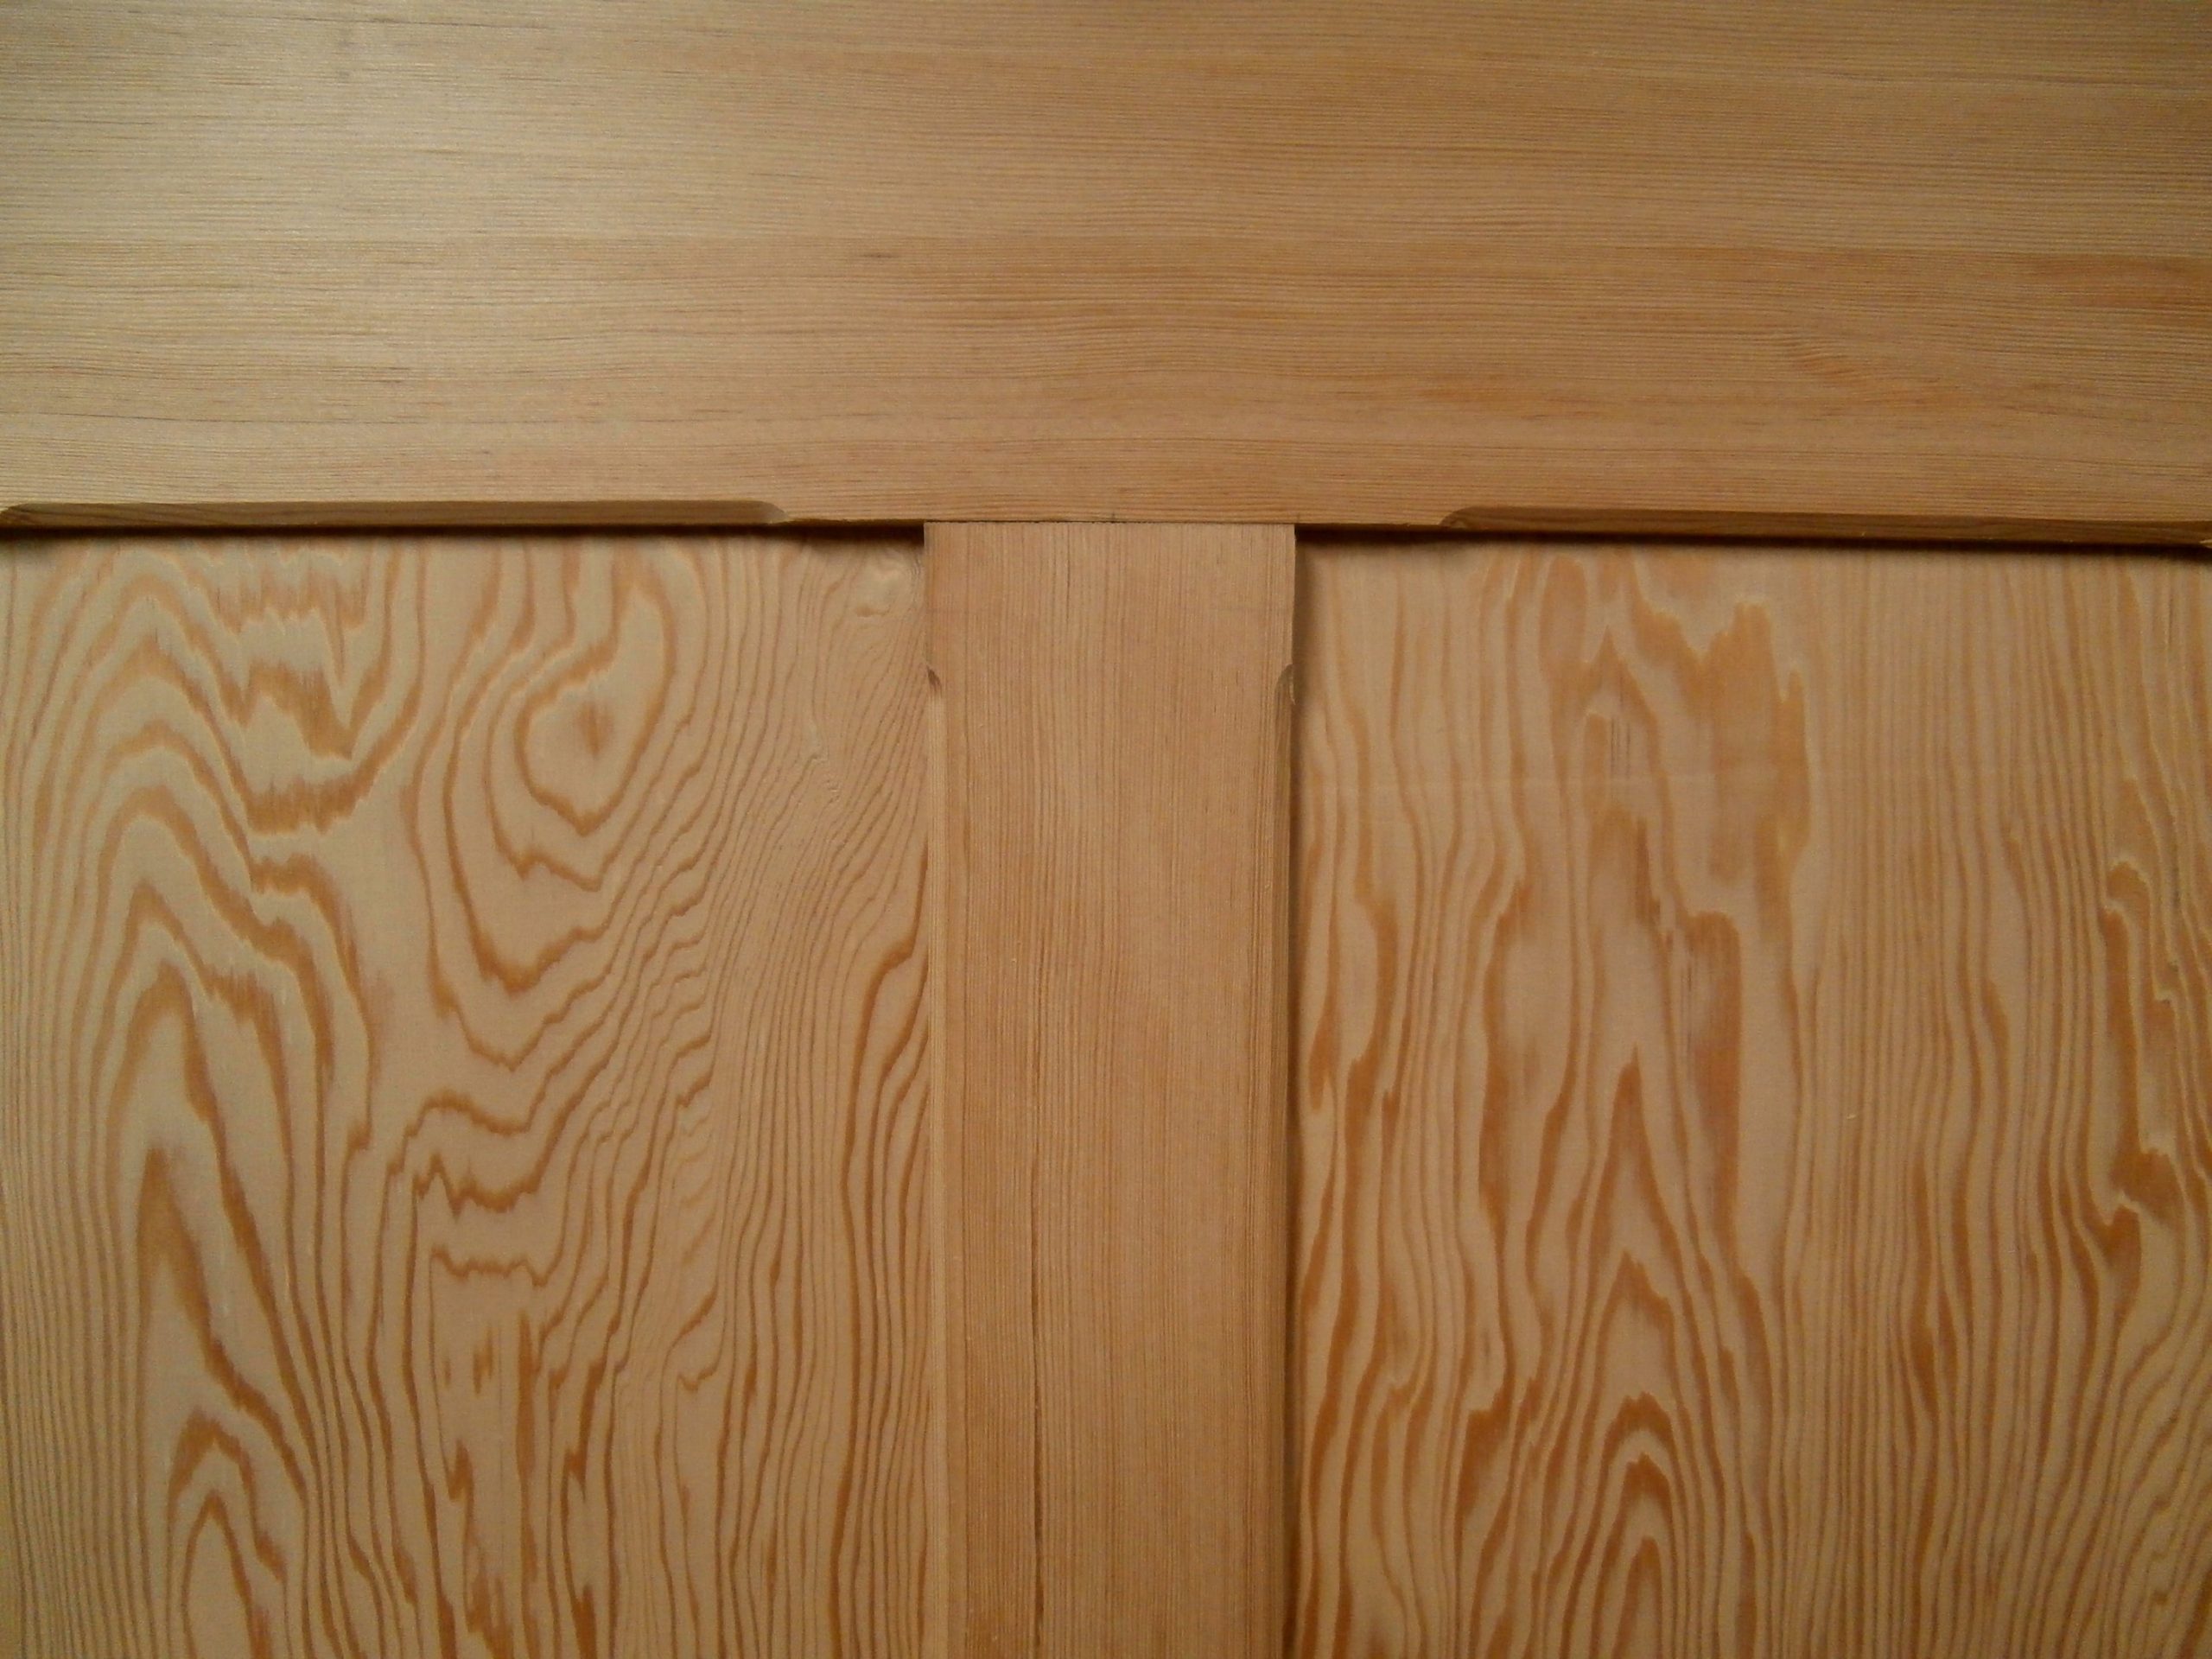
The dry fit stretcher assembly is then marked with the location of all chamfers.  The chamfers in the original hay rake do not compromise the strength of the rake, but they decrease the weight the farmer has to lift and pull for hours on end.  In the table, weight is not a concern but the chamfers add immeasurably to the aesthetic appeal of the stretcher.

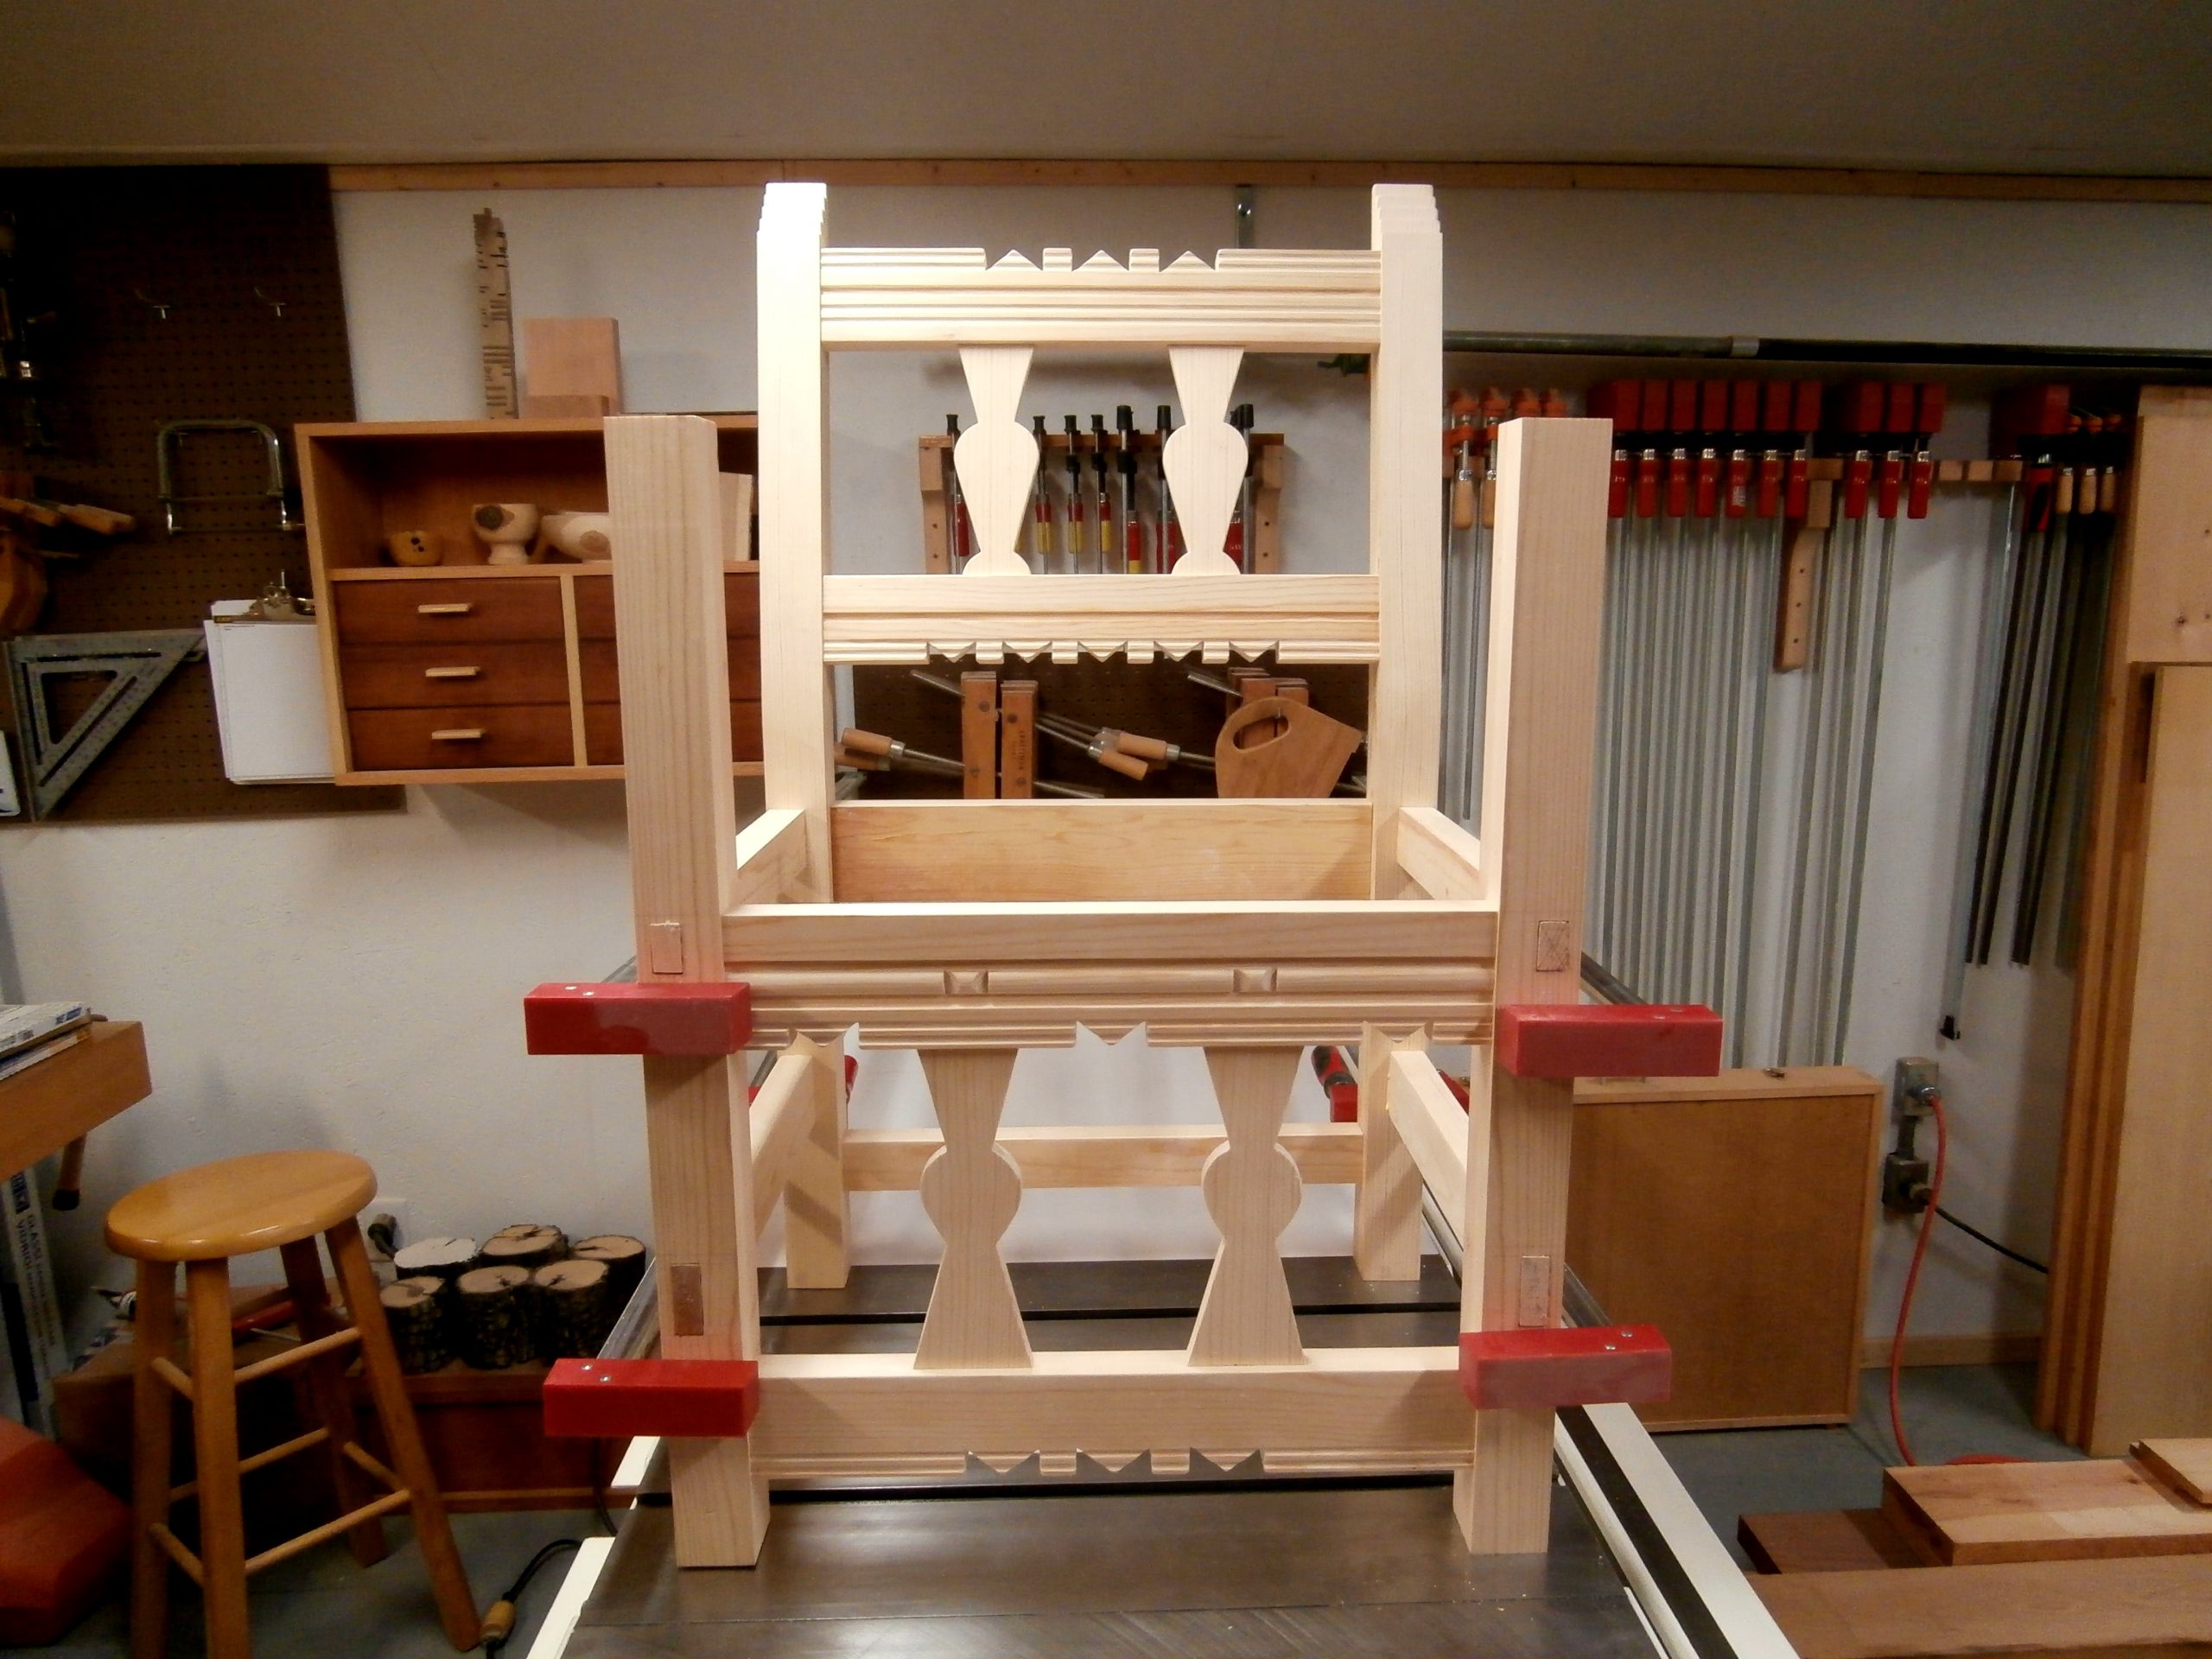
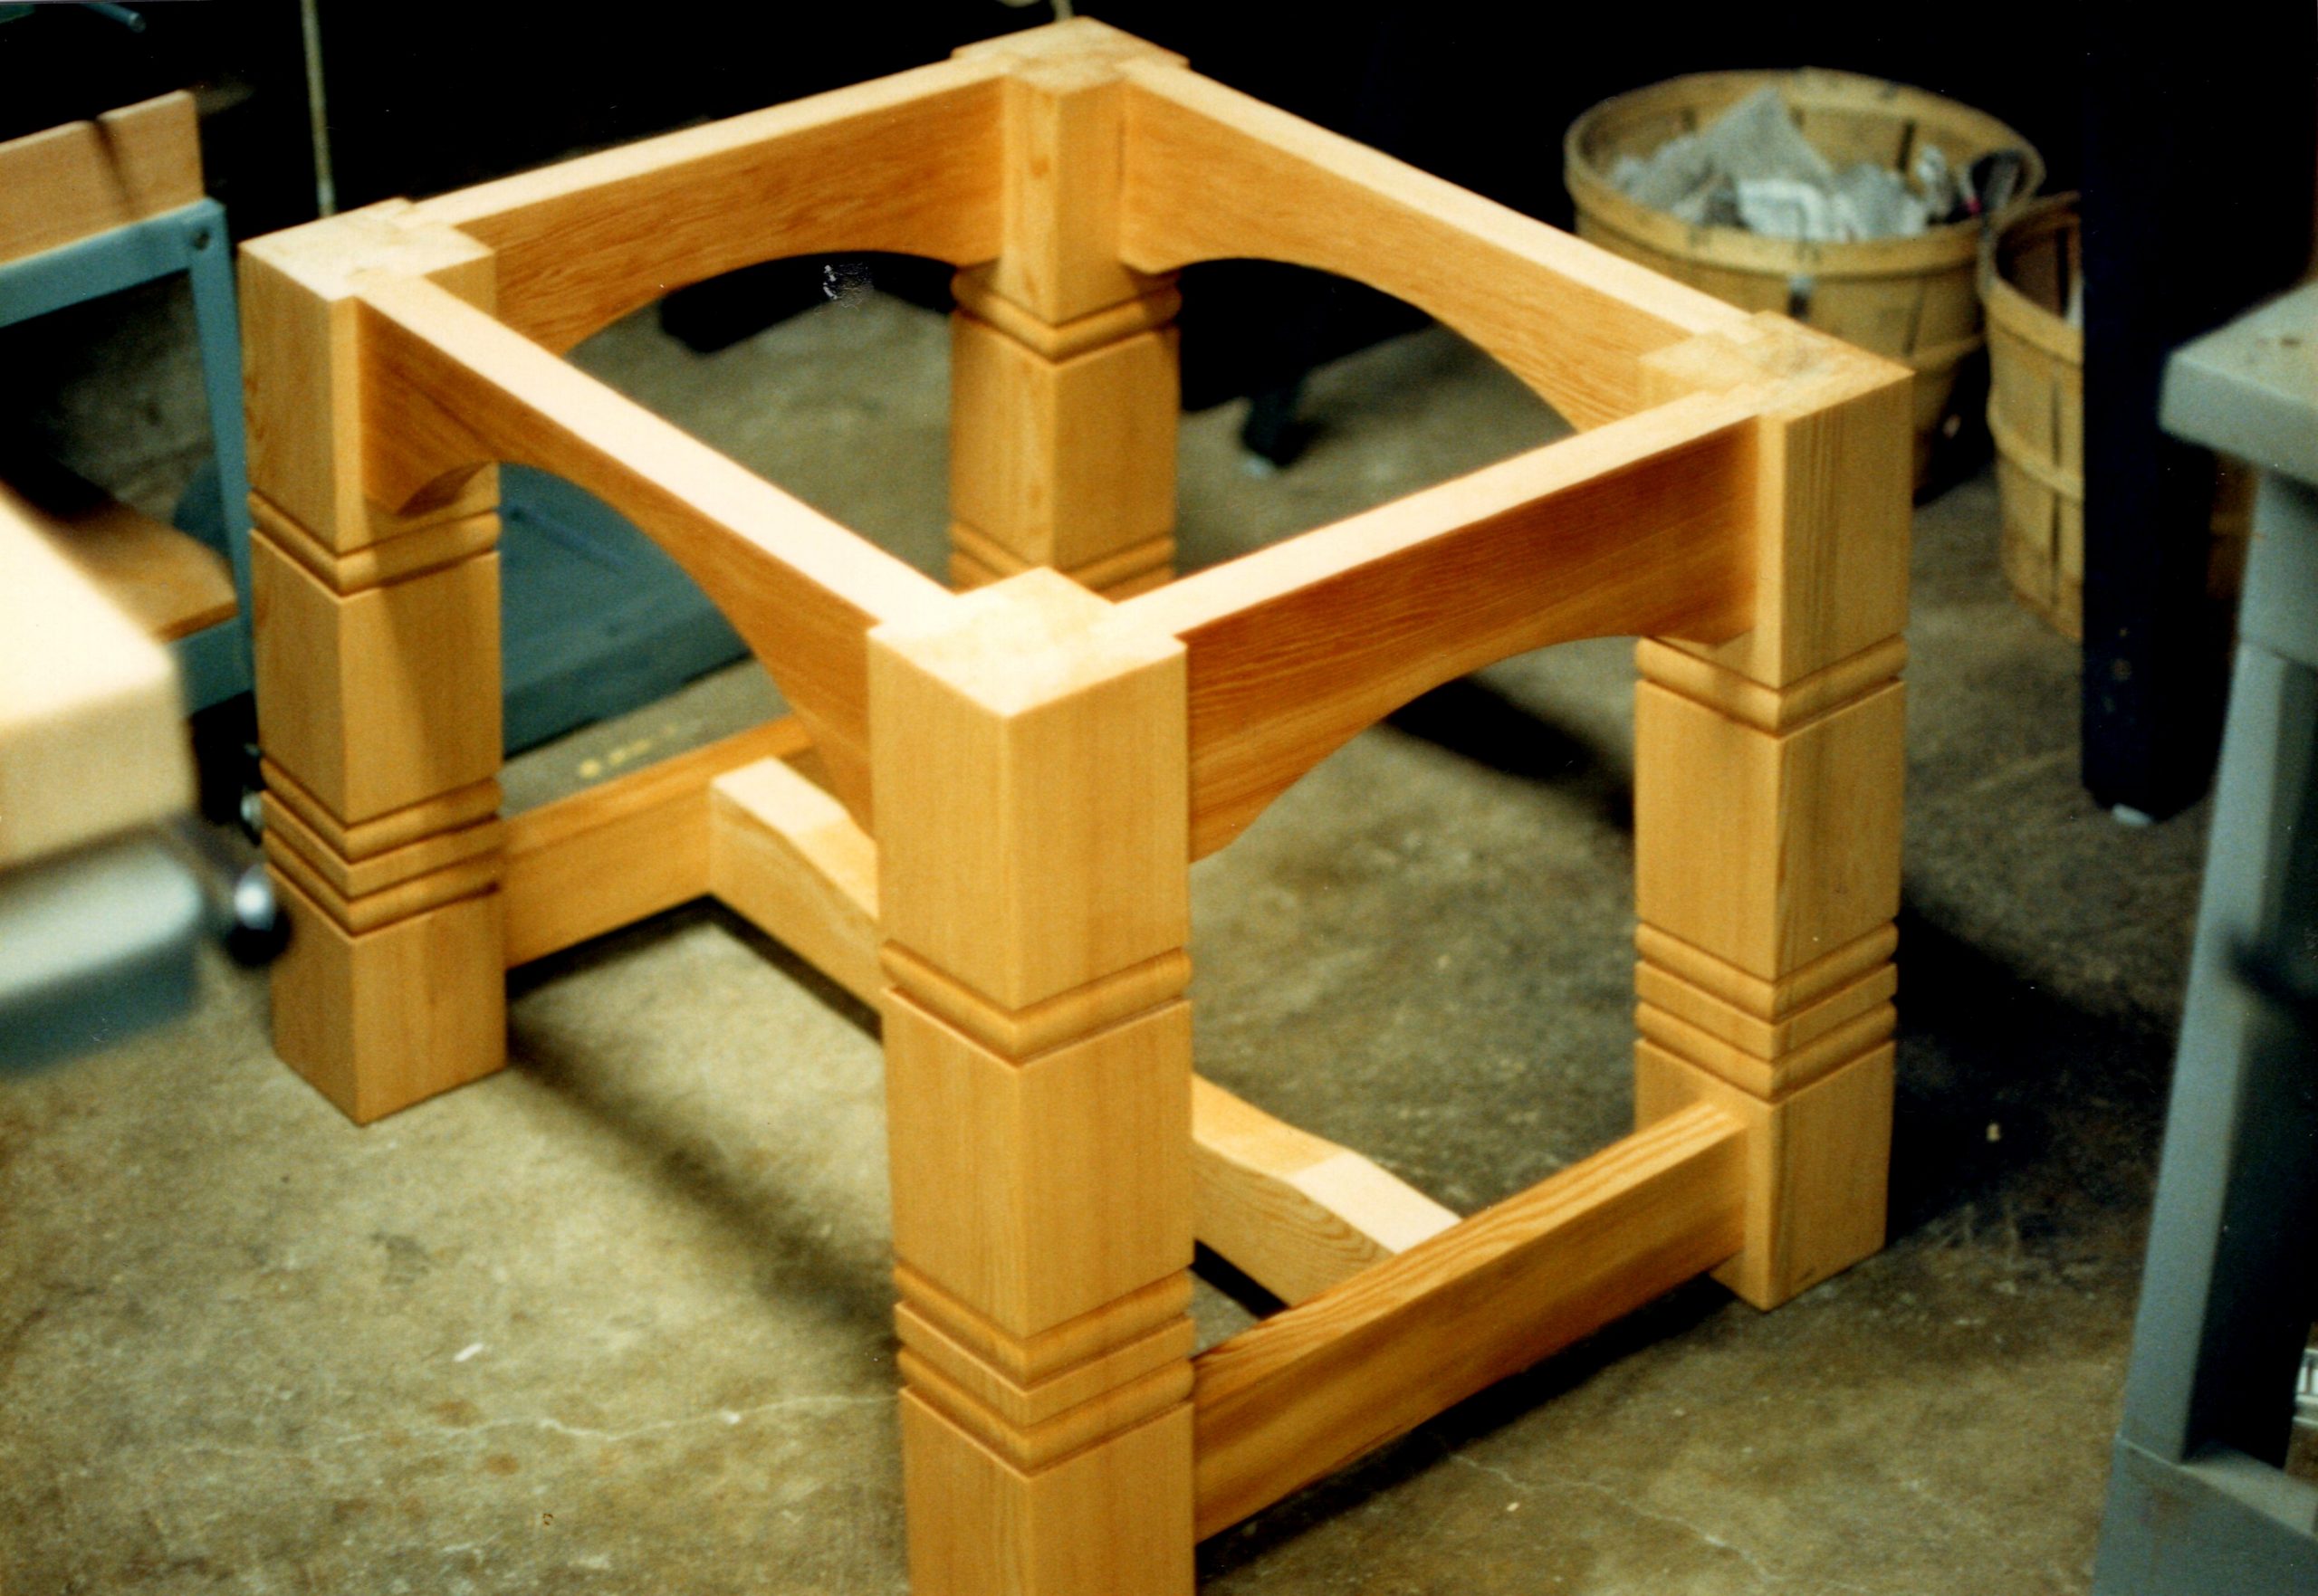
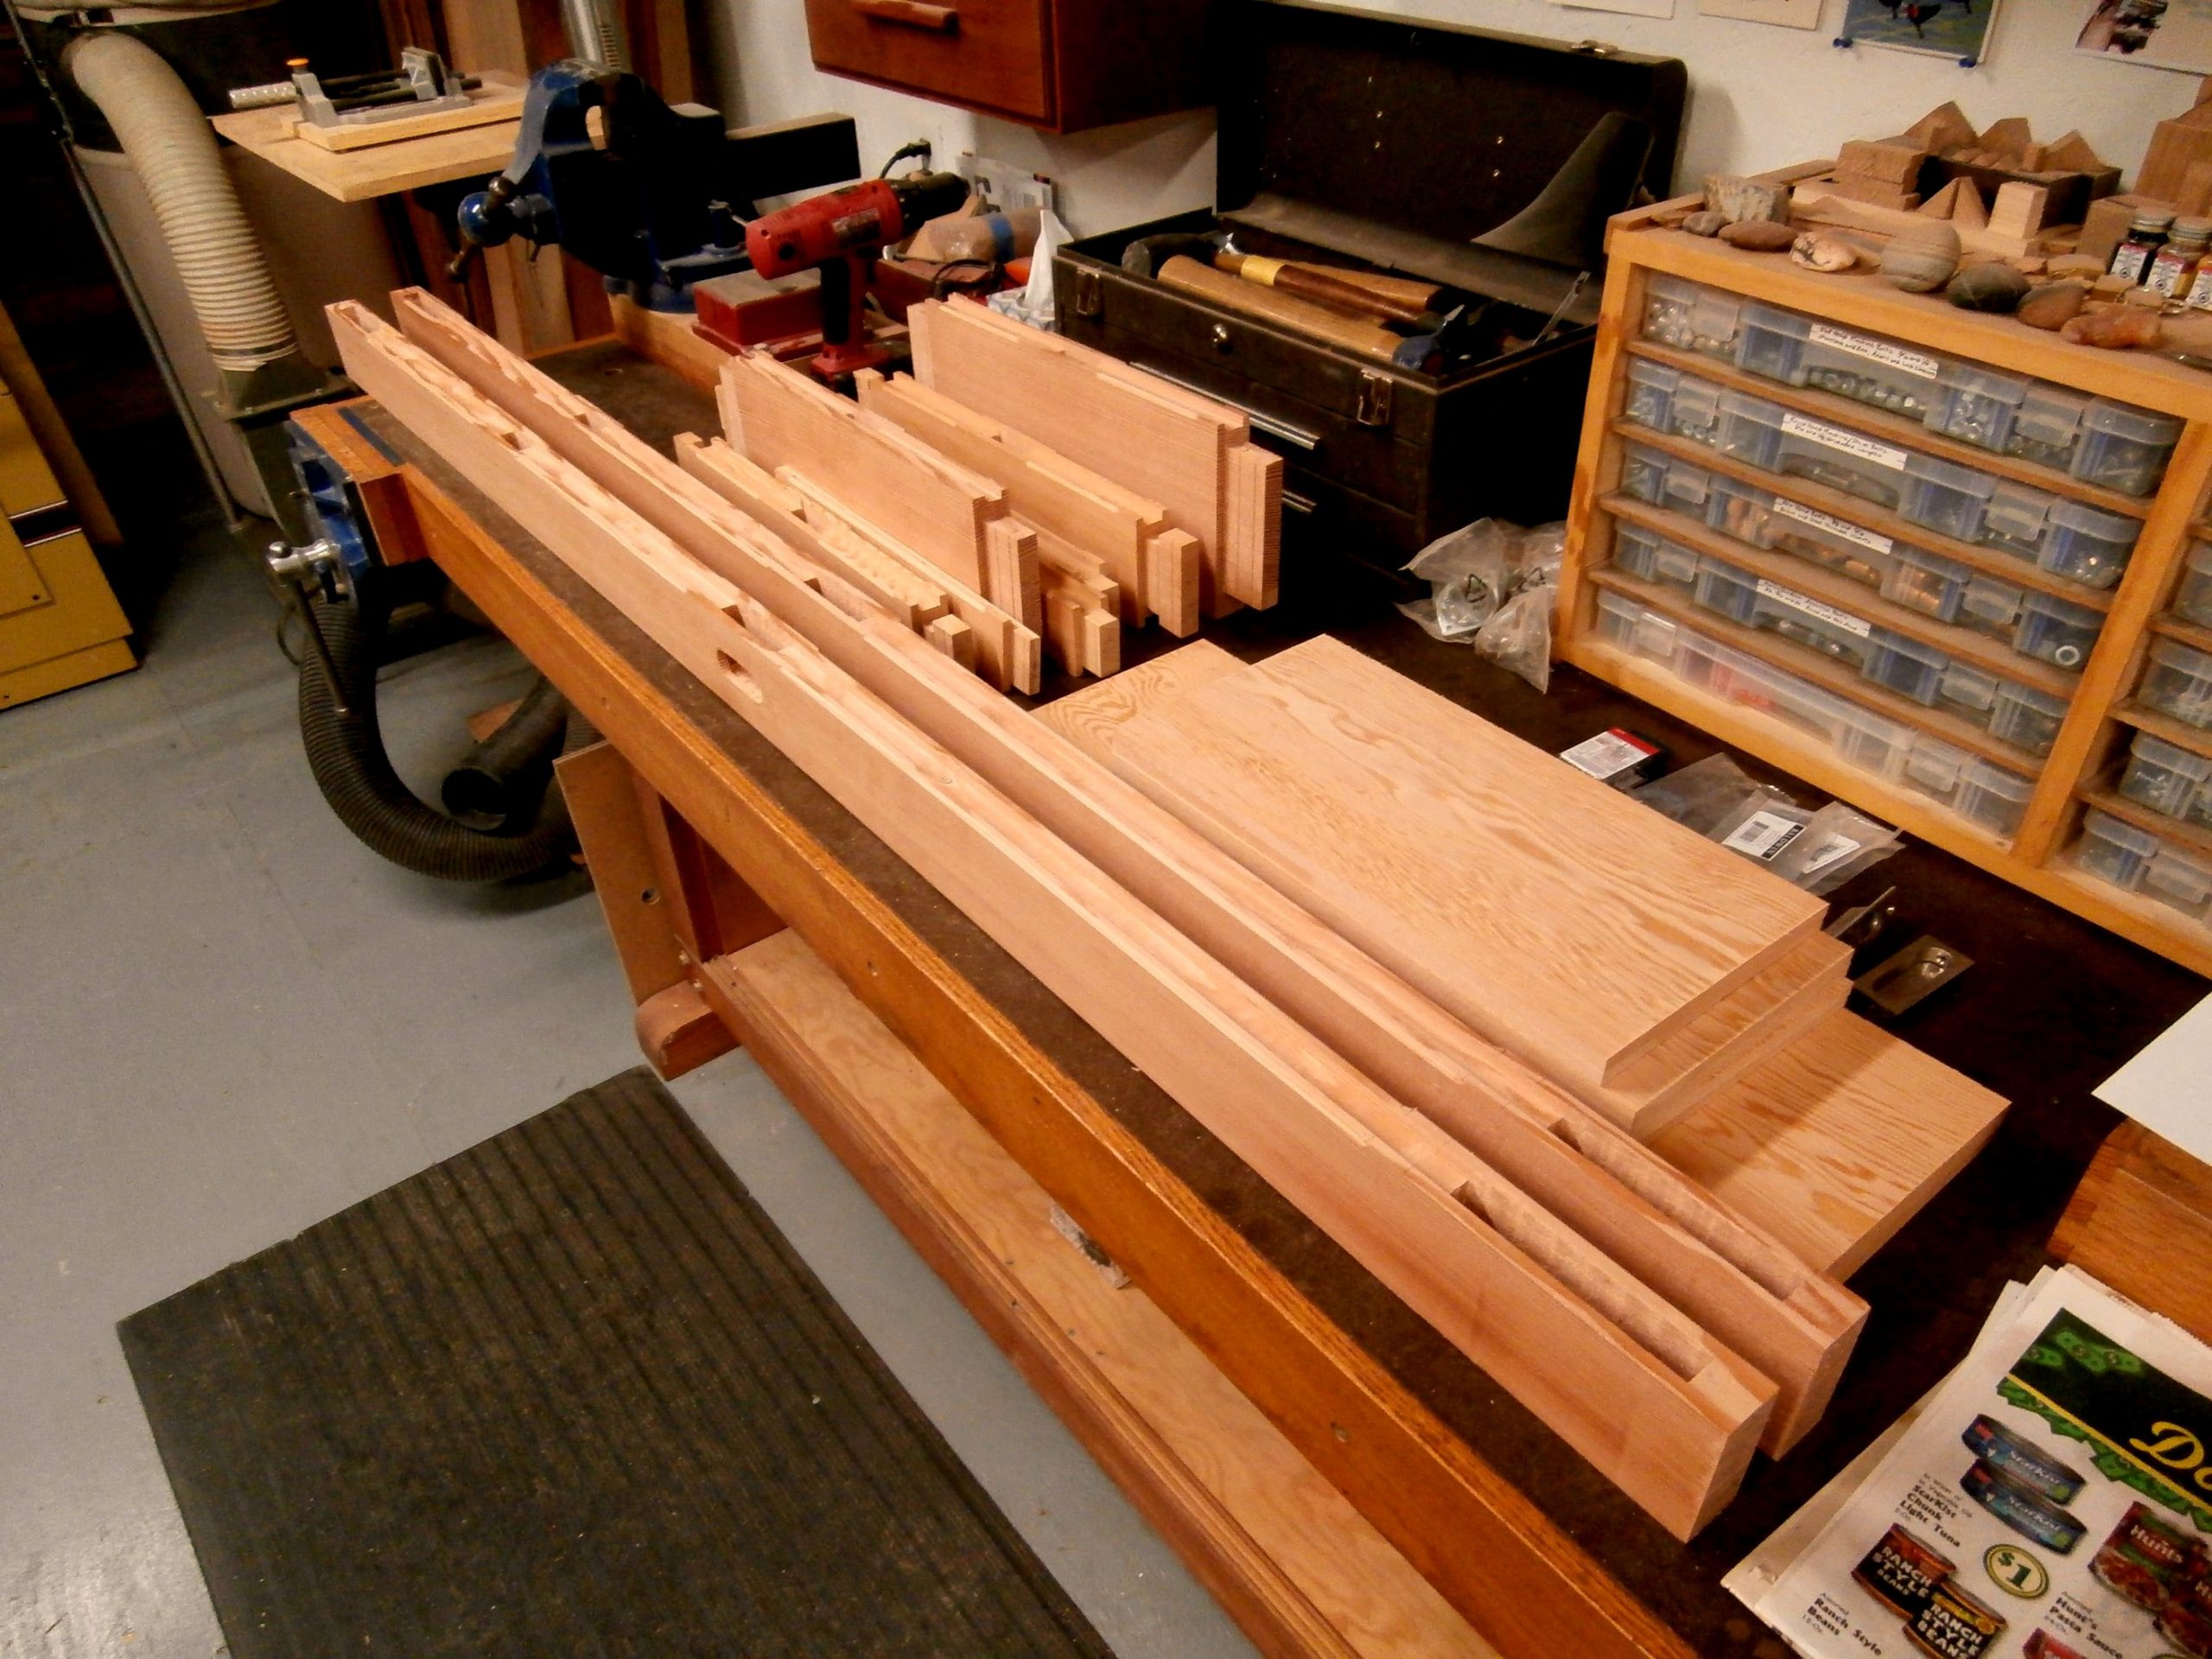
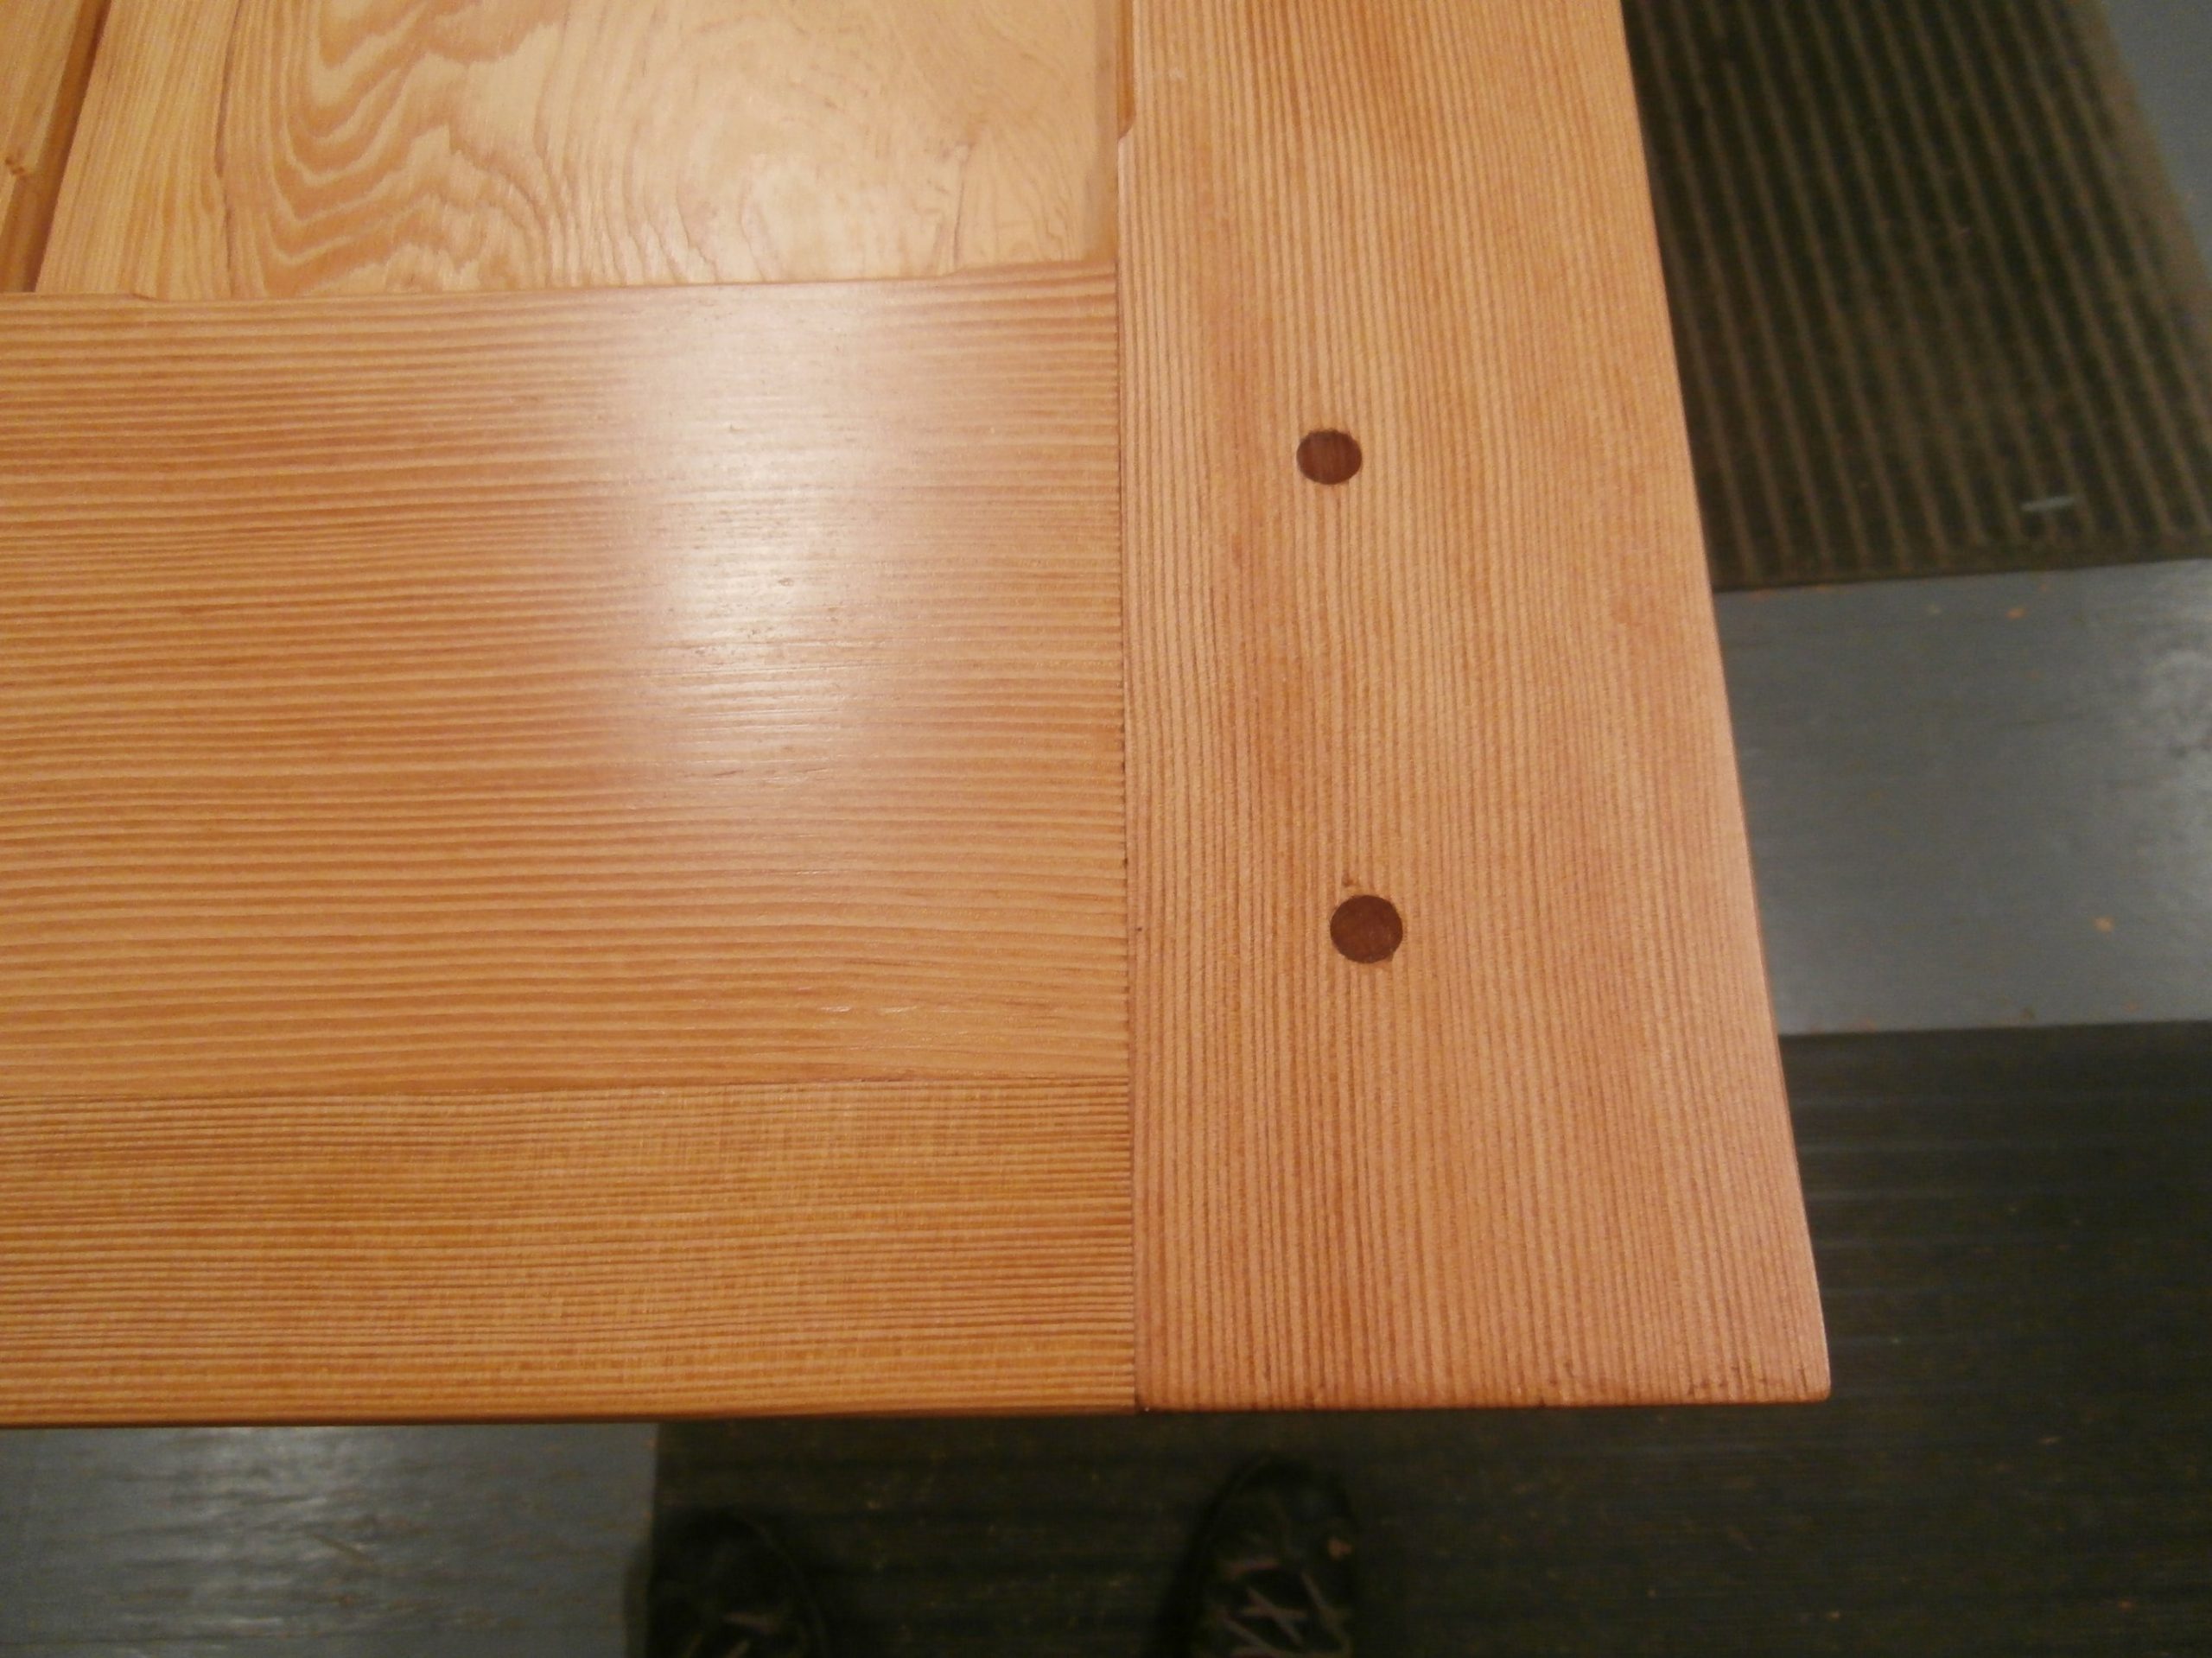
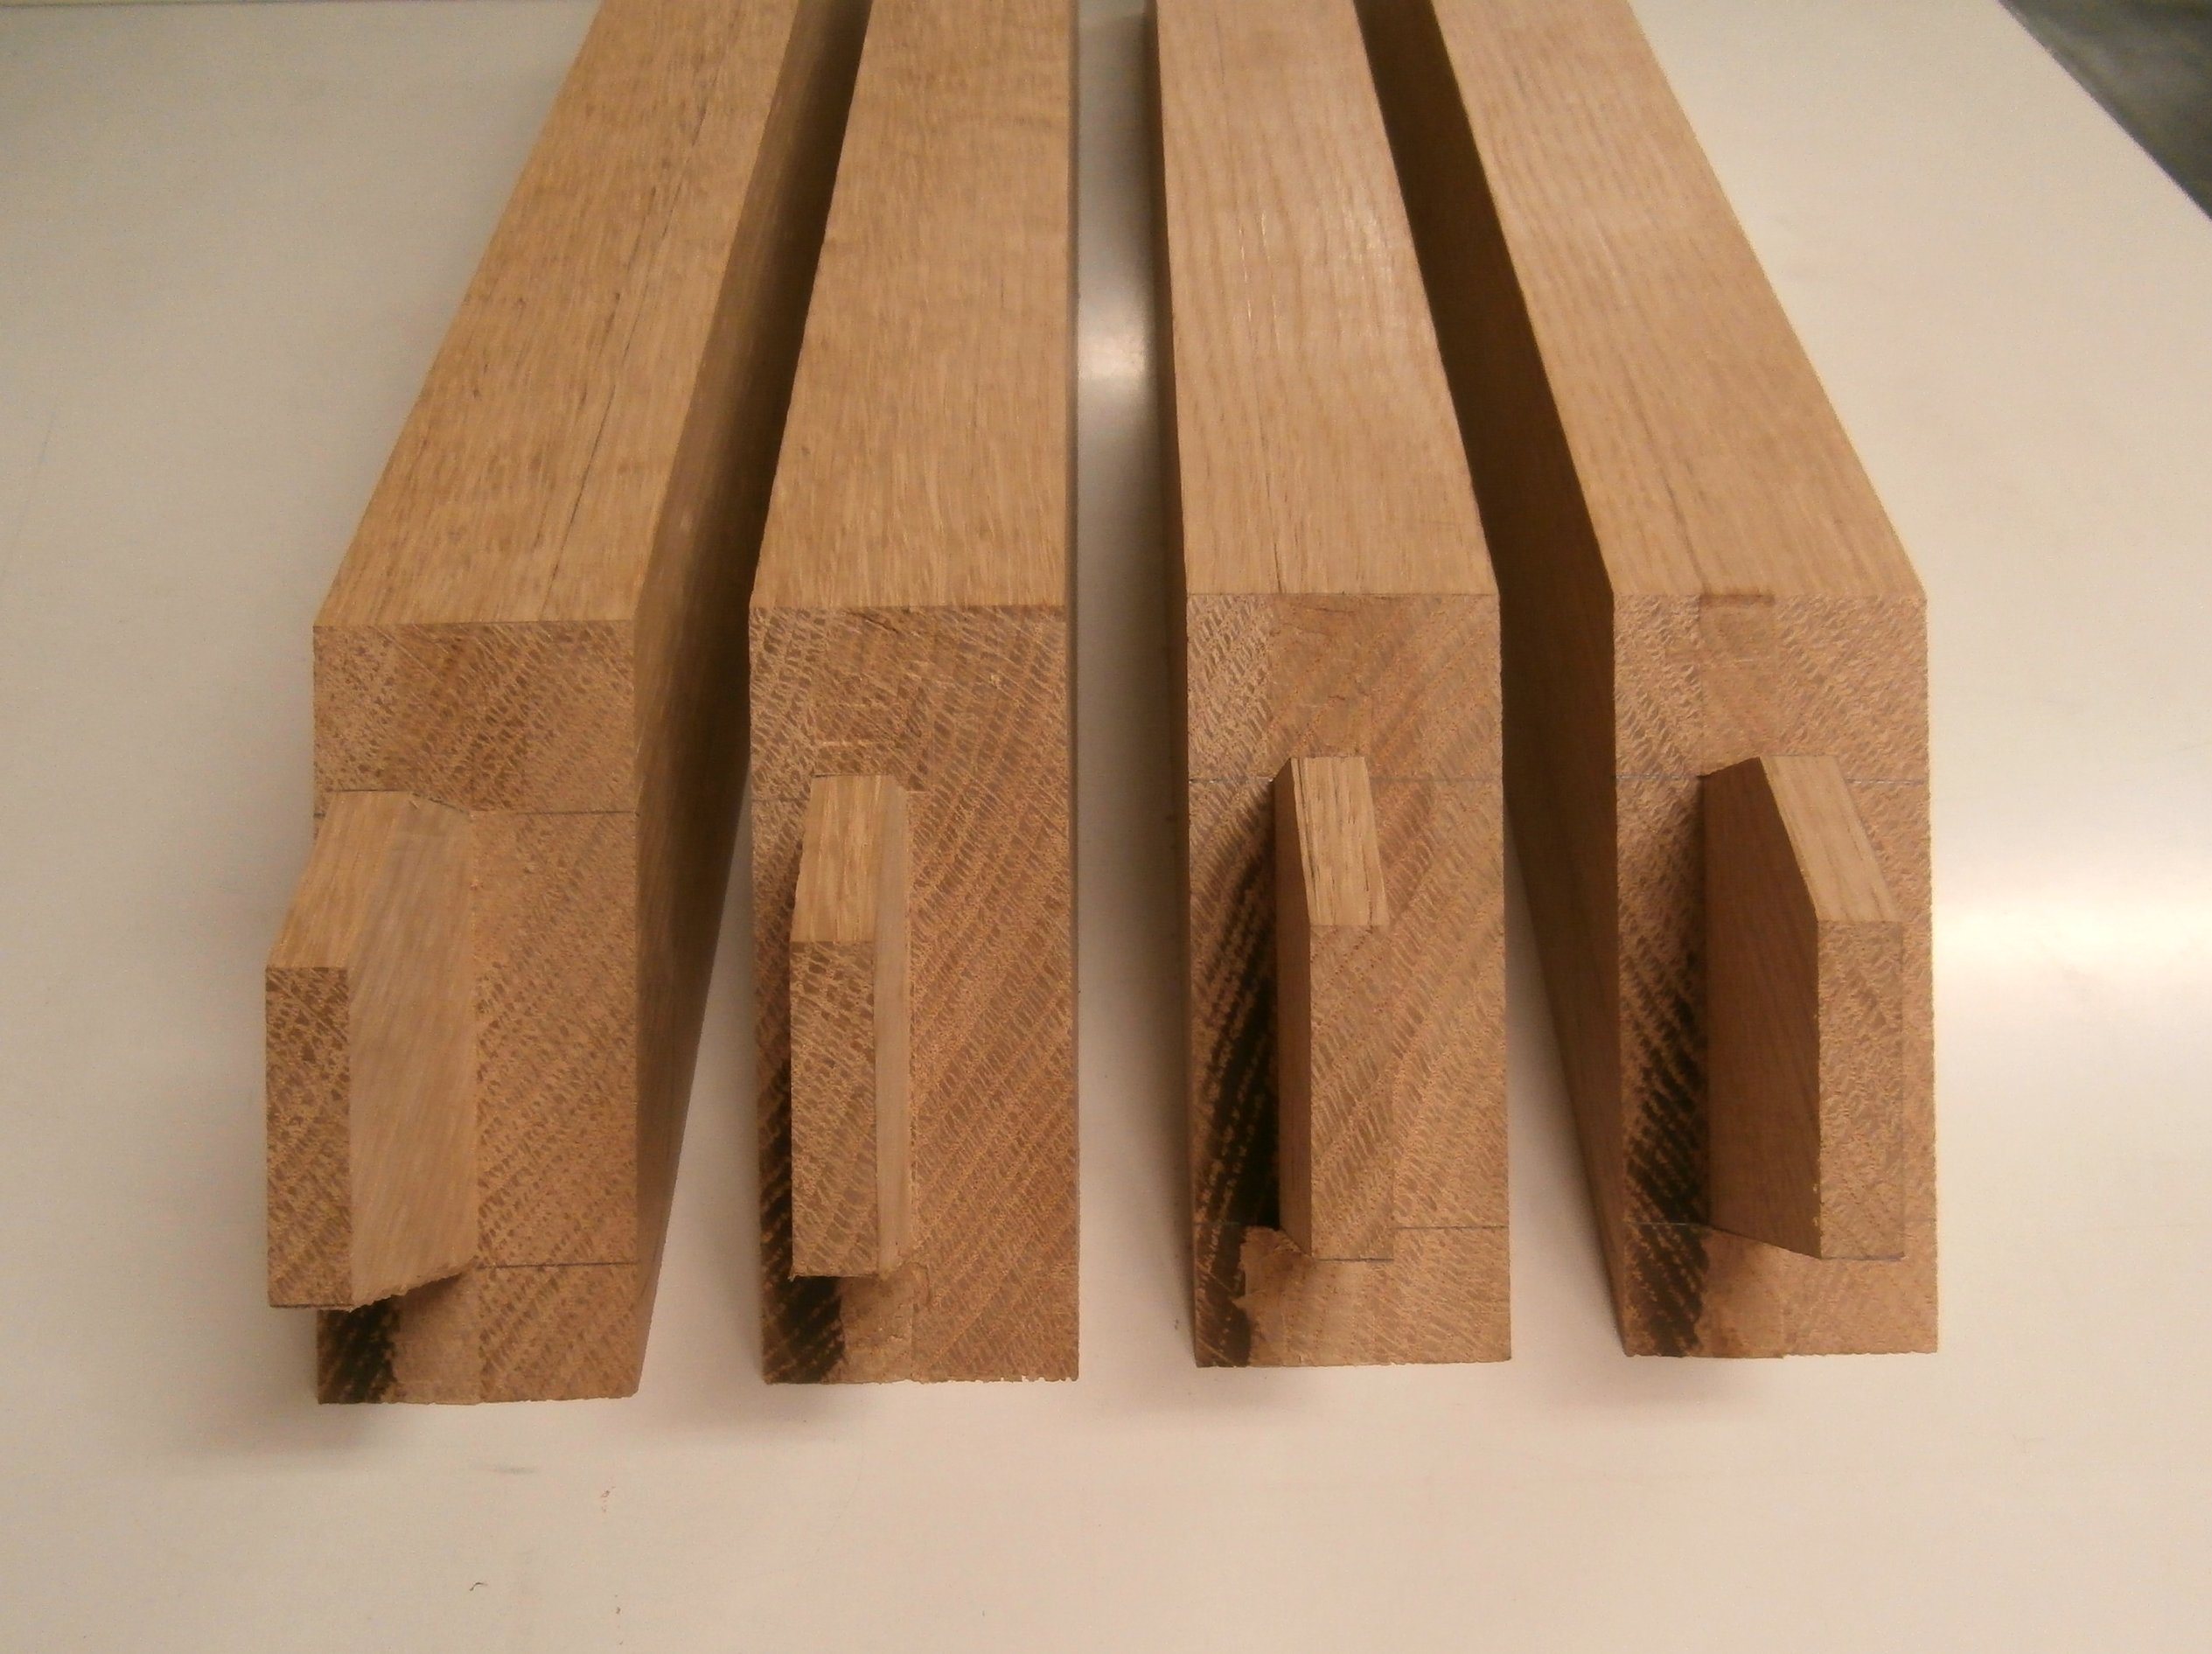
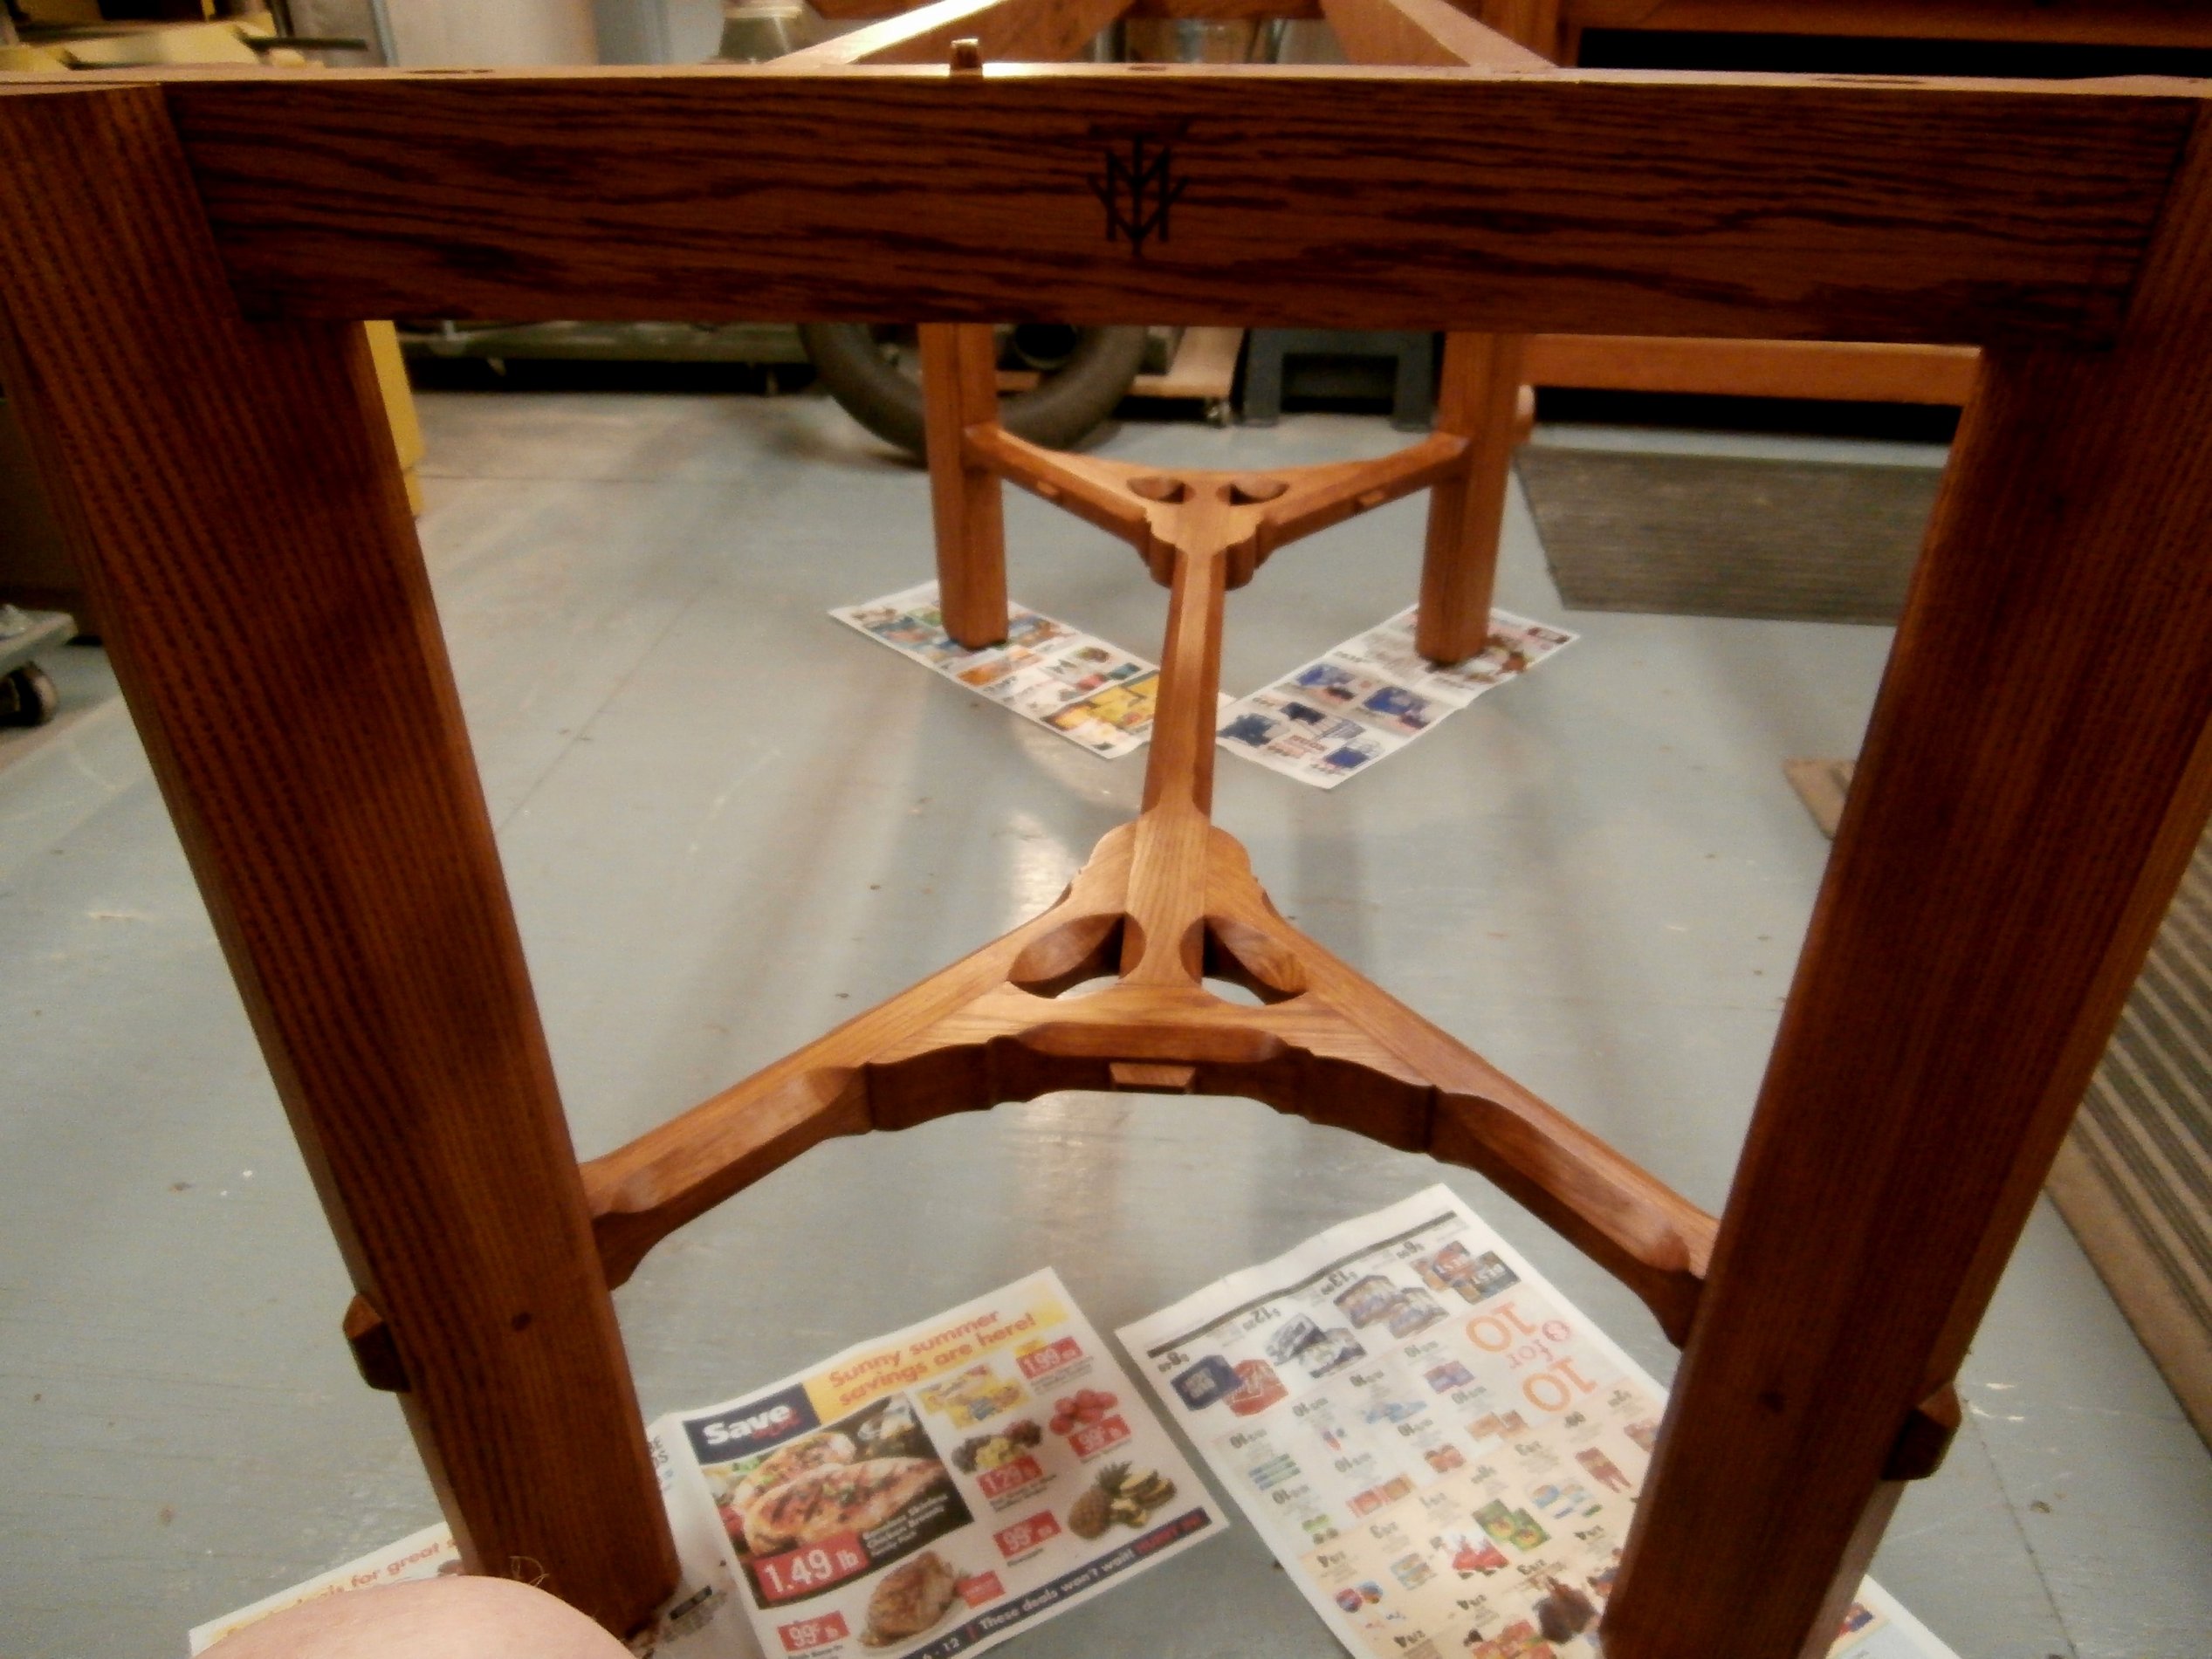
See below the full stretcher and leg set ready to go and then assembled.  Barnsley chose to have the pegs that lock the tenons in their respective mortises visible from above.  I put the pegs in from below so they do not show and therefore do not distract from the flow of the joinery.

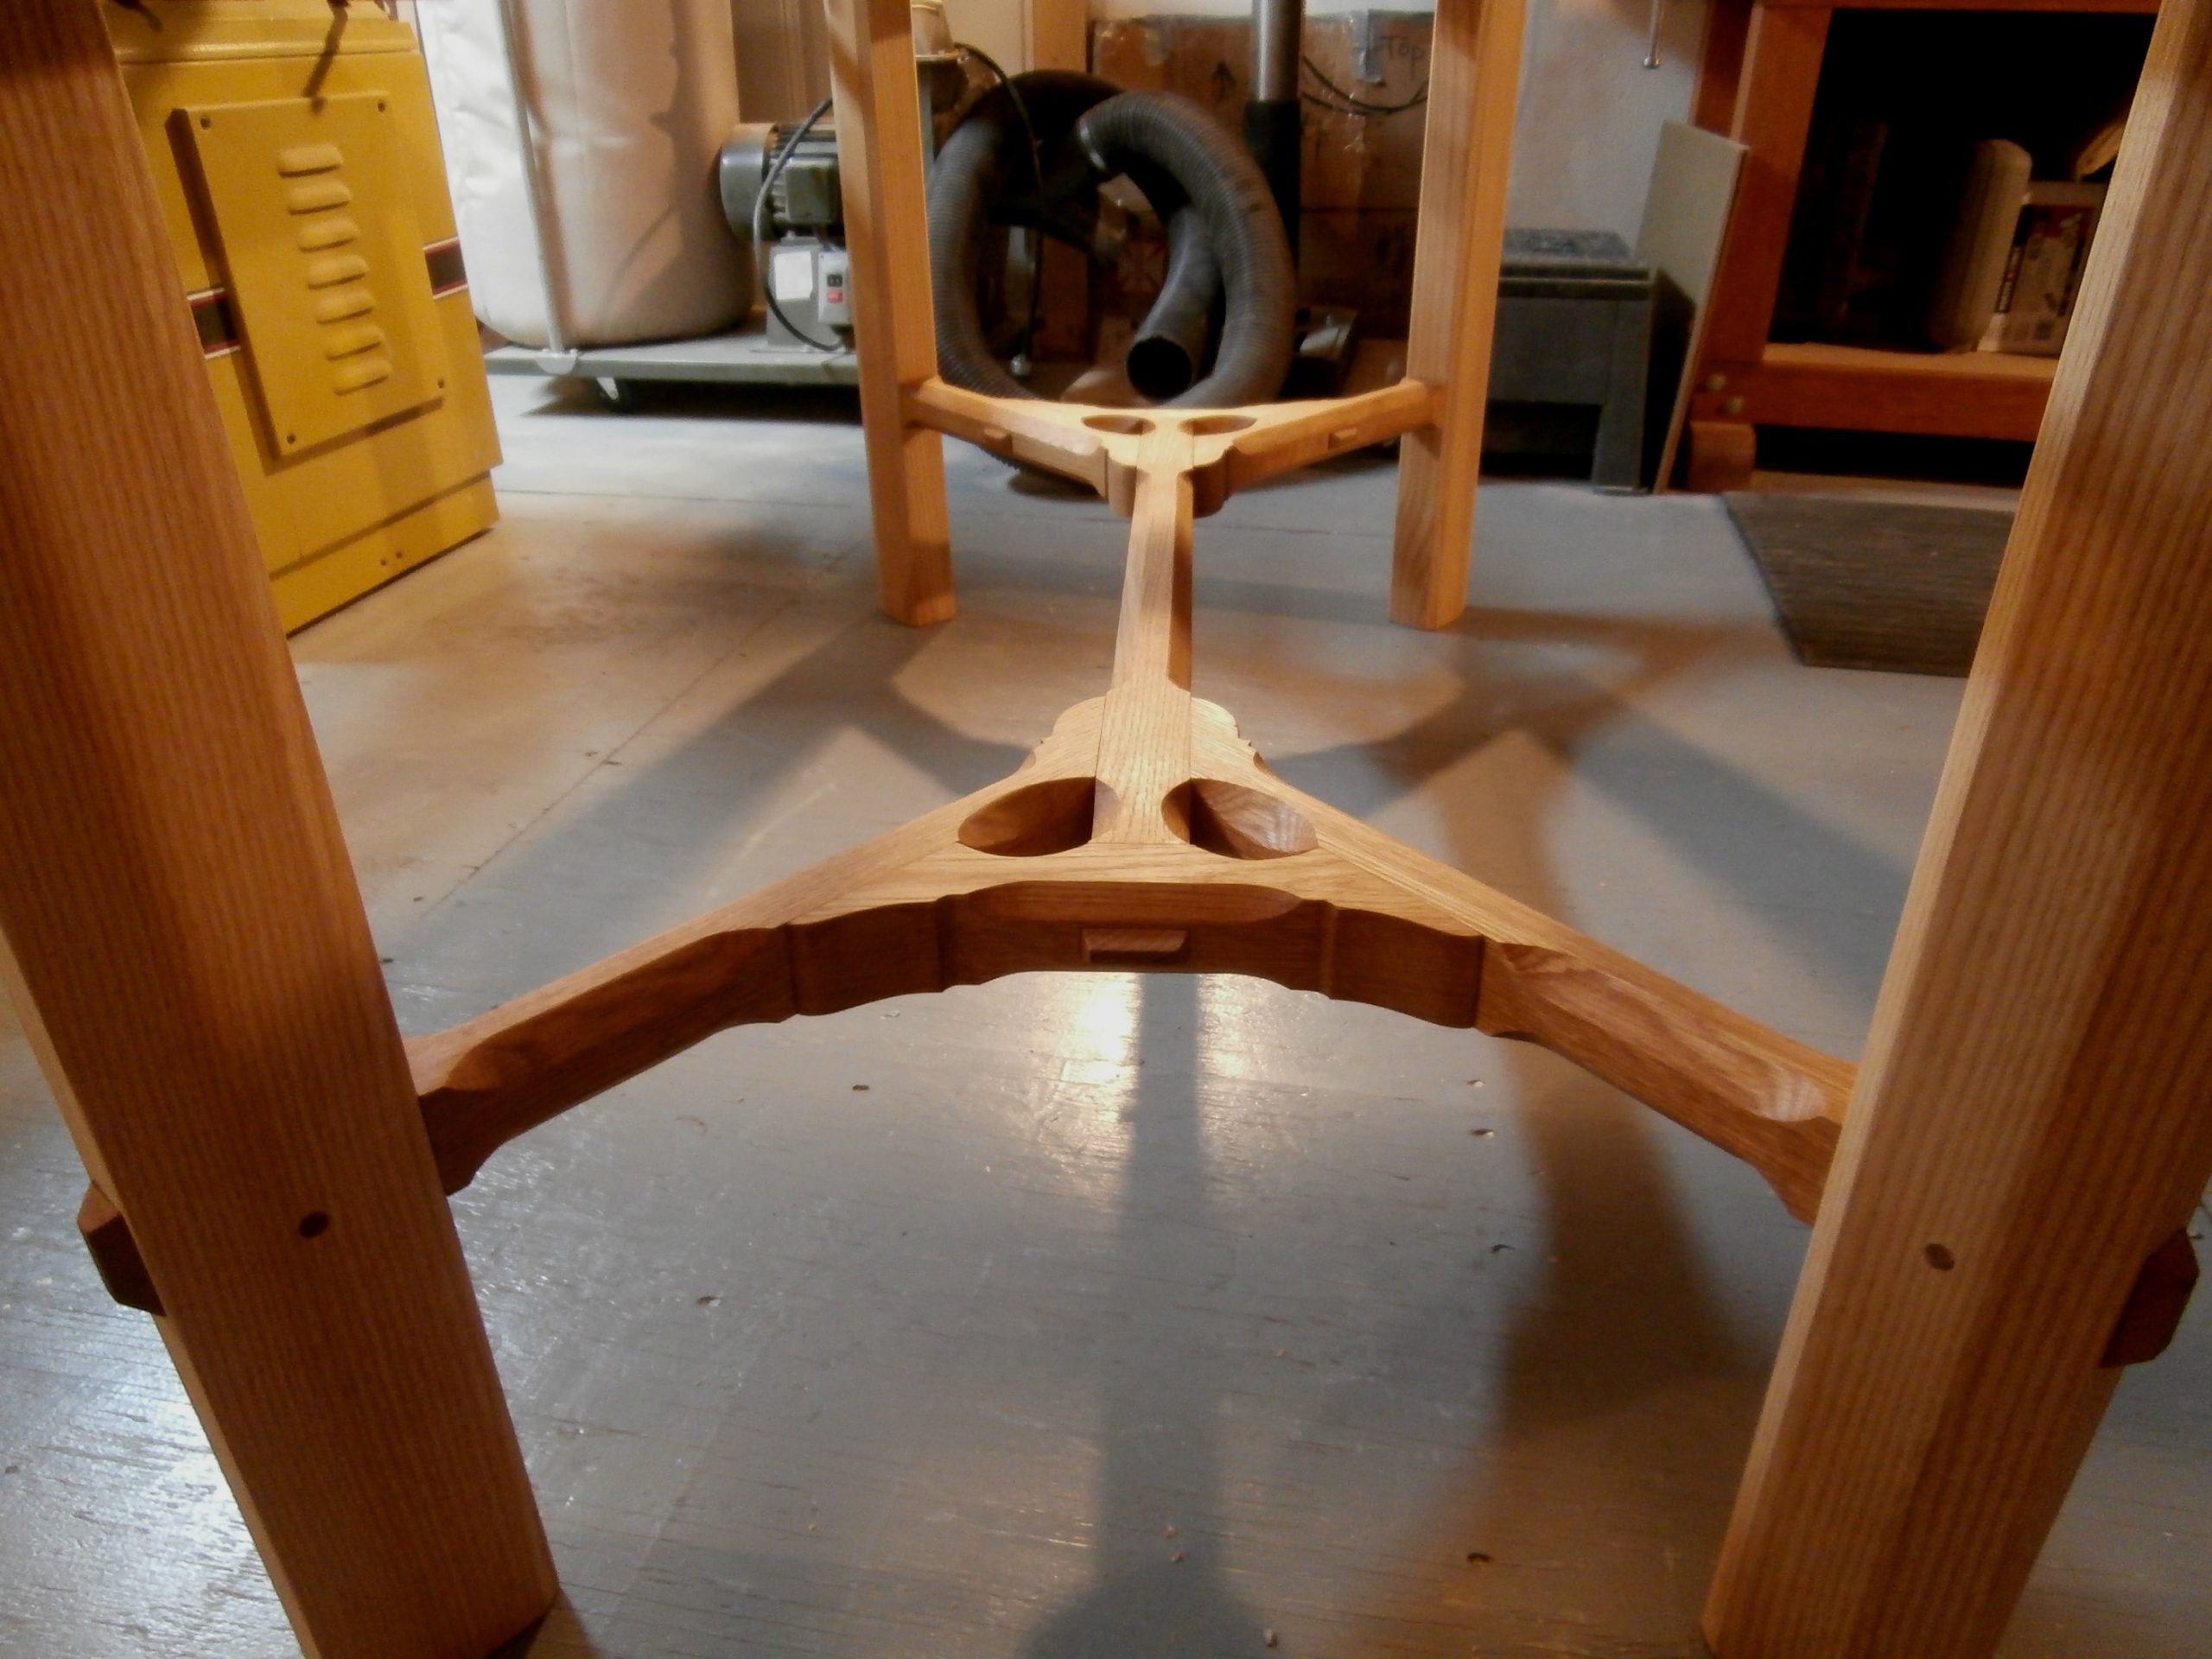
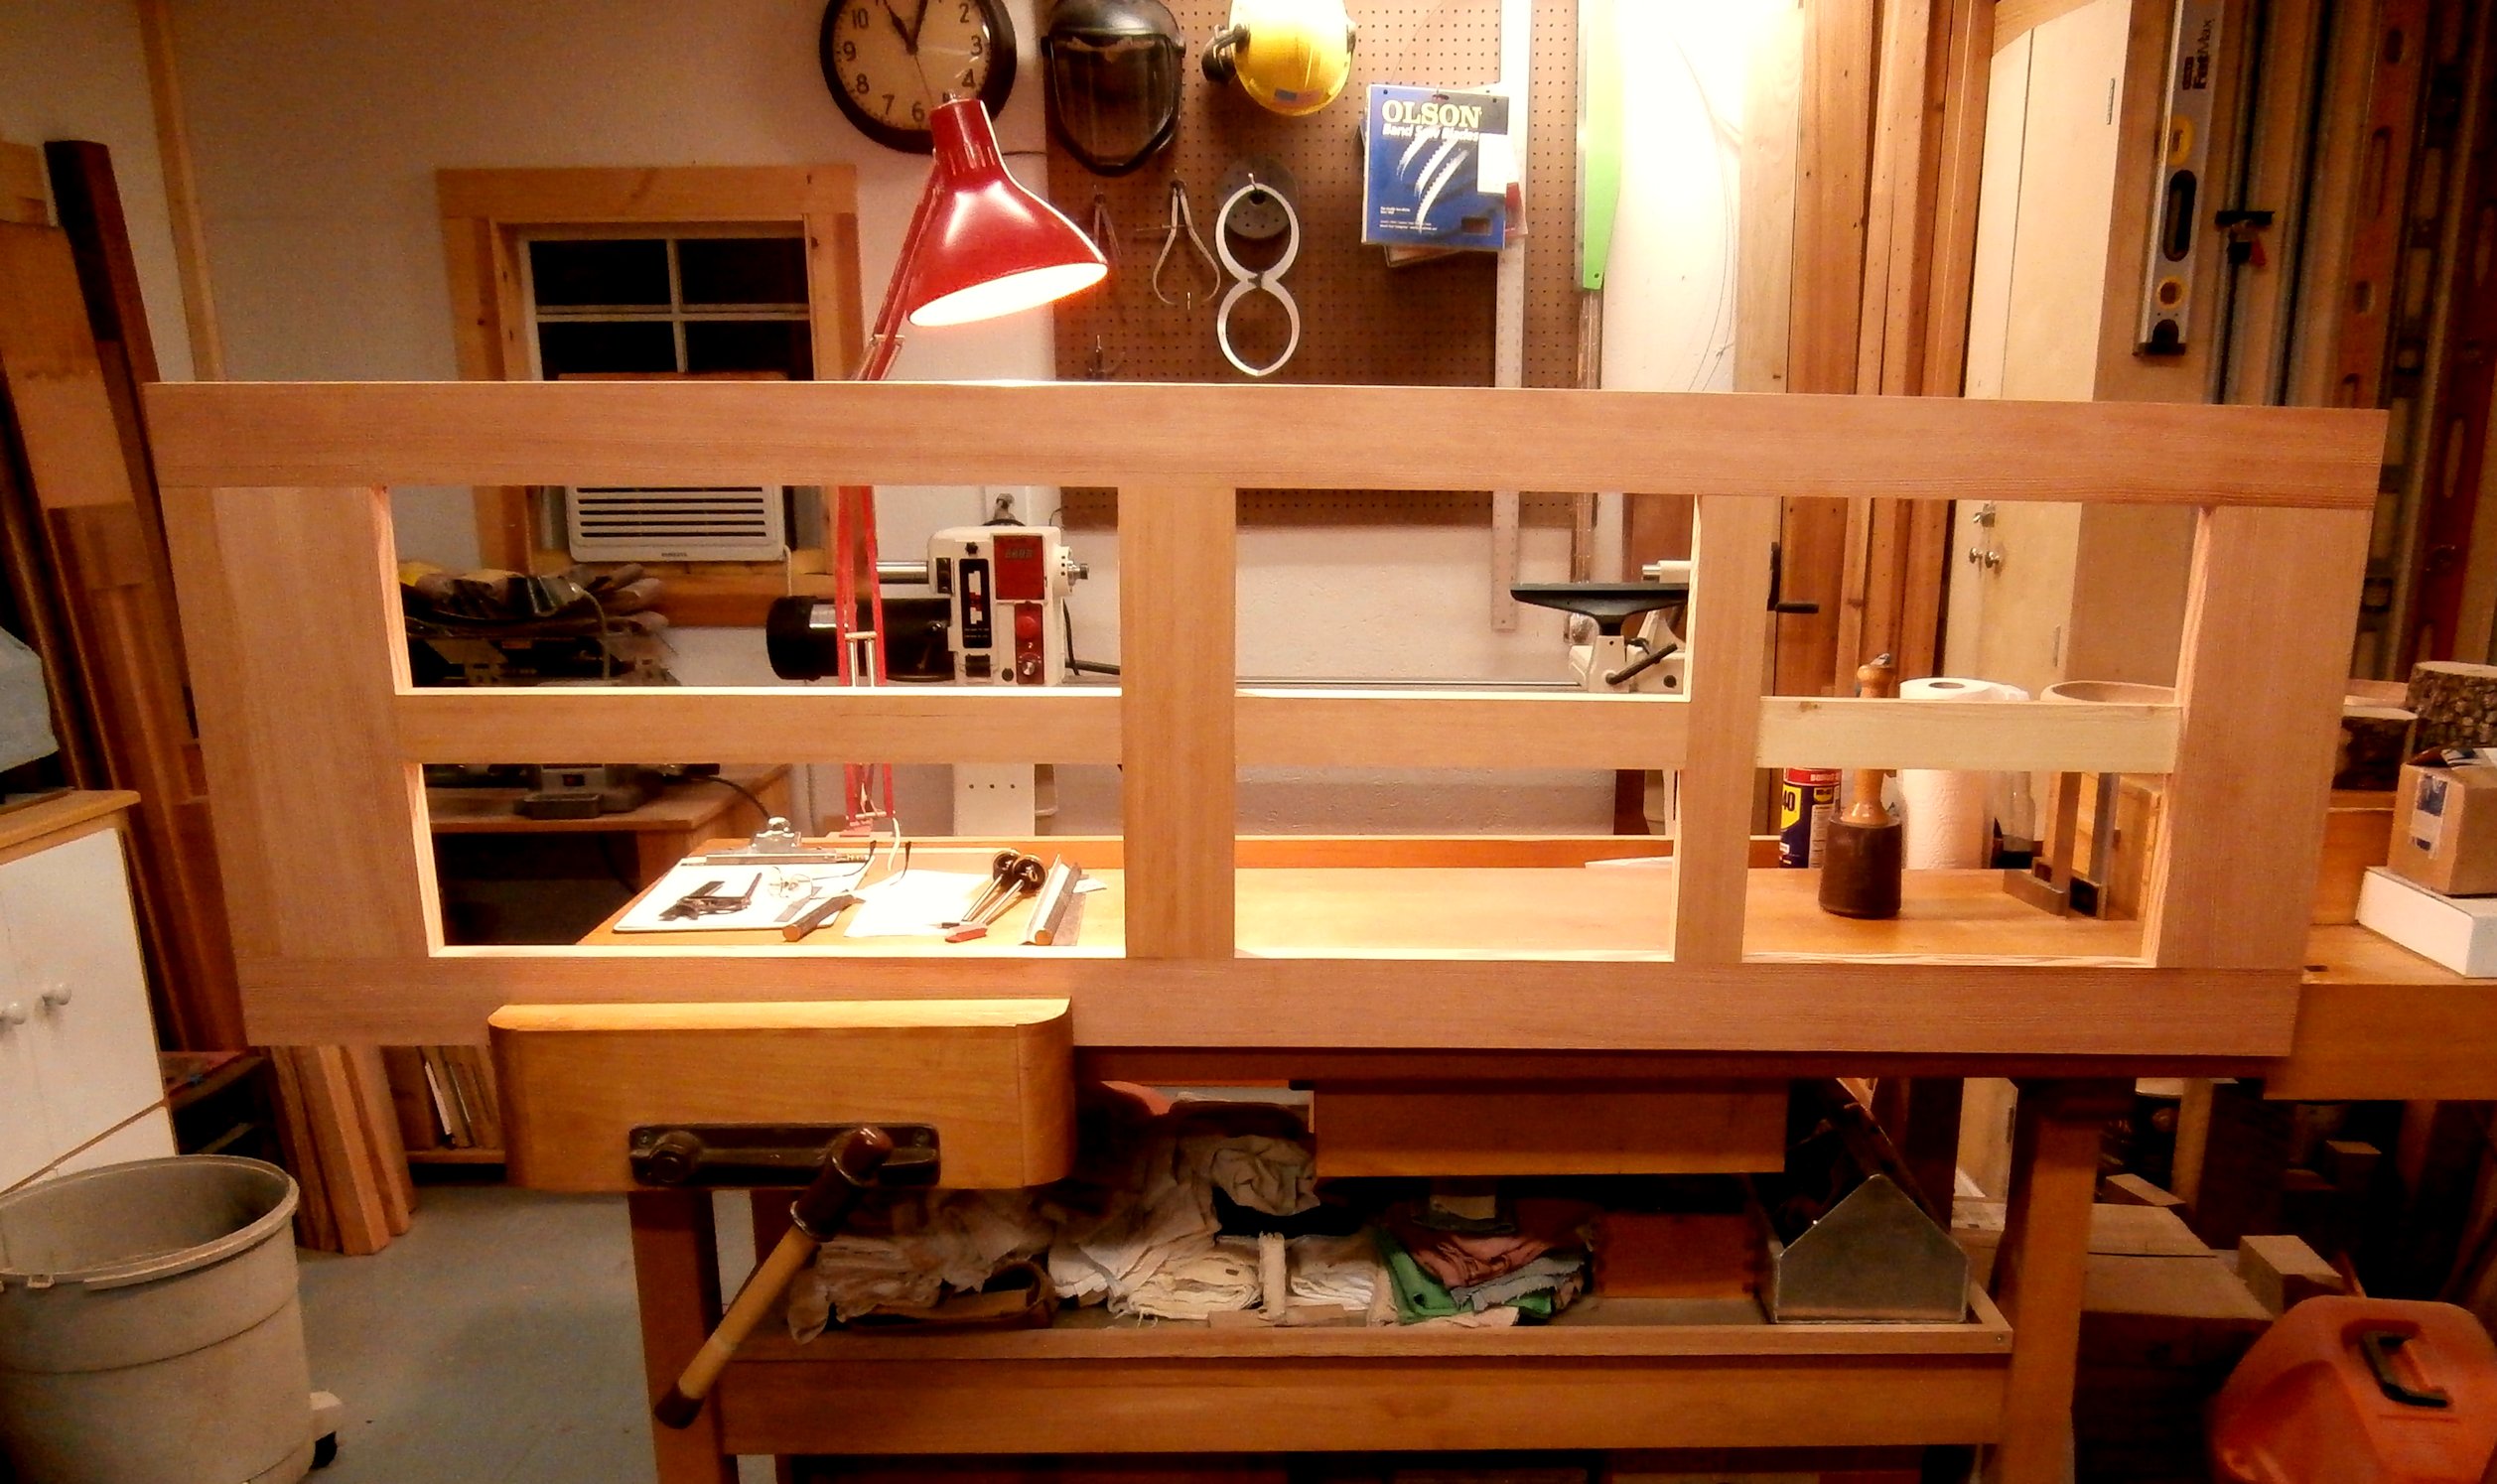
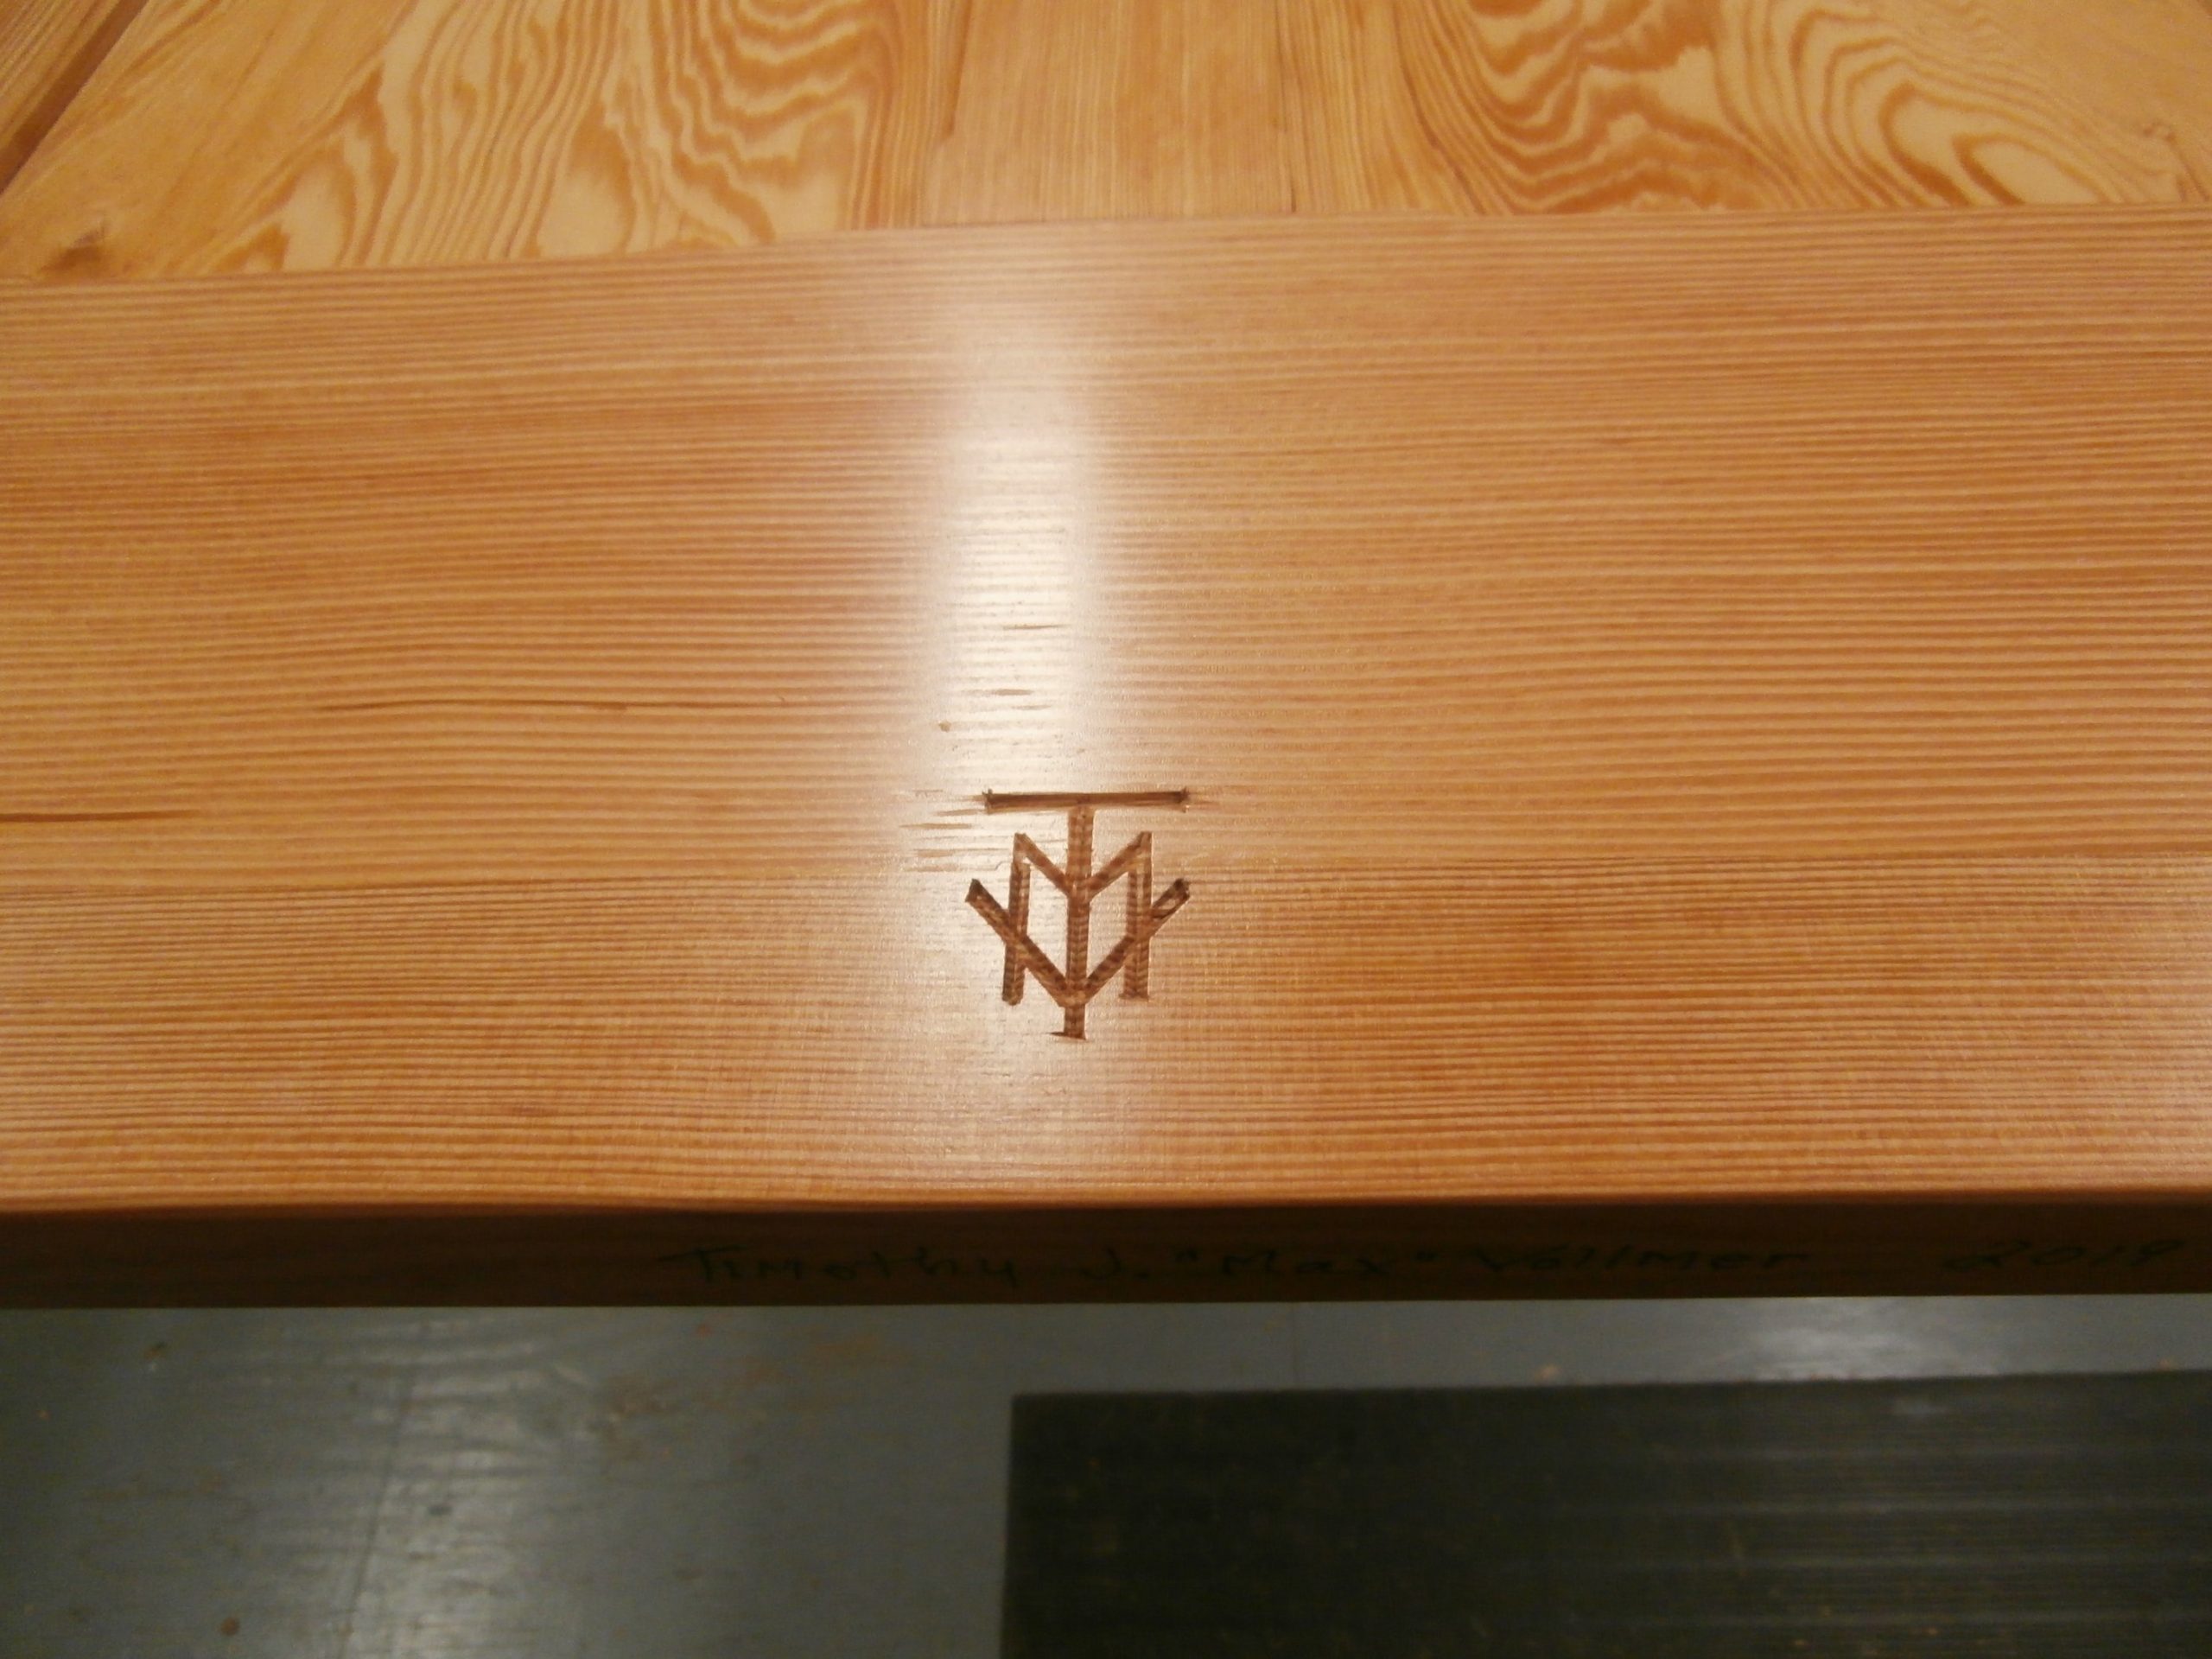
Rounding out the table frame, I fit cross pieces to the tops of the legs and then installed two long, under-table supports that are joined to the cross pieces with dovetails.  The result is a support structure that, barring fire or natural disaster, has an essentially unlimited lifespan (1,000 years?) if cared for.  Here it is with finish and signed with my makers mark on a cross bar.

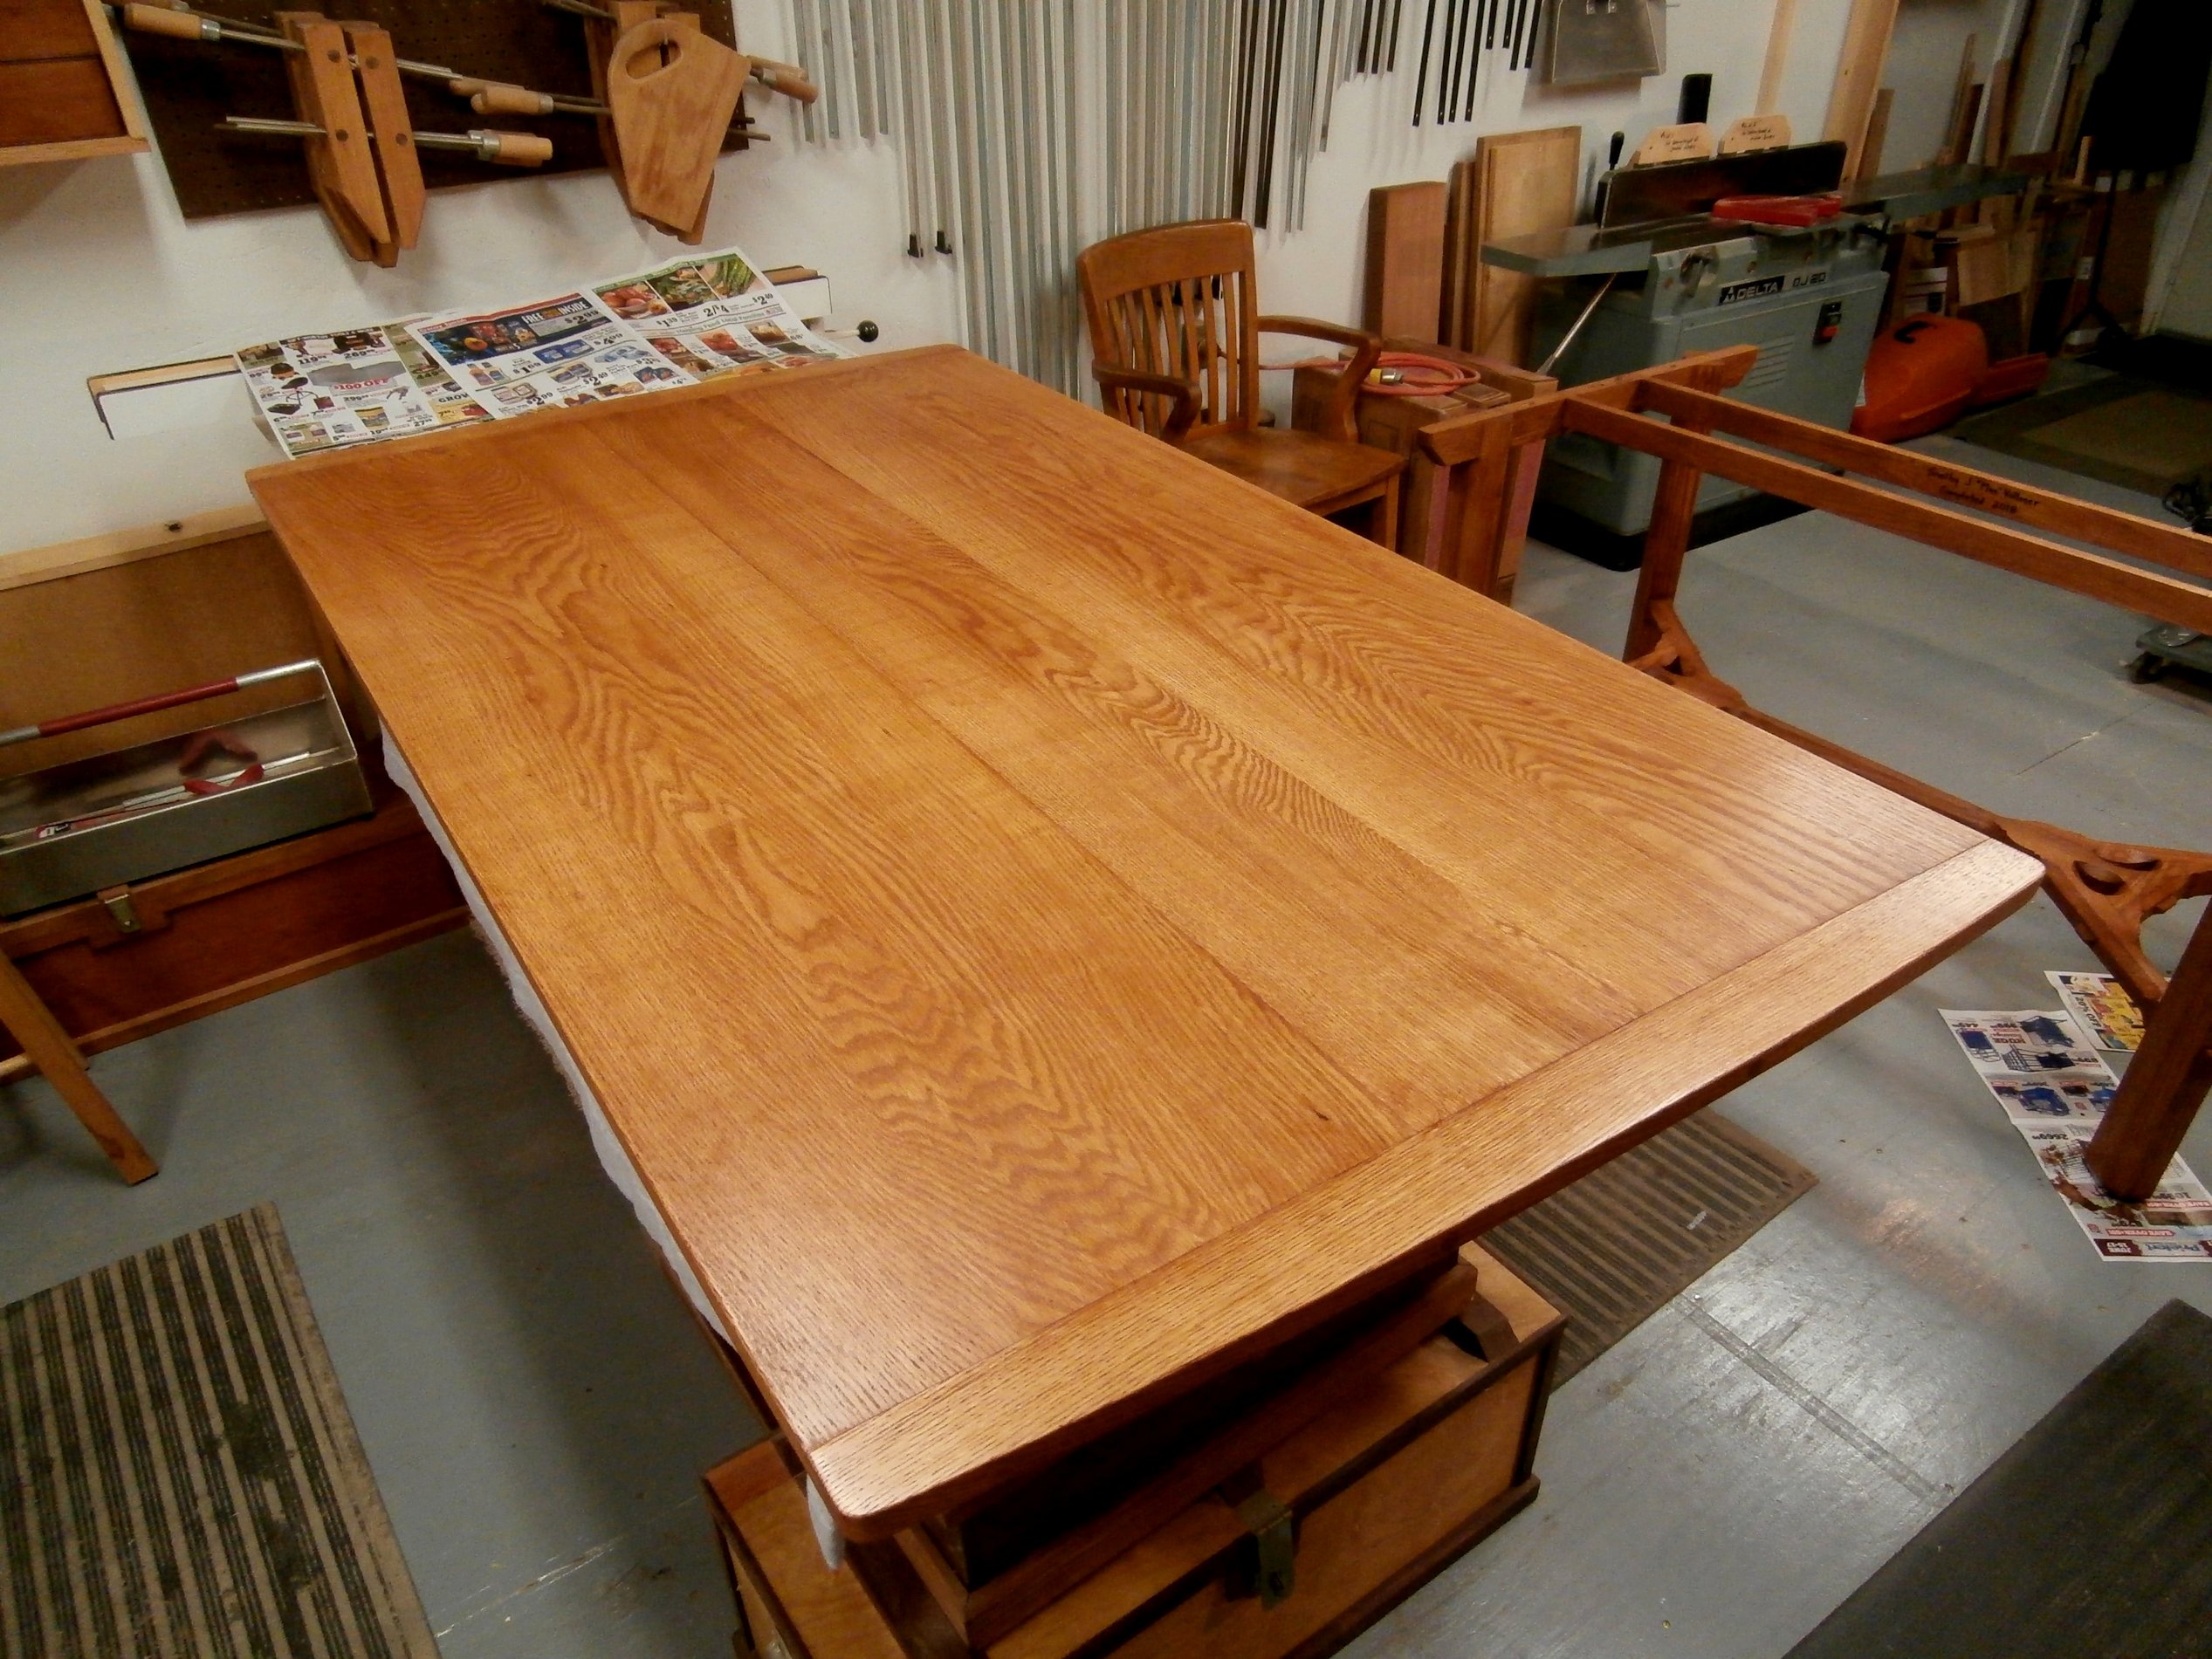
Here’s the table top.  And, following that,  the table in my house.  Final dimensions are 68″ L x 38″ W x 31.5″ H.  The table is compact, but the design of the hay rake stretcher and the canted legs allow for four chairs, across and end to end, and will accommodate four people comfortably for a meal.

I have the lumber to make a long, low, and narrow coffee table with the same hay rake stretcher design, to which I want to add wishbone struts under the table top for added complexity and interest, something Barnsley did in one of his tables.  I just need a shop.

The Grand Gallery Pictographs – Canyonlands NP, Utah

In the late 1960’s, early 1970’s, I purchased a Sierra Club Ballantine book authored by the brothers, Renny and Terry Russell, titled On the Loose.  It was comprised of their accounts and their photographs from explorations as young men in the wildlands of Utah.  One picture they took and included in the book was of the “Grand Gallery” of ancient Native American pictographs in a small, separate and remote piece of Canyonlands National Park in Utah.  The book captured my imagination and I had every intention of following in their footsteps.  I made several road trips into the southwest before 2004 when I finally set out to find the Grand Gallery.

Departing from a paved highway in central Utah, the dirt and gravel road to the trailhead for the gallery is about 25 miles long.  I made the trip in February.  It was so cold the night before I set out on the day-long hike that my gallon of milk turned into an icy slush overnight.  The trail to the gallery descends from the tableland into the canyon on a very rough “road” dynamited in the 1950’s by uranium prospectors down a sandstone cliff to the canyon below.  The hike takes half a day to the gallery and half a day back.  I had it all to myself.

The pictographs cannot be precisely dated but are estimated to be thousands of years old, made by the Archaic peoples who preceded the Anasazi and more modern Pueblo people.  Here are some photos taken on the way out to the trailhead and on the day of my hike.  [Click on any image to enlarge, All photos copyright symbol Max Vollmer]

The long road out to the trailhead.
Parking at the trailhead.
Dinner of beef stew with fresh, steamed broccoli.
Hiking through the canyon.
The Grand Gallery on the cliff face from 100 yards away.
Some of the pictographs, the largest of which is approx. 8 feet tall.
Otherworldly, probably shamanic figures.
Deer, antelope, and buffalo presumably, with a hunter holding his bow and arrow to the right..
Closeup of the deer pictograph.

The largest and strangest anthropomorphic figures are believed to be the work of shamans on their vision quests.  The animal figures are thought to represent the game hunted by a later group of people.  Fortunately, all the pictographs are now too high up on the wall to reach which gives them some protection from vandals.  Erosion over the centuries has lowered the canyon floor.


Malheur County, Owyhee Canyonlands, Oregon – January 2021

I made a mid-Winter trip down to the SE corner of Oregon, in part to find some open space amid the pandemic, but also for my first glimpse of the Owyhee Canyonlands.  This remote area is very sparsely populated by cattle ranchers and some sheep herders.  To give you and idea, one sign I passed read, “Next gas 120 miles.”  I hit a spate of dry weather which was fortunate because the desert soil turns to a slippery and sticky gumbo when wet.  During the day I needed 4WD on the Leslie Gulch-Succor Creek Byway which is mud in winter.   Here are a few photos.   [Click on any image to enlarge, All photos copyright symbol Max Vollmer]

This was just before sunset at my first campsite NW of Burns Junction.  Overnight low was 28 degrees F, enough to freeze the mud which made it easier to break camp in the morning.

This was my setup at Succor Creek State Park alongside the Owyhee River.  Dinner that evening was Beef Stroganoff with egg noodles, sliced red pear with some cheese, and hot coffee.

Darkness fell around 5:30 p.m. and the pre-dawn light didn’t amount to much until 5:30 a.m.  That makes for a long night in the sack.  When I packed up and departed on my last morning along the Owyhee, it was 22 degrees F.  I had hot coffee and cleared out while the mud was frozen and shallow puddles were iced over, but not before picking a bunch of sage along the river bank to perfume the truck cab.

Winter colors in the canyonlands are not much to brag about.

Priest’s Chair – Palace of the Governors, Santa Fe, New Mexico

I found this picture online of an 18th century chair in the collection of the New Mexico Museum of Art in Santa Fe, New Mexico, known as the Priest’s Chair.  See below.

There are a few, early, carved armchairs like this one from northern New Mexico that are referred to as Priest’s Chairs without any documented connections to churches.  However, chairs of any kind were few and far between on the northern New Mexico frontier in the 1700’s and armchairs like this one would have been found only in the homes of prosperous Spanish families and in a few Catholic churches with larger congregations.  The wood used in the original was the best timber available at the time, Ponderosa pine from the Sangre de Cristo mountains.   I decided to make a copy of this chair, with added details, to accompany my carved New Mexico bench (October 2015 Archive) and my carved Harinero chest (January 2018 Archive).  This was the last project I completed before dismantling my shop in January 2020.

Without plans or the actual chair to go by, I based my chair dimensions on the research I did for the New Mexico bench and the old photograph.  I prepared scaled drawings and then followed my usual practice of cutting and shaping all the individual pieces for the chair, including in this case, the “through” mortise and tenon joinery used on the original (“through” referring to the fact that mortises pass all the way through the wood so that the tenon ends are exposed).  See below.  [Click on any image to enlarge, All photos copyright symbol Max Vollmer]

I then tried to estimate the original dimensions of the back splats and those in front, below the seat; drew them on paper, glued the paper down to boards, and rough cut out the shapes on the bandsaw leaving enough wood top and bottom for tenons to go into the chair rails front and back.

The front and back sub-assemblies for the chair, with carved details, looked like this.

I assembled the main chair components, leaving the armrests off at first so that I would be able to accurately locate them on the back legs of the chair.

Locating the armrests was a little tricky.  I wanted them level with the ground and at a height that would be comfortable for someone seated in the chair.  I clamped the unfinished armrests to the front and back legs, marked their position, and then marked out the mortises in the back legs.

The location of mortises and tenons were marked on the armrests and the chair legs, cut as marked, and then all that remained was to attach them.

I sealed the pine with Minwax Natural and then made a blend of Minwax tinted sealers to darken the wood.  Finally, I attached a temporary plywood seat that will be upholstered when  I get the chance.


A New Home for my Timberline desk and chair

Not long after moving to Eugene, Oregon in 1987, I traveled to Timberline Lodge on the slopes of Mt. Hood to take photographs and measurements of what are known as the Mezzanine Desk and Chair, part of the of the original 1930’s Depression era collection of furniture made by WPA (Works Progress Administration) artisans for the lodge.  I did that so I could make an exact reproduction of the two pieces.  Below you see a picture of the cover of a book on Timberline Lodge published by Friends of Timberline in 1978 and a photograph from the book of the original desk and chair in one of the alcoves on the lodge’s mezzanine level.

My reproduction differed from the originals in two repects:  one, I used clear vertical grain (CVG) Douglas fir while the originals are made of Douglas fir with knots; and two, I made rubbings of the carved five-petal flower on either side of the upper portion of the desk in order to replicate the carvings on my reproduction.

With no plans to guide me on the actual construction of the heavy-timbered  desk and chair, I settled on what I thought would be the most durable way to secure the leg and stretcher sets for both, and that is through the use of sliding dovetails.  Although I do not believe this is the technique used on the originals, it made the greatest sense to me because of the fact that both leg sets are splayed outward creating compound angles where the legs connect to the skirts and the stretchers, as you can see in the photograph above.  The desk legs were approximately 4″ x 4″ square and the chair legs were approximately 3.5″ x 3.5″ square.   Constructing the legs sets so that the splay angles matched those I had measured in the originals was a  challenge, involving the use of the traditional sliding T-bevel.  Below you can see the leg set for the chair, and the skirt sets for both the desk and chair, prepared for assembly with the dovetail slots and keys.

In the next two photos you can see a detail of how the skirt pieces are joined to a leg, and then the fully assembled leg set for the desk.

The rounded profiles on all four legs of the desk and chair were created prior to assembly by rough cutting the profile one leg at a time on the bandsaw and then finishing by hand with wood rasps, files, and what are called wood “floats,” and finally sandpaper.

The pieces for the desk top, the seat and back for the chair, and the upper section of the desk were all worked with handplanes to create the smoothest surfaces, smoother by far than what is possible with  sandpaper.   Below you can see my use of a jack plane to refine the edge of the desk top.

The next photo set depicts the desk and chair assembled, with a detail of the chair back support, but prior to the application of any finish.

With a Minwax Natural sealer and a Watco Danish Oil natural finish, the set looked like this when new in 1987.

I used the desk and chair from 1987 until 2020 when I sold the two pieces and the 1978 Friends of Timberline book to a couple in Portland, OR.  The wife in particular has a love of Timberline Lodge and has collected Timberline memorabilia, including commemorative Timberline Lodge blankets woven by the Pendleton woolen mills in Pendleton, OR, to display in one corner of her home.  The couple have two children who use the desk now for homework.  I could not have asked for a better home for my work.  Here are two pictures she sent me of the desk and chair in their new home.

Emily’s Pocket Door

My daughter and her partner are building a Tiny House from the ground up in Nehalem, Oregon.  My contribution is a pocket door for the bathroom.  For this project I selected some  rough sawn, old-growth, clear vertical grain (CVG) Douglas fir that I had been hoarding for 30 years for the door frame and panels.  [Click on any image to enlarge, All photos copyright symbol Max Vollmer]

CVG Douglas fir beams and boards.

The first step was to size and plane the lumber according to my plan and cut list for a six-panel door with a stained glass mosaic visible from one side only.  Then I cut the mortises and tenons for the door frame and dry-fit the pieces.  It is absolutely critical for a door that the frame be dead-square, with 90 degree angles at all joints.

Checking for square.
Door frame, dry fit.

The next step was to cut the rabbets all around the inside of the frame members to accept the 3/4 inch thick panels.  As with any frame and panel construction, allowance has to be made for the expansion-contraction of solid wood panels that occurs with changes in ambient humidity.

Dry-fitting panels in the rabbets cut into the door frame members.

With the door frame members sized, the mortises and tenons cut, and the panels sized, I now had a door “kit” ready for embellishment, sanding, and assembly.

The pocket door “kit.”

To add a little interest, I created 45 degree, stop-chamfers around all framed openings in the door on both sides.

Stopped-chamfers.

The side of the door that faces out was planned with a stained glass mosaic depicting a cormorant perched on a piling in the surf, a common sight on the Oregon coast.  The hand crafted mosaic was glued down to a 1/4 inch thick masonite panel sized to fit the door frame.

Stained glass mosaic.

My plan called for the stained glass mosaic to be recessed 1/4 inch in from the front surface of the door frame and “picture-framed” with thin, beveled pieces of fir.  Then backing up the mosaic, and on the back side of the door, I cut and planed thin but solid fir panels to make it appear as a six-panel wood door on the reverse side.

Front side with mosaic.
Back side.

Because this is a pocket door and will slide into a cavity in the wall rather than be hung from hinges, I used door pulls that were inset flush with the door surface, instead of regular door knob hardware.  To retrieve the door from the pocket when it is open, I used an edge pull inset into the door frame.  Finally, we wanted to employ a rare-earth magnet catch to hold the door closed and you can see one-half of that magnetic catch installed above the edge pull.

Recessed door pull.
Edge pull and rare-earth magnet catch.

Although the framing members were glued at the mortise and tenon joints, I built in extra stability and longevity by pinning the four corners of the frame with 1/2 inch cherry dowels that are visible only from the back side of the door.

1/2 inch cherry dowels pin all four corners of the door.

I signed the door on the bottom edge of the back side with my “makers mark.”

The “makers mark.”

Here are photos of the finished door, front and back, in my shop.

Front.
Framed mosaic.
Back.