Tag Archives: Hand Cut Dovetails

Wall Cabinet – Oak, Cherry, Elm and Maple

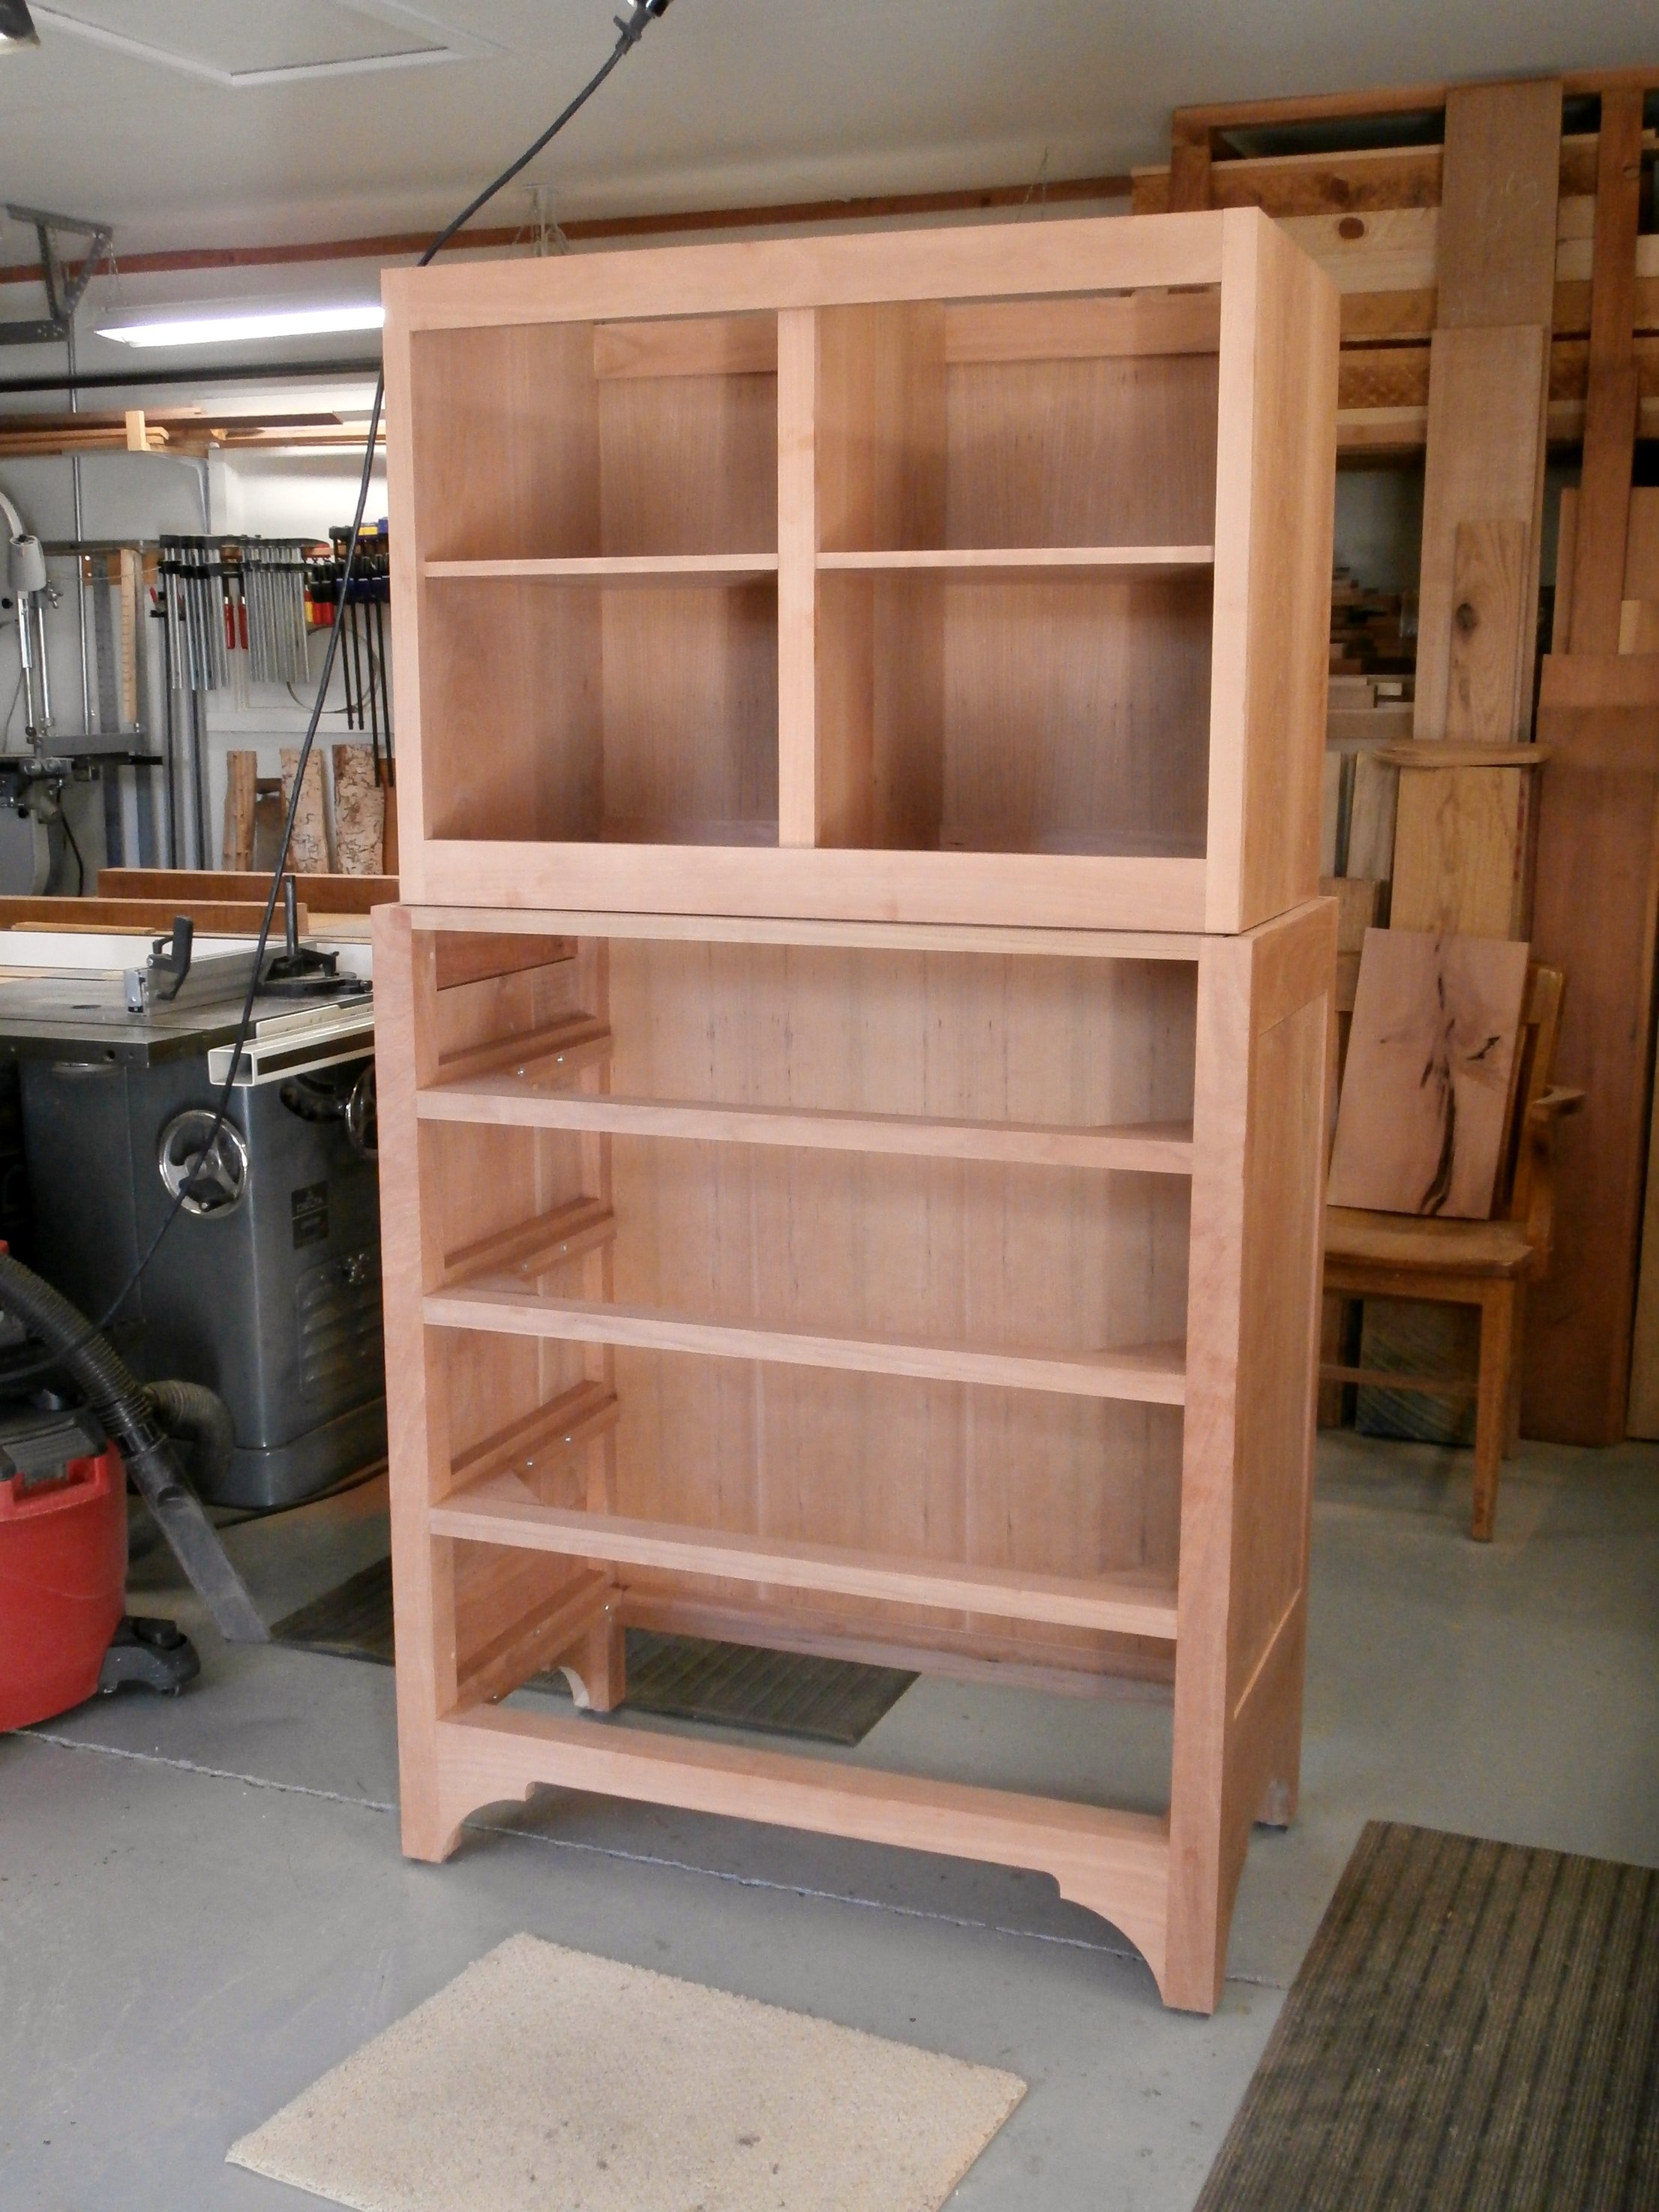
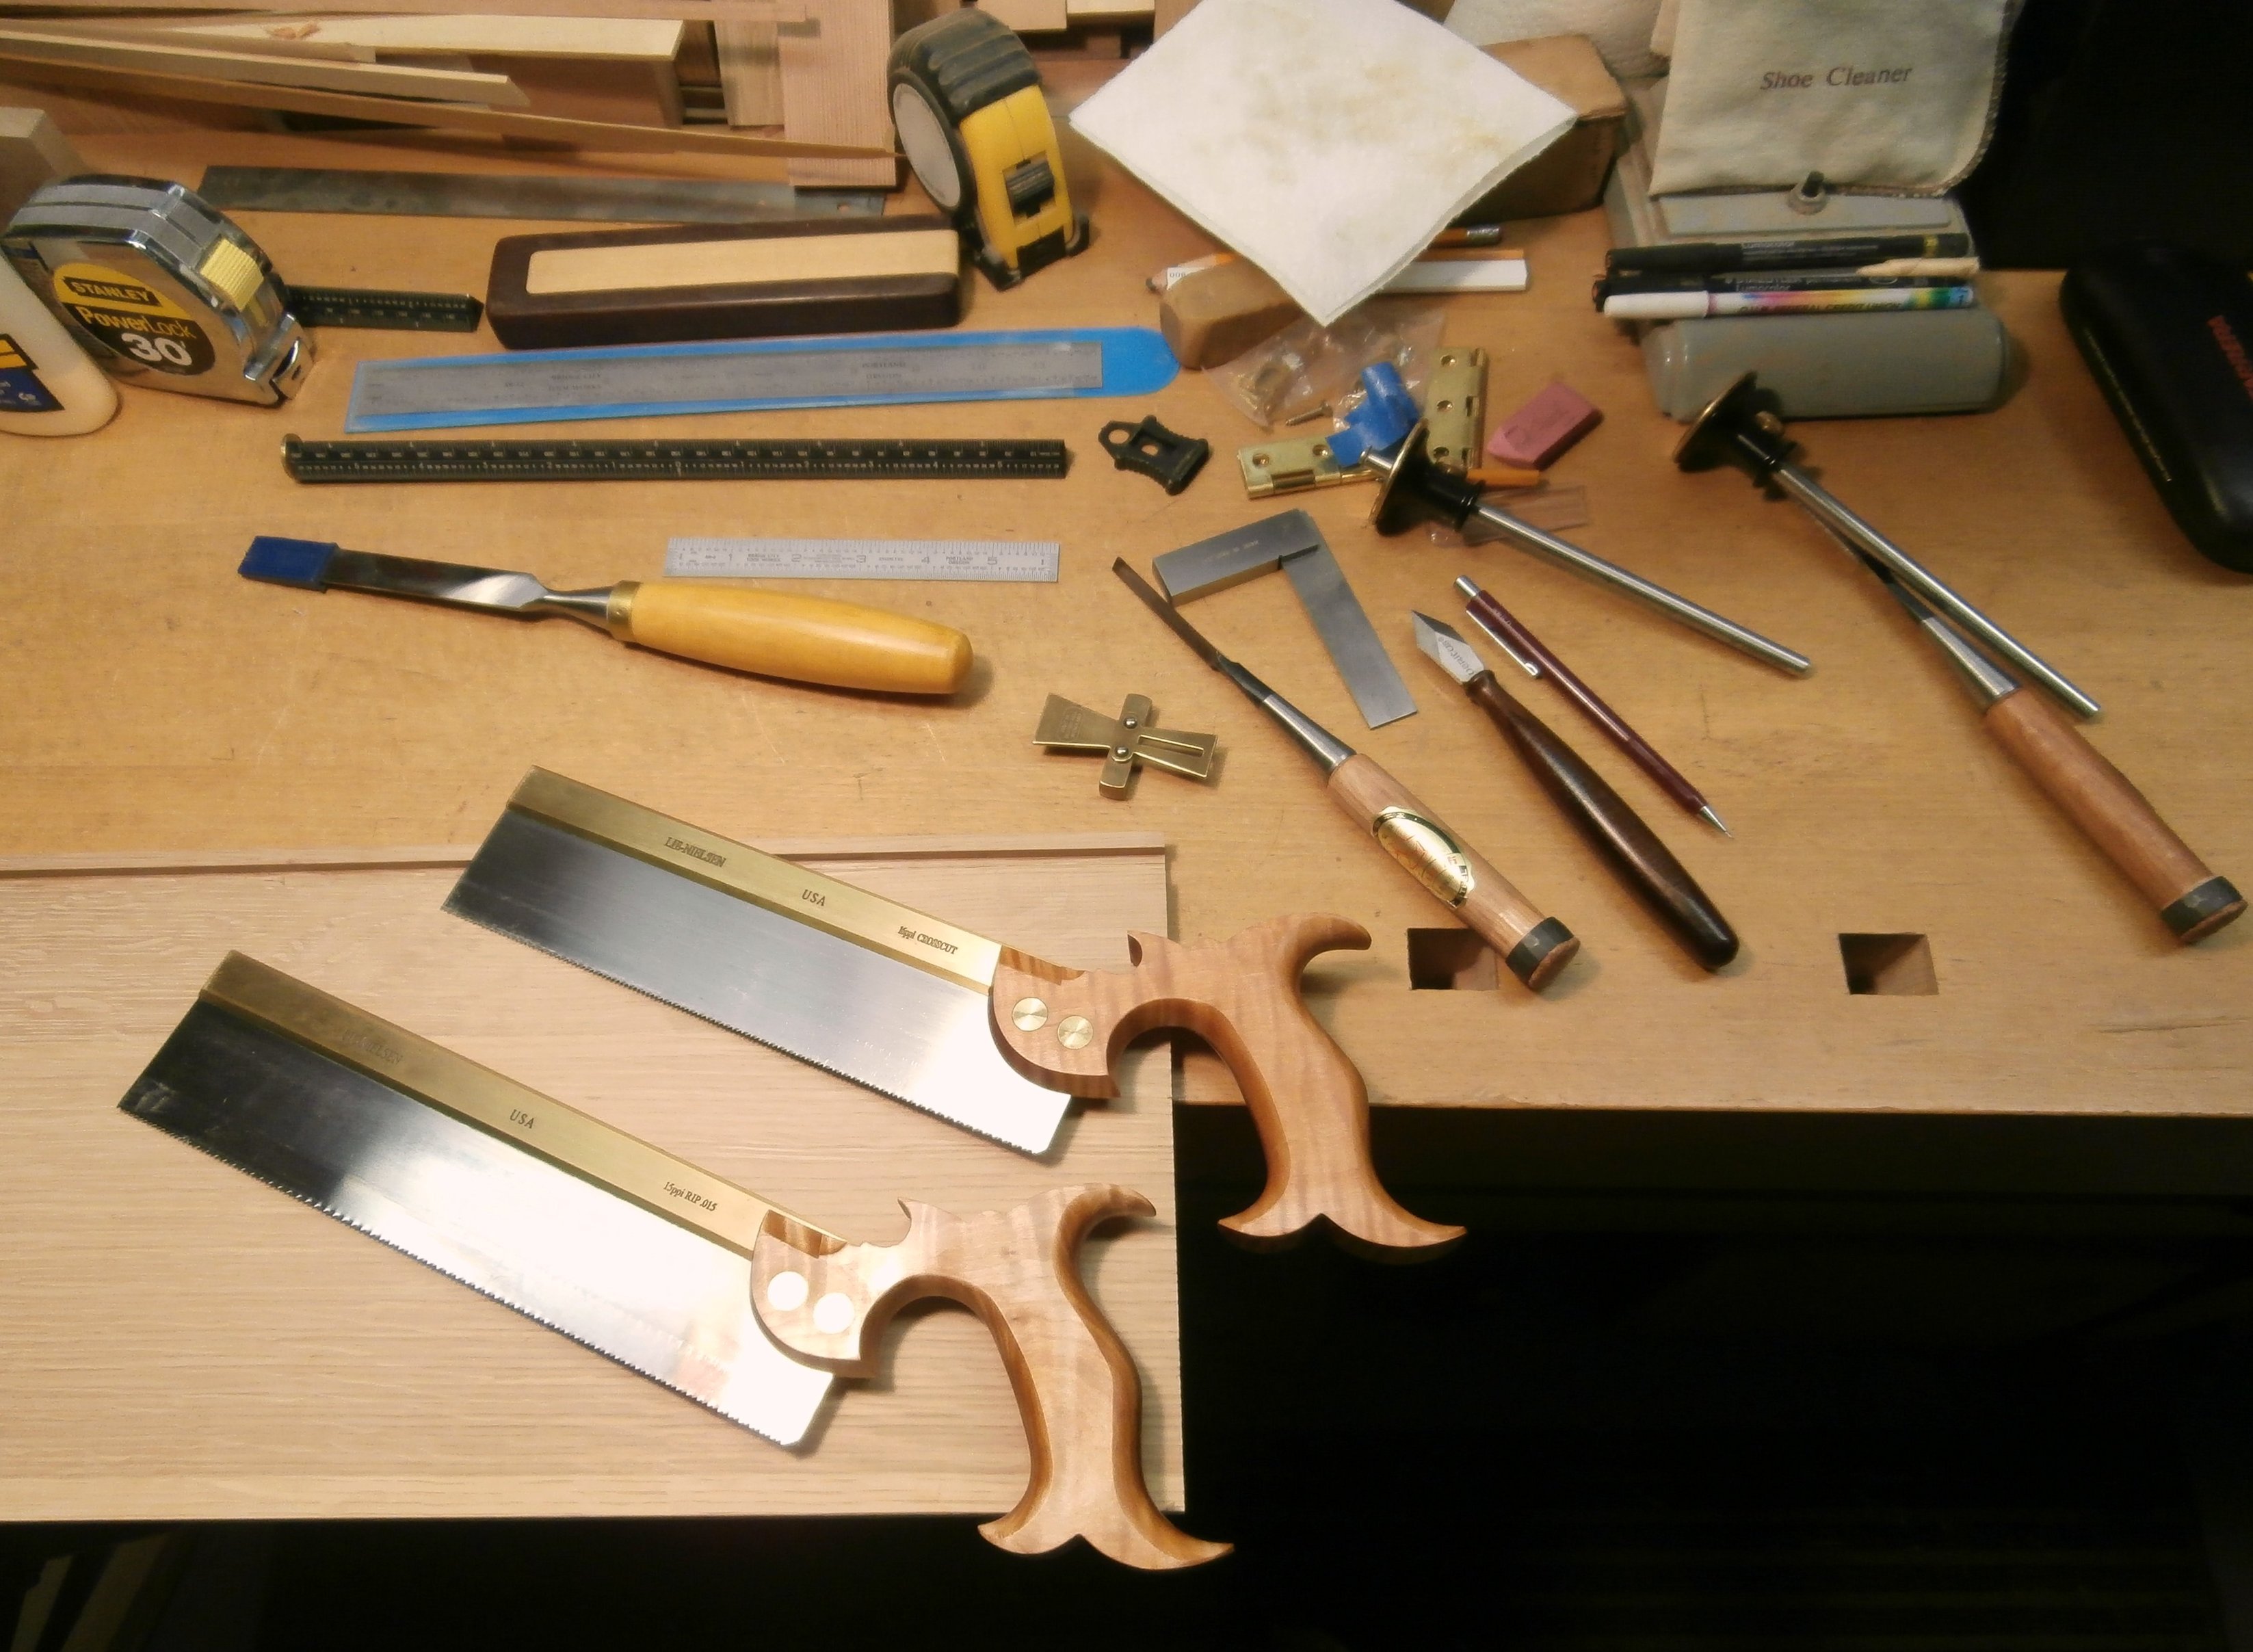
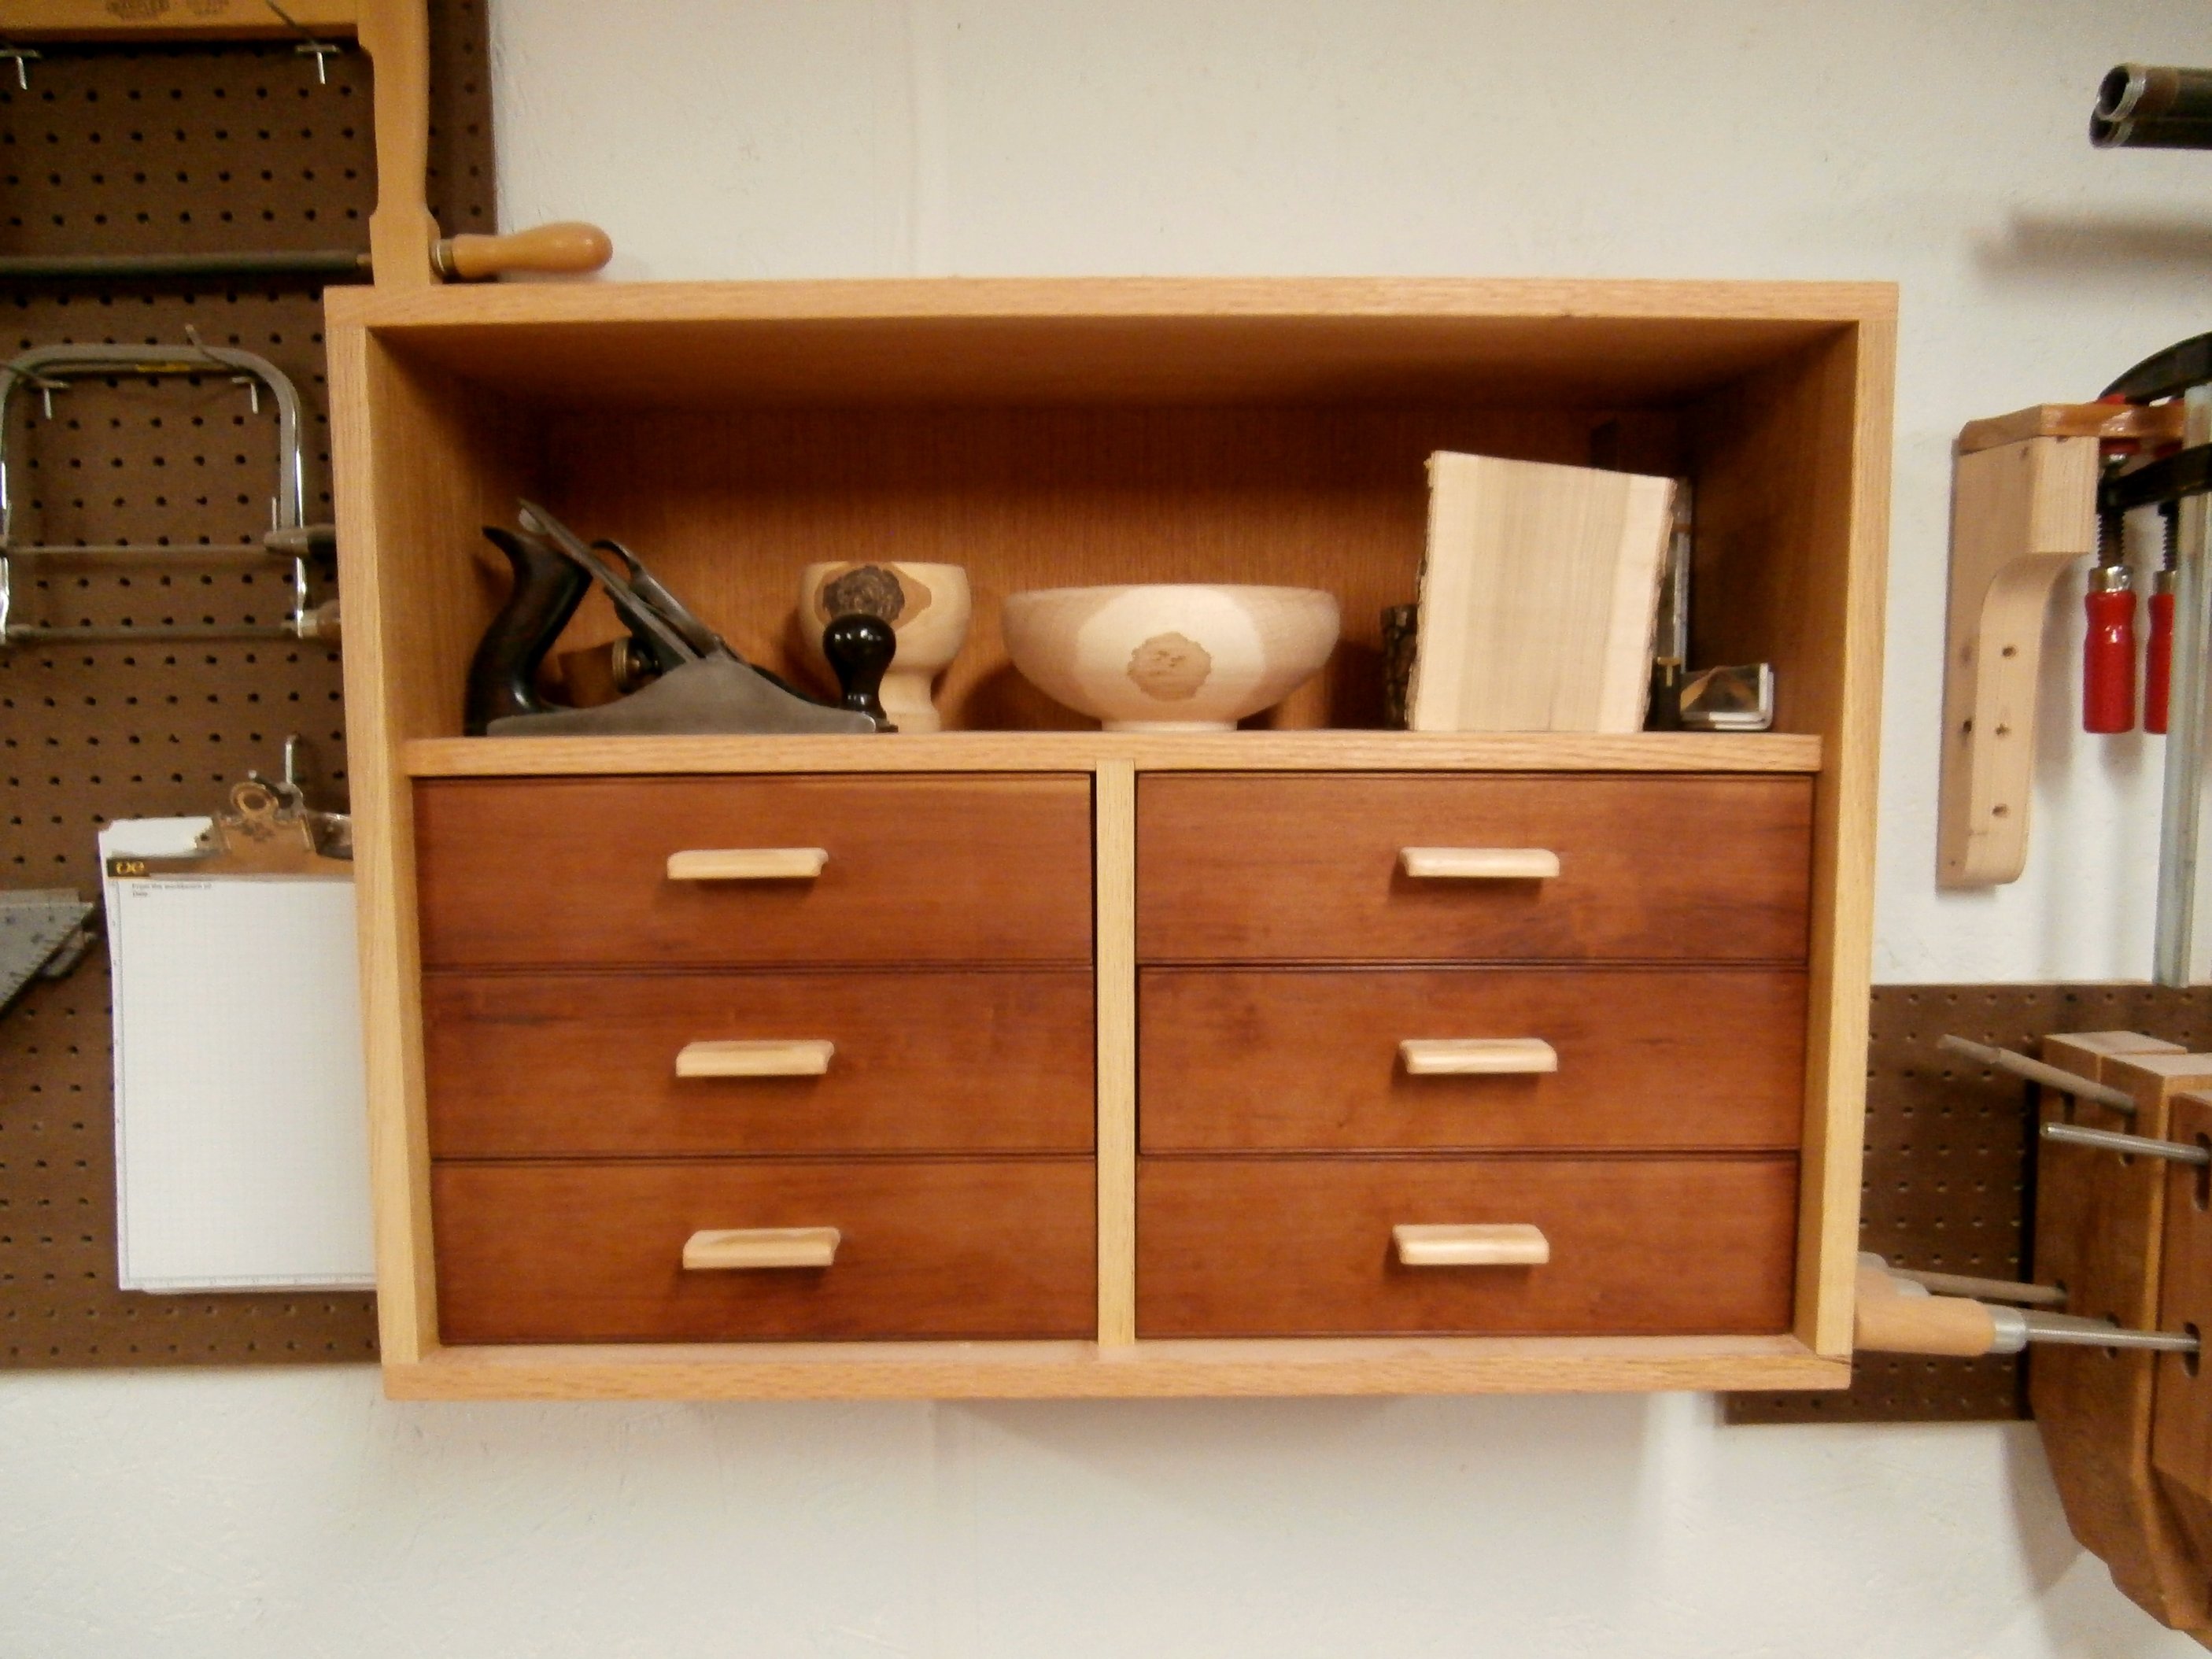
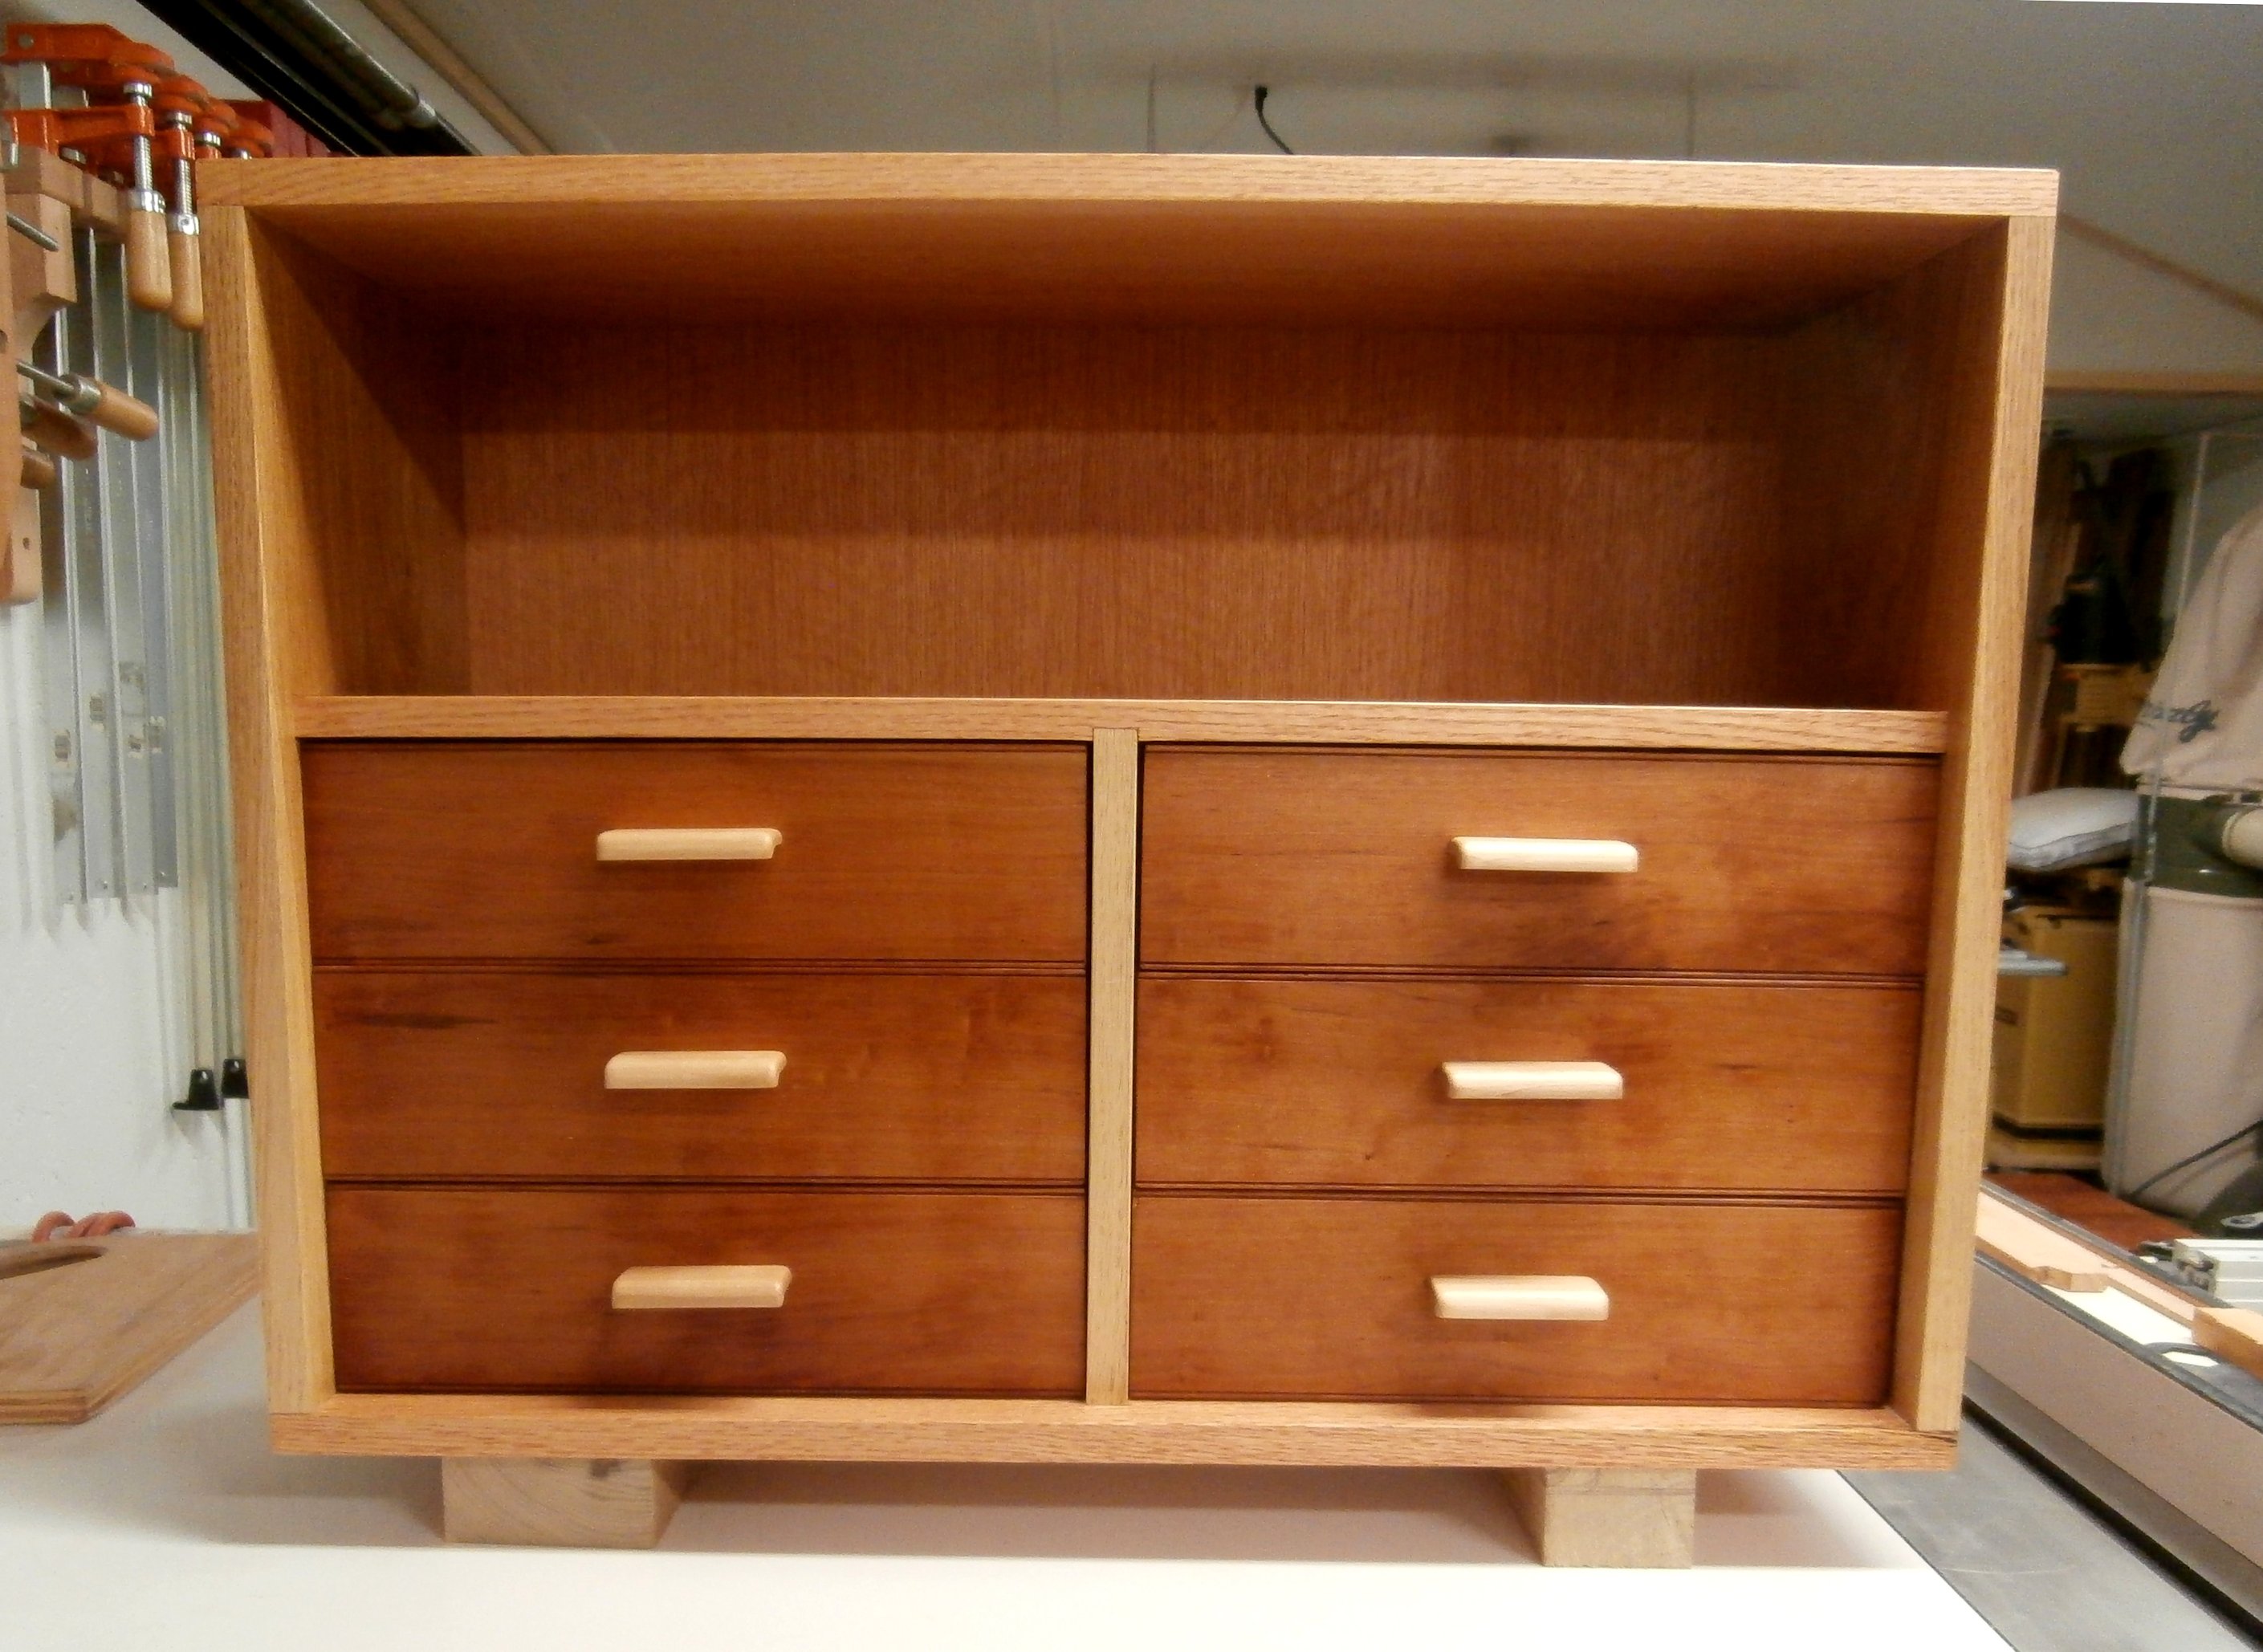
I made this small, wall mounted cabinet to hold my layout tools for measuring and marking.  It puts them within easy reach and keeps them organized.  I used some off-cuts of red oak, black cherry, American elm, and sugar maple that were too good to throw away.  And I used some of the same tools that are now housed in the cabinet to make it.  [All photos copyright symbol Max Vollmer, Click on any photo to enlarge]

Wall cabinet. [Click on any photo to enlarge]
I’m going to illustrate the step-by-step process I use for hand cut dovetails, both the through dovetails on the case and the half-blind dovetails on the drawers.

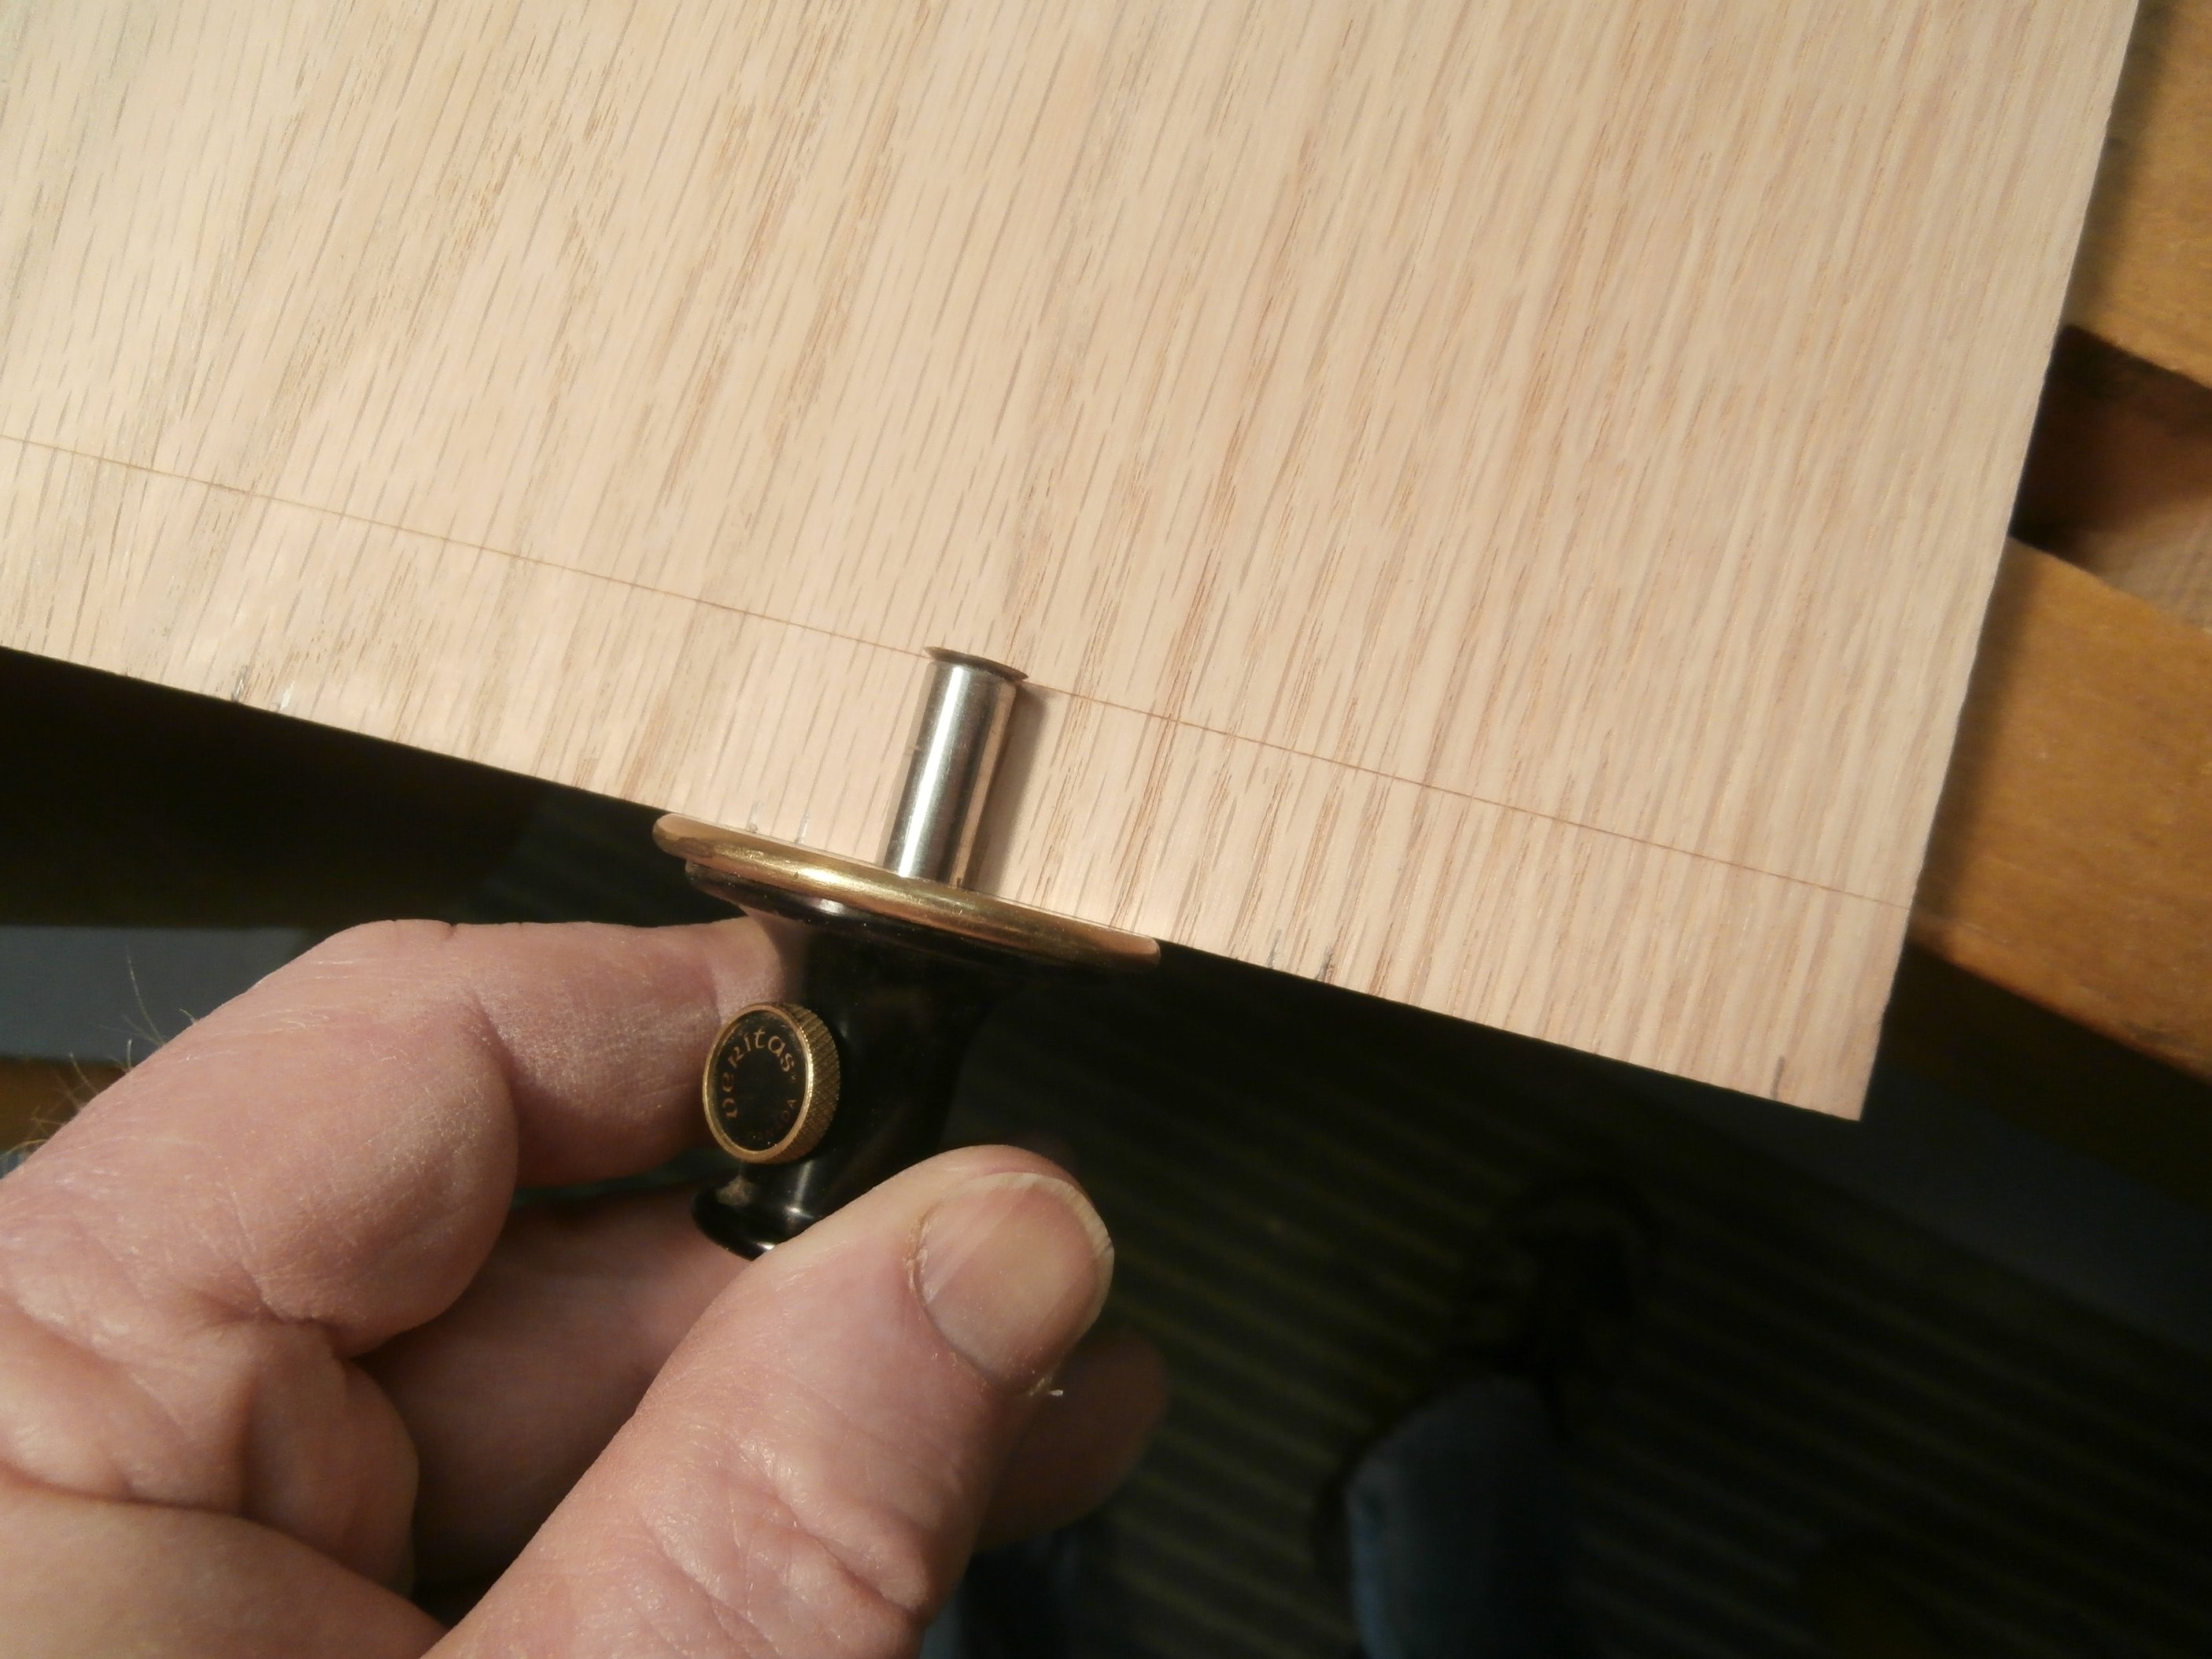
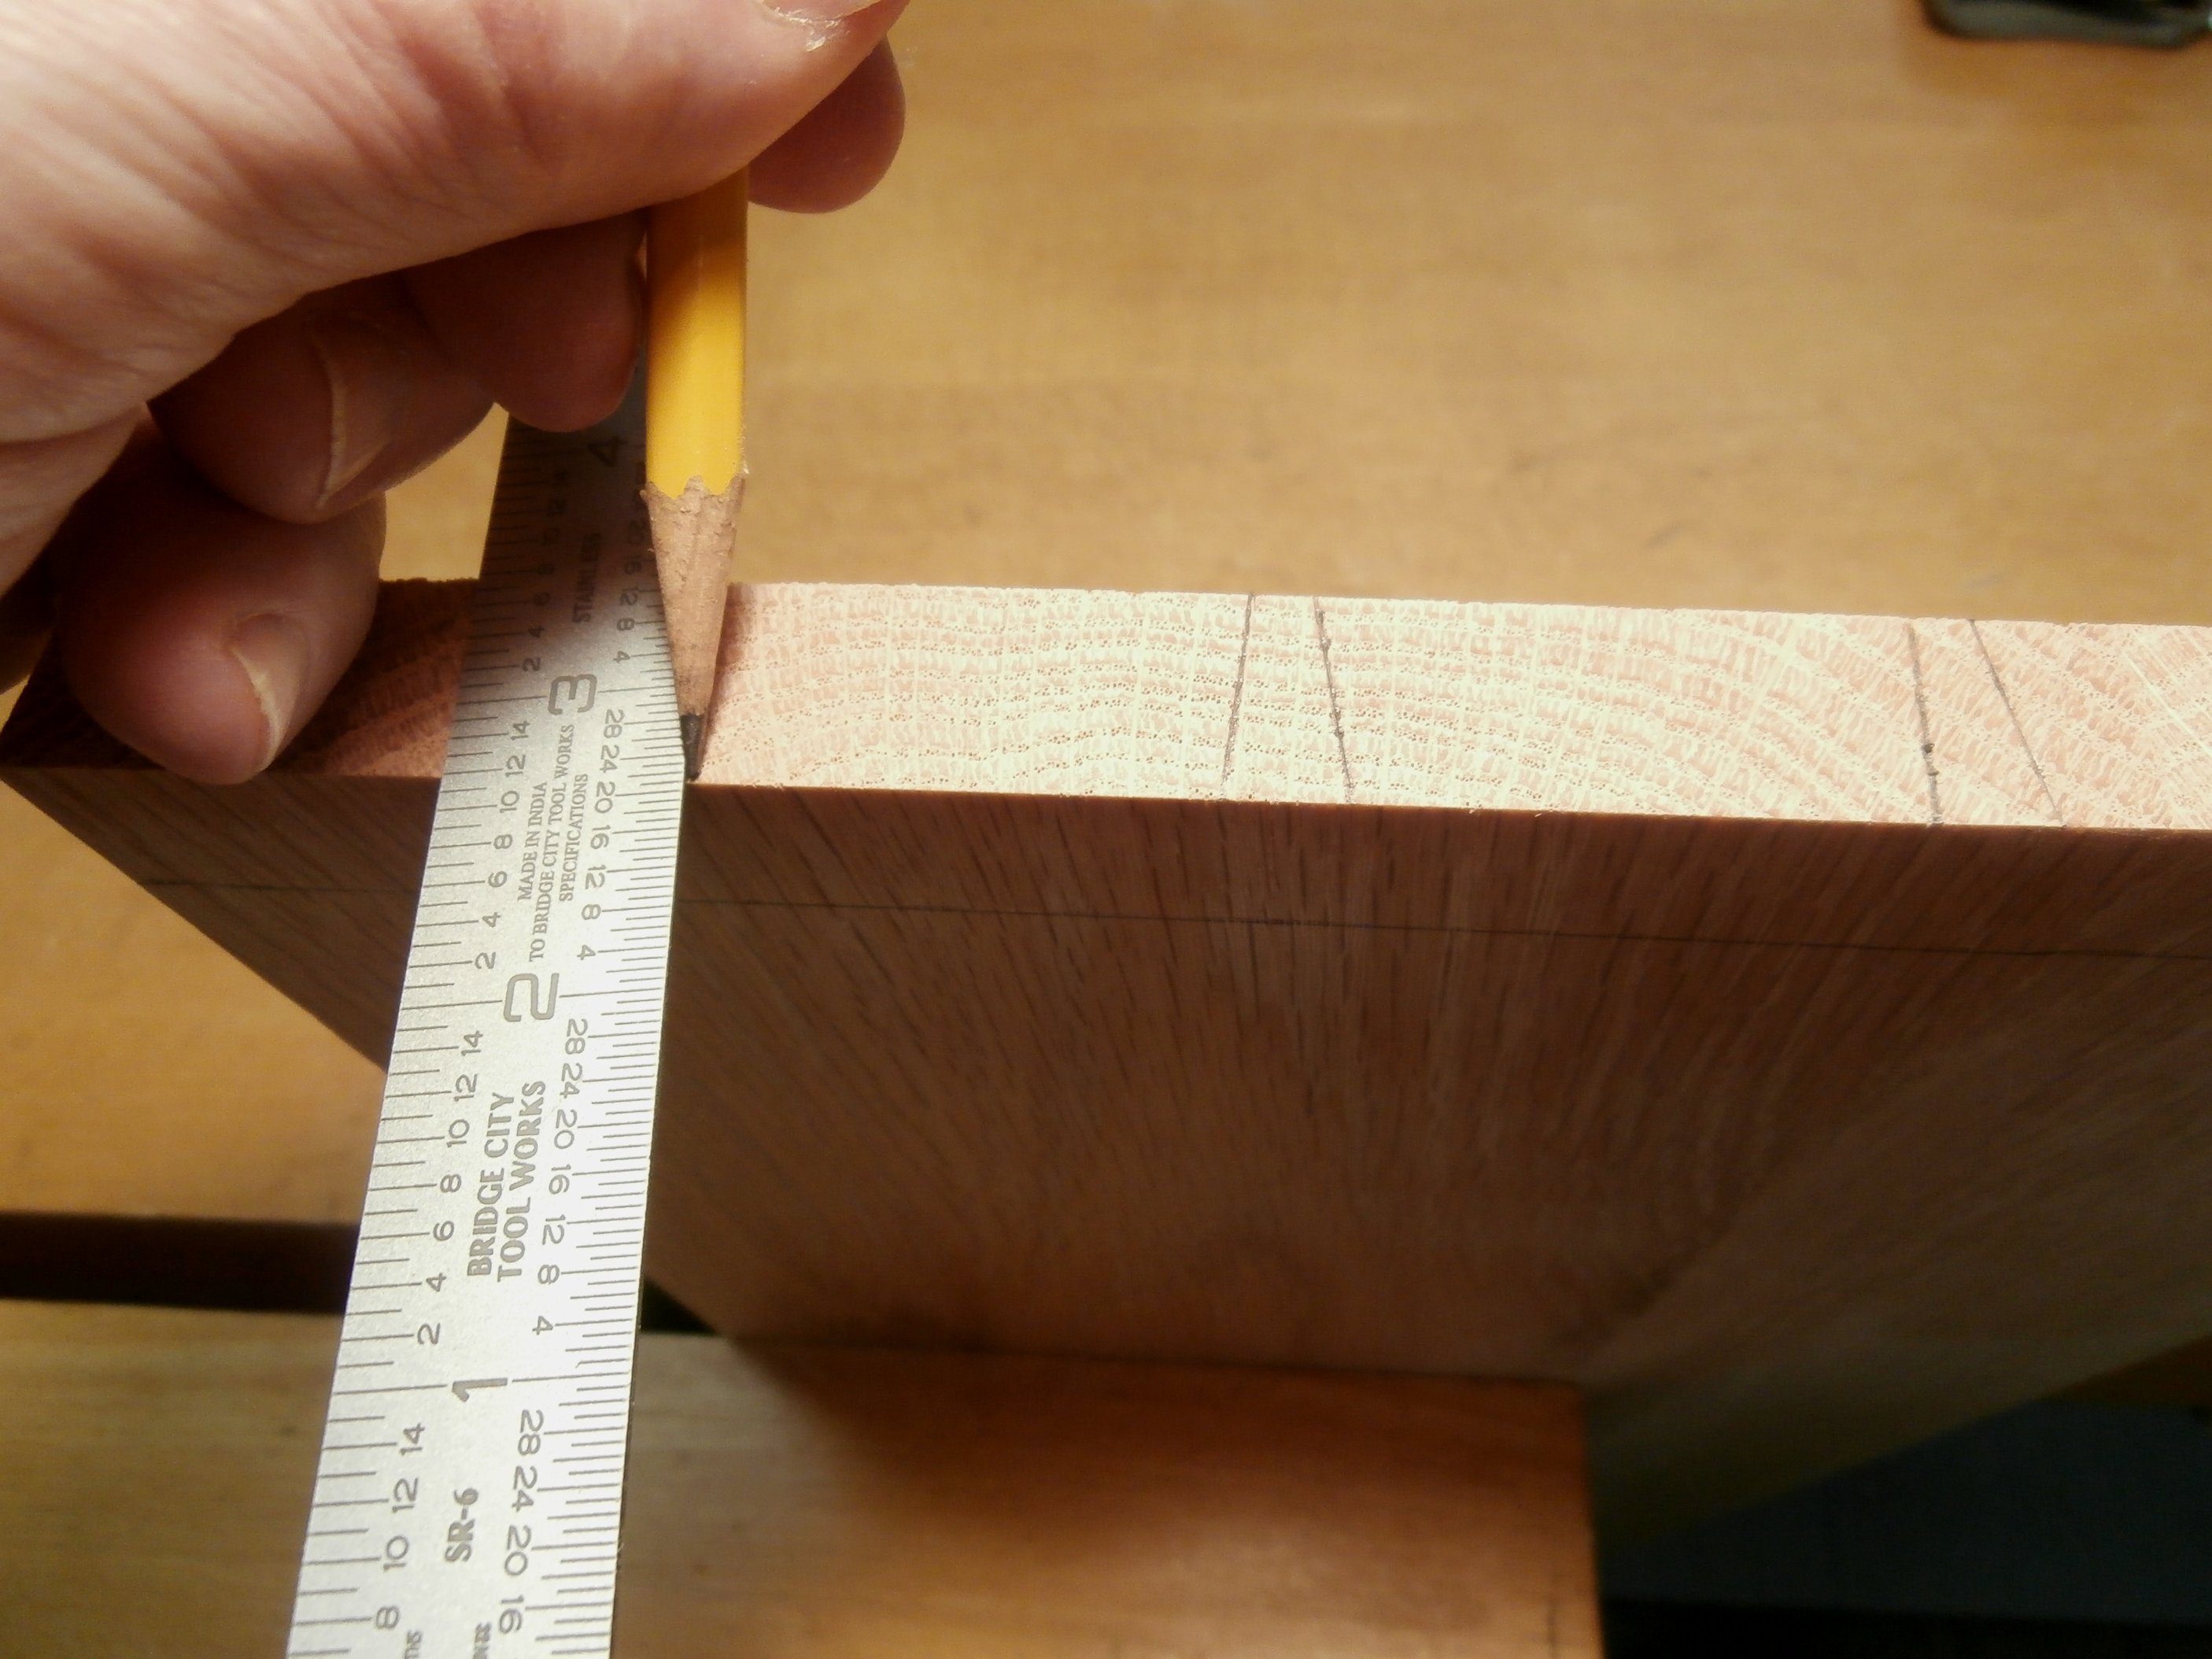
Step one:  having determined the dimensions for the cabinet and cut the component pieces to size, I started the through dovetails for the case by marking the length for the tails based on the thickness of the board to which they will be joined, using an adjustable marking gauge made by Veritas Tools in Canada.

Marking the length of the tails.

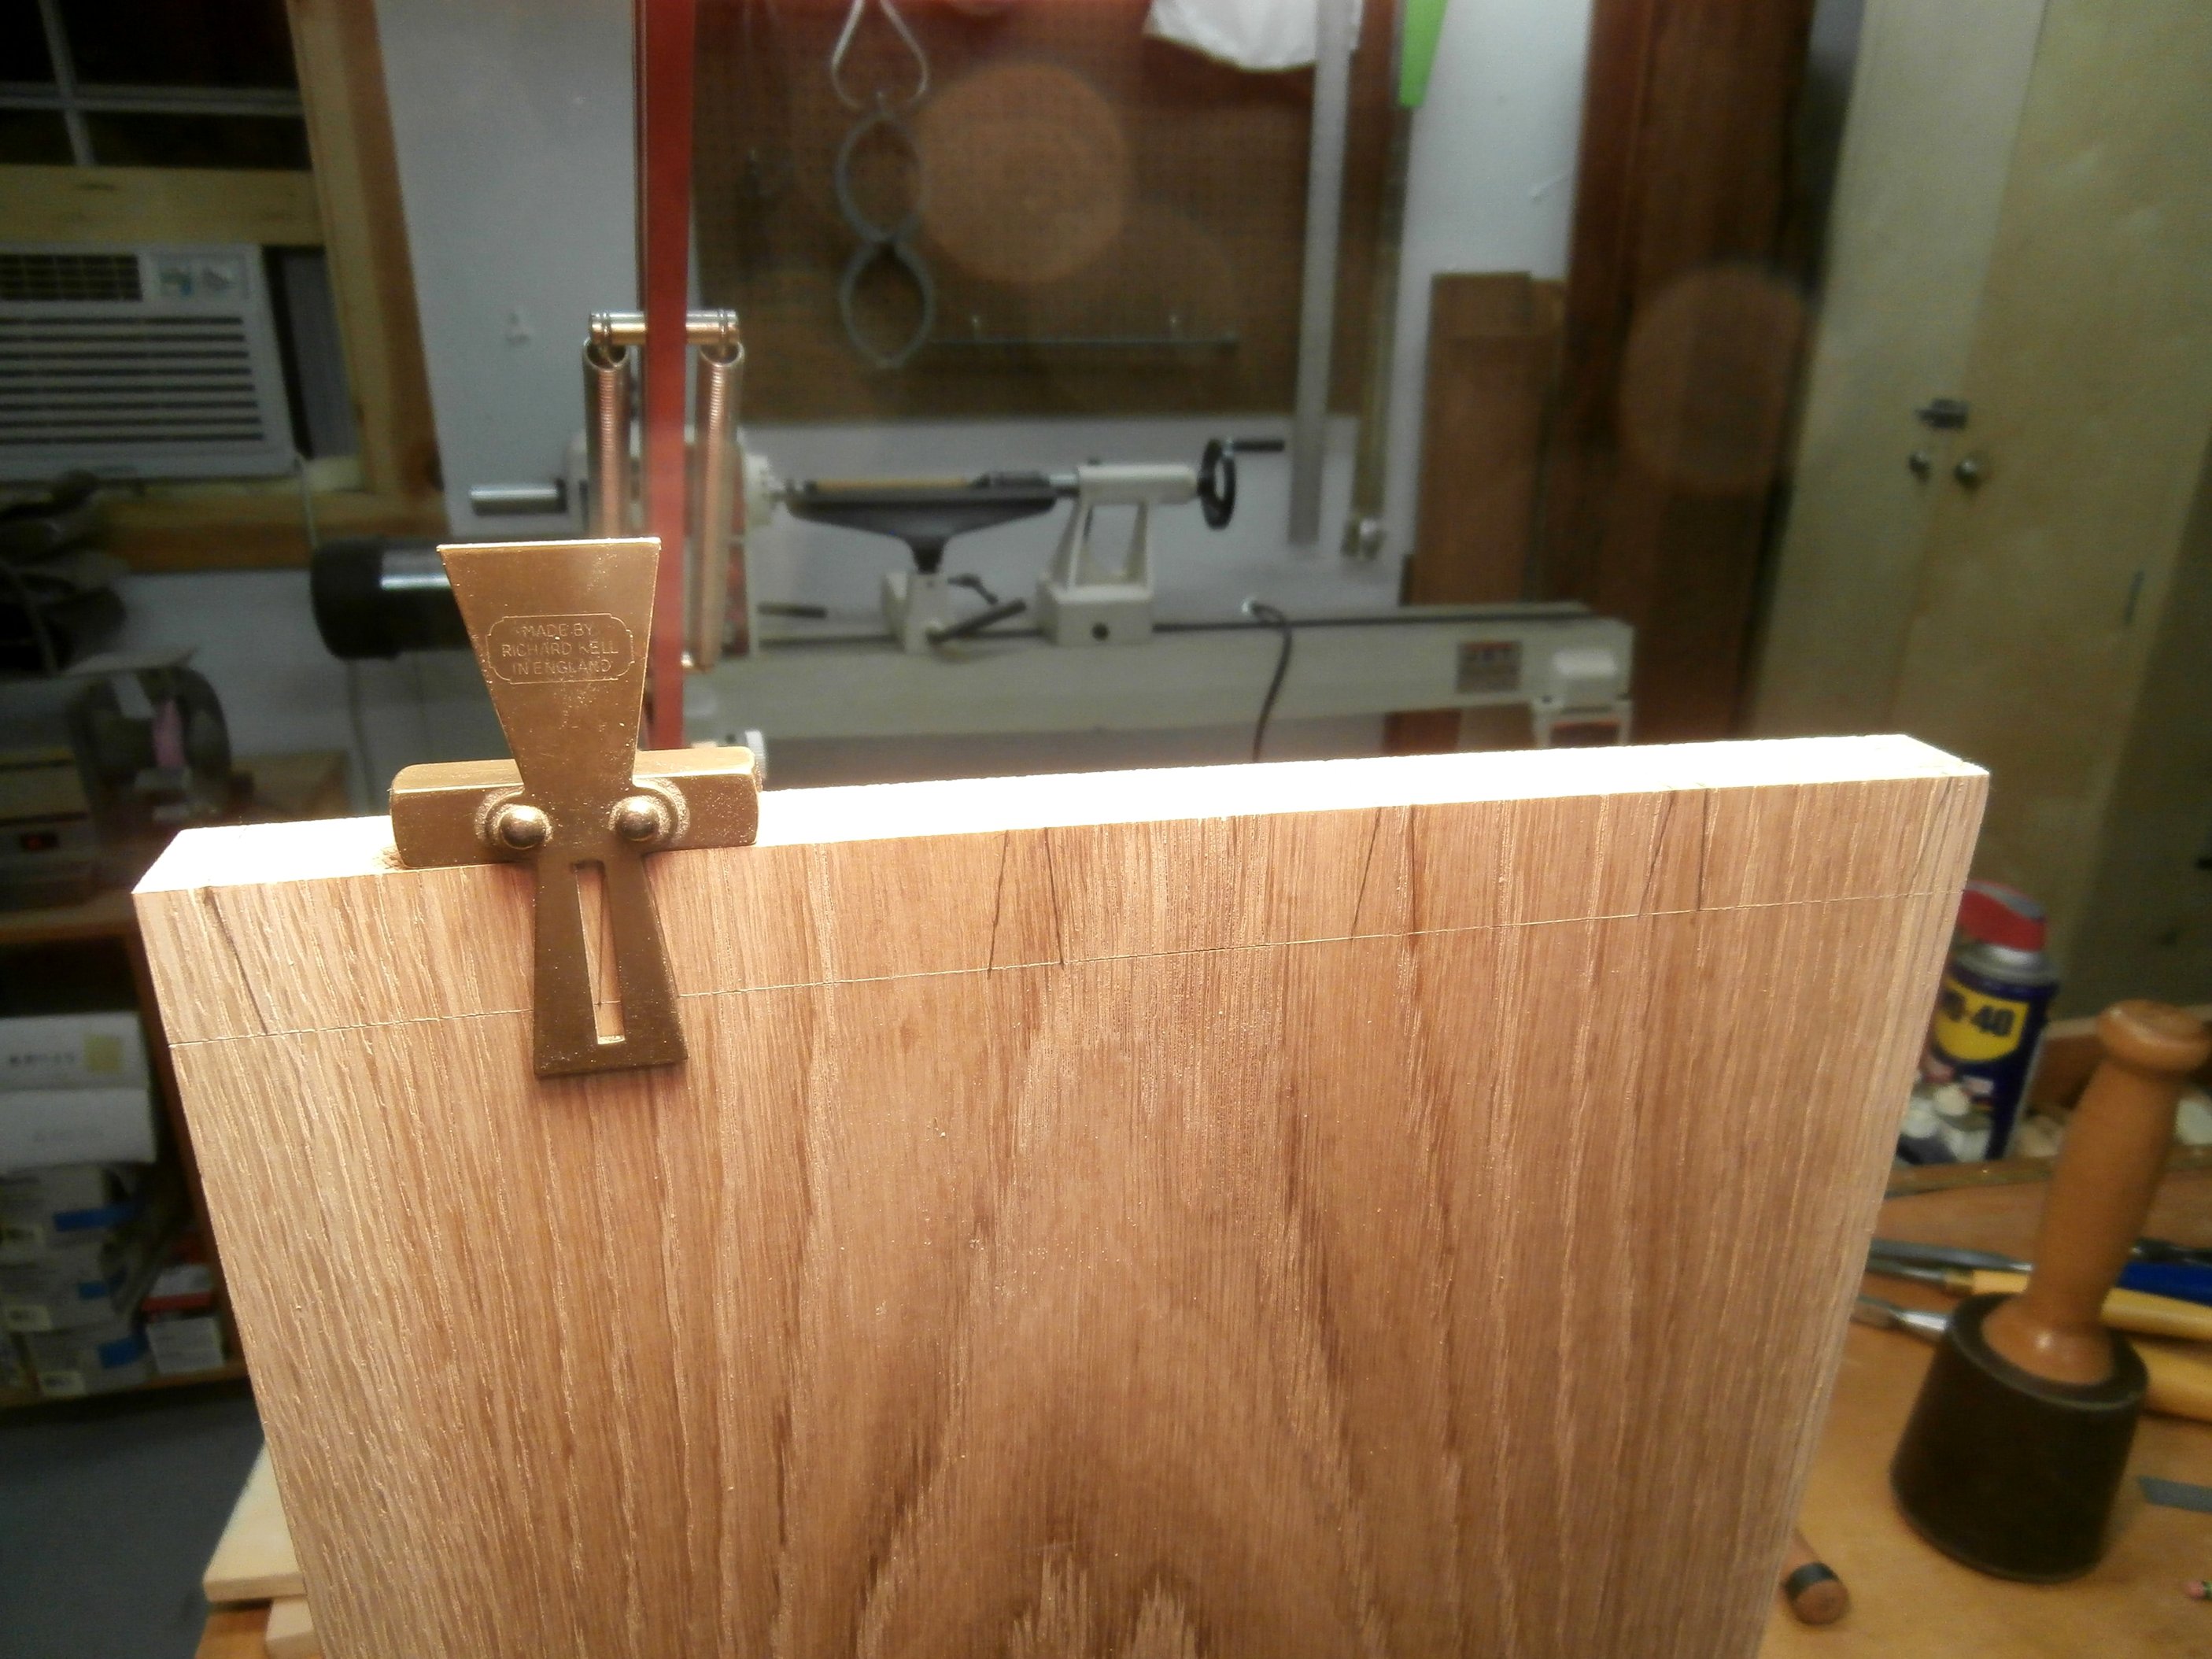
Having decided on my dovetail spacing, I then marked the tails with a brass dovetail guide made by an Englishman, Richard Kell, many years ago.

Marking the tails.

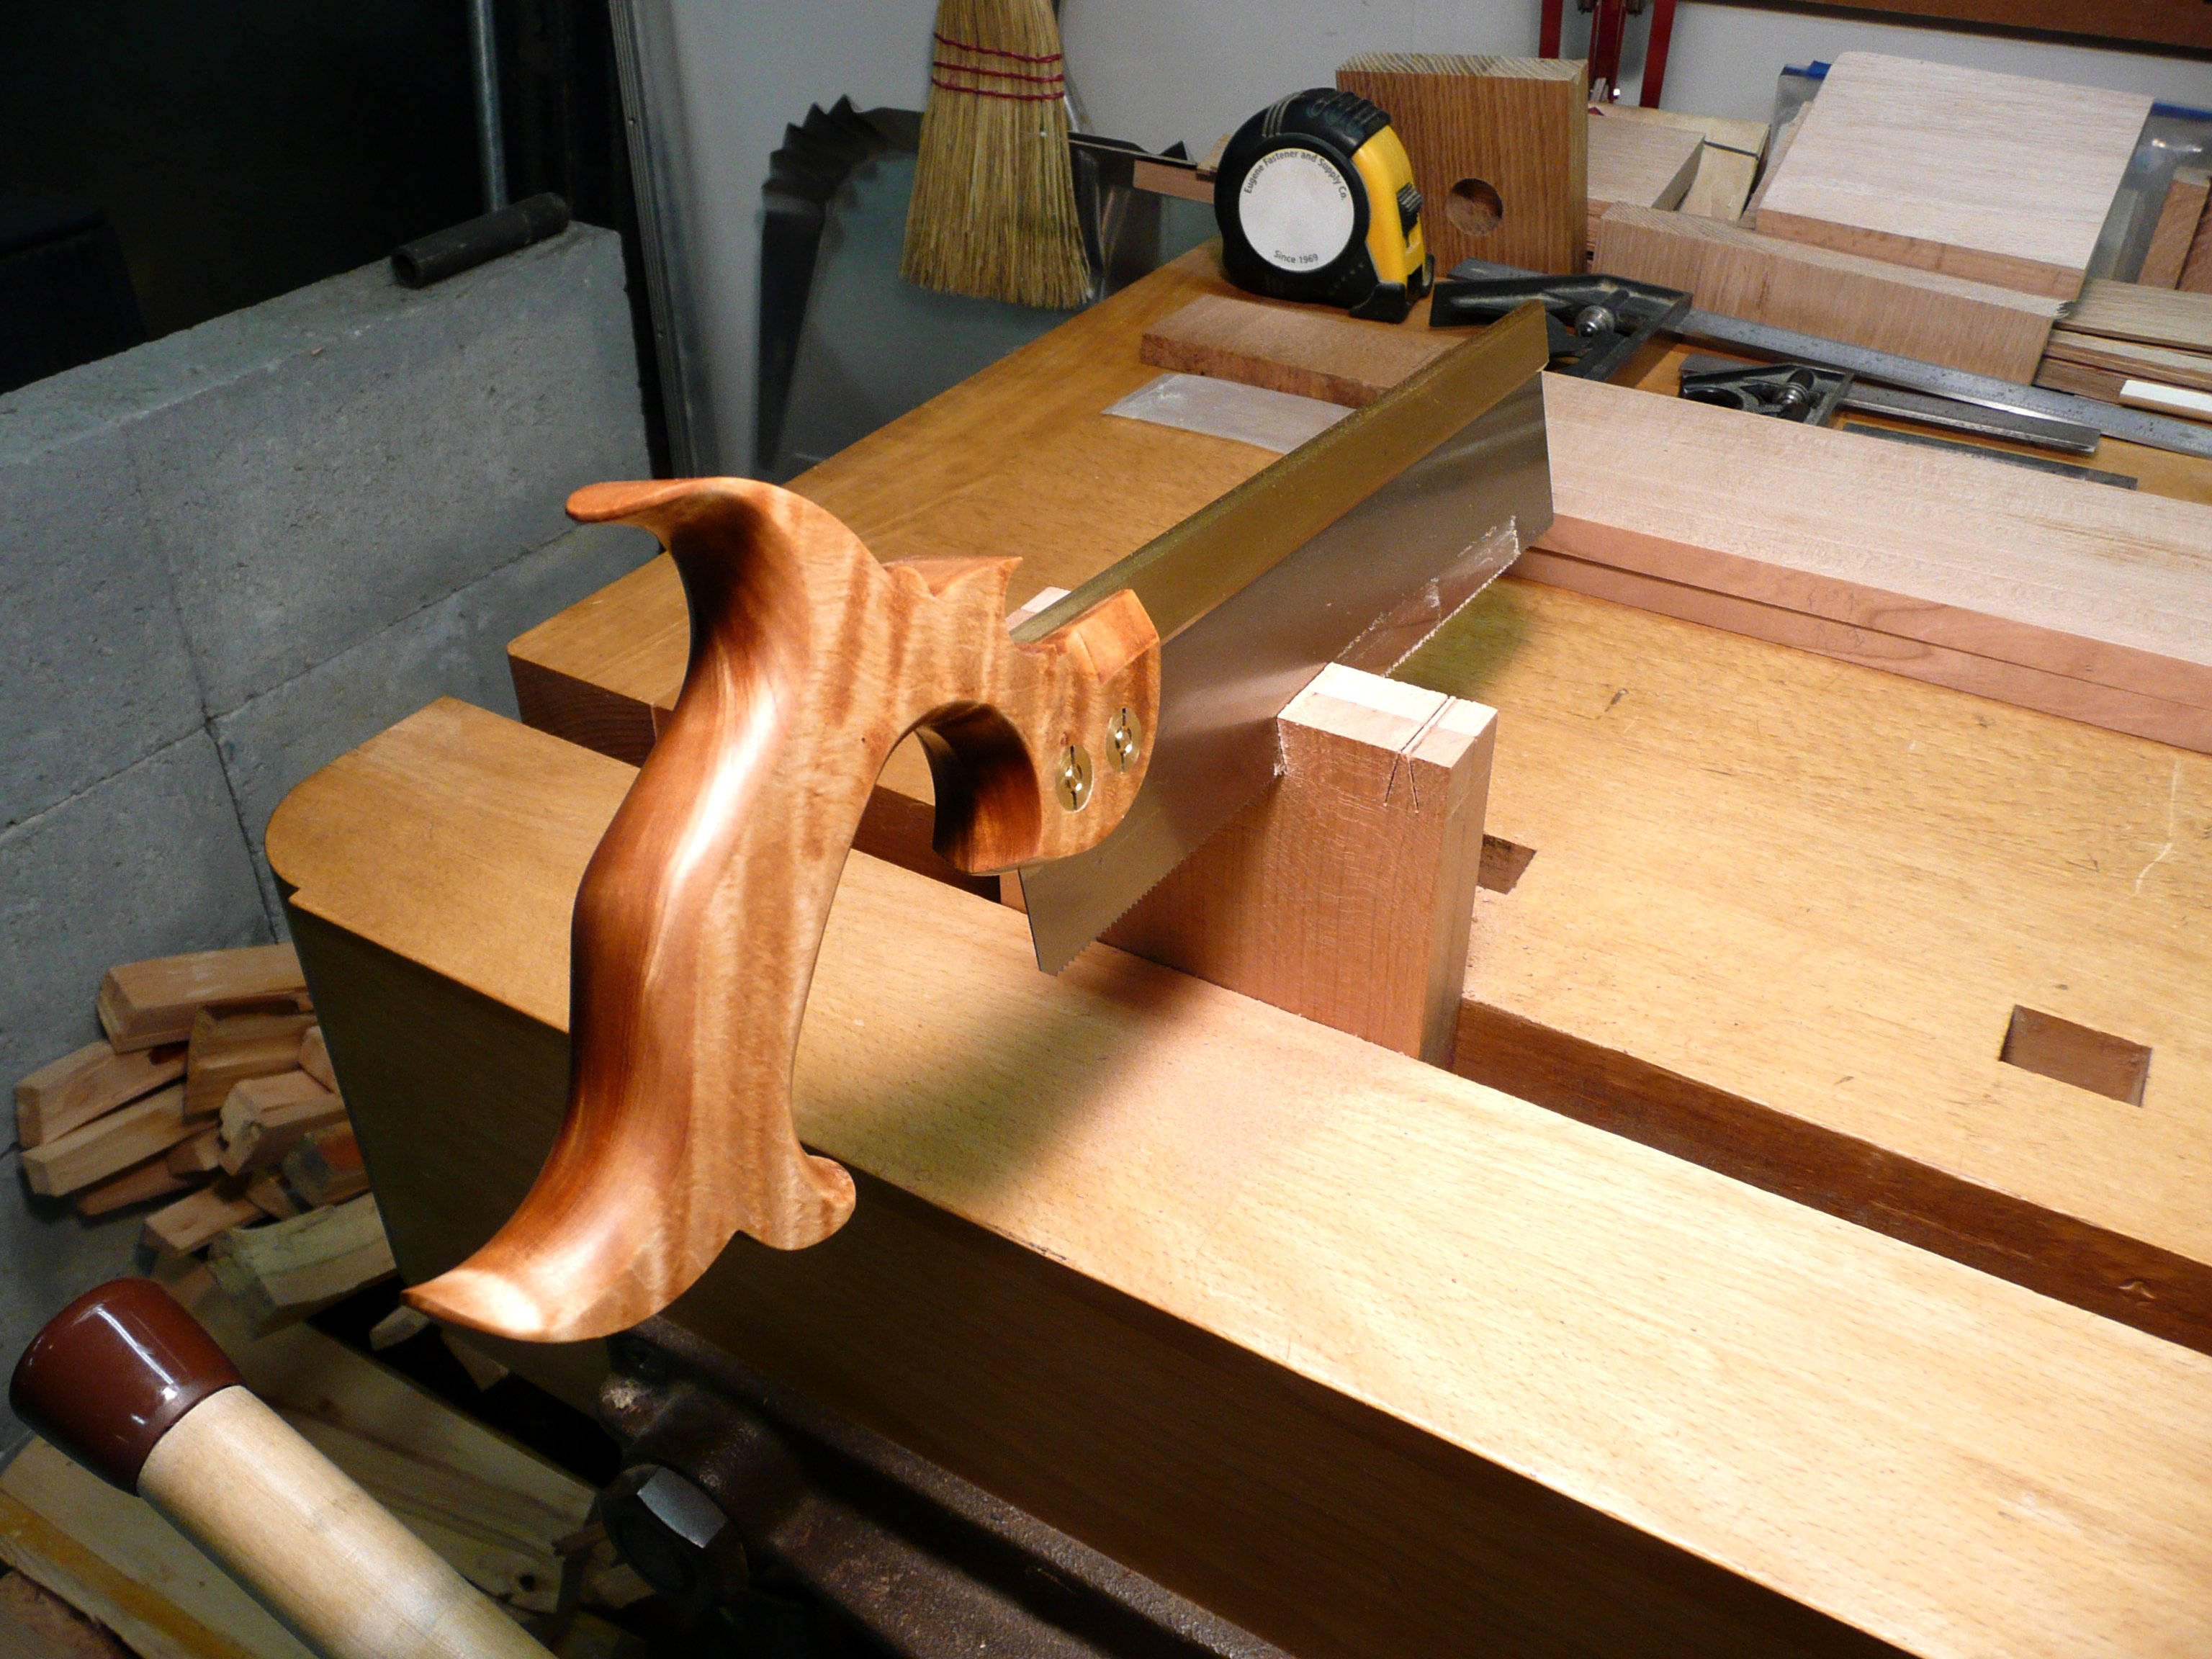
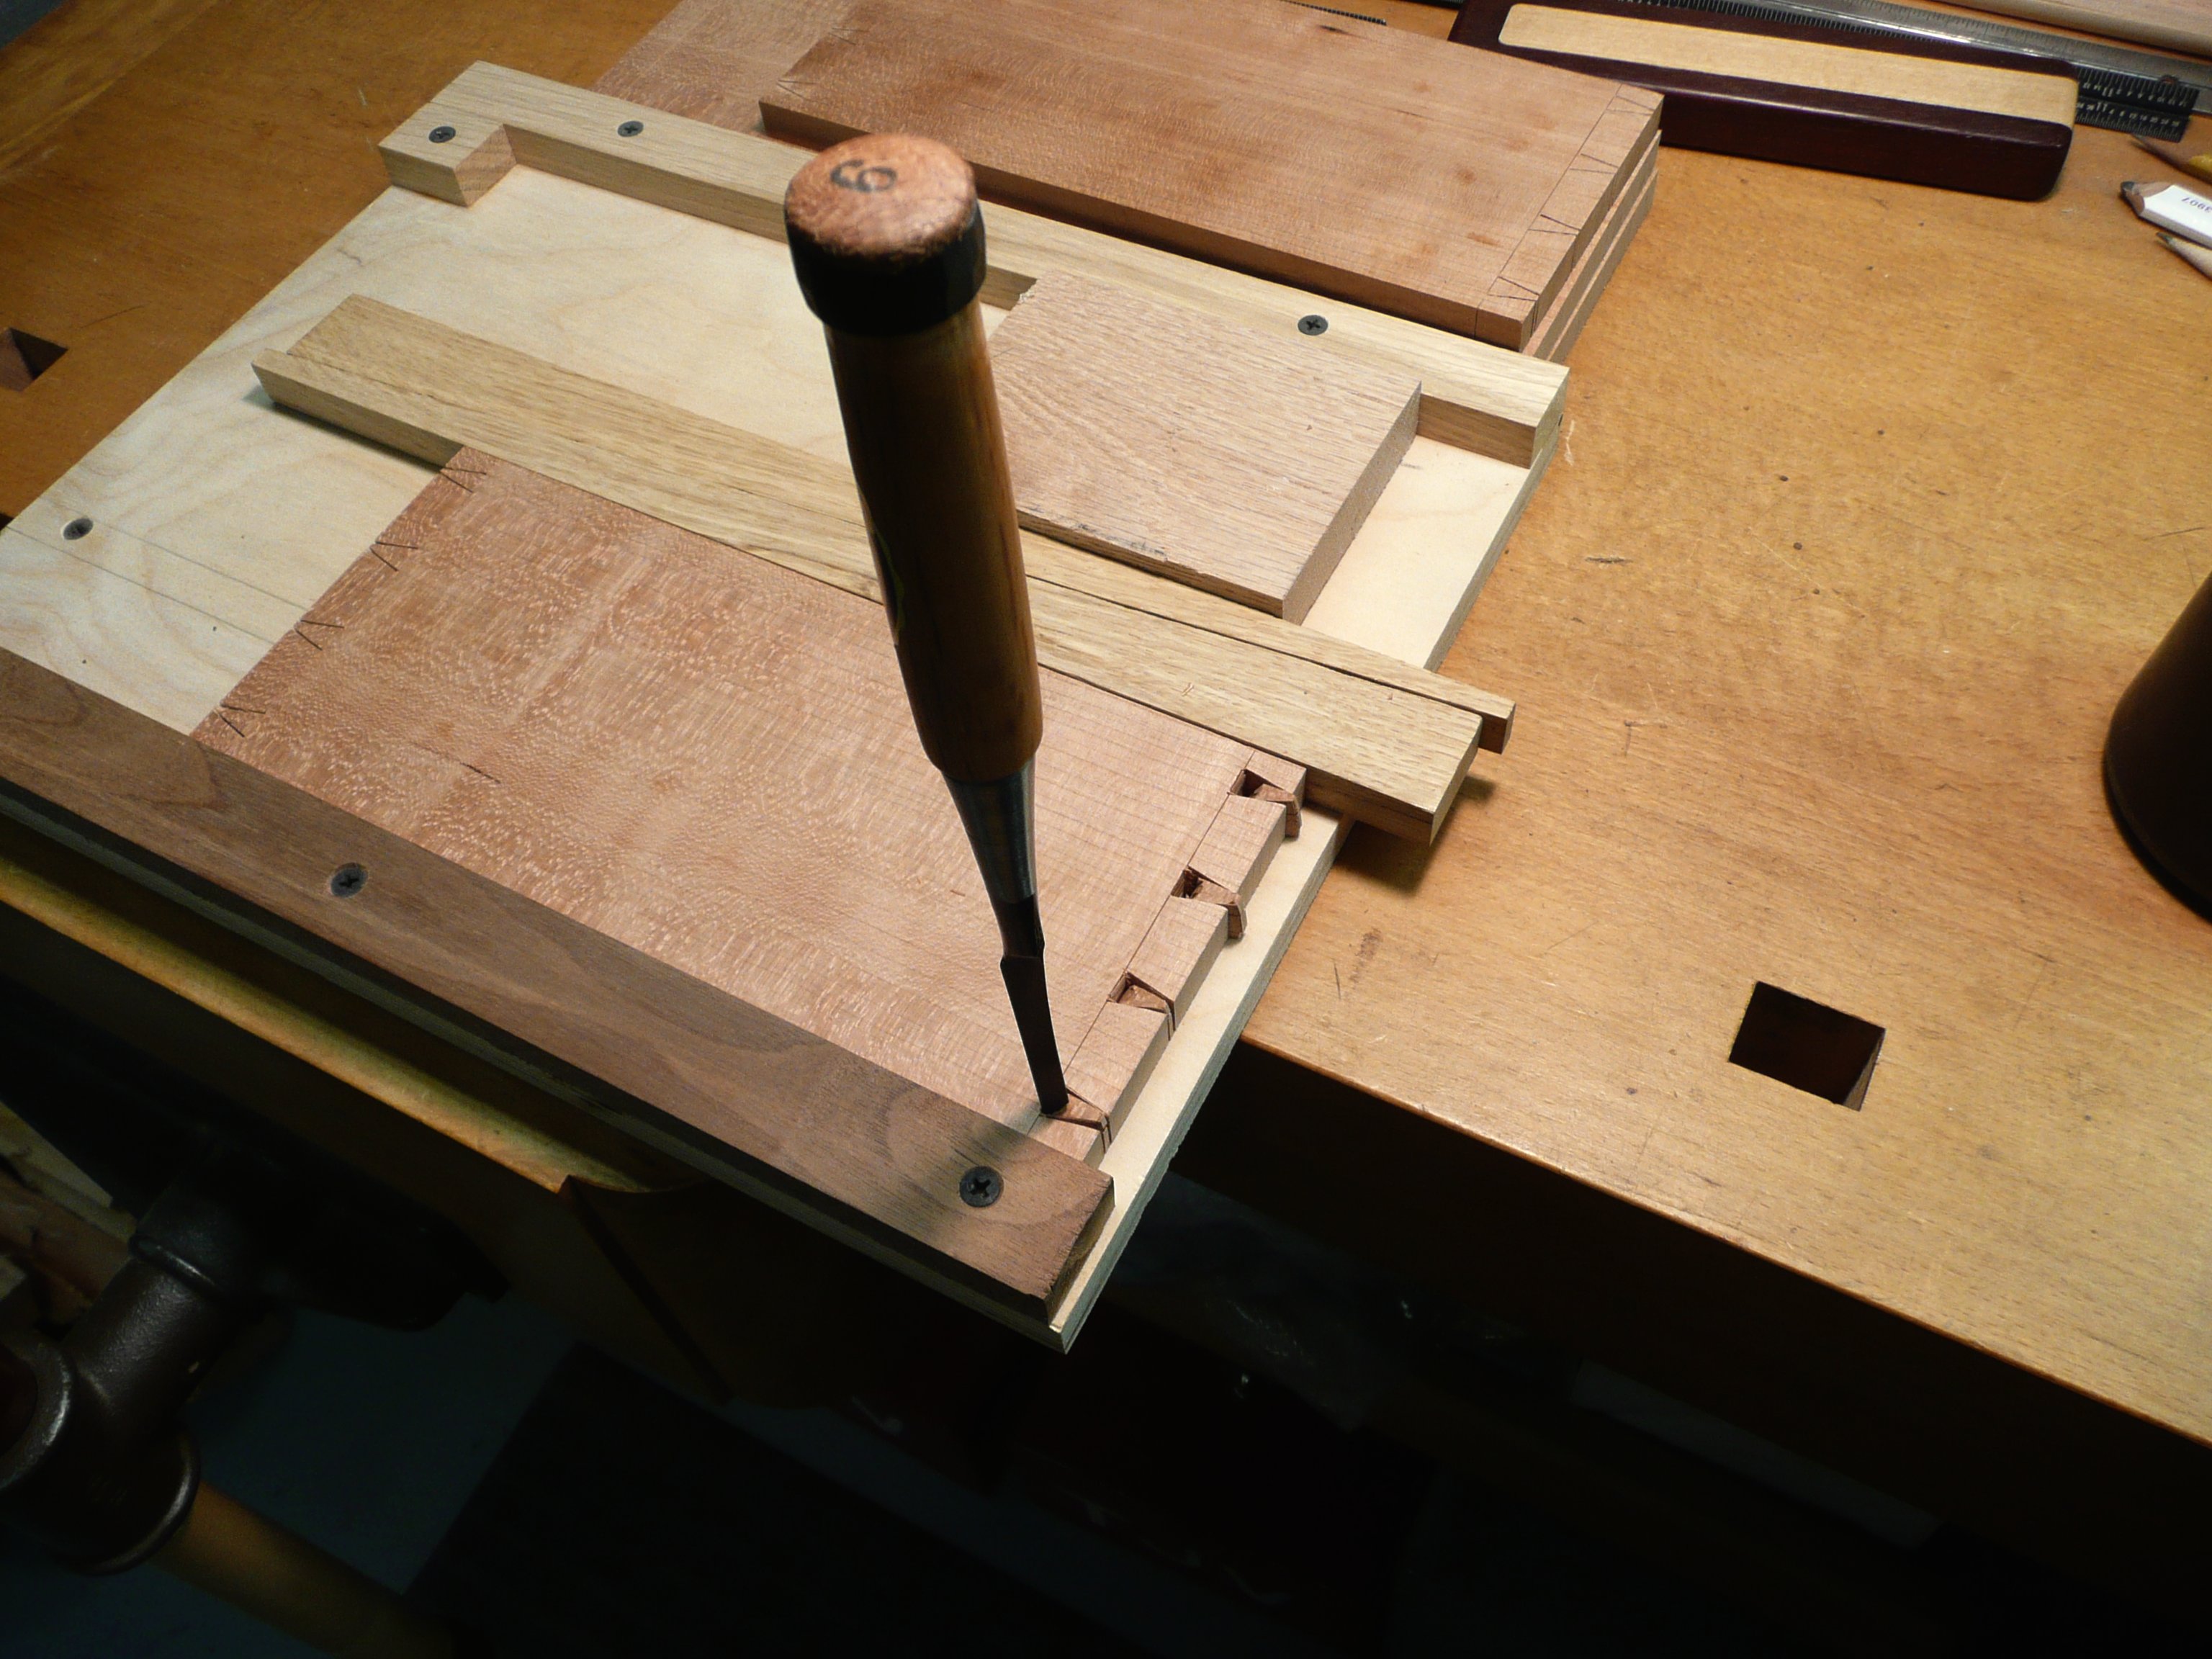
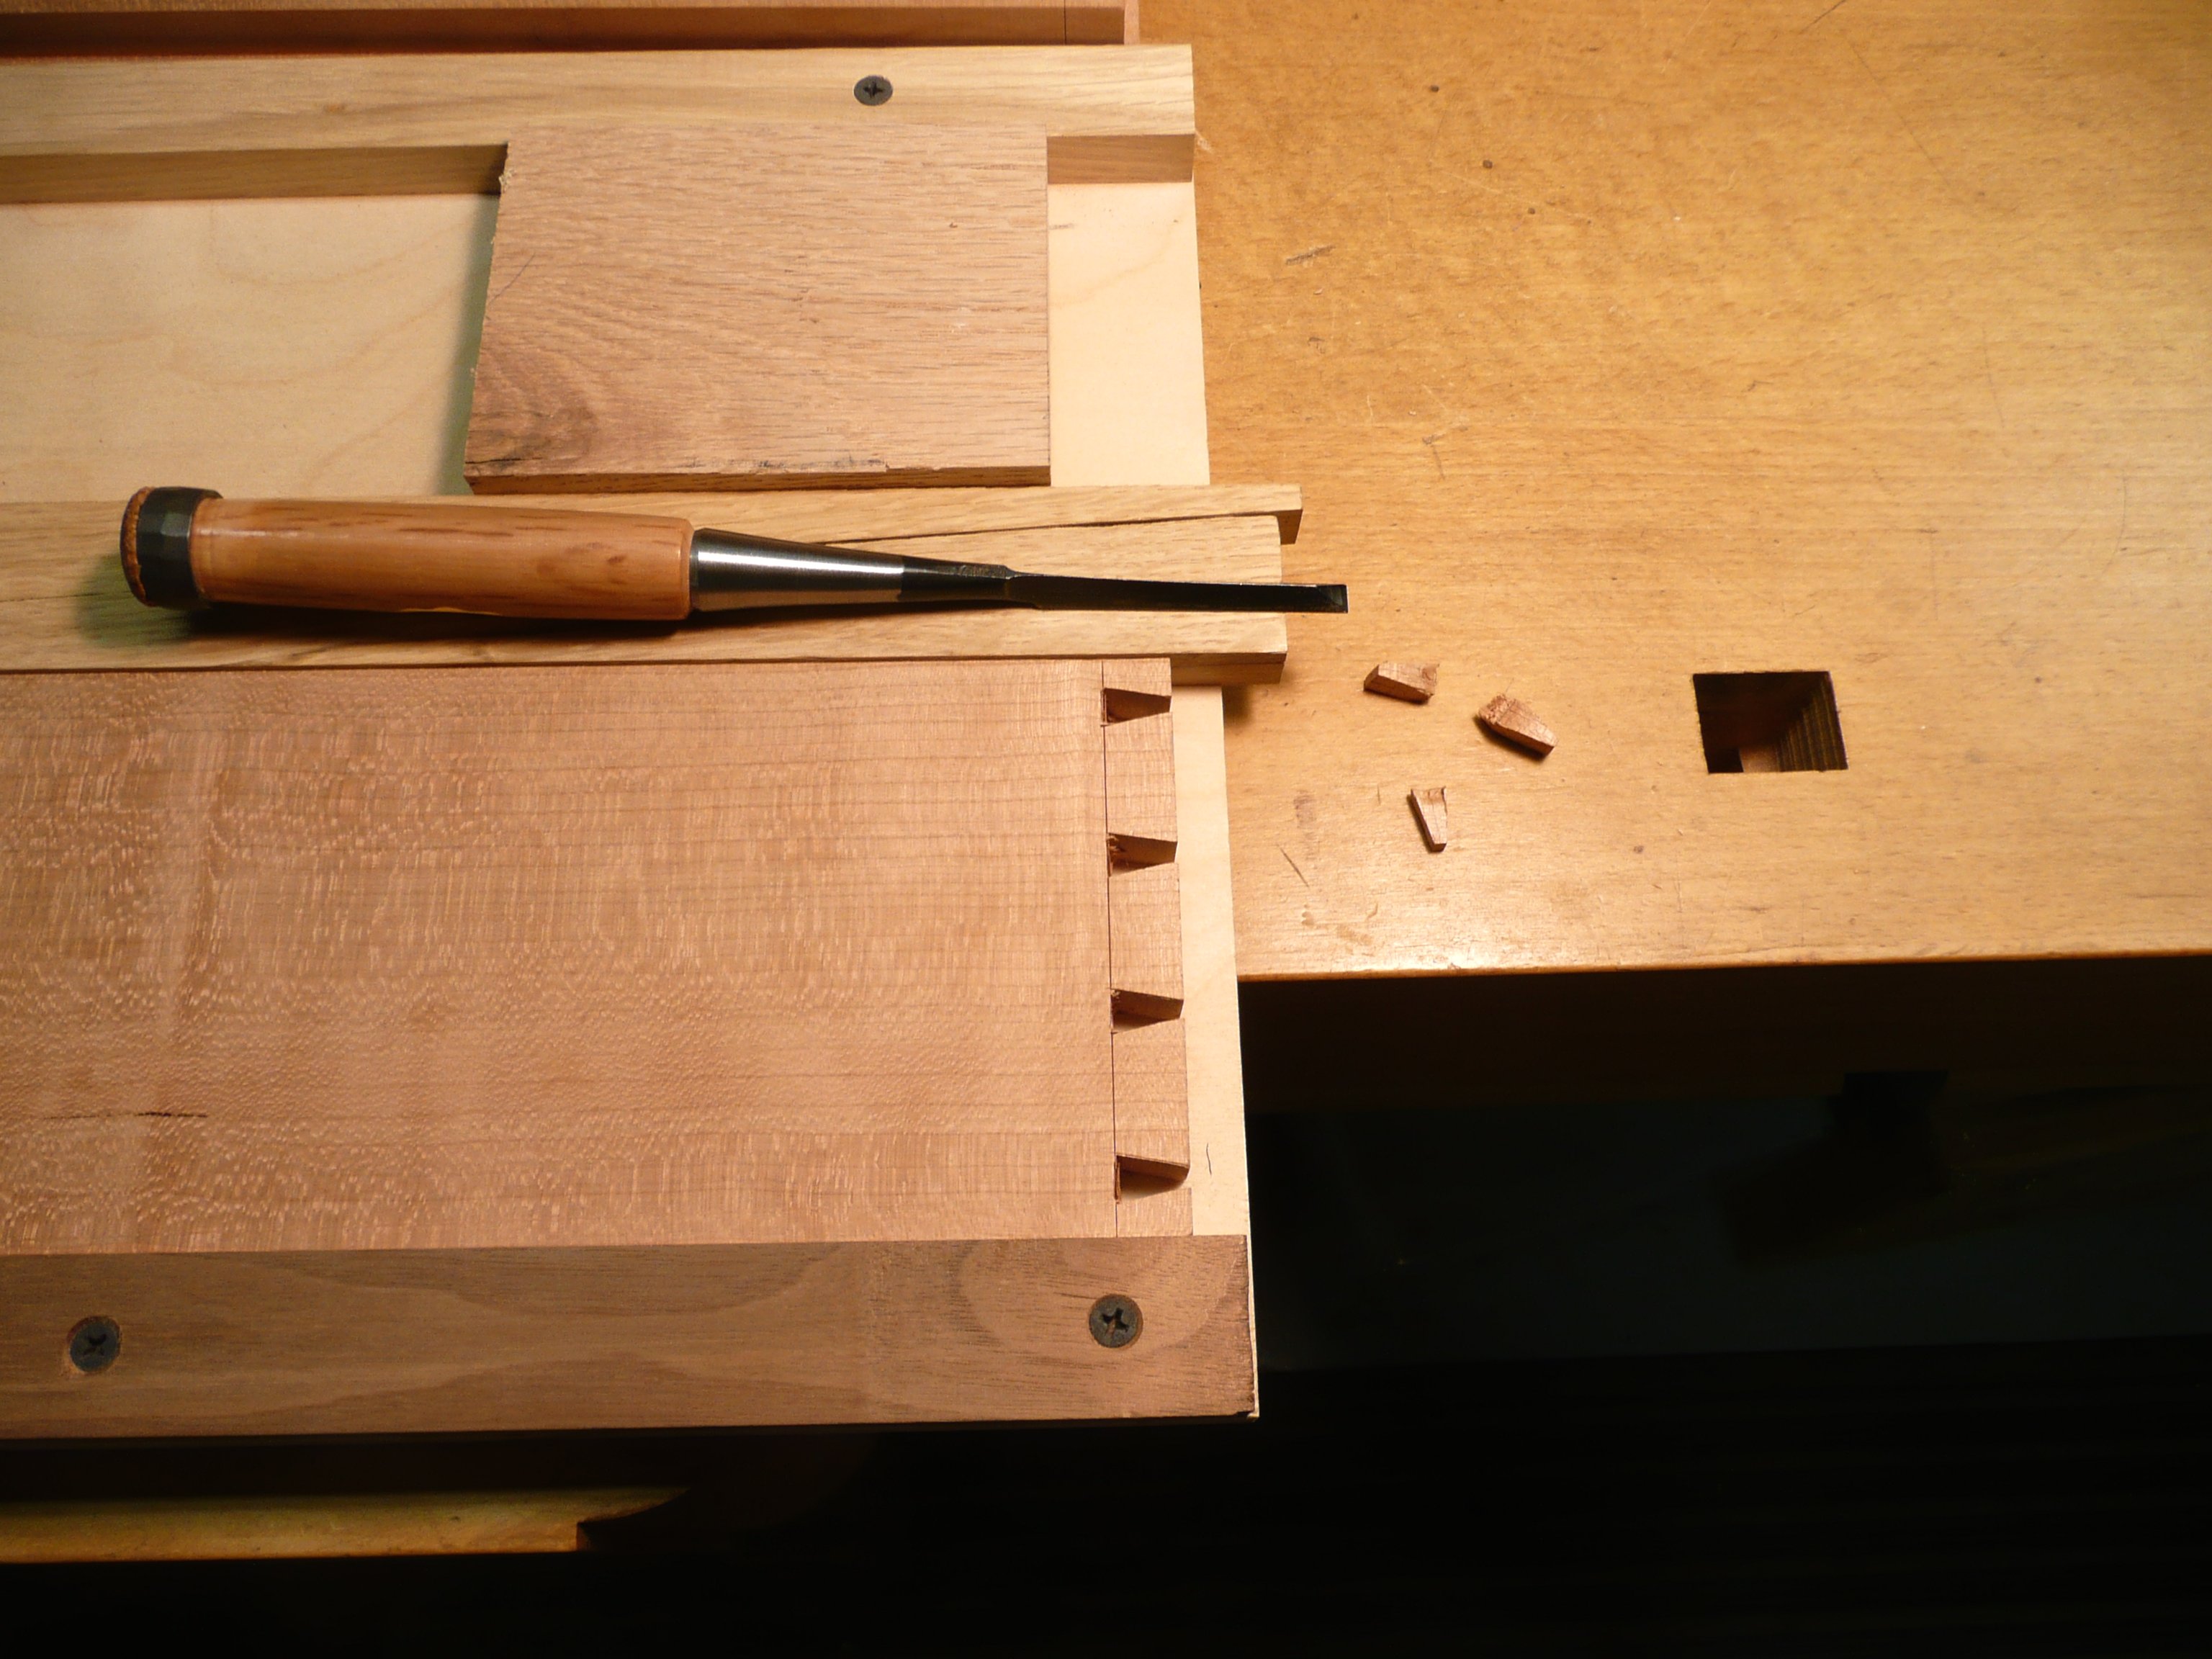
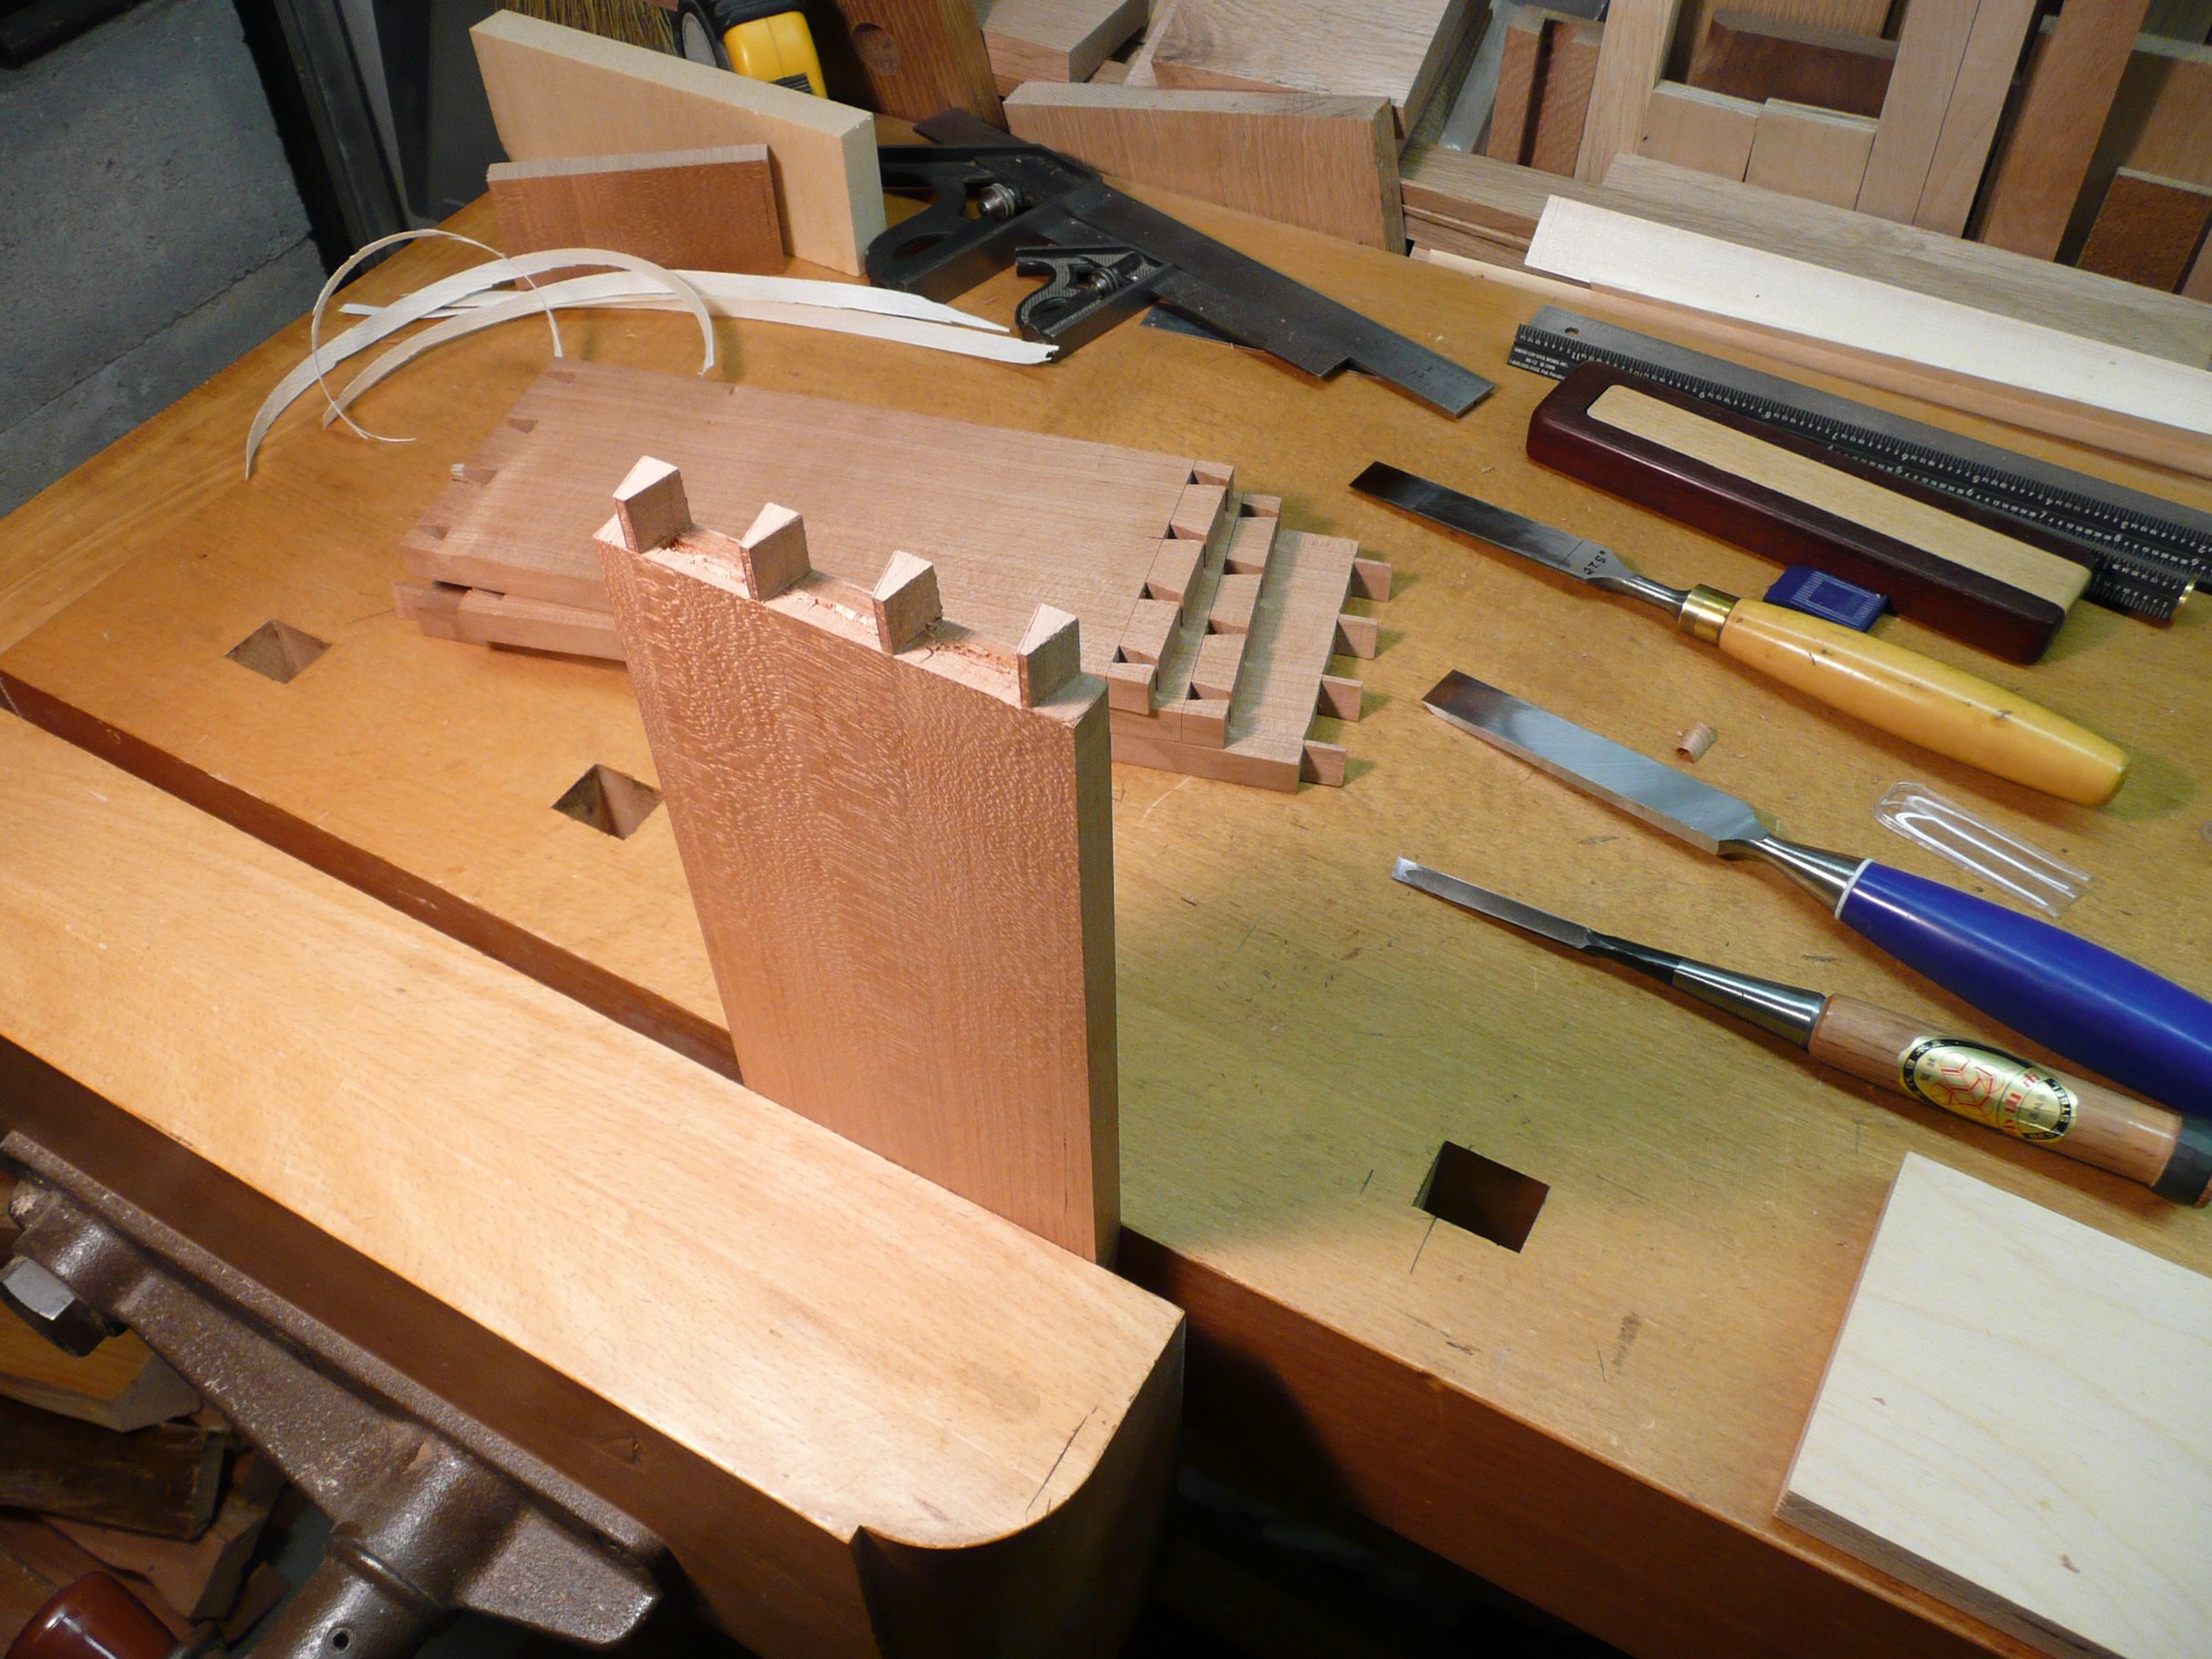
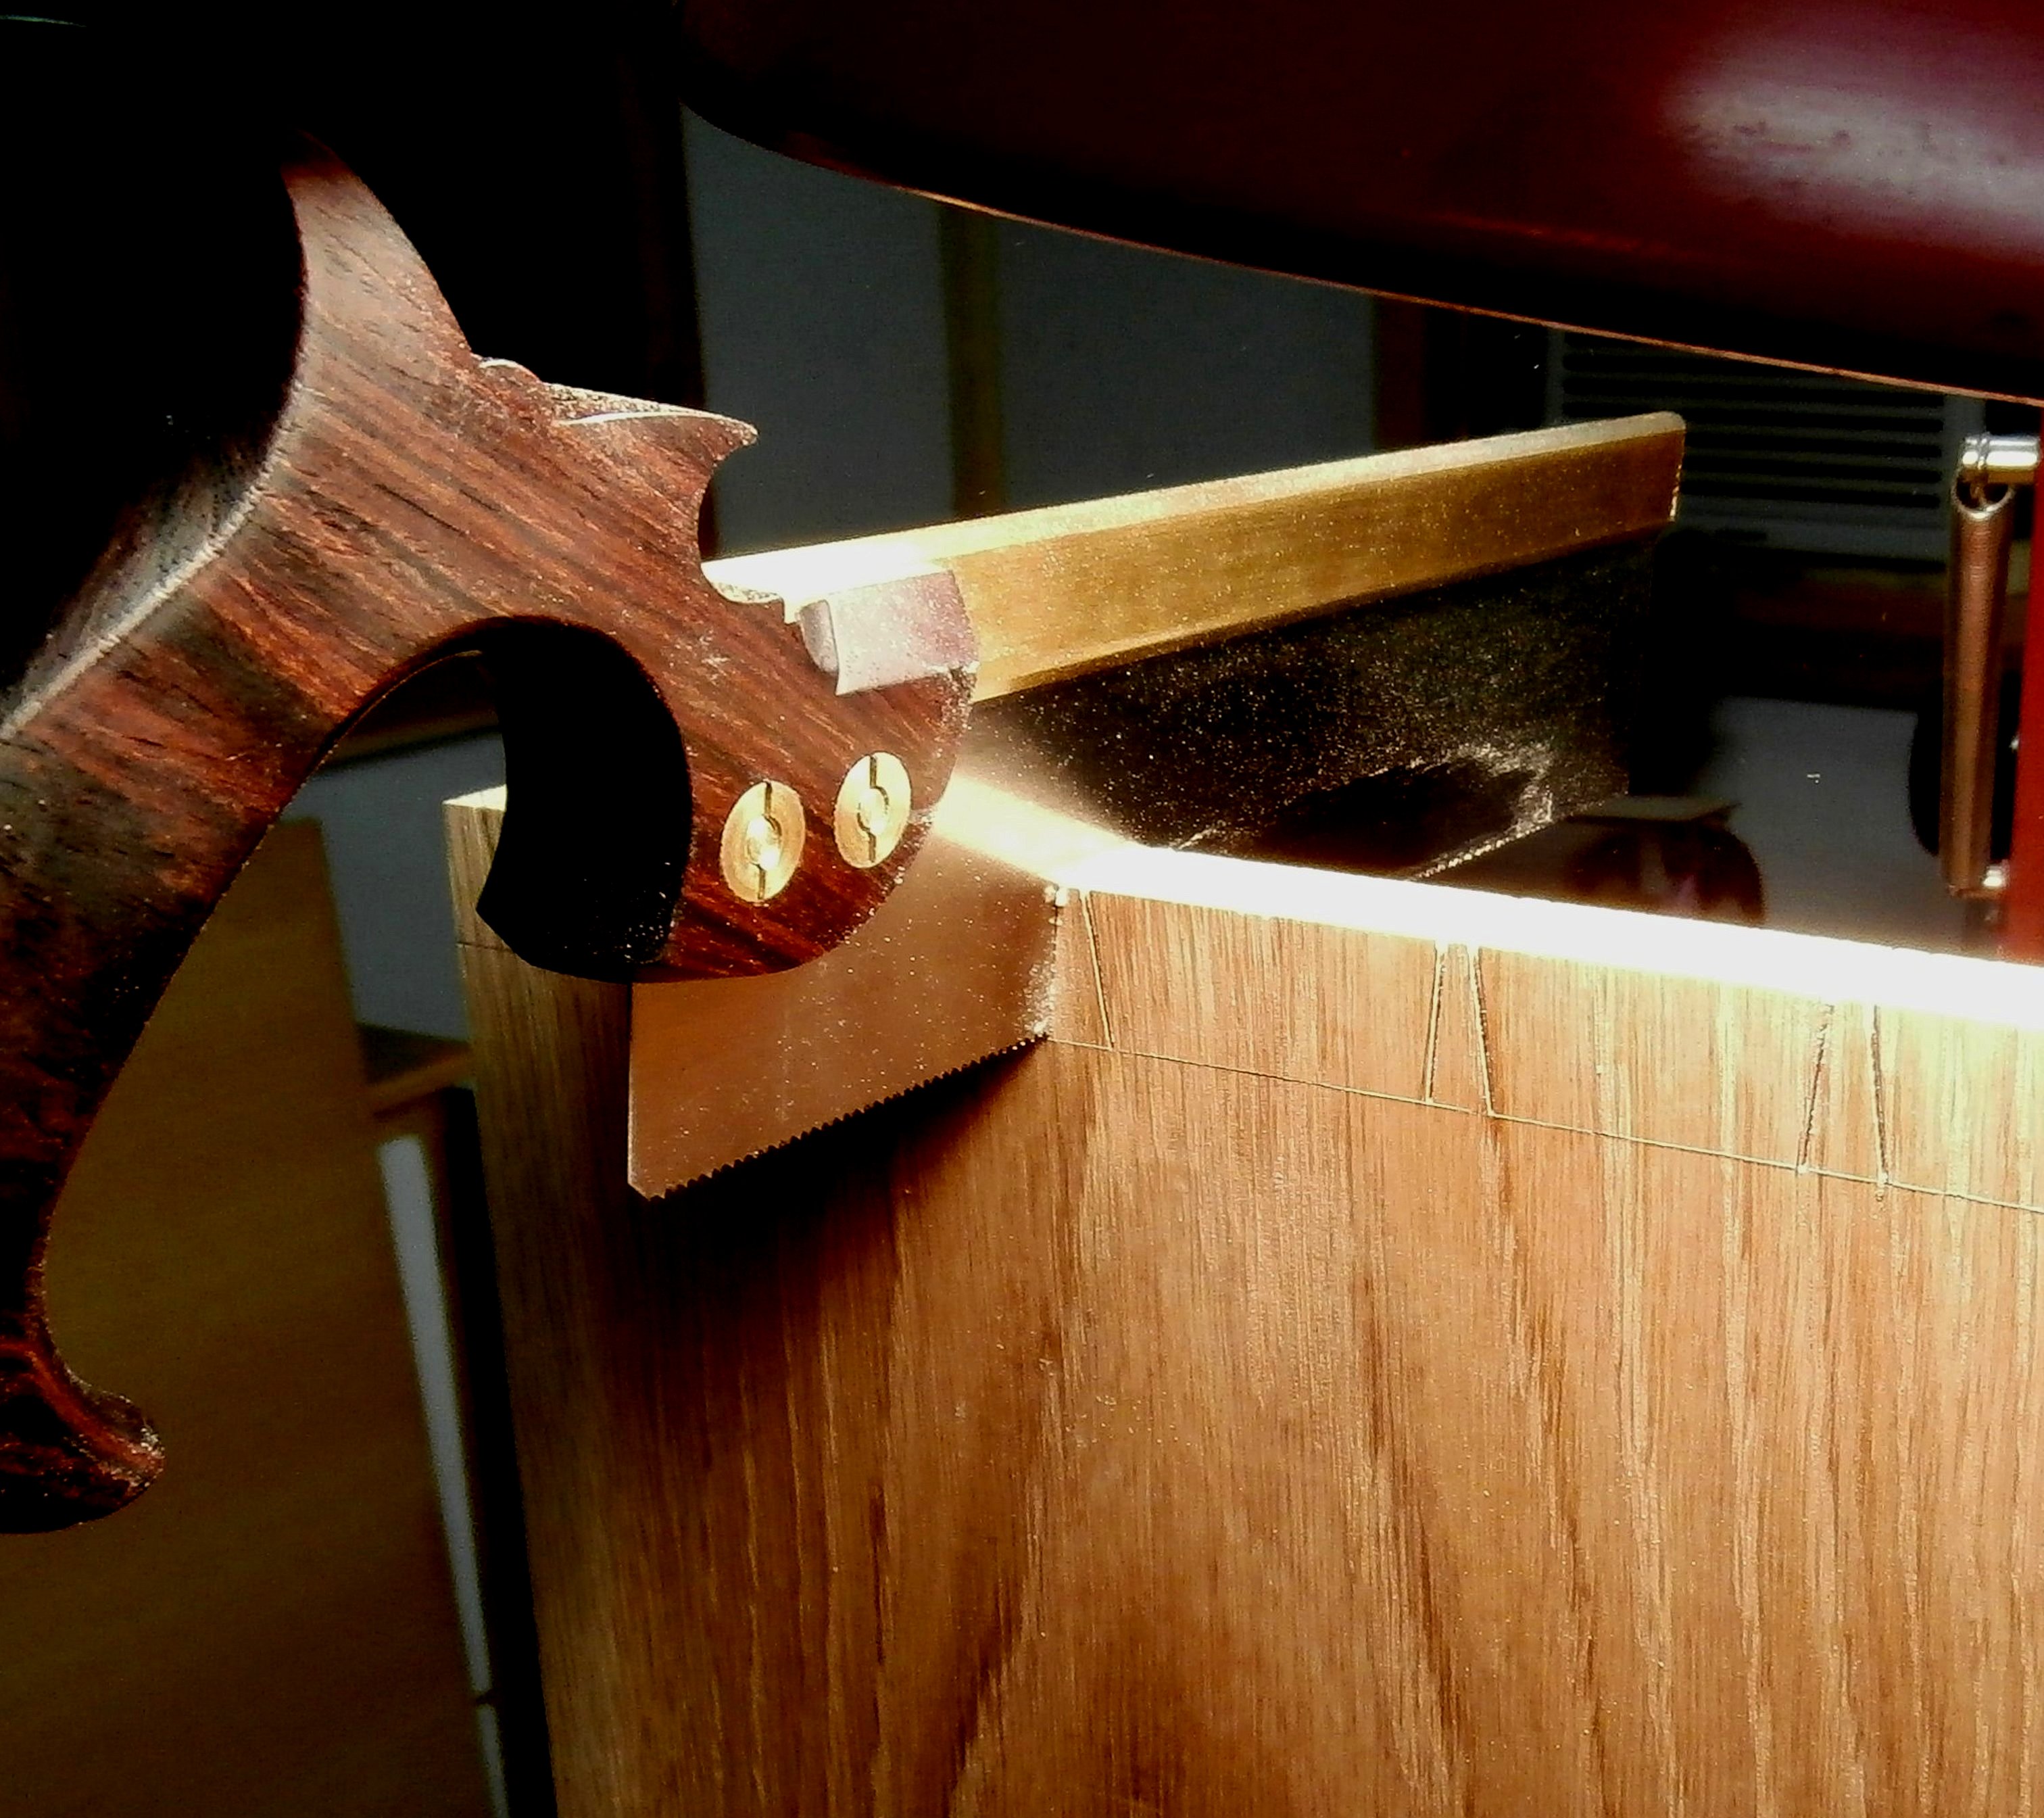
The next two steps were to cut alongside the marked tails and then chop out the waste between them.

Using a chisel to chop out the waste between the dovetails.

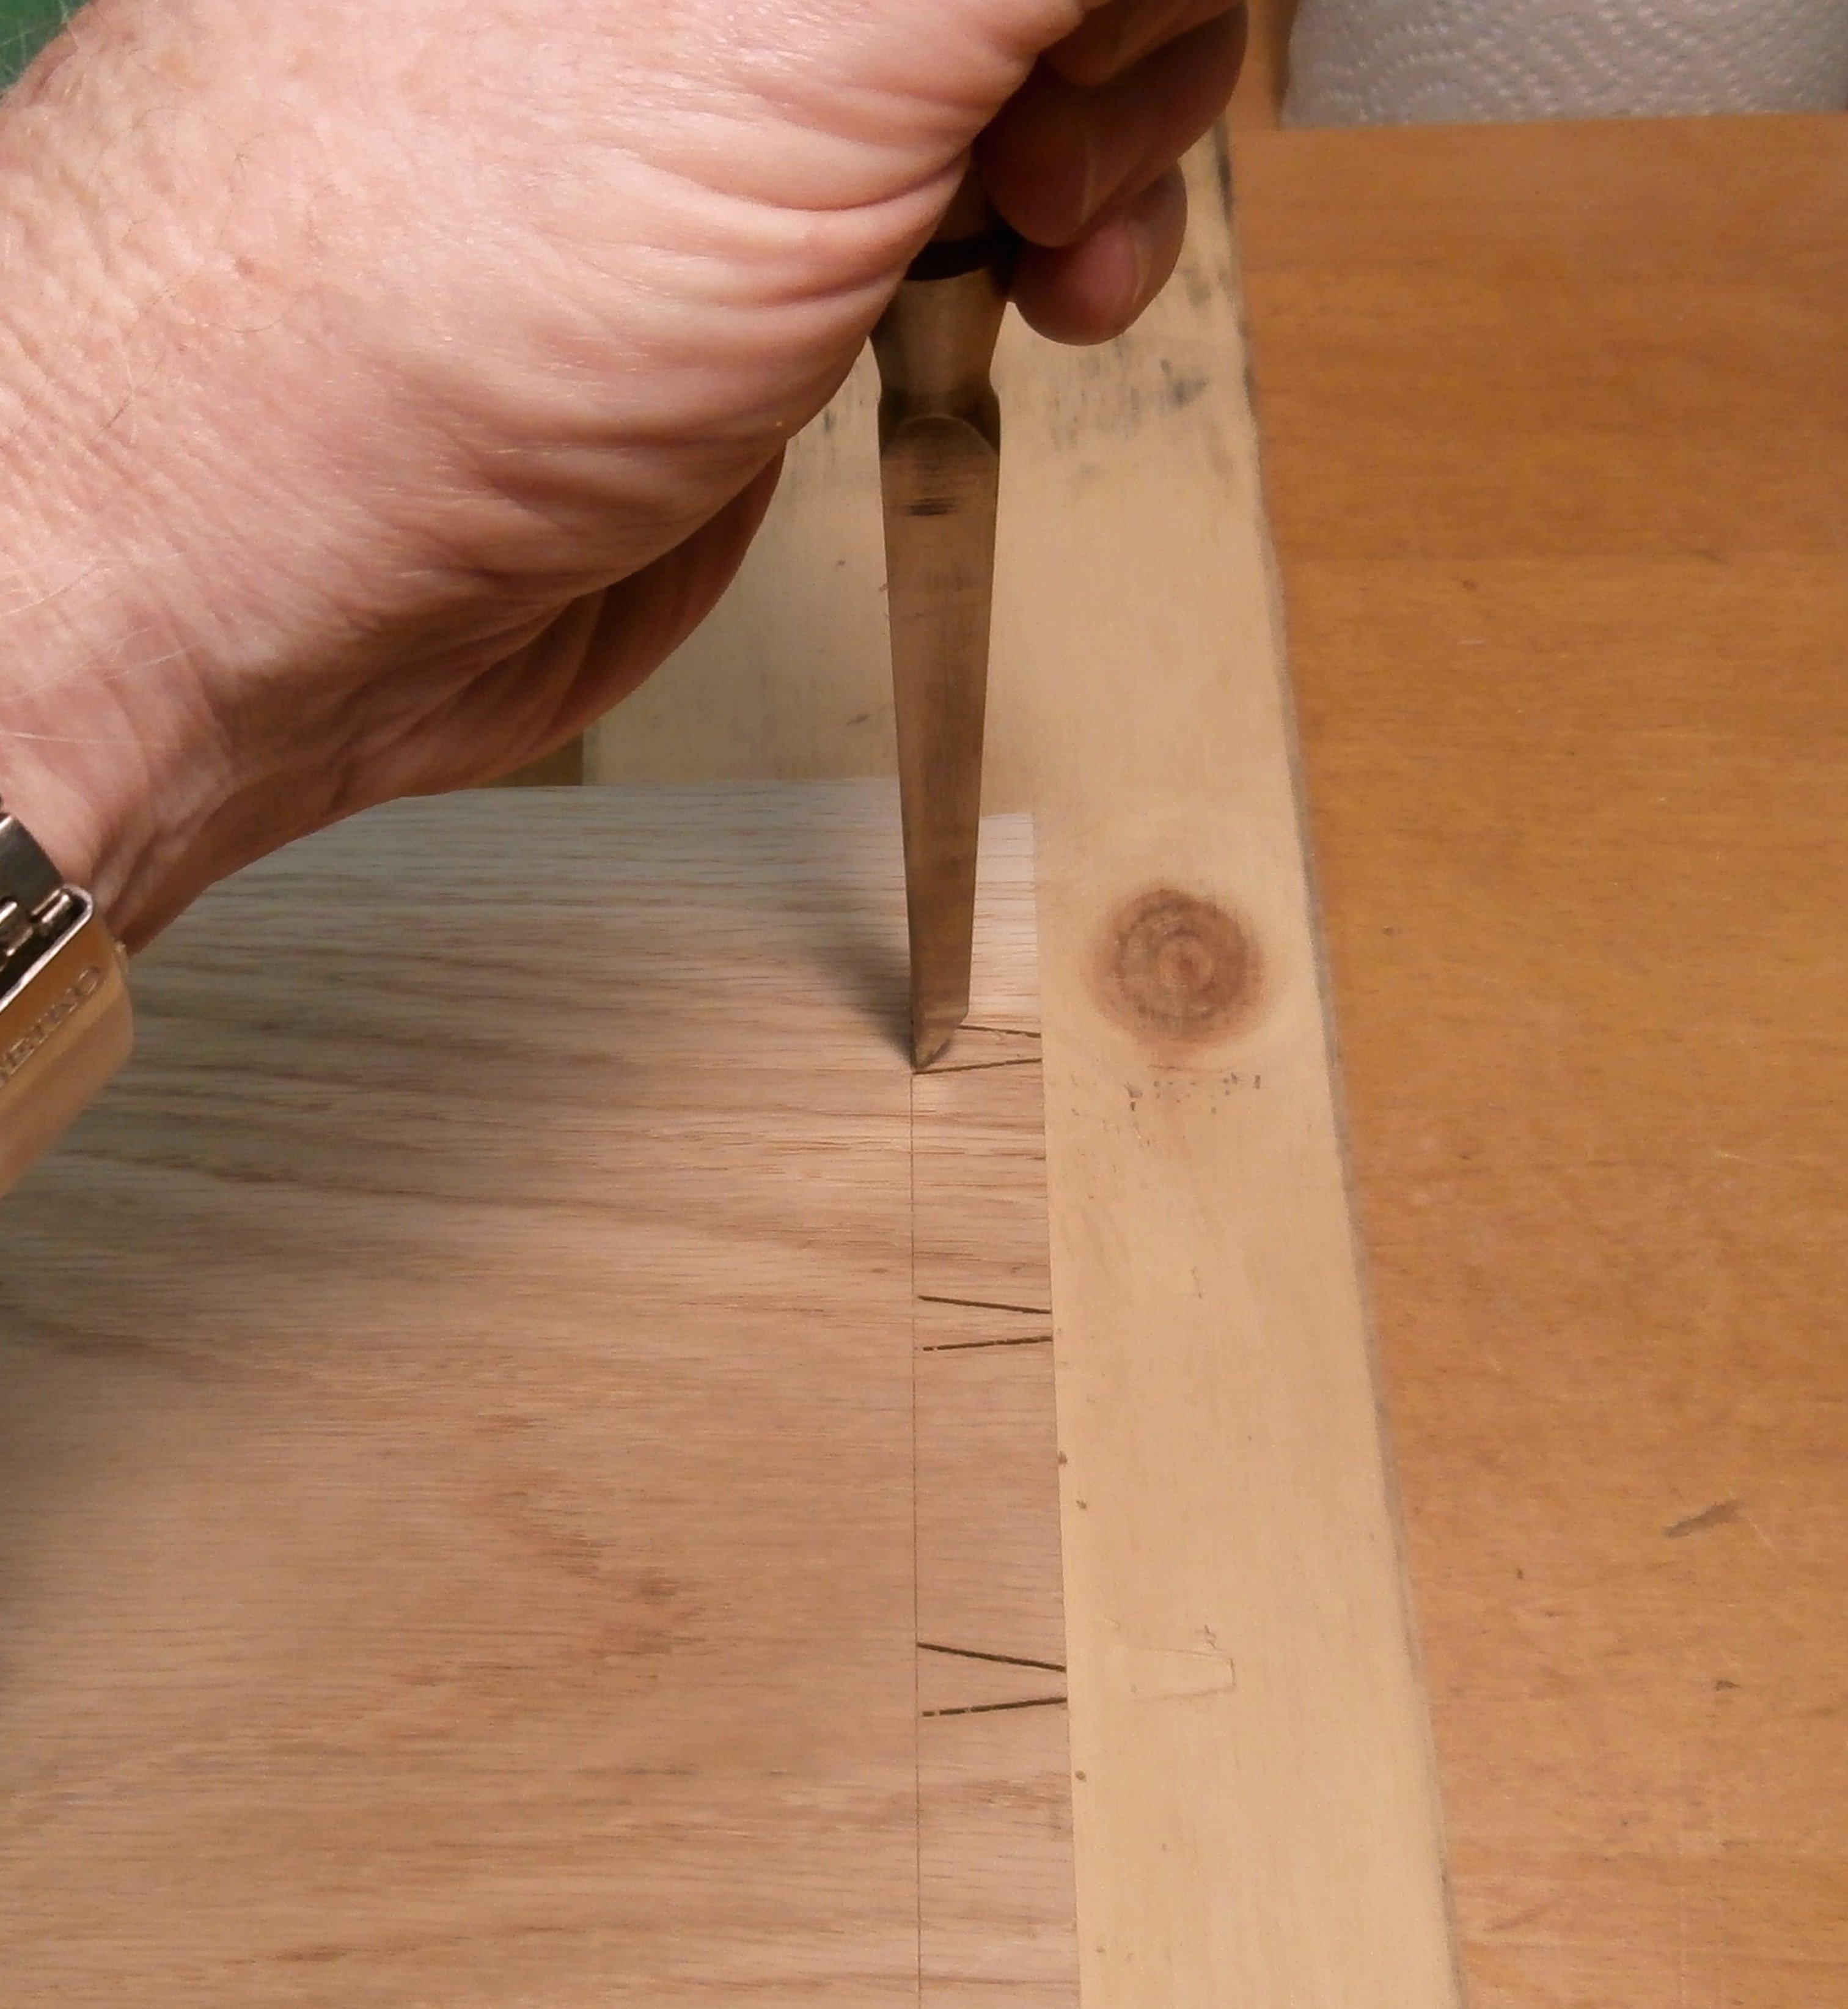
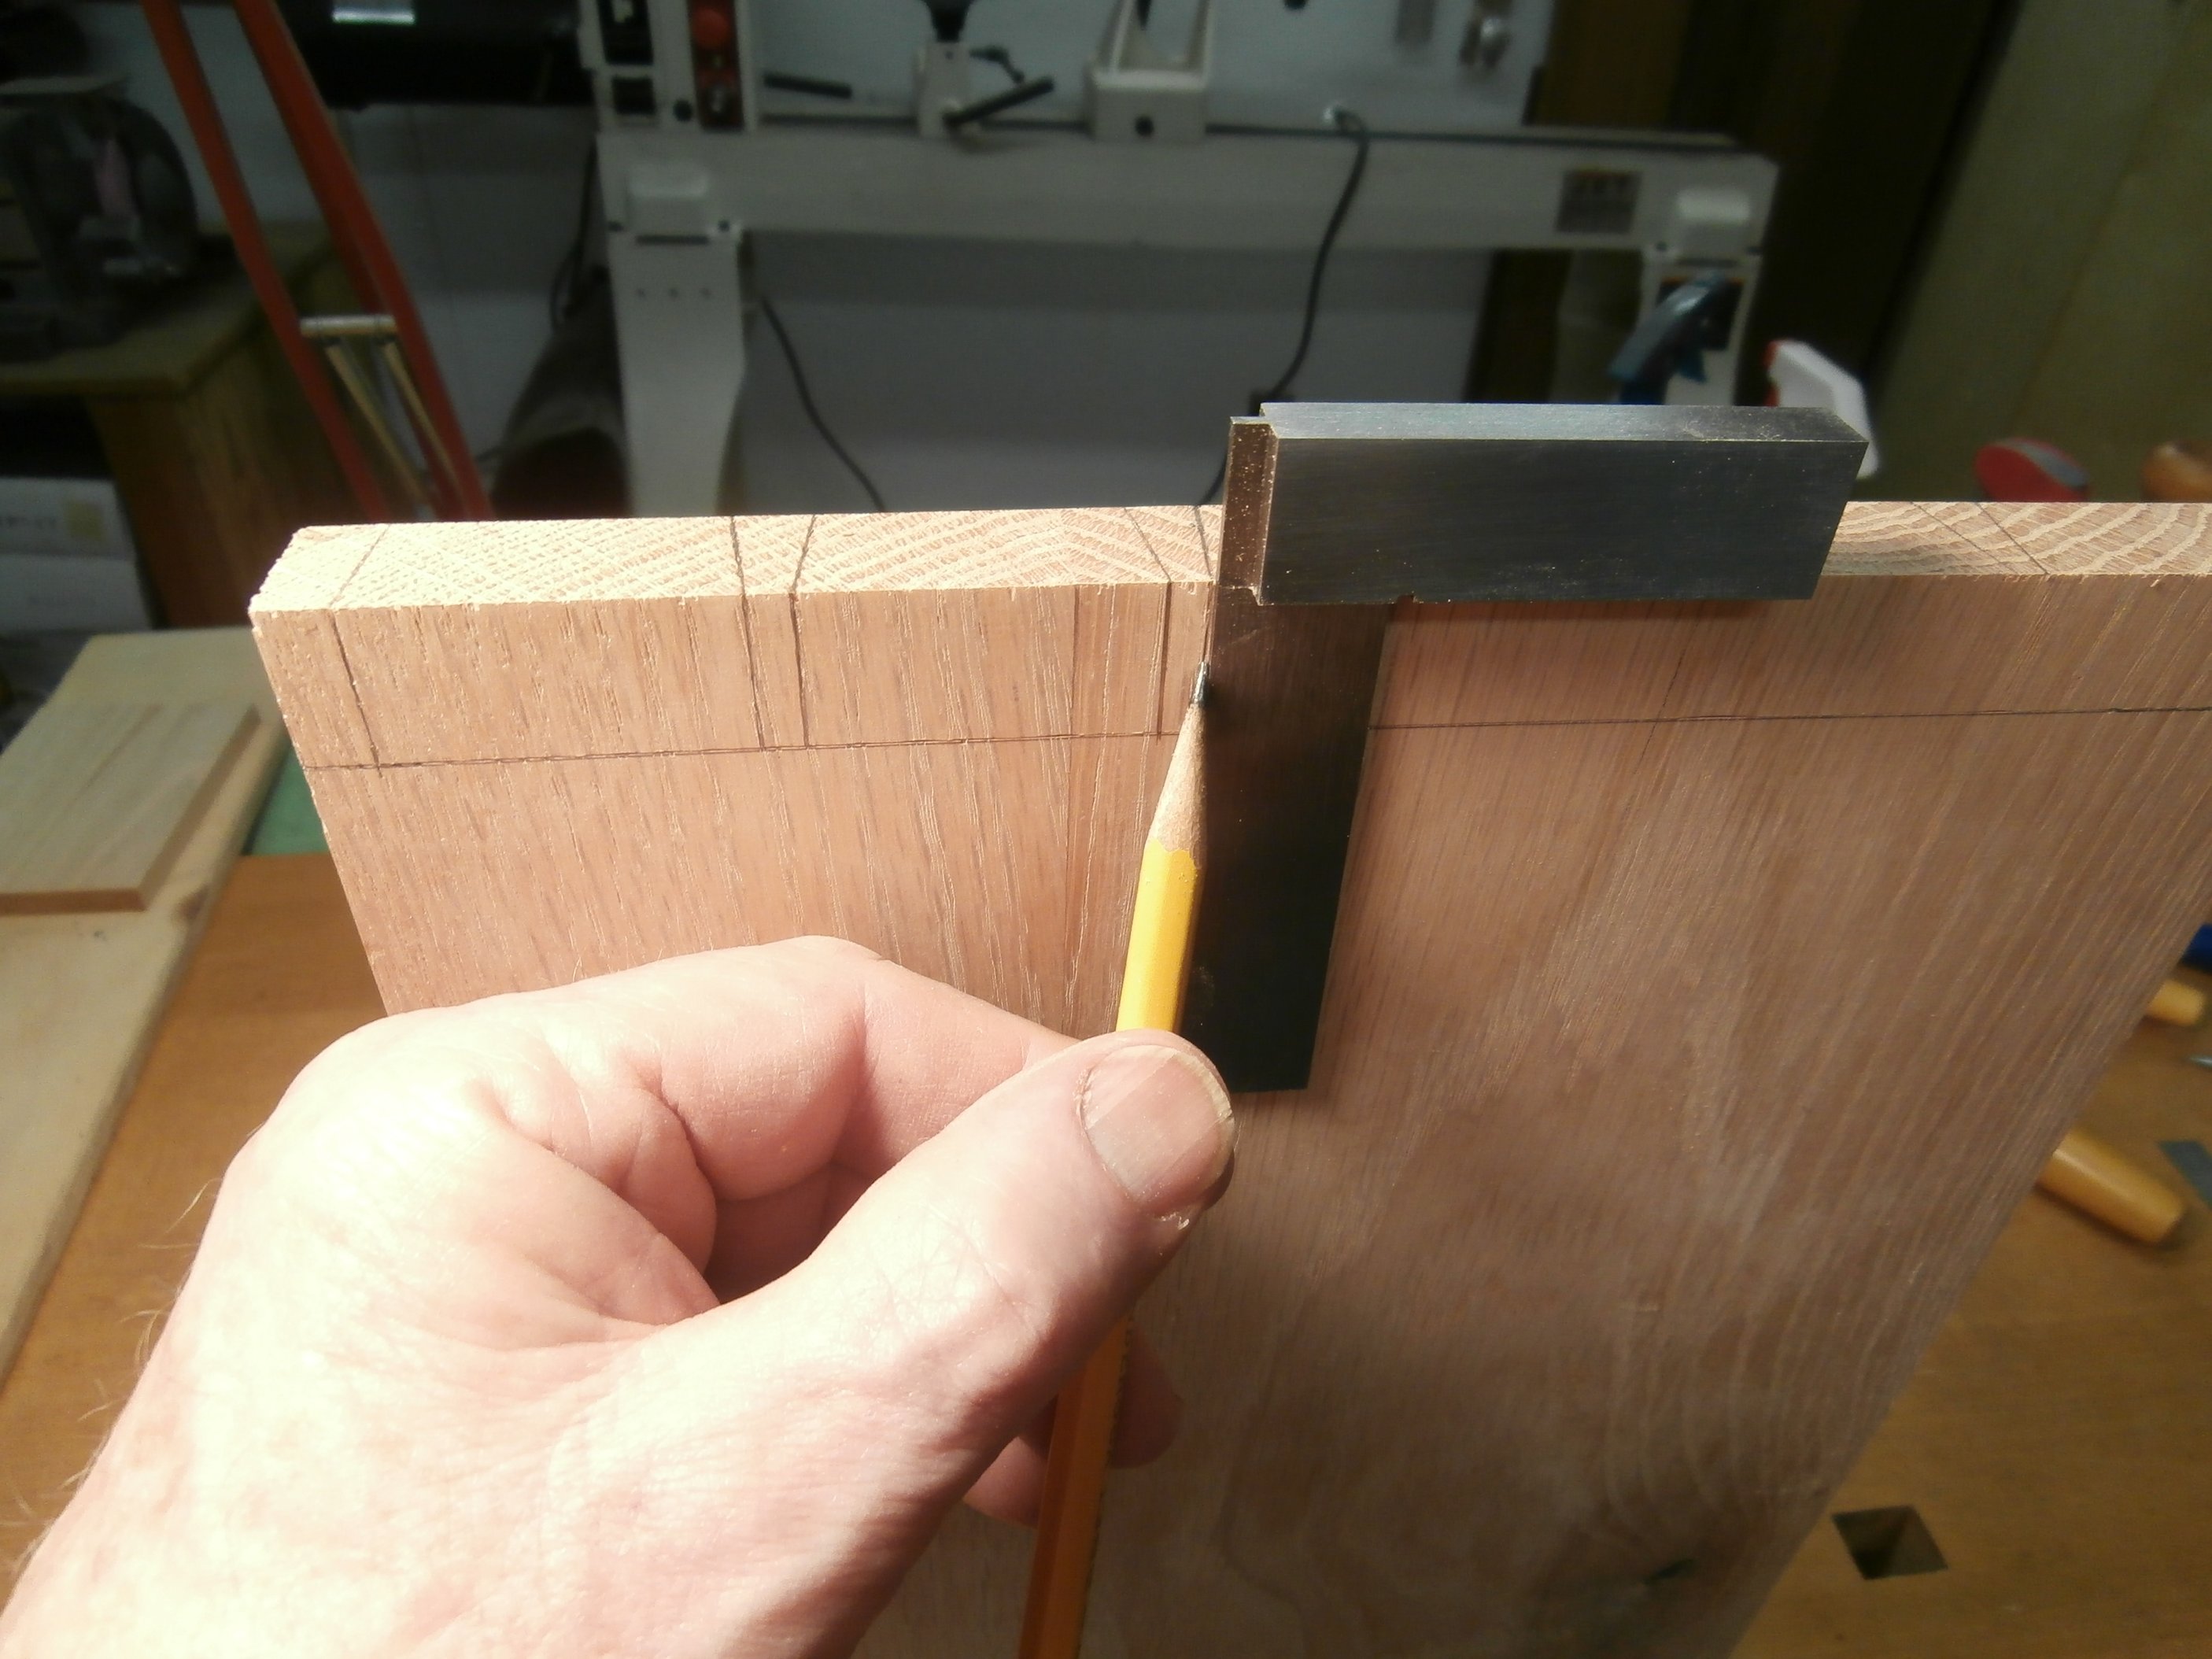
To align the dovetails with matching pins, I clamped the board with the finished tails in my bench vise and lined up the board that will have pins and marked their location.  With the spacing marked in pencil, I used a marking knife to inscribe the outlines of the waste between pins.  I go to all this trouble to get the narrowest pins and finest fit.  There are always slight variations in hand cut dovetails, unlike those made with a router and jig.  It is not possible to get the very small pins you see in fine, antique furniture with a router and I want my furniture to reflect the skill required for hand work.

Alignment for marking  pin spacing.
Pencil marks for spacing and marking waste between pins with a marking knife.

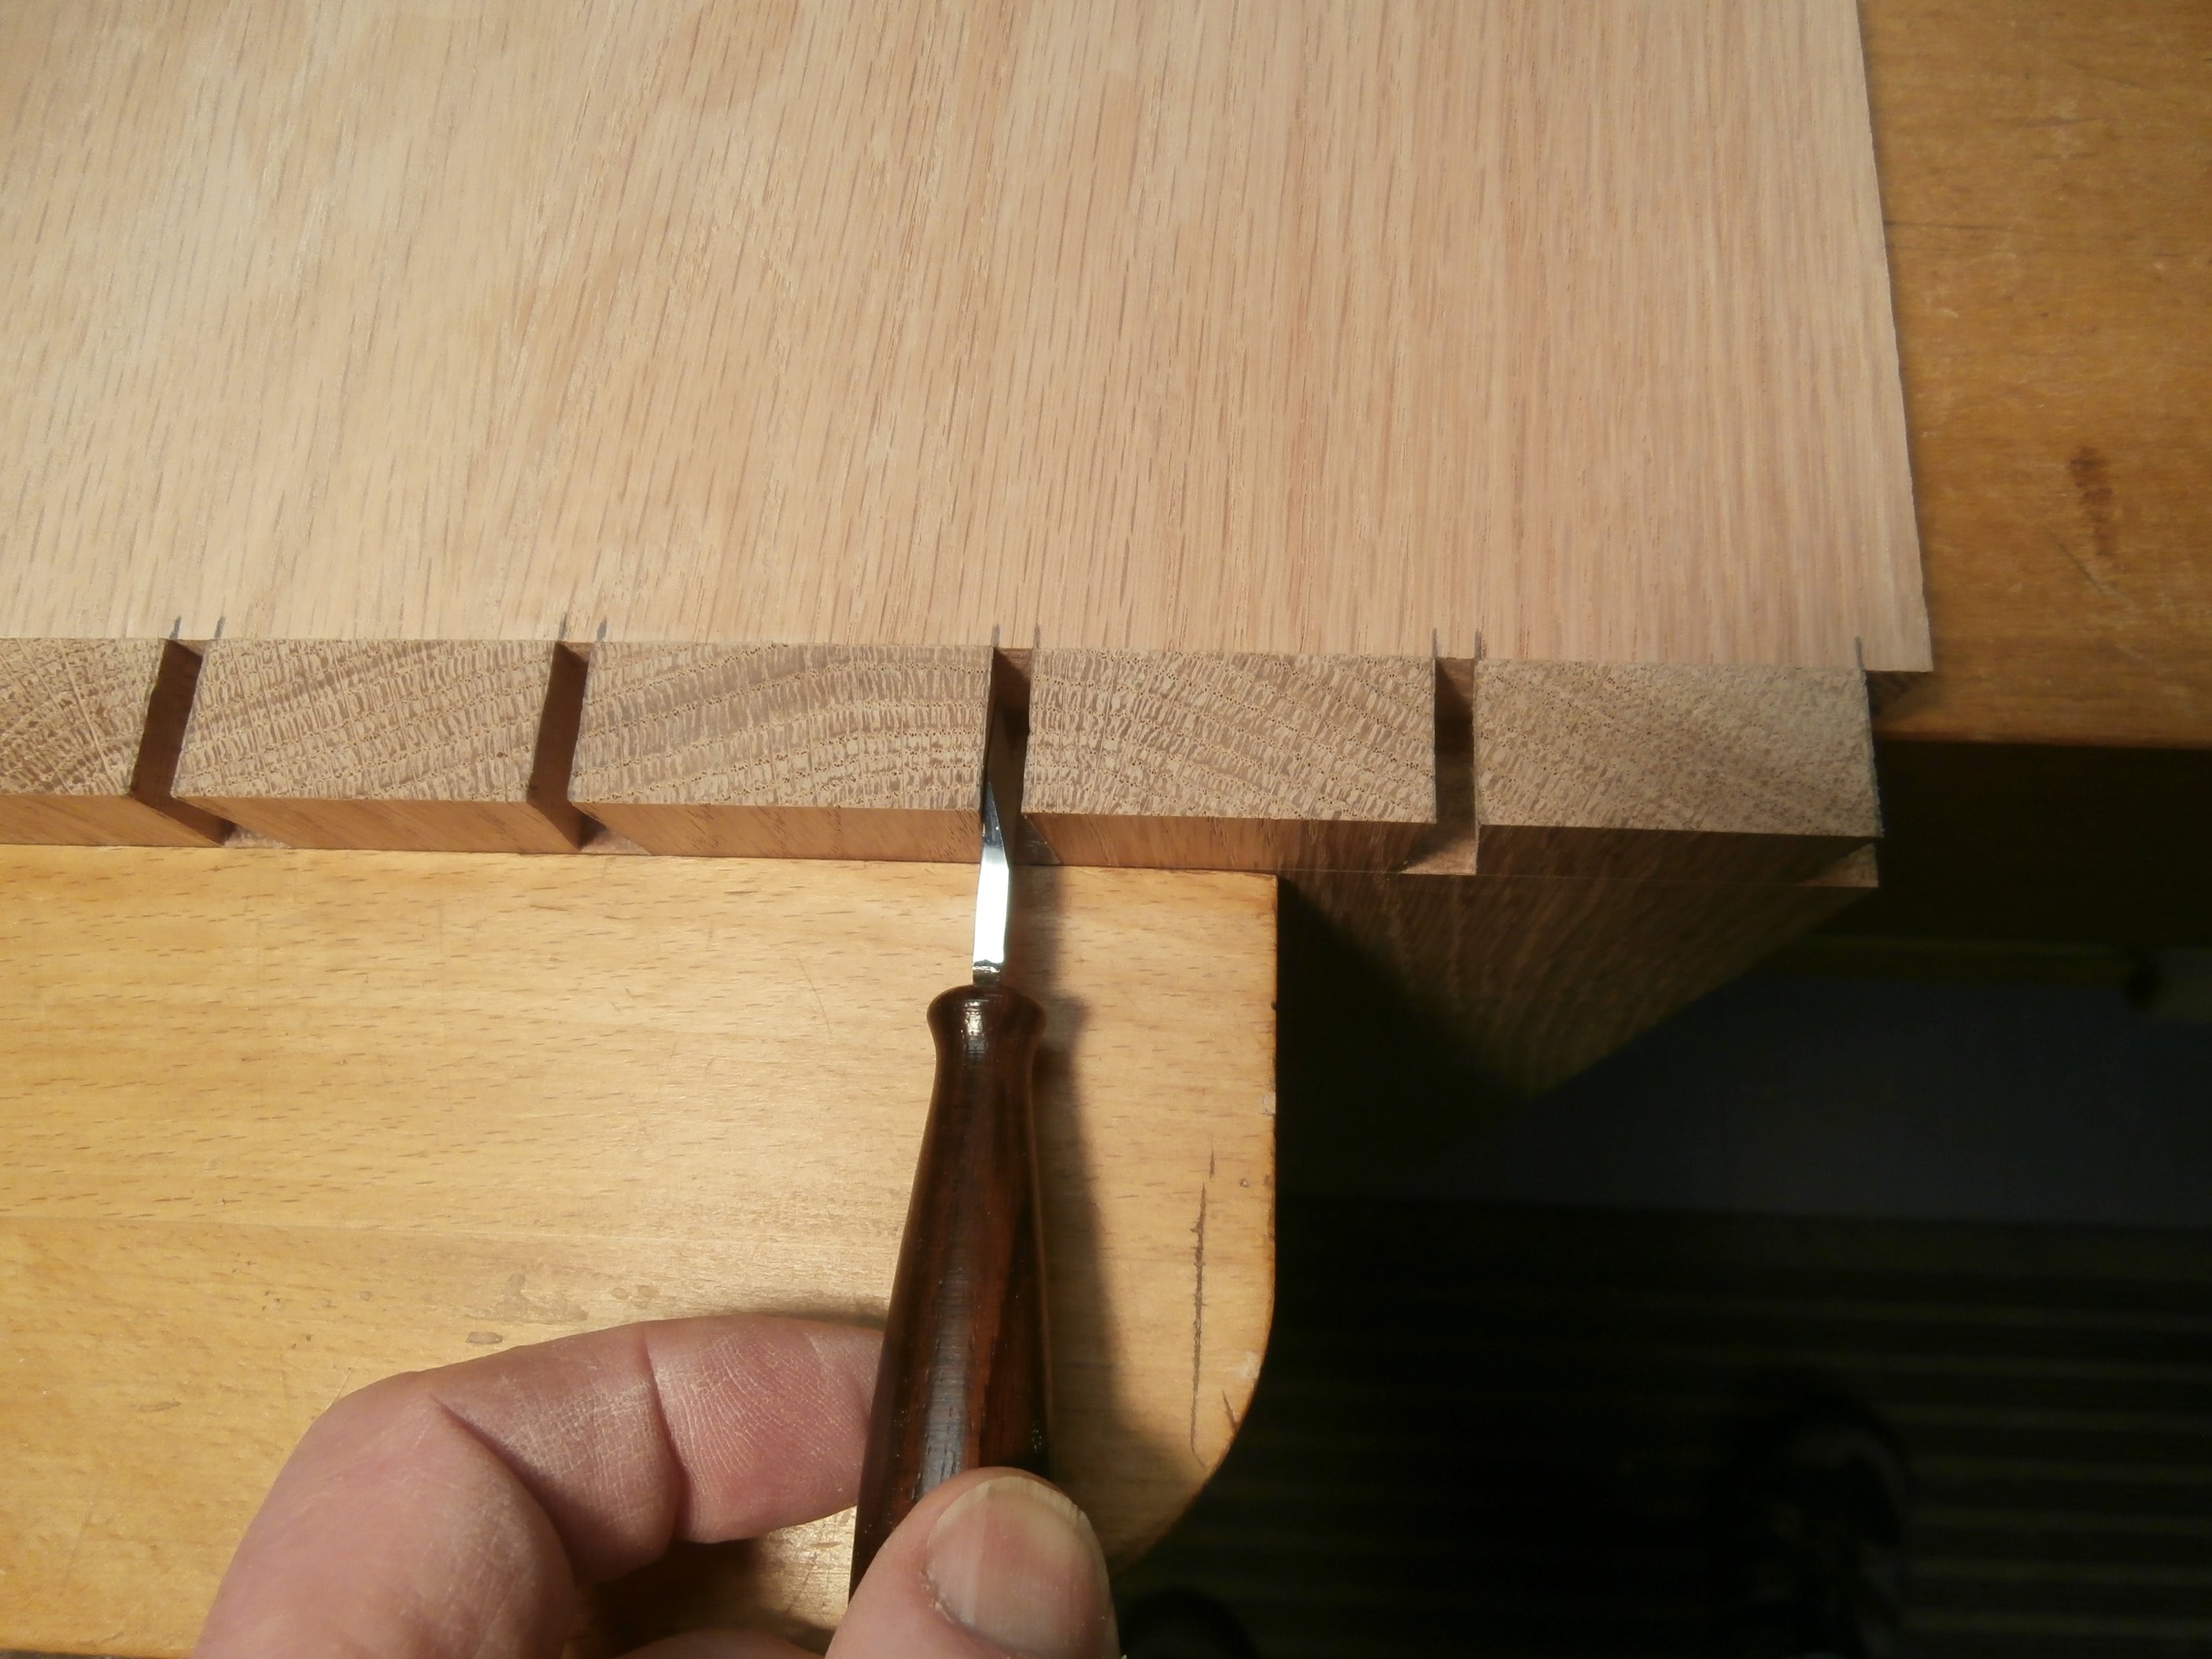
Next, I fully outline the pins with a pencil to guide my cuts.  This is slow work but yields good results.

Outlining pins.

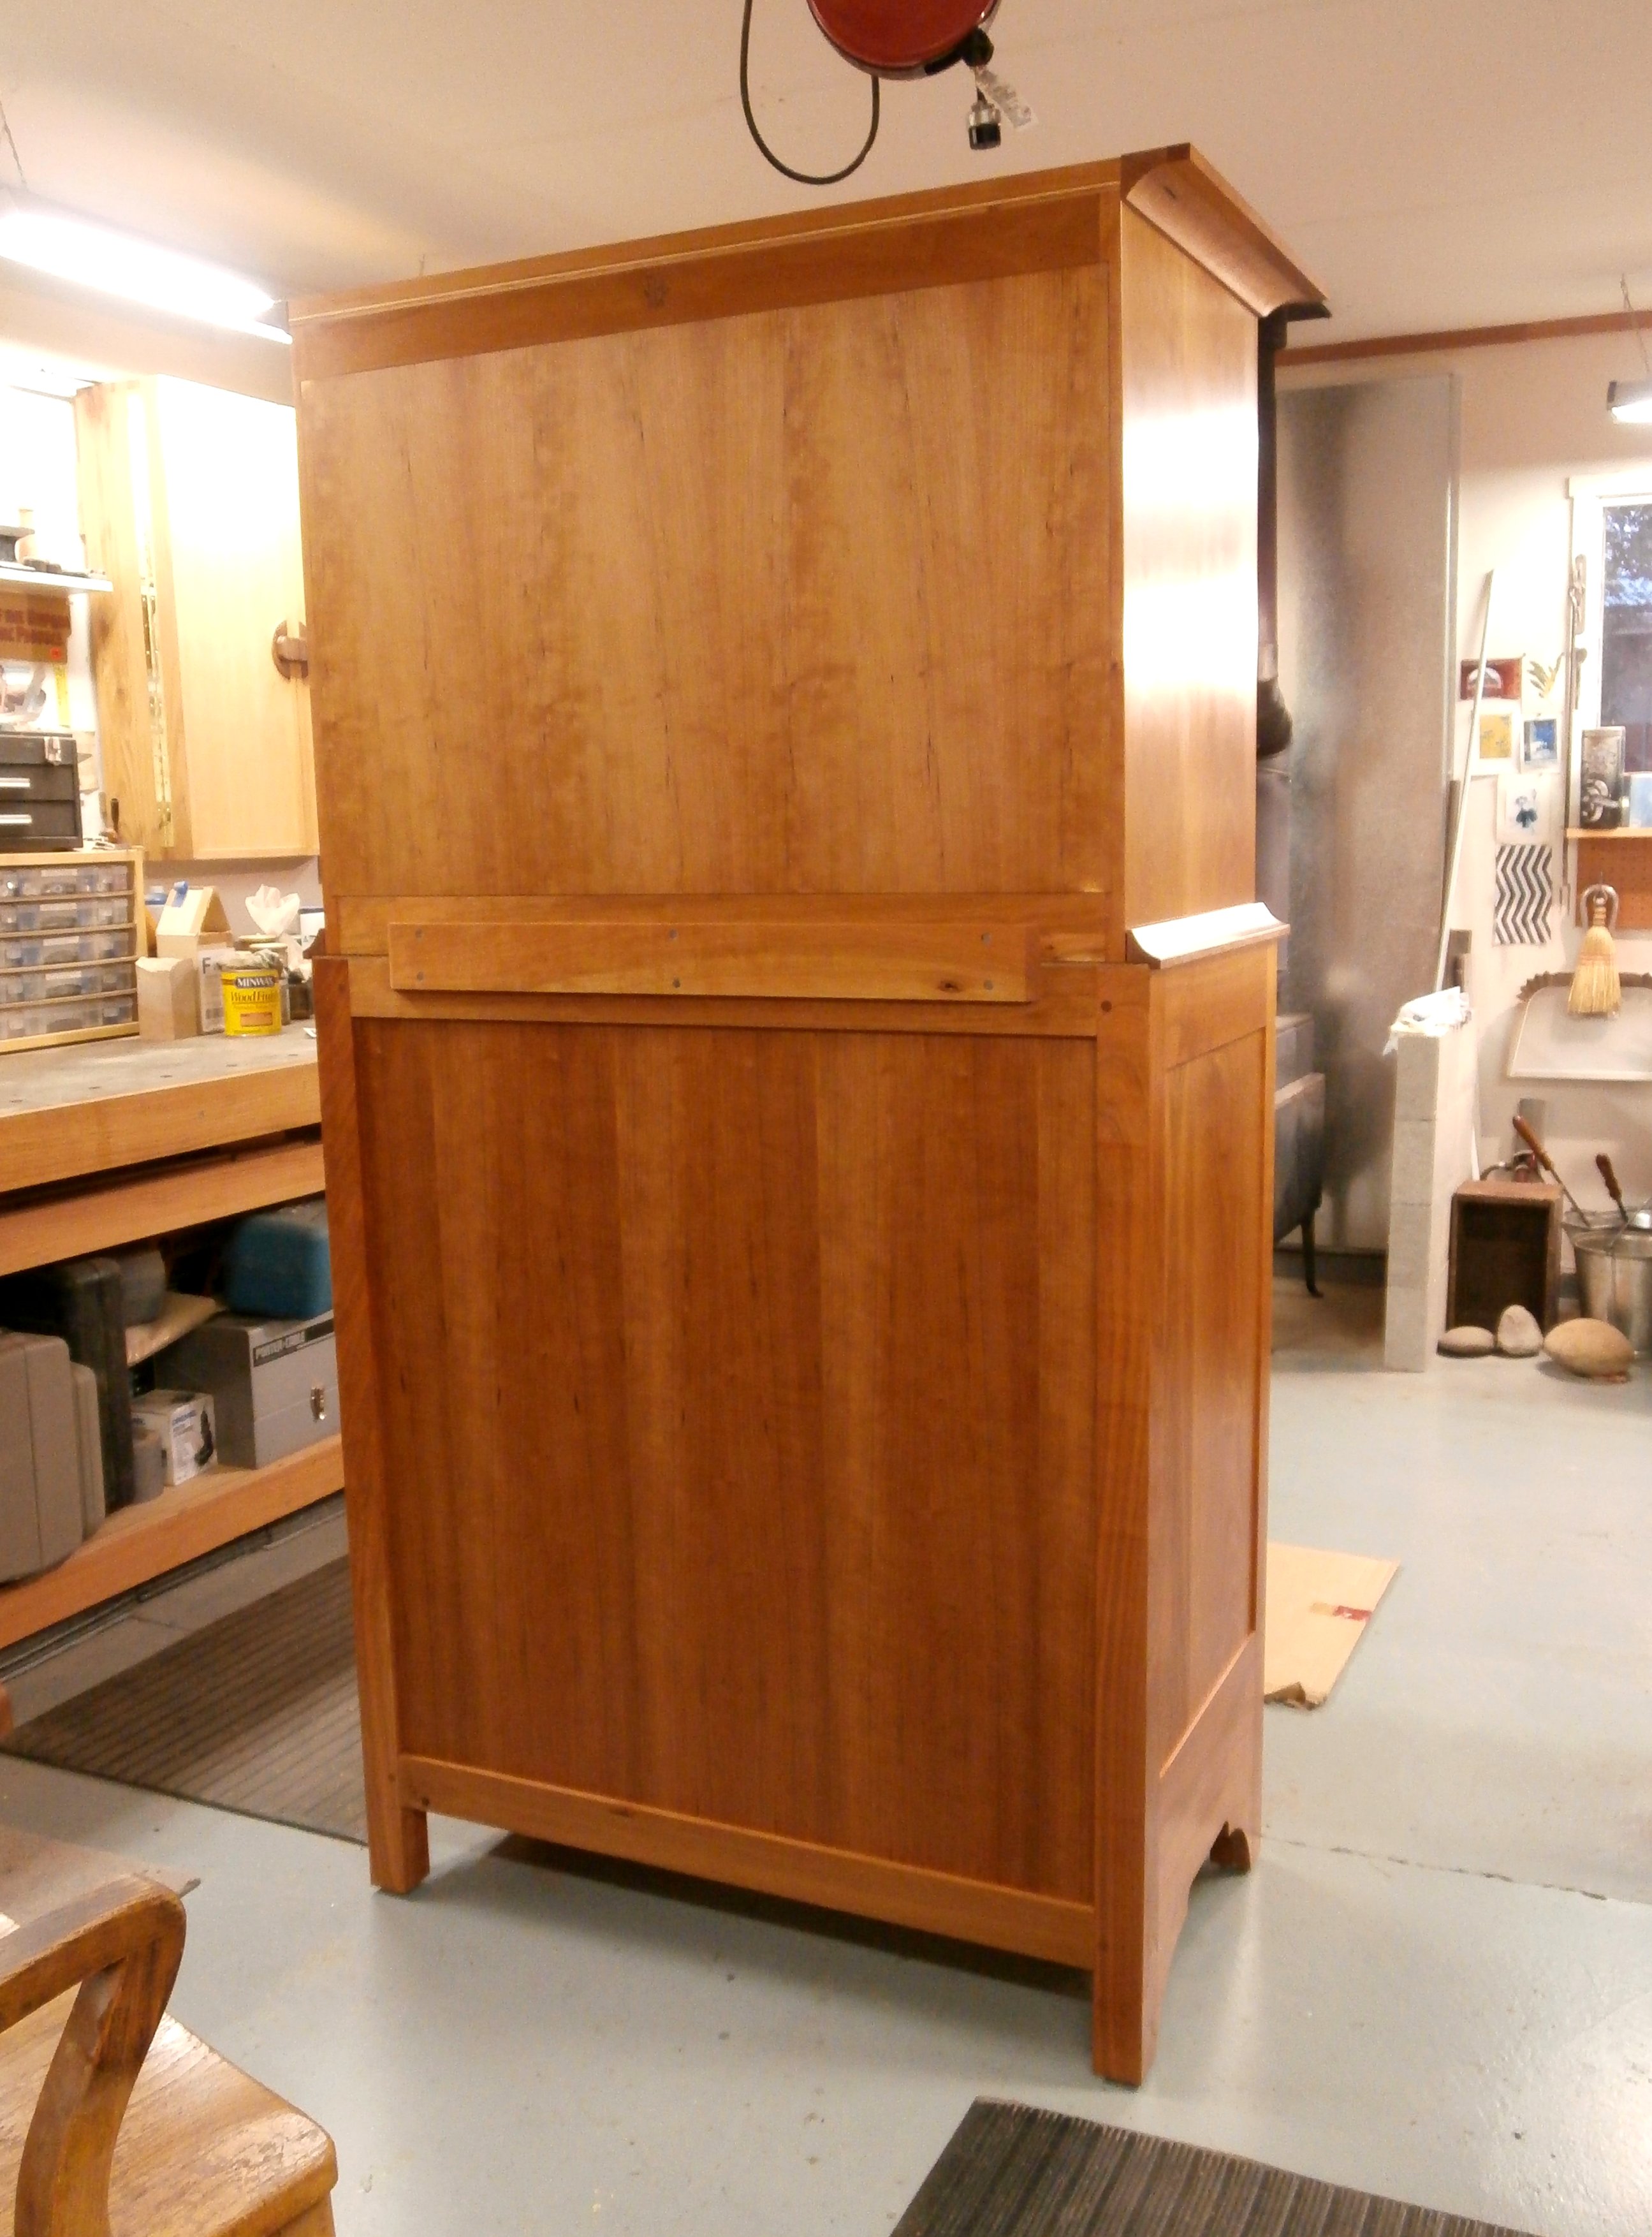
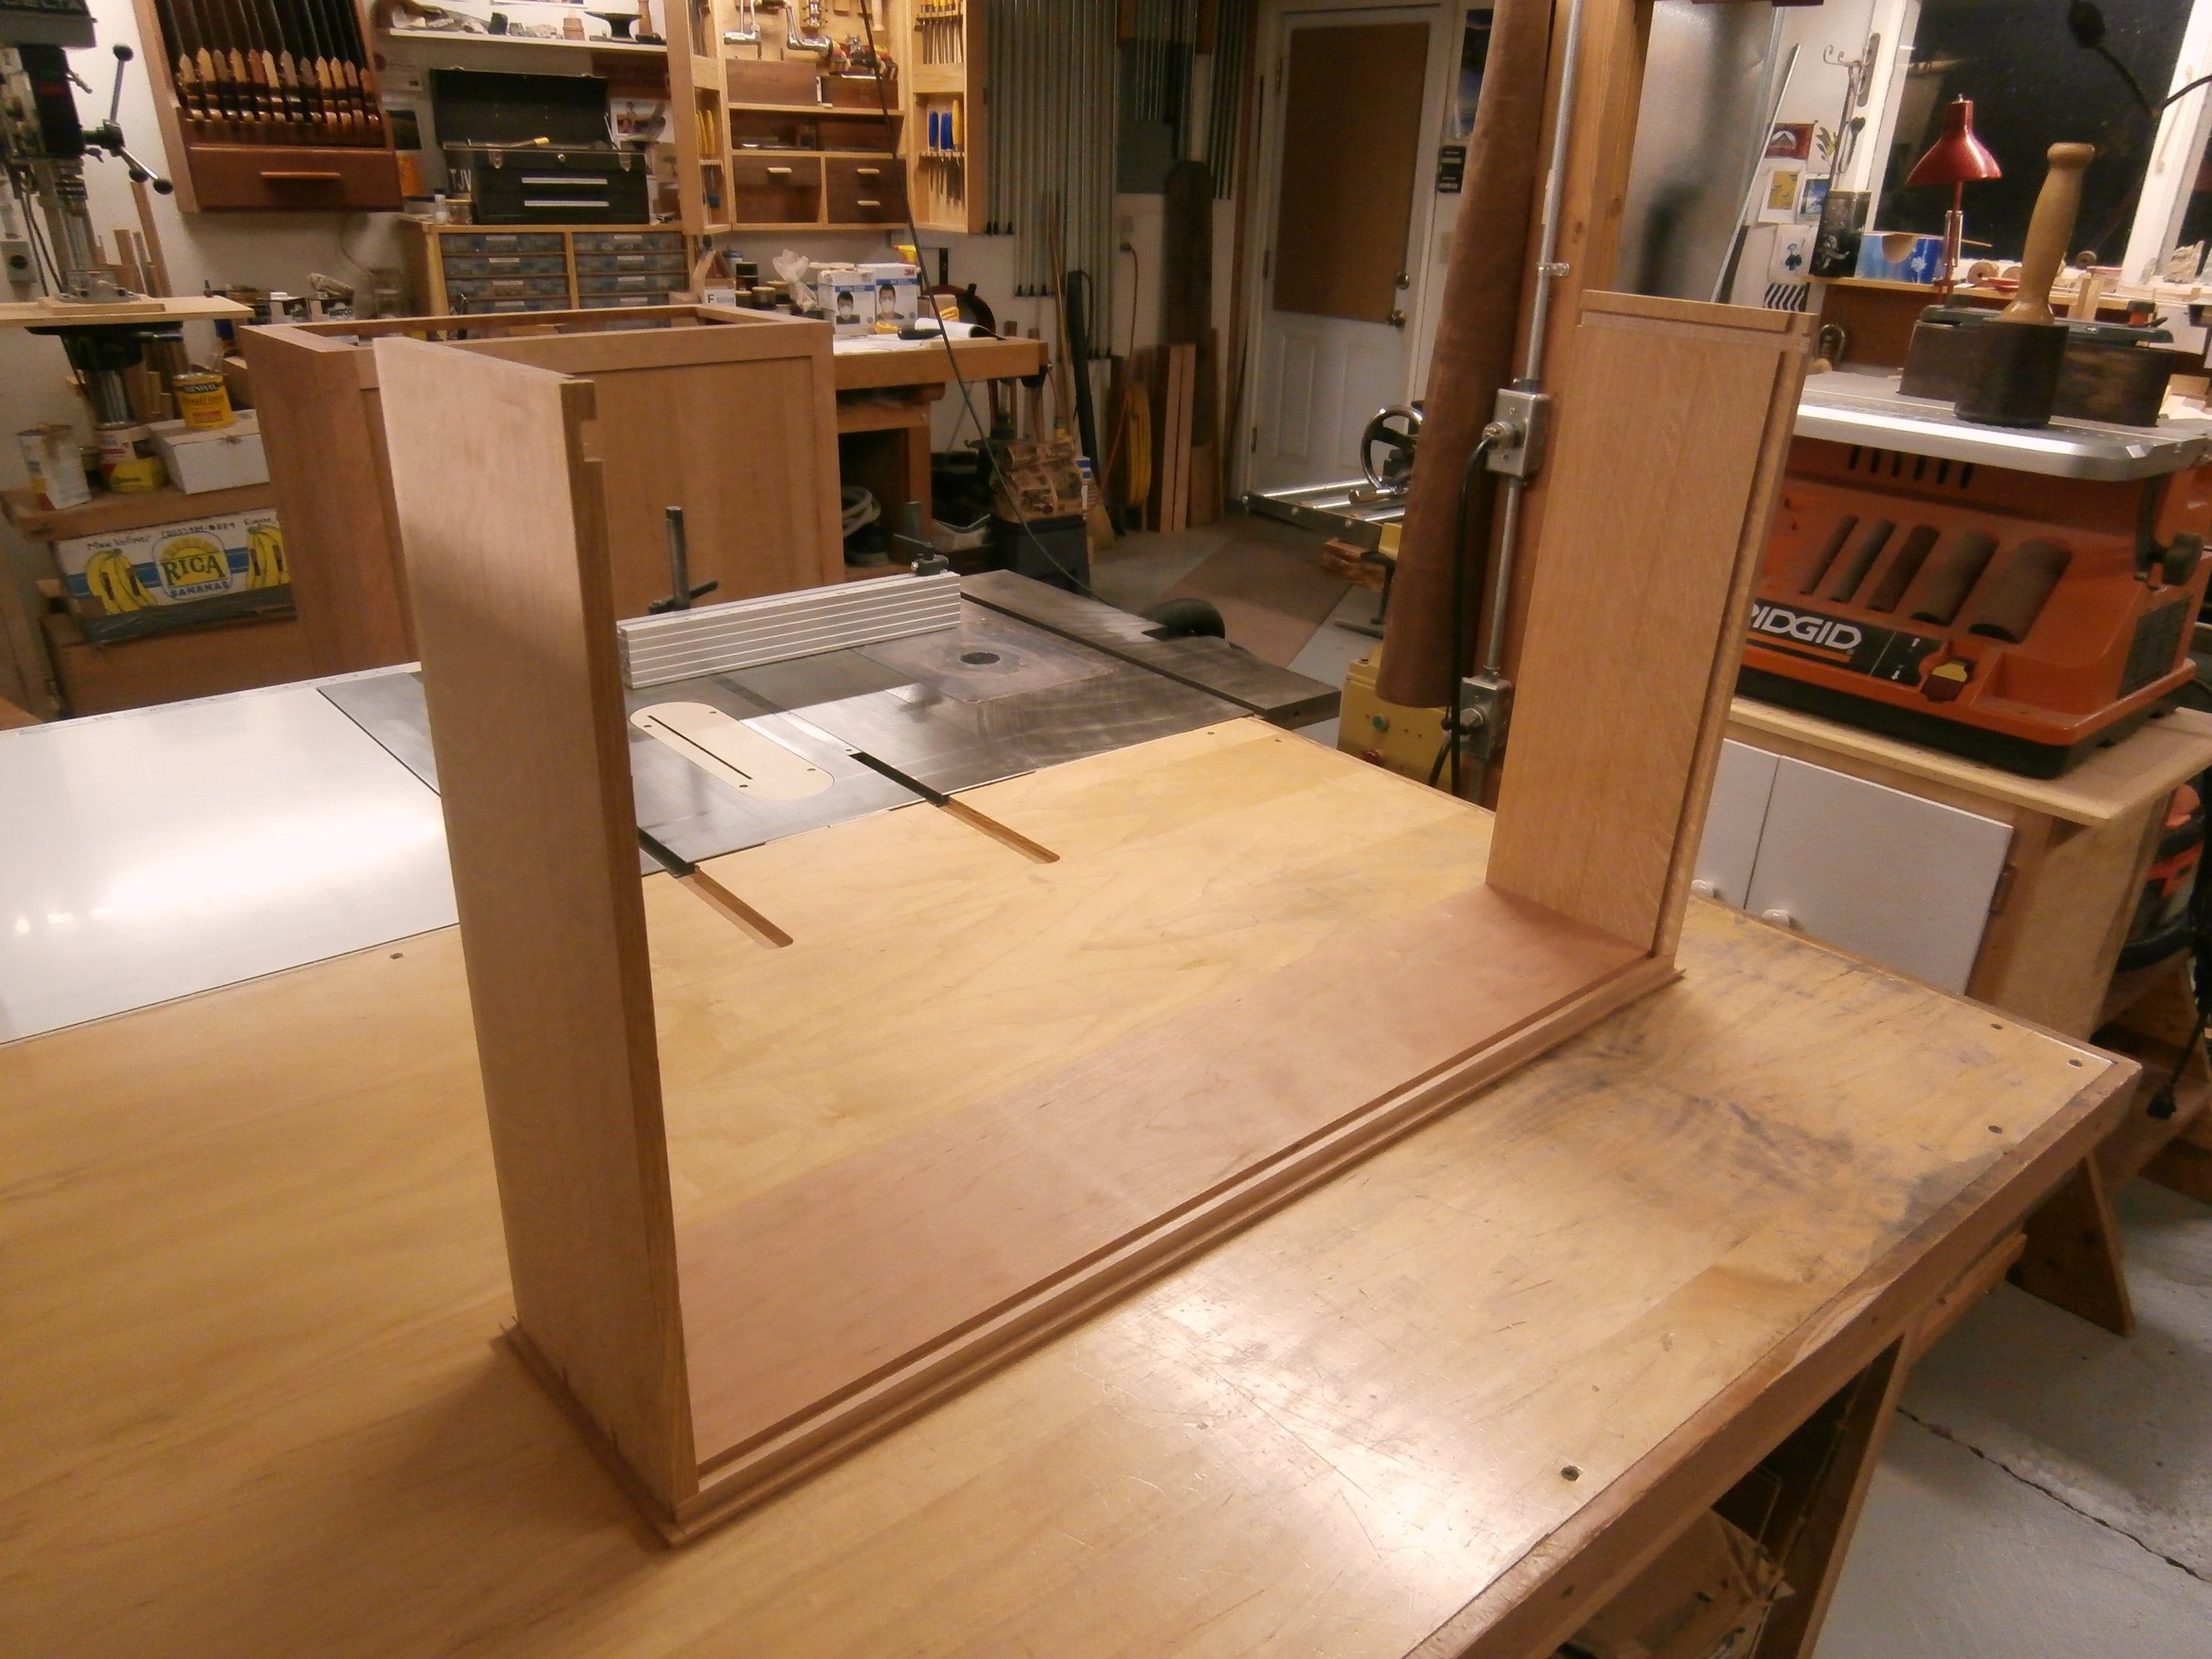
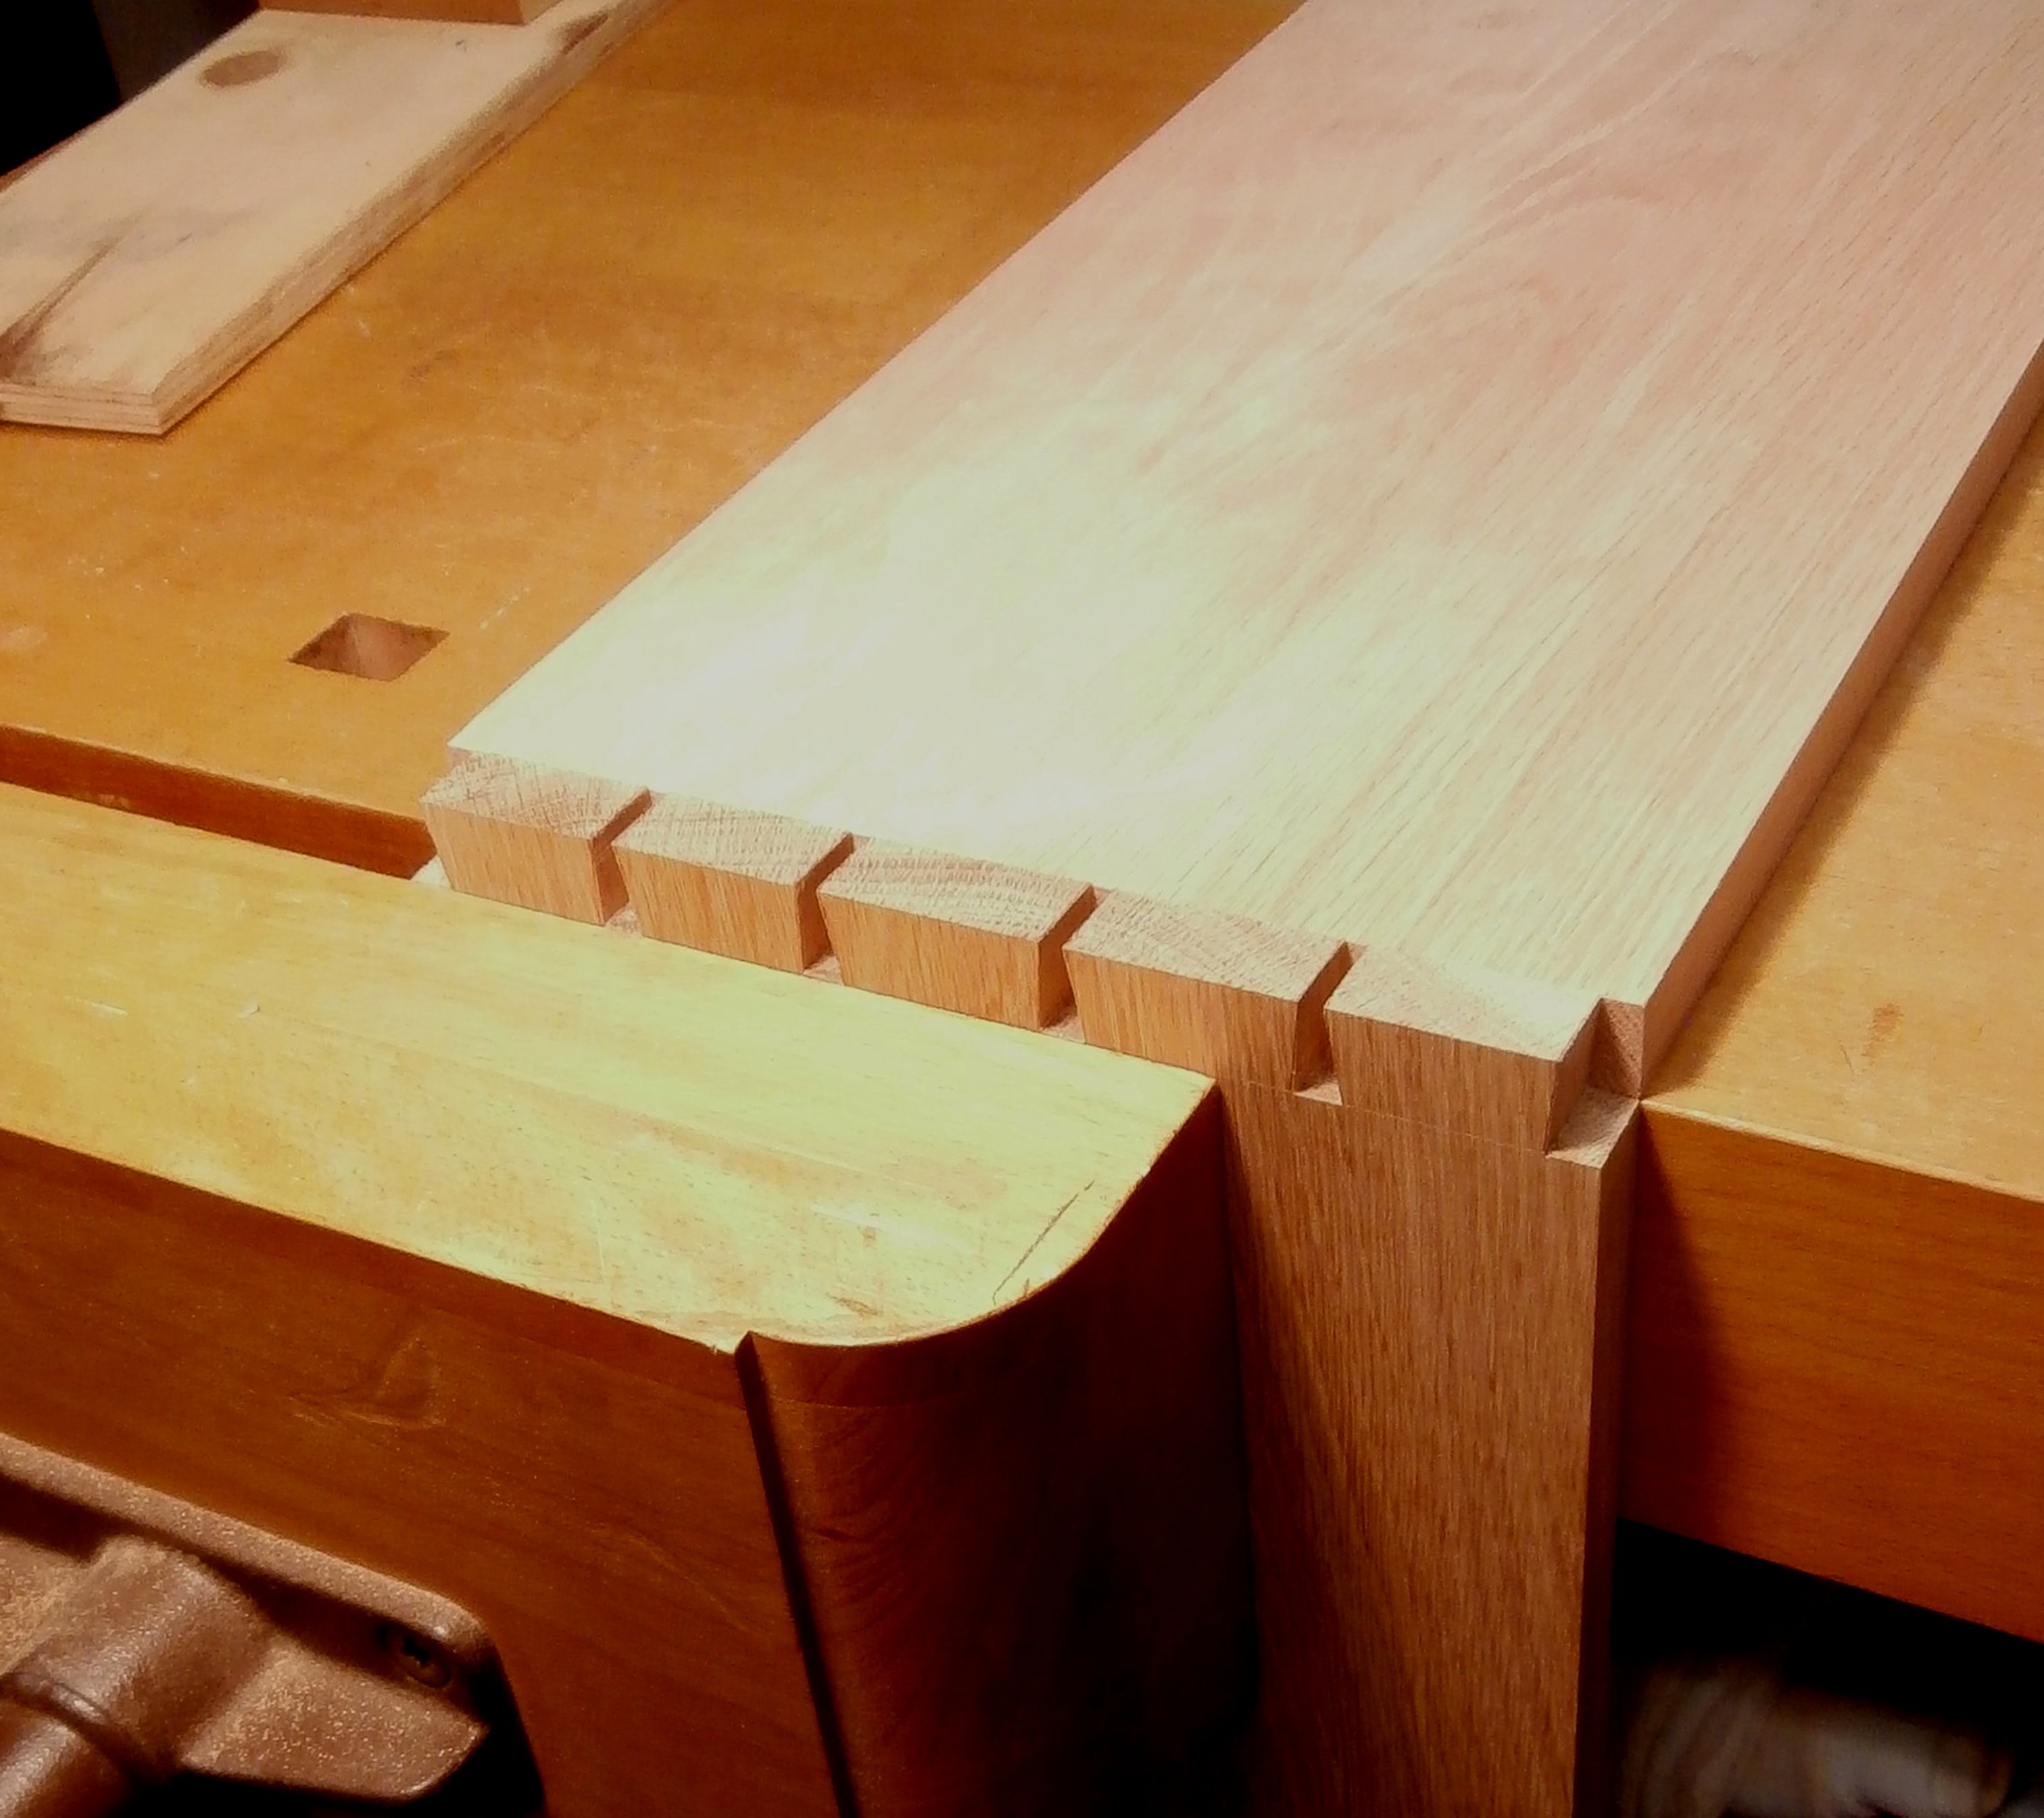
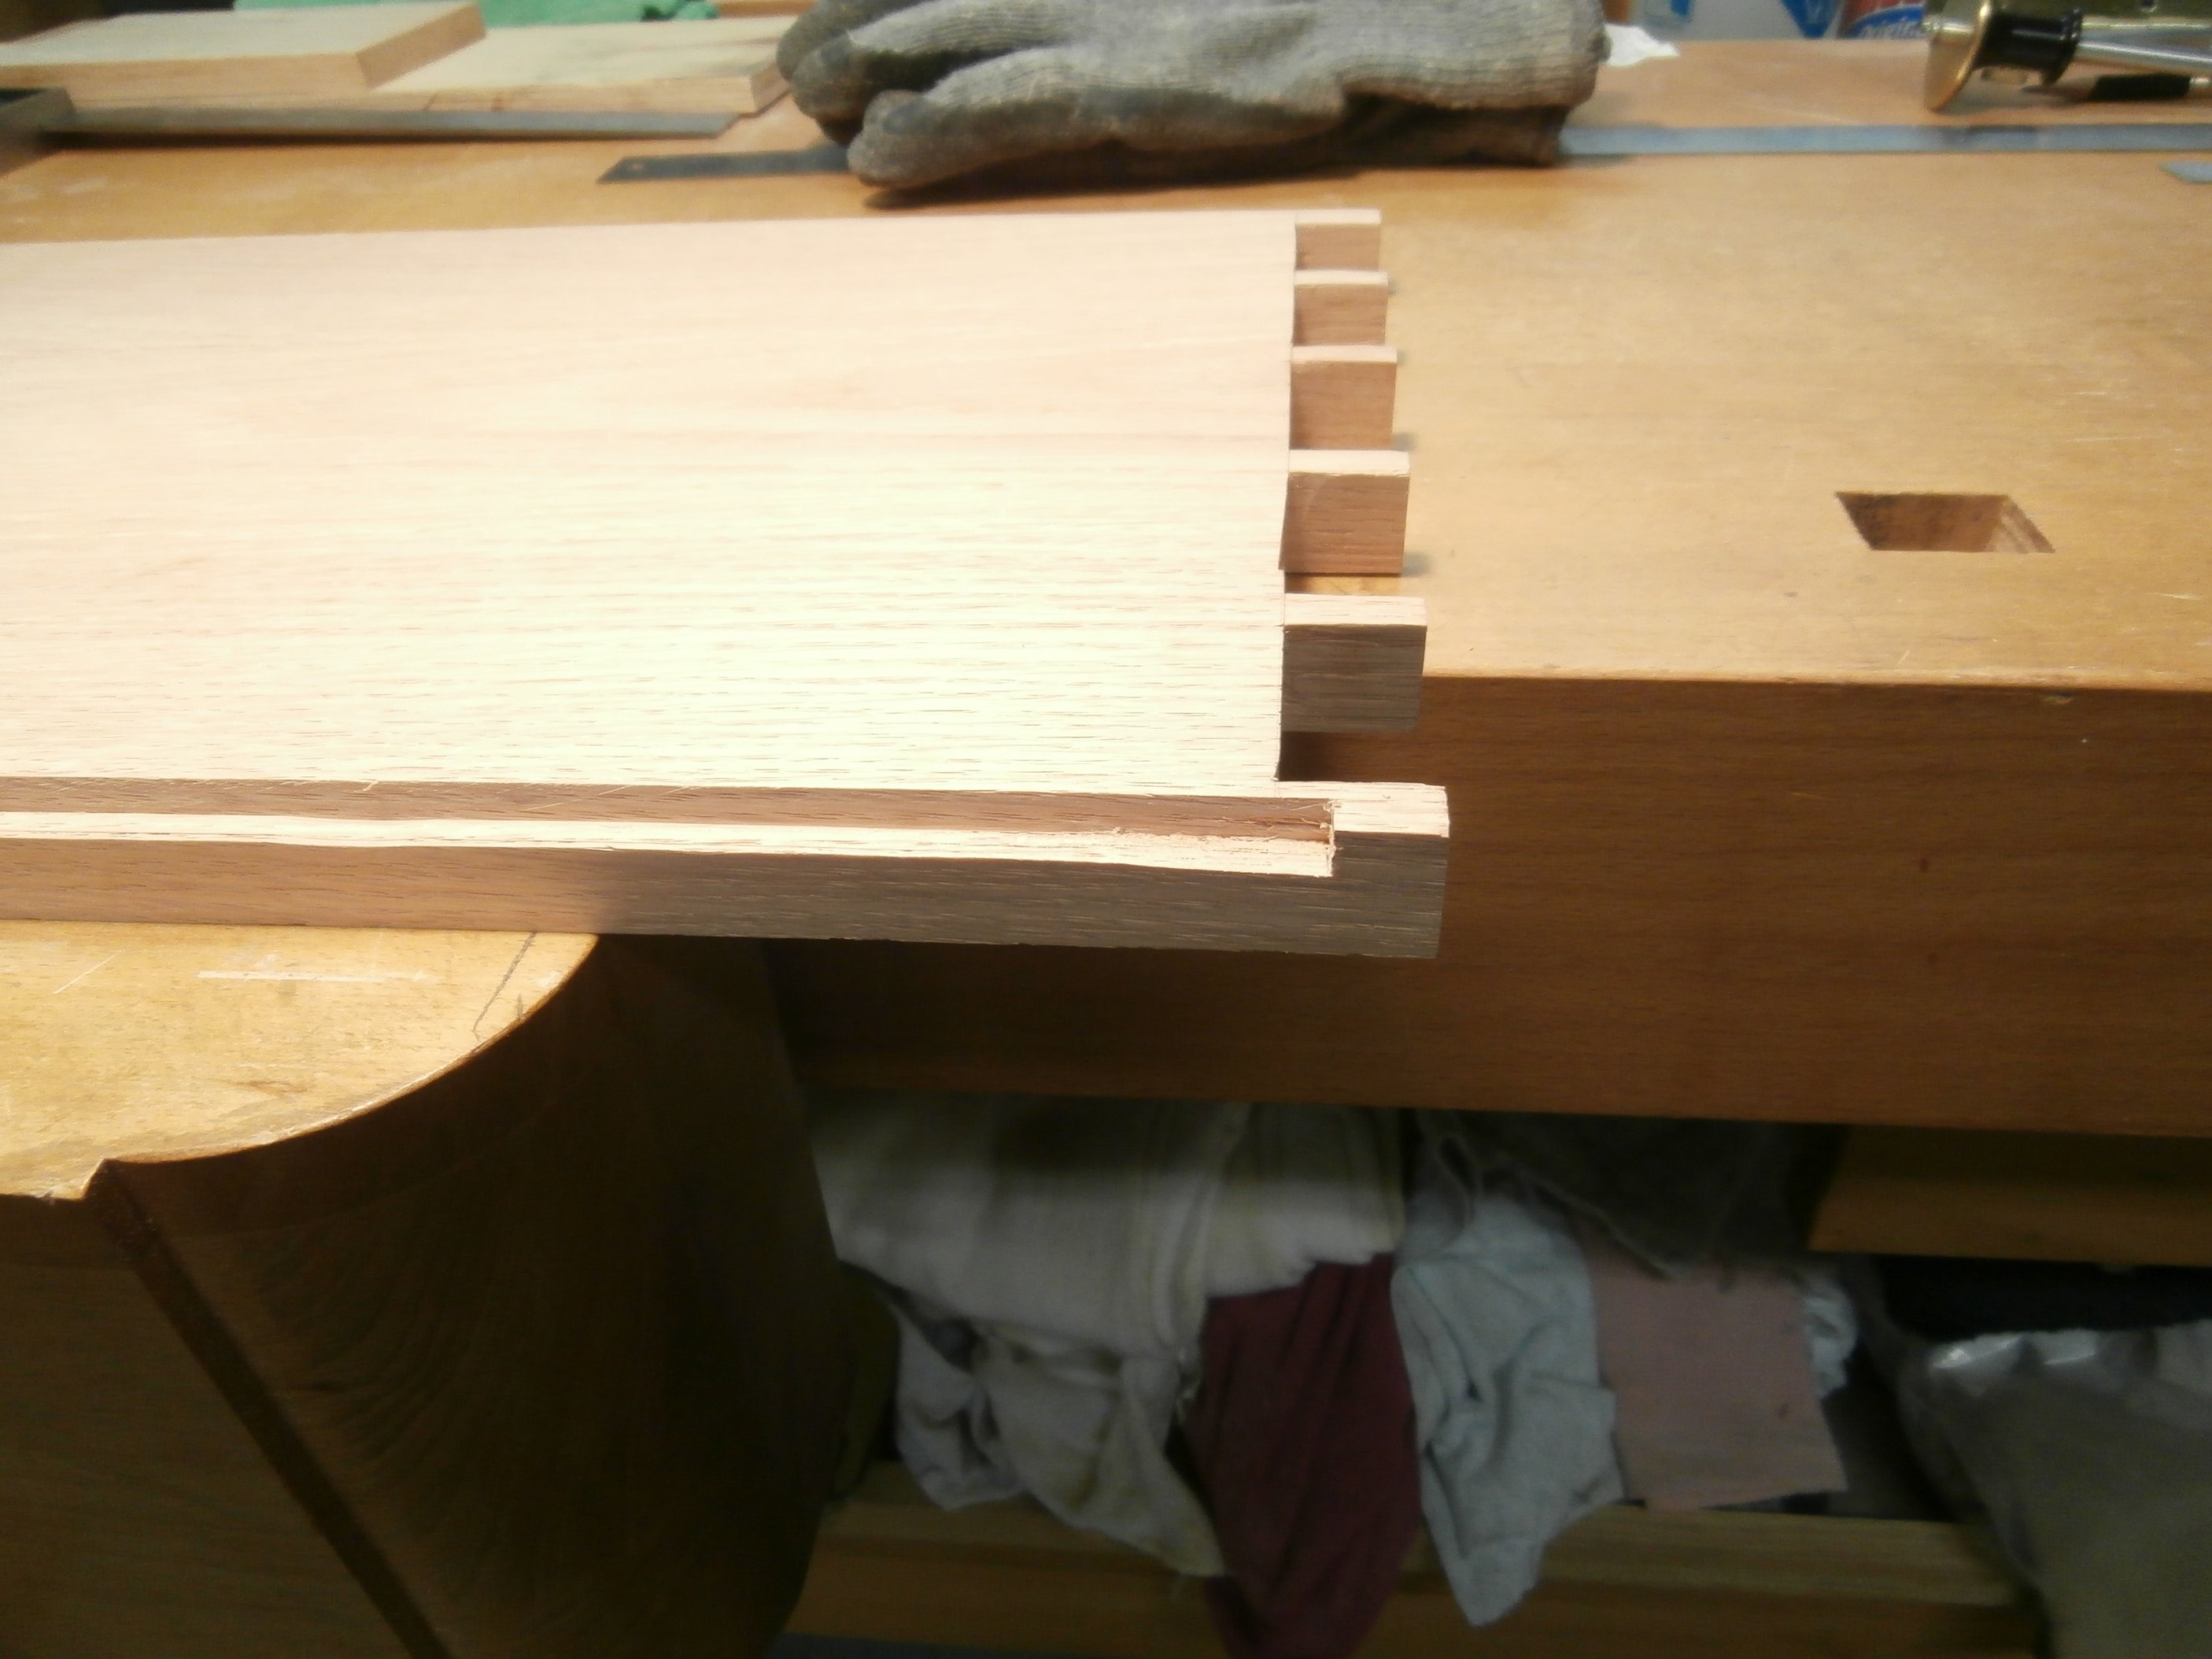
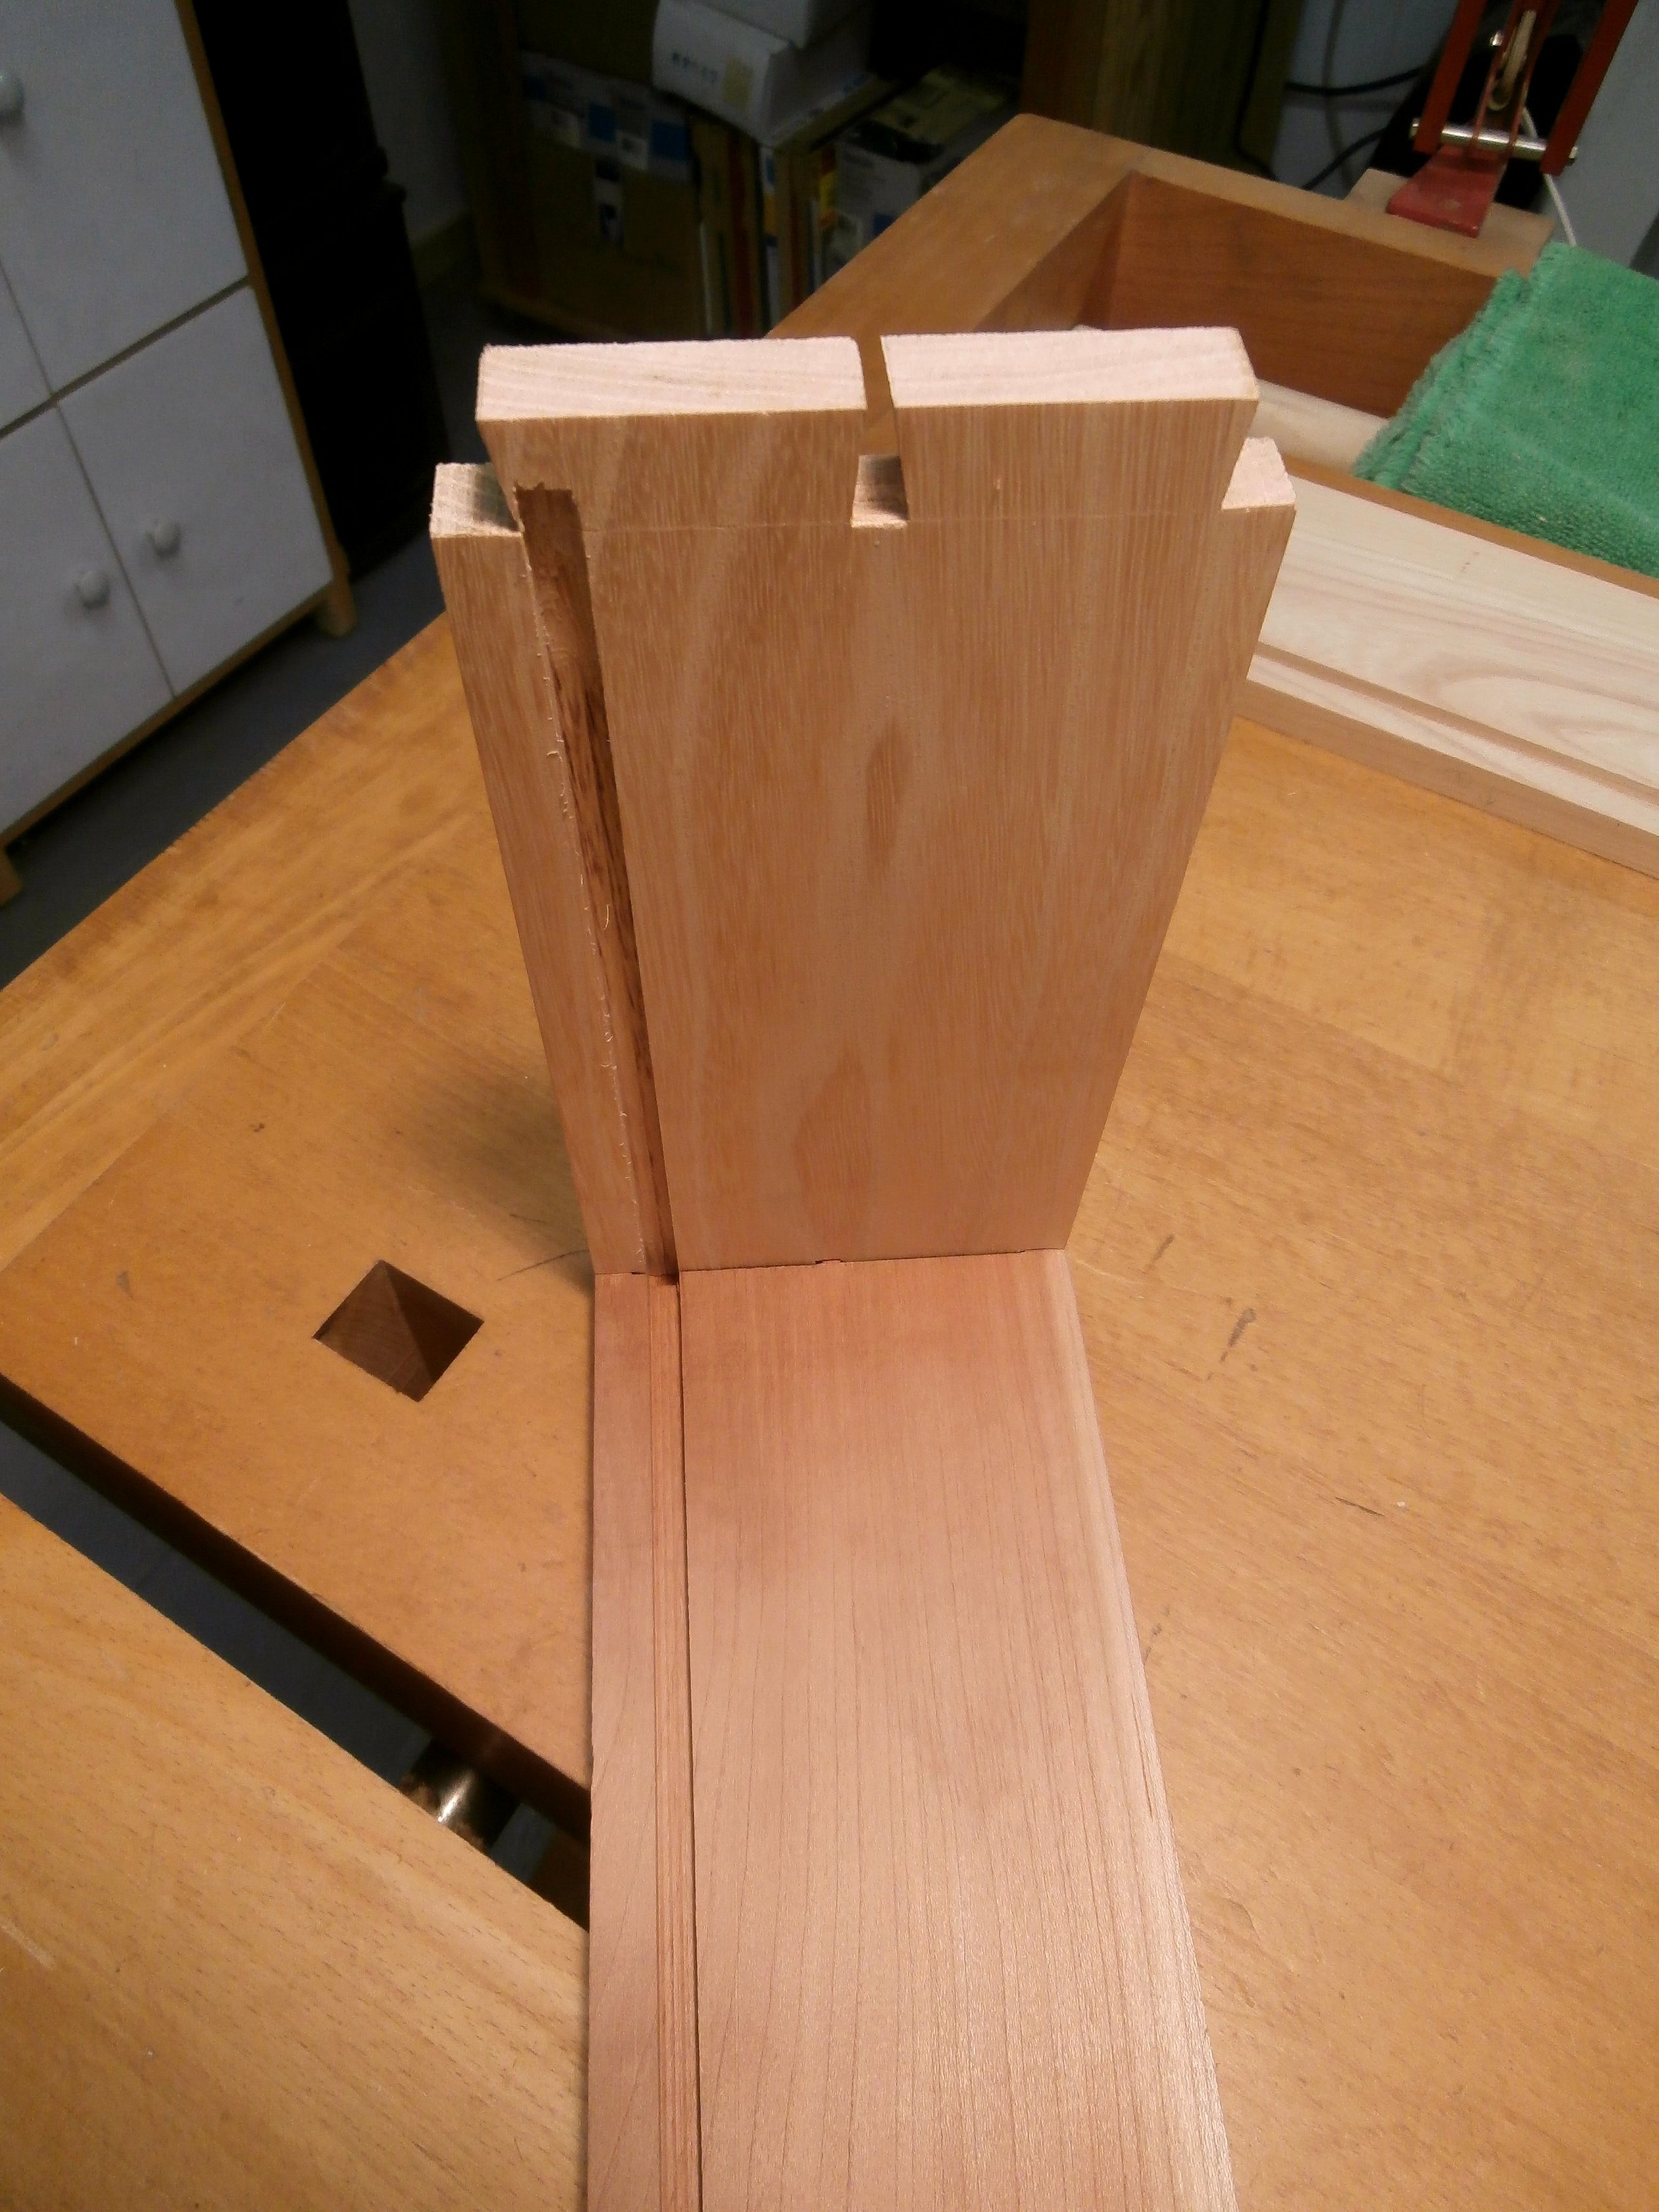
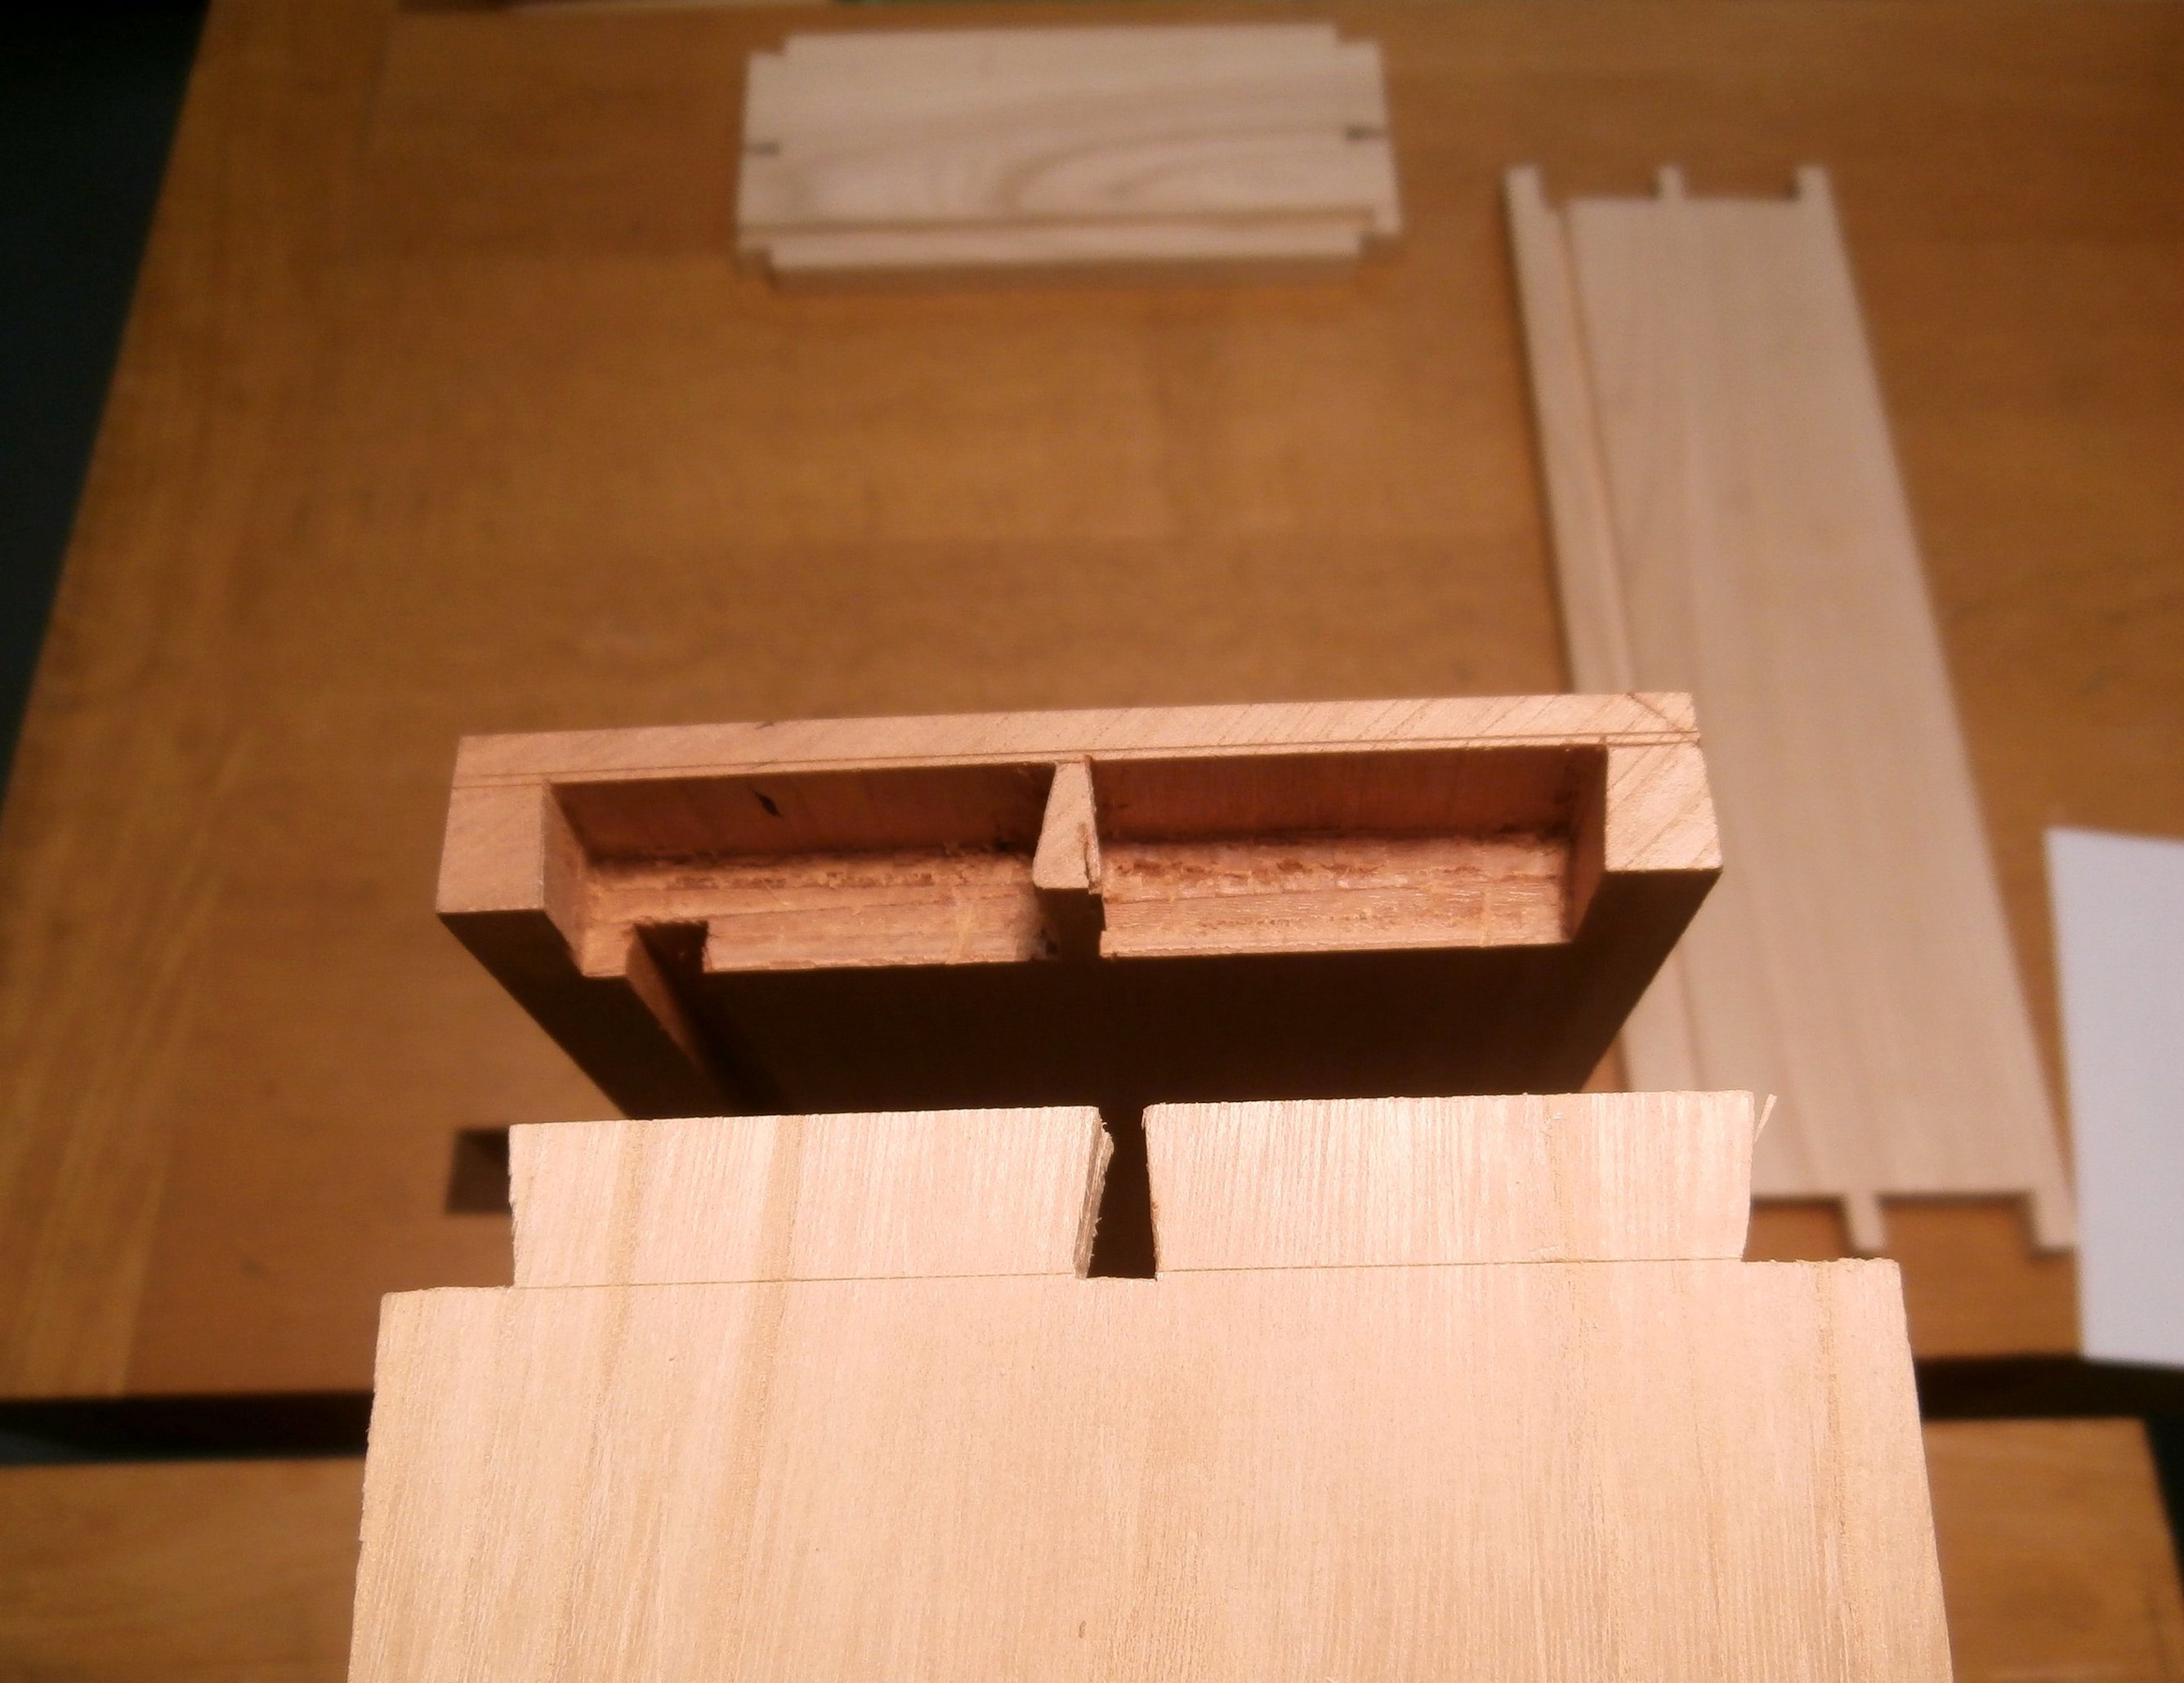
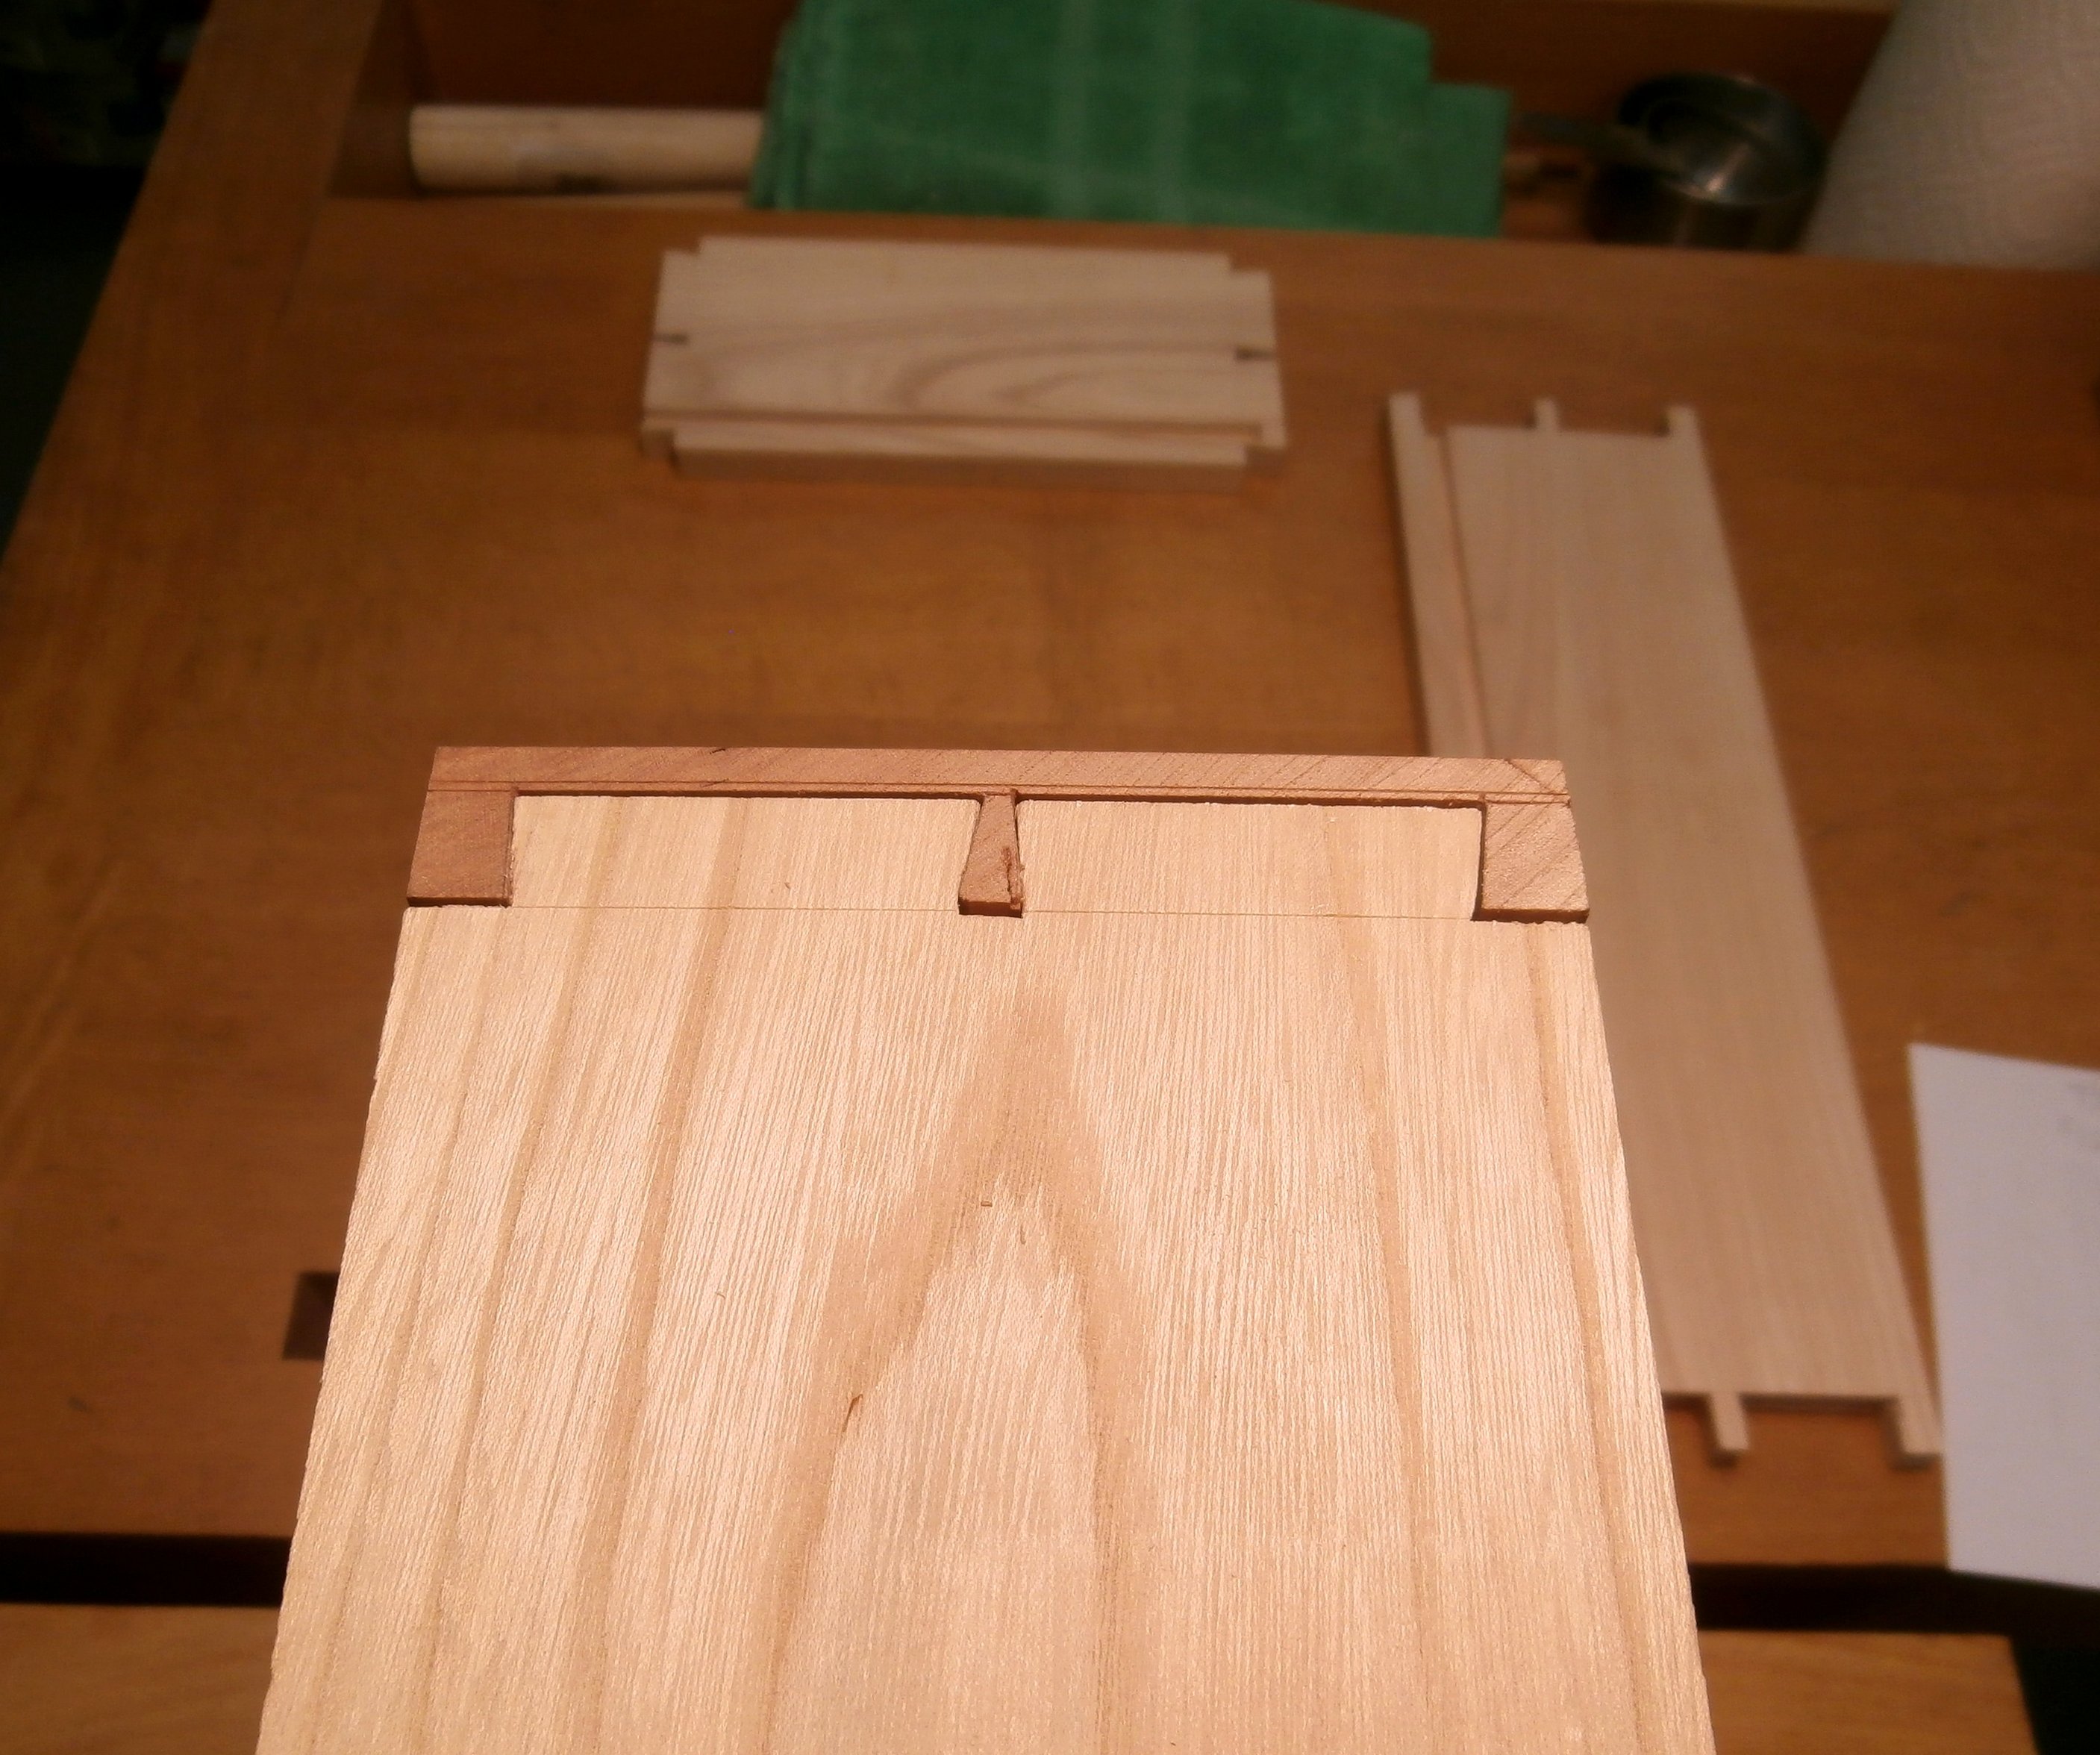
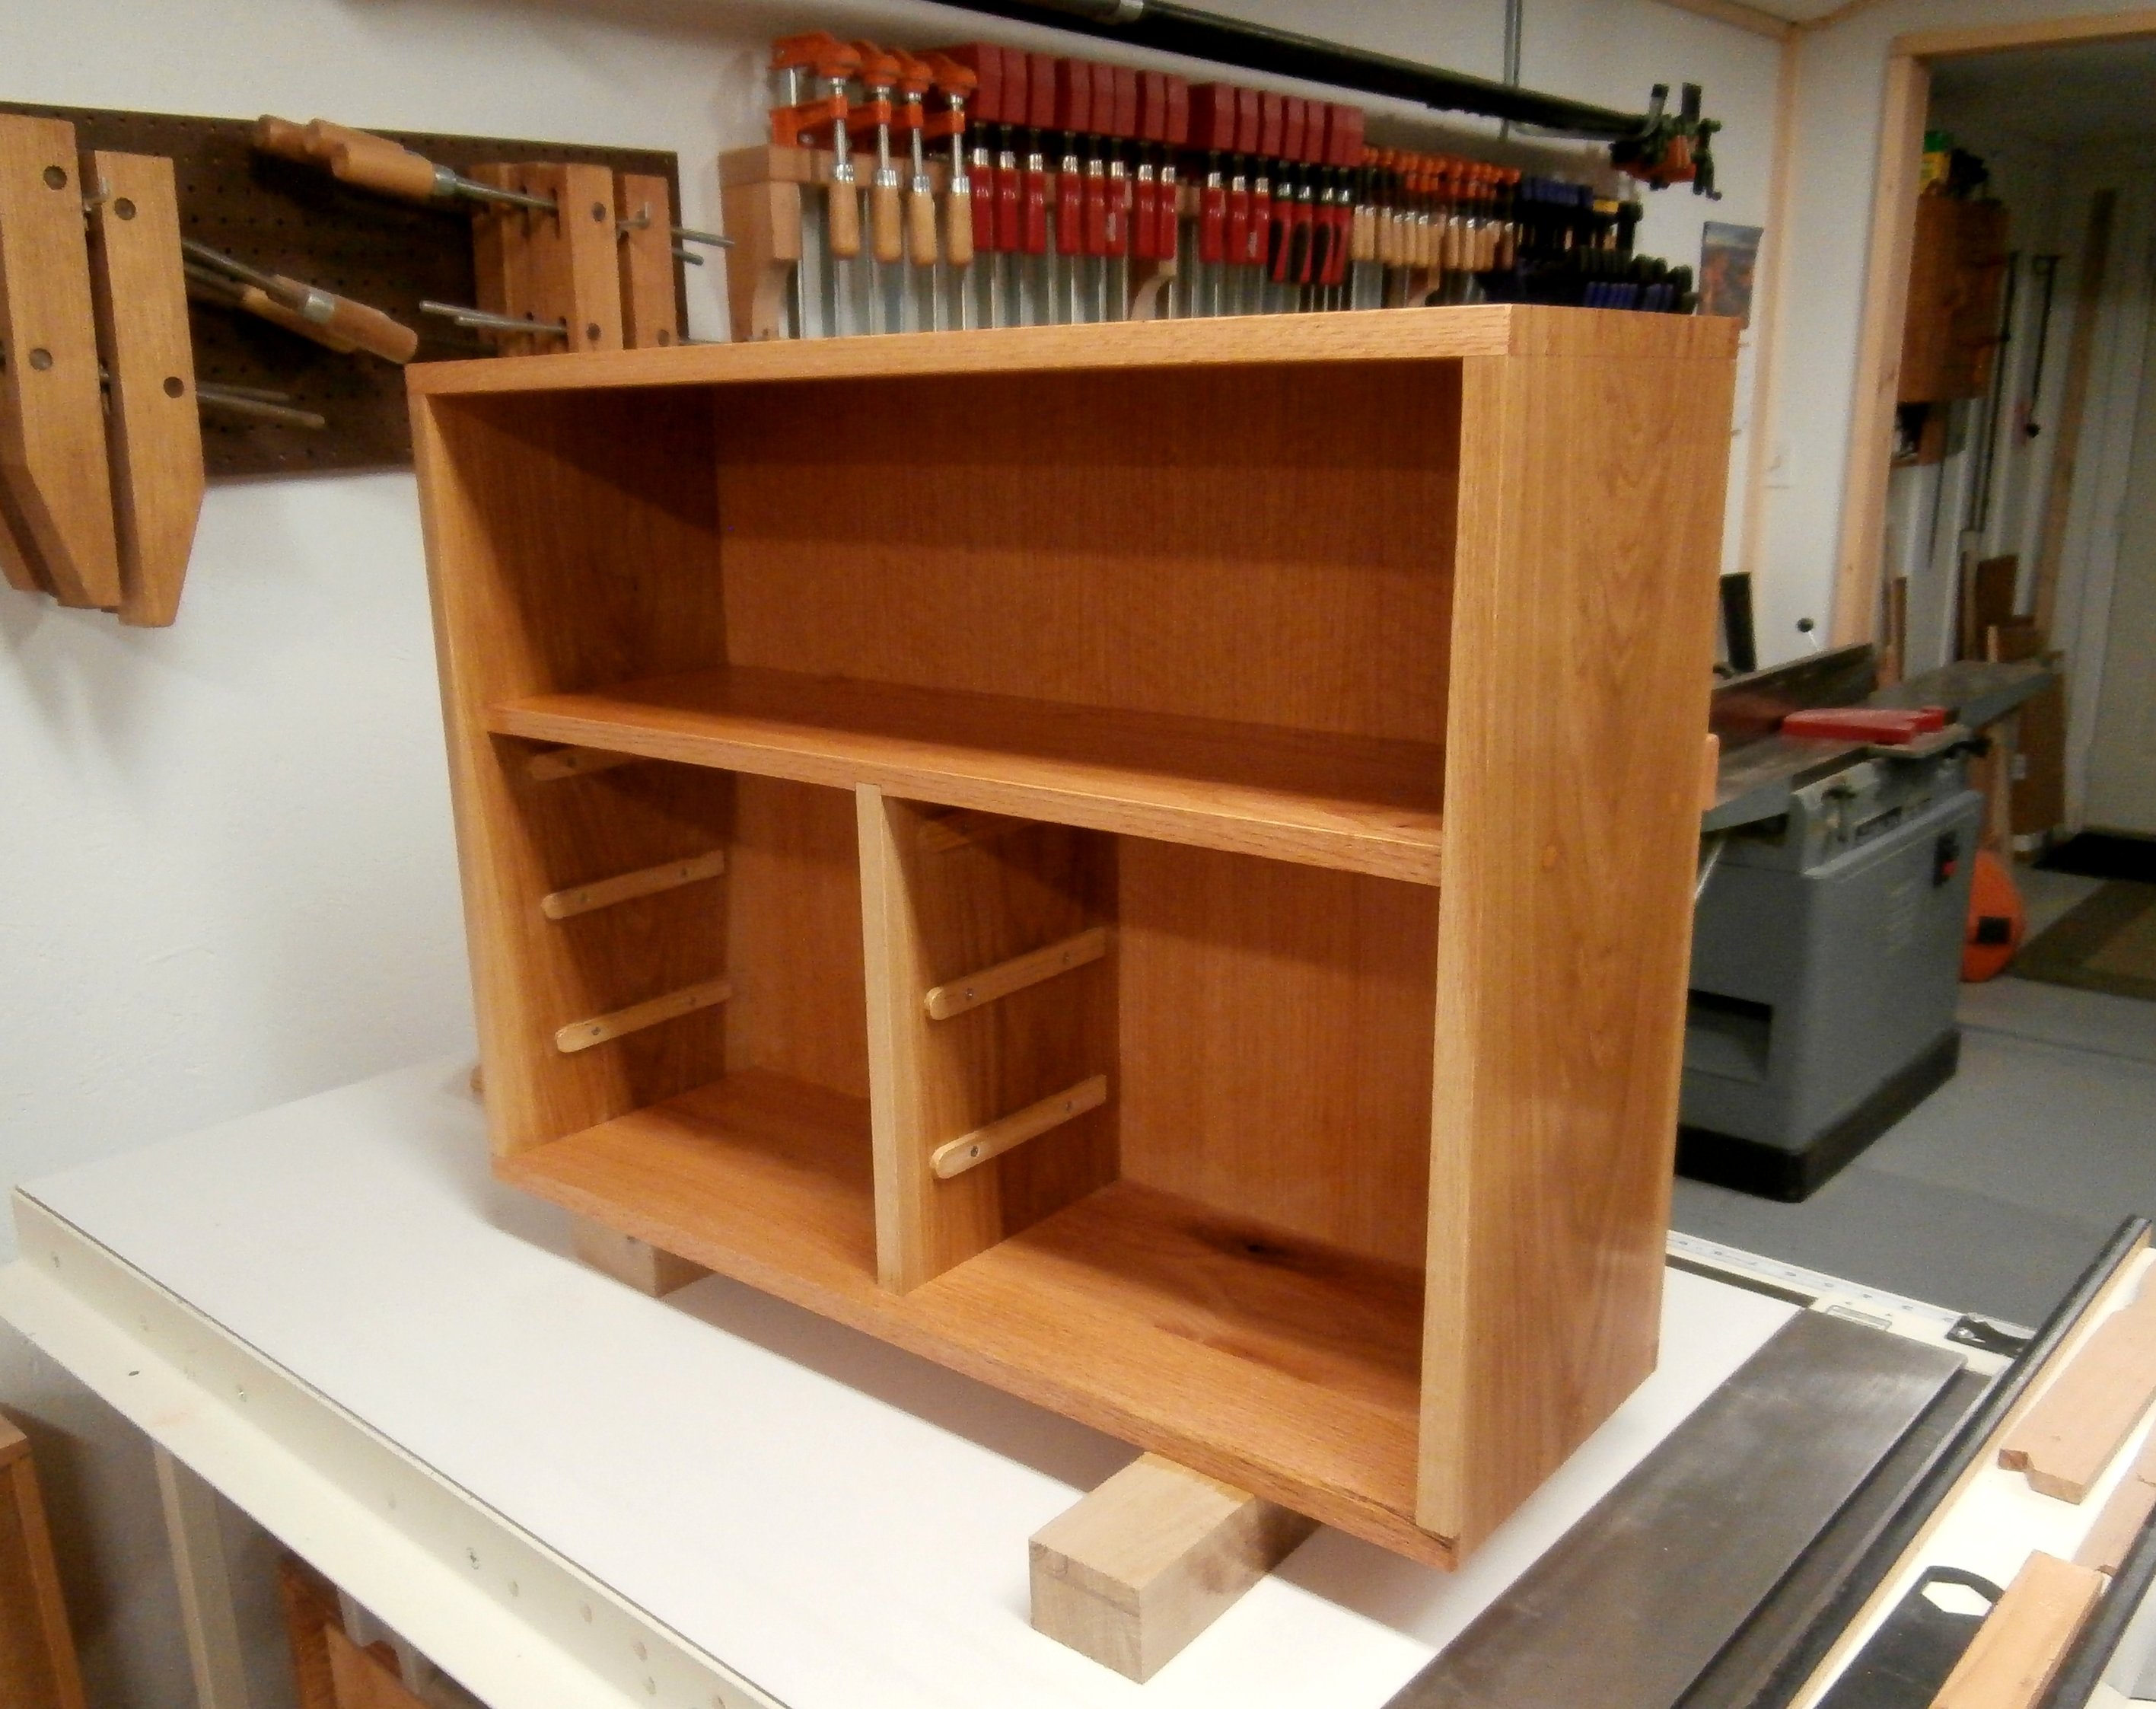
Since I planned to have a recessed back panel for the wall cabinet, after cutting the tails and pins for all four of the case frame pieces, I took this opportunity to cut the stopped rabbets around the back edges of the case pieces as well.  See Below.

Stopped rabbet for recessed back panel.

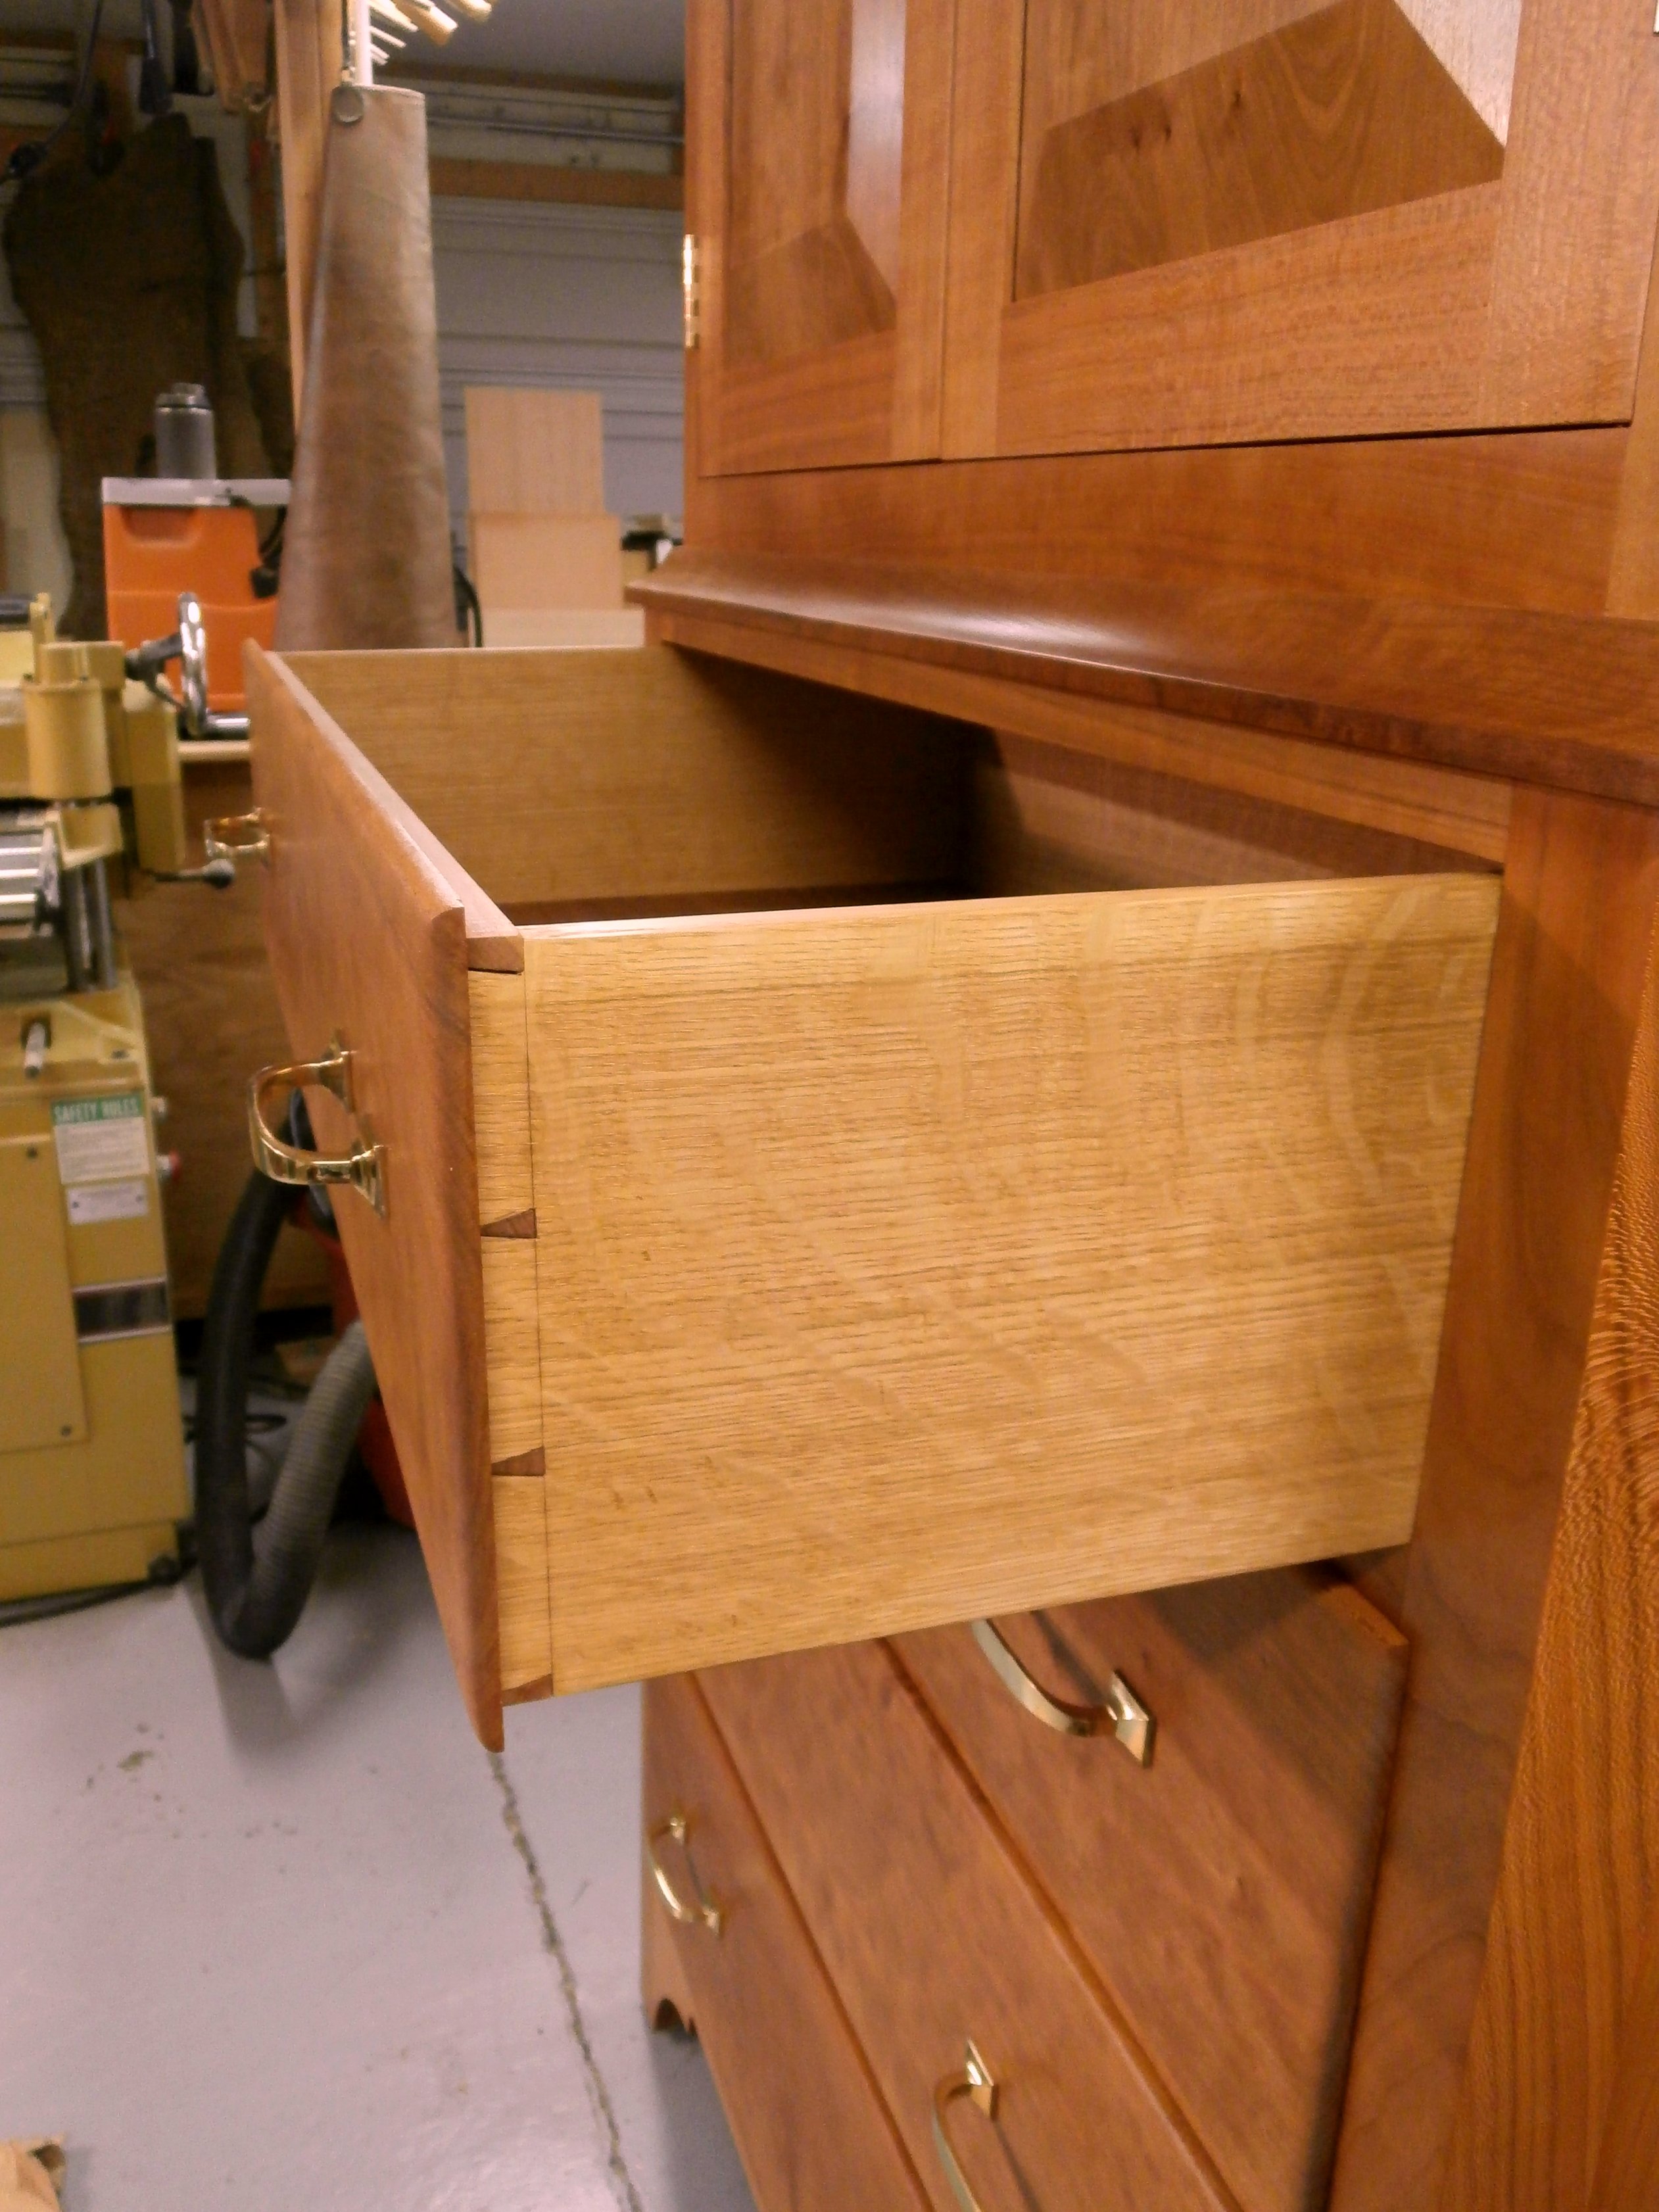
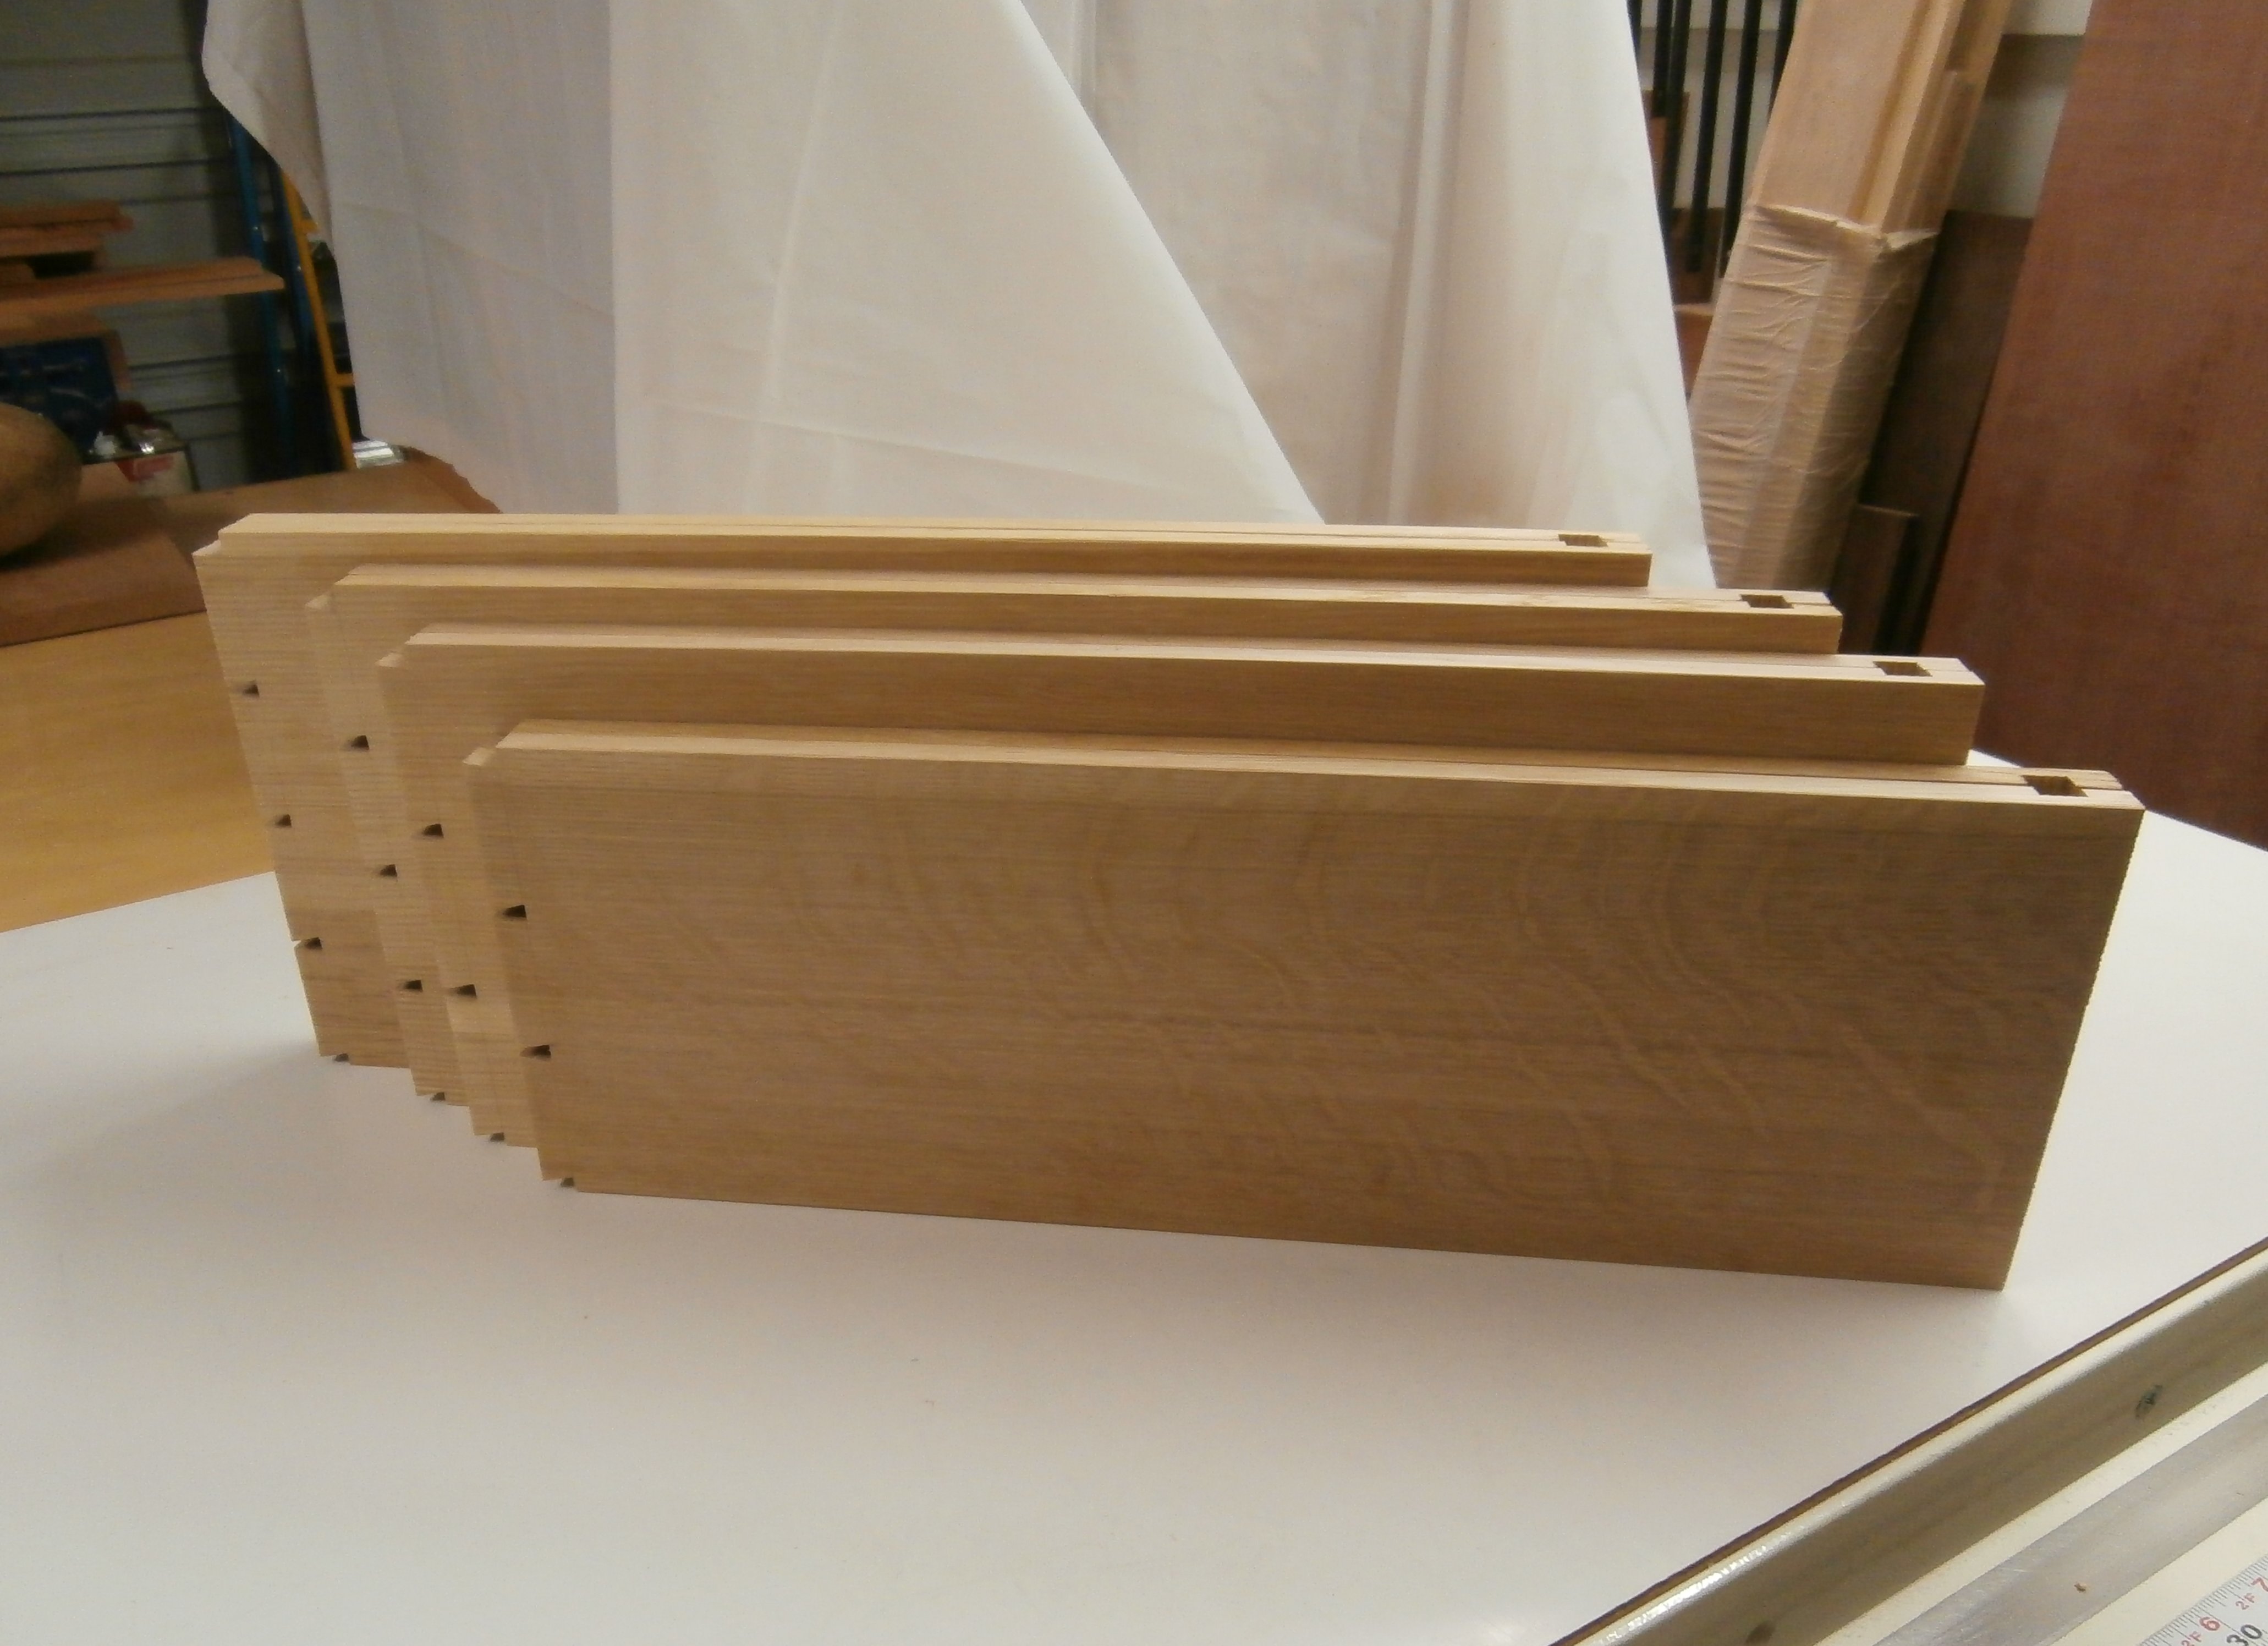
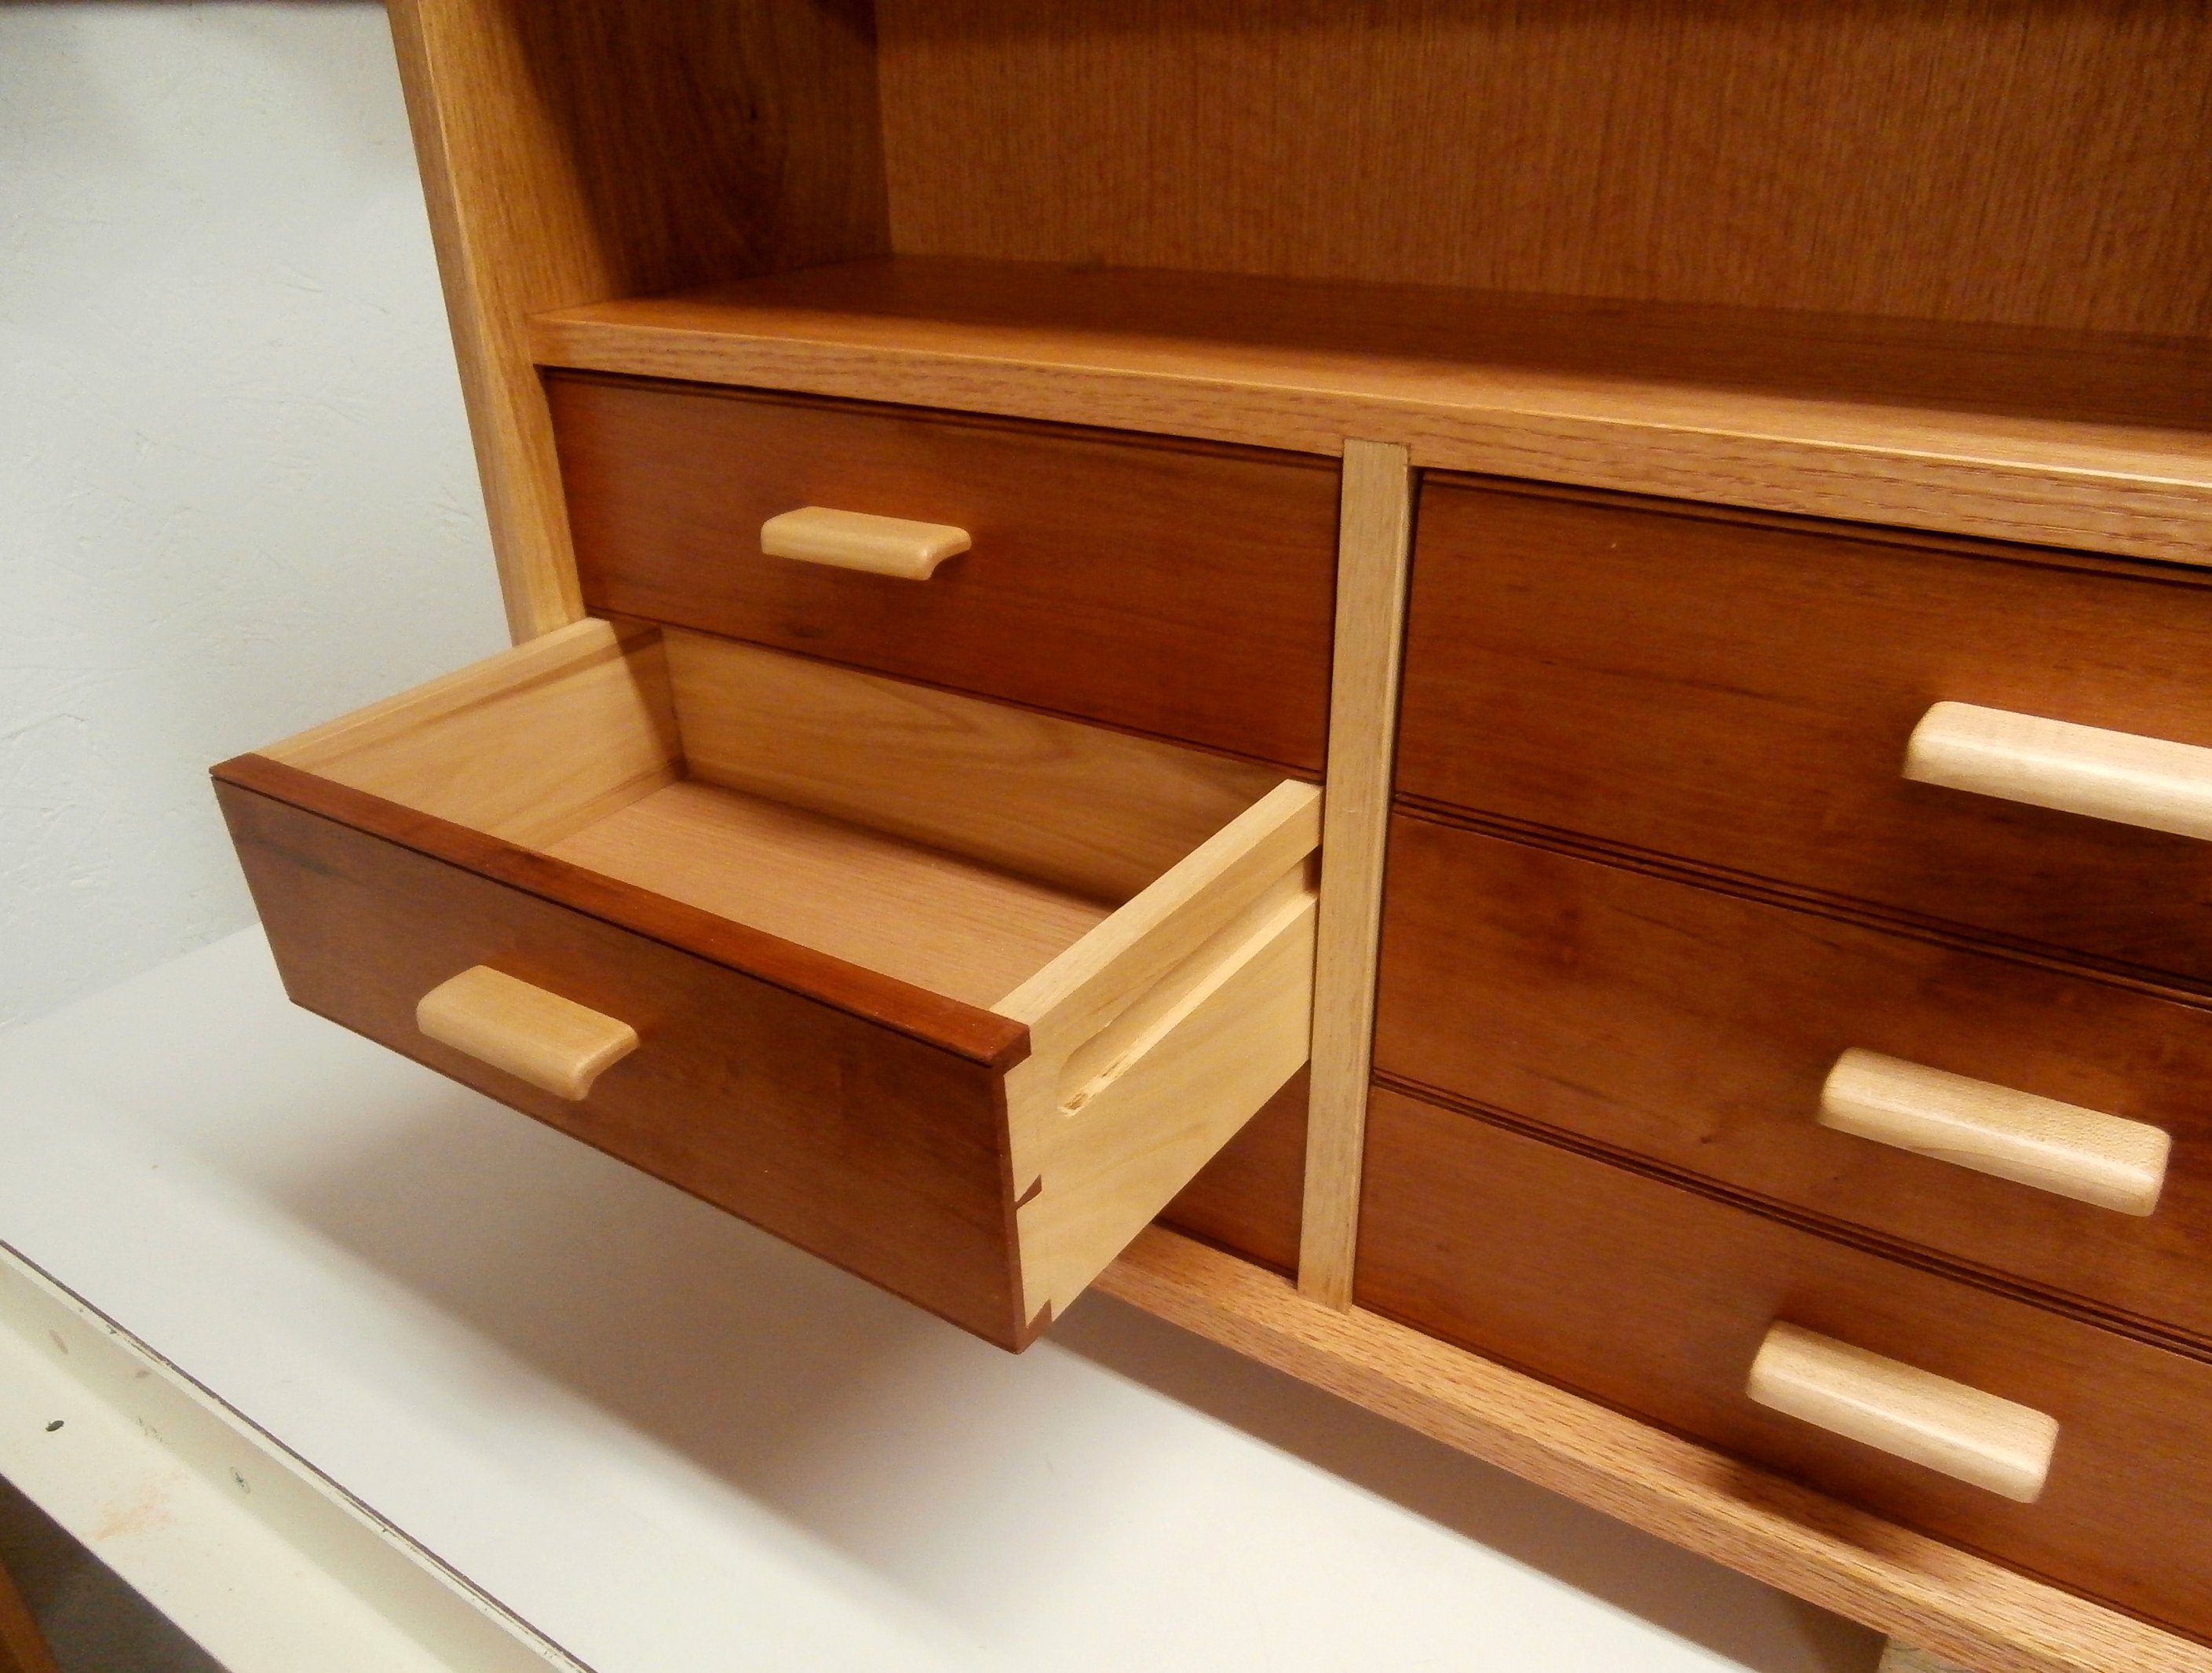
The six drawers, with American elm sides and Black cherry drawer fronts, have through dovetails on the back corners and “half-blind” dovetails on the front corners.  “Half-blind” means that the tails do not go all the way through the adjoining boards so that they do not show on the face.  My technique for the half-blind dovetails was basically the same as that for through dovetails.  See below.

Drawer side and back with rabbets cut for drawer bottom.
Elm side with tails fits into cherry front with pins to create the half-blind dovetails.

All sides, backs, and front pieces for the six drawers.  Ready for assembly.
Dry fit through dovetails at the rear and half-blind at the front of the drawer.

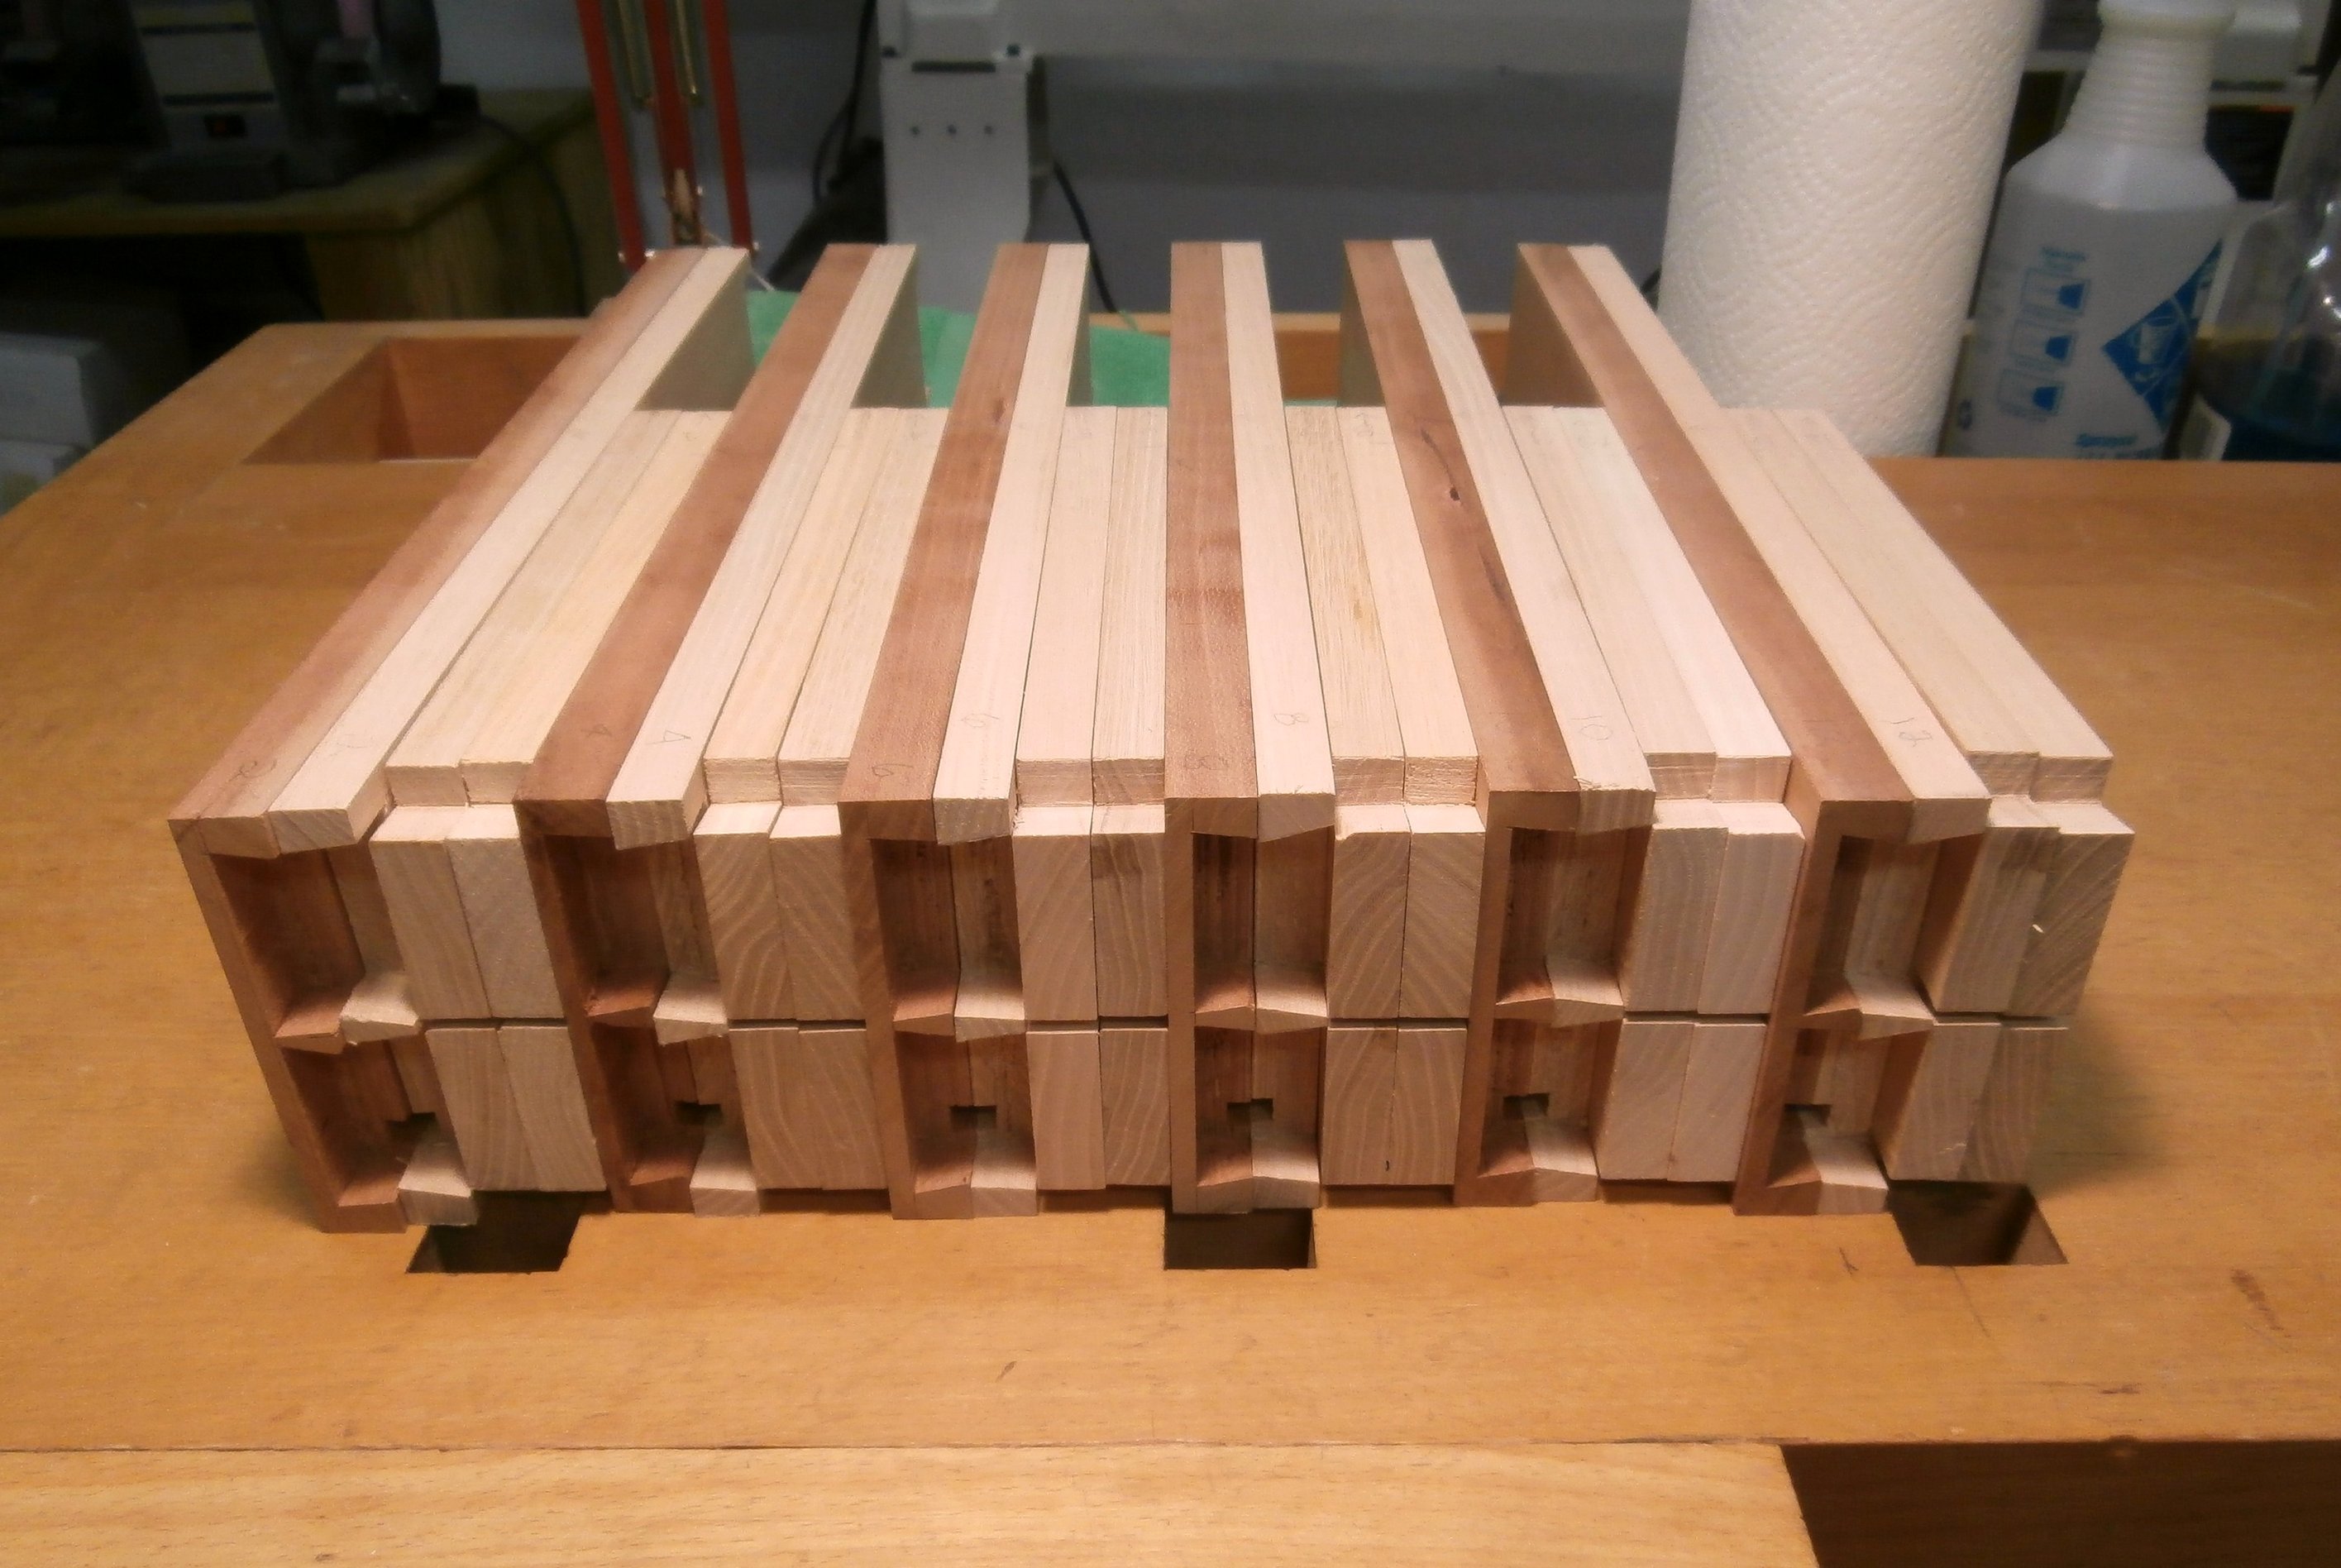
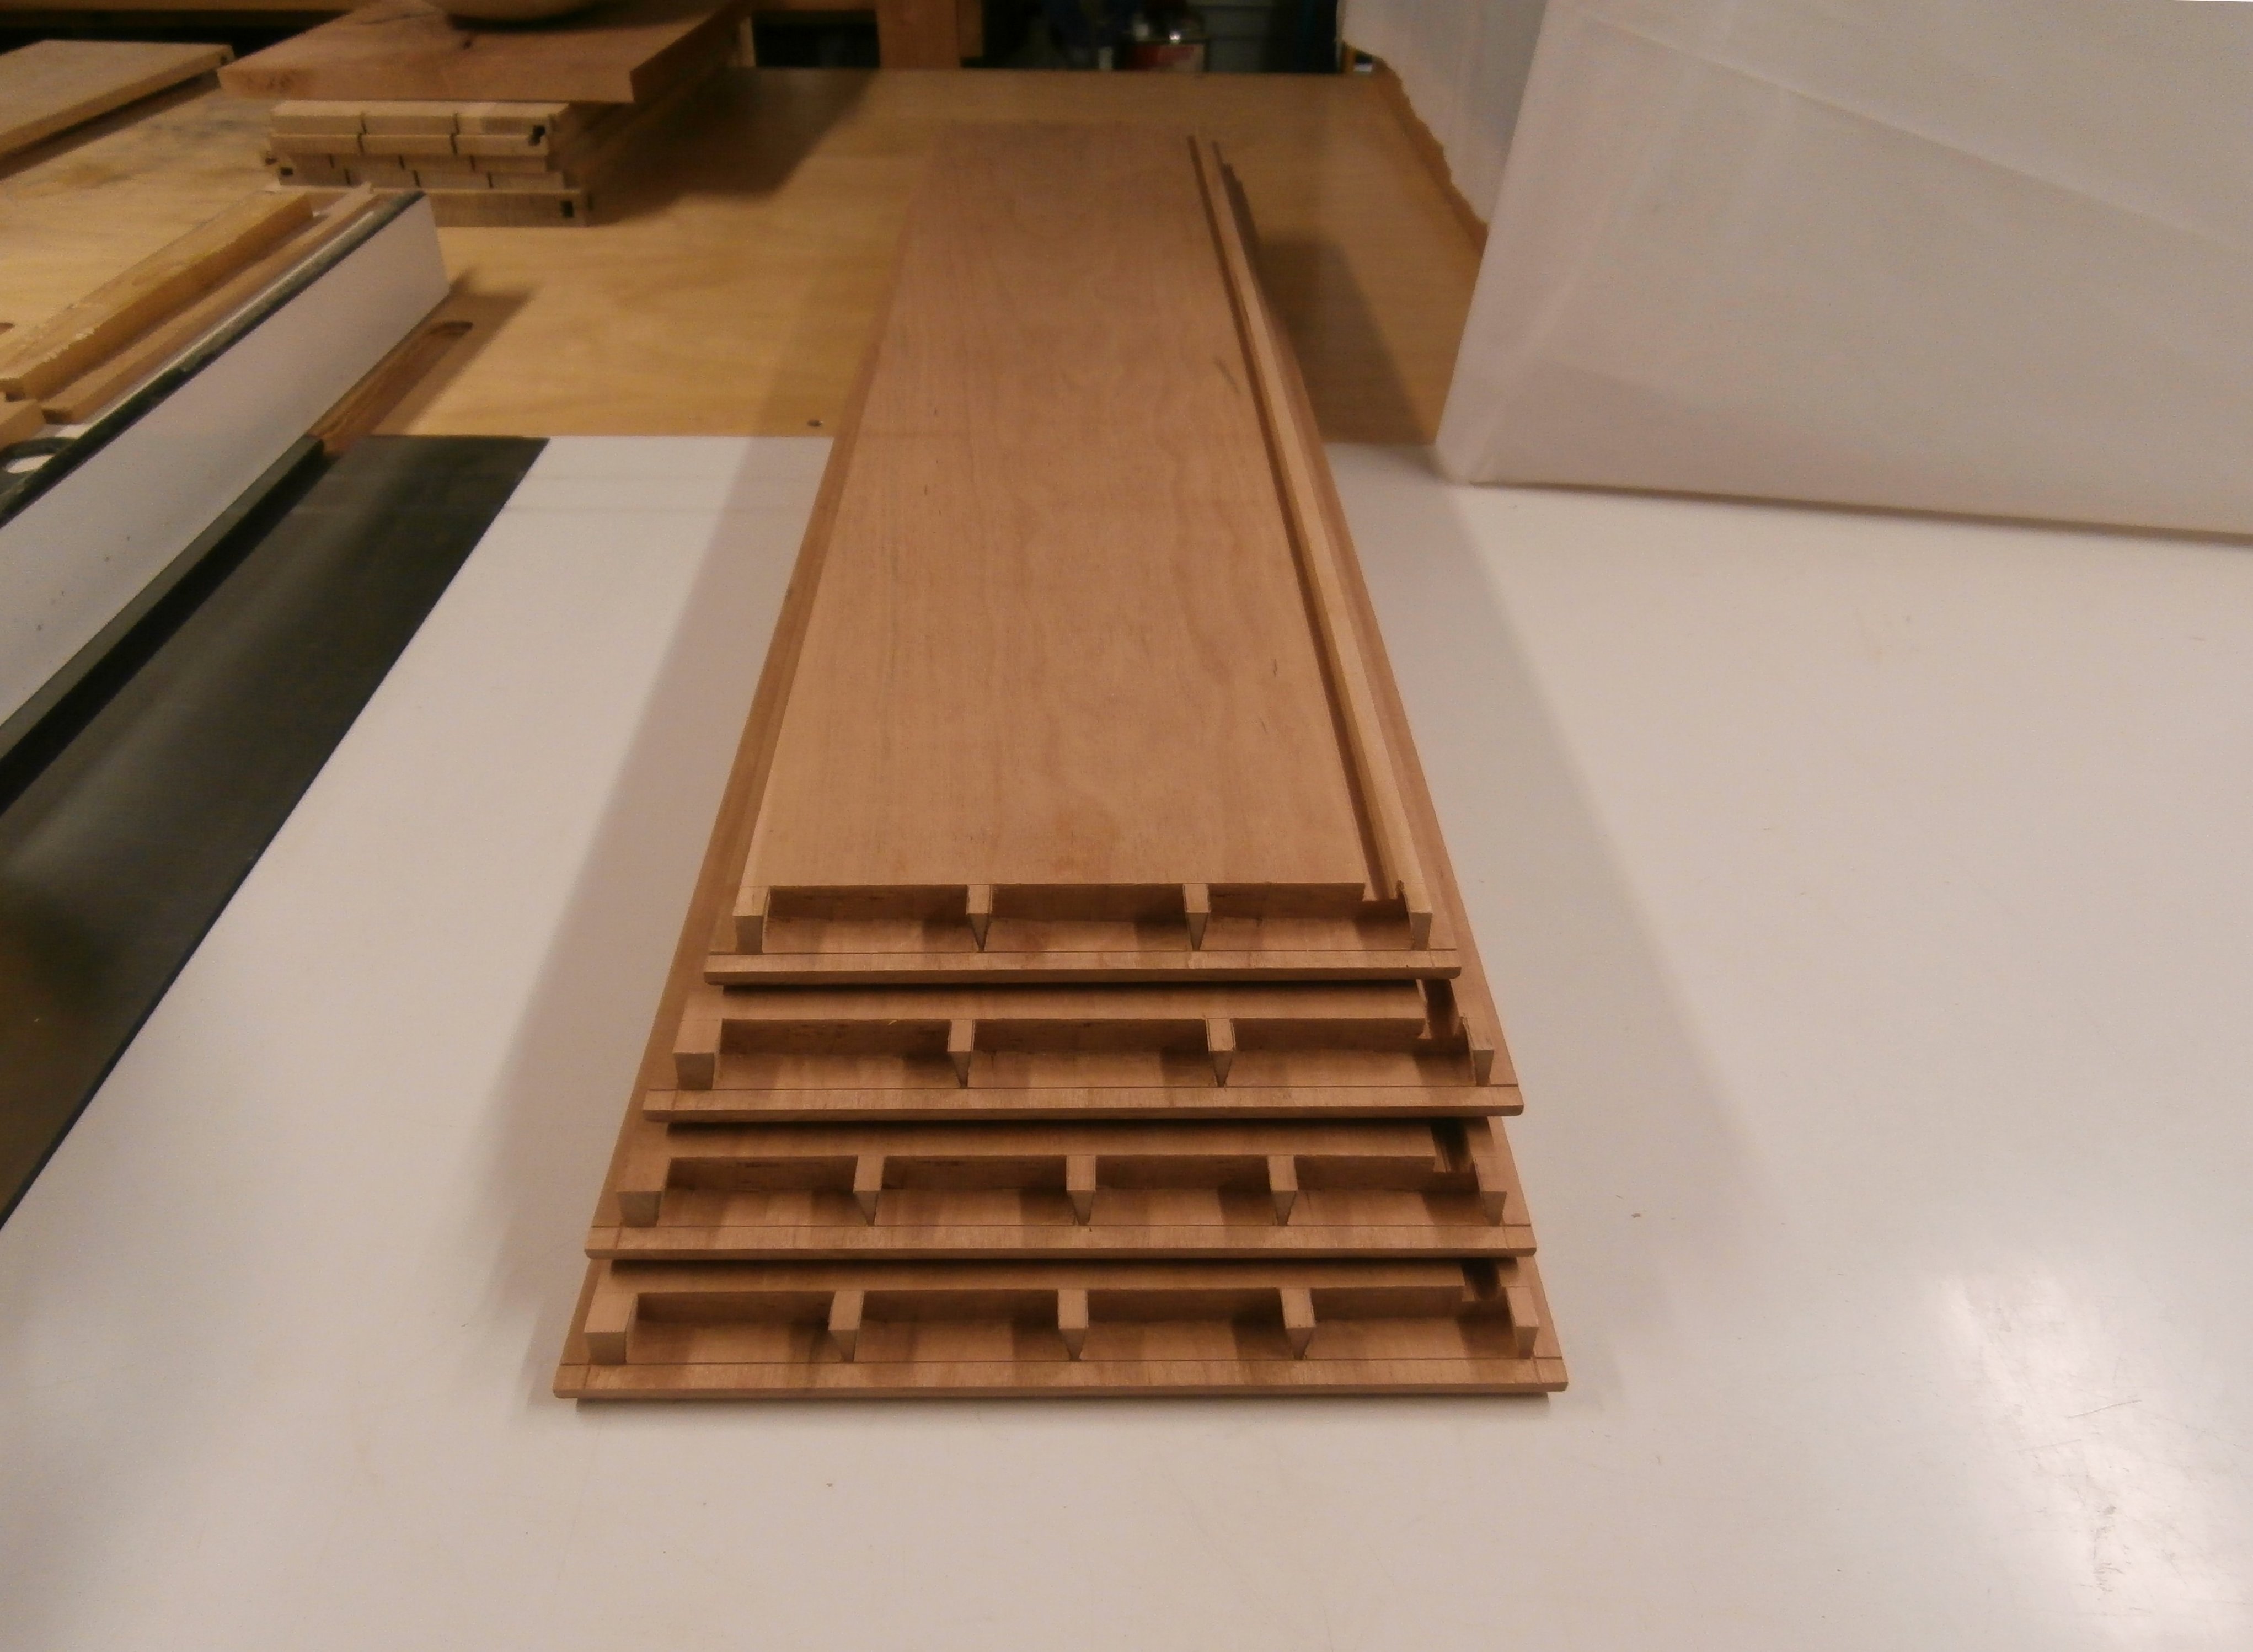
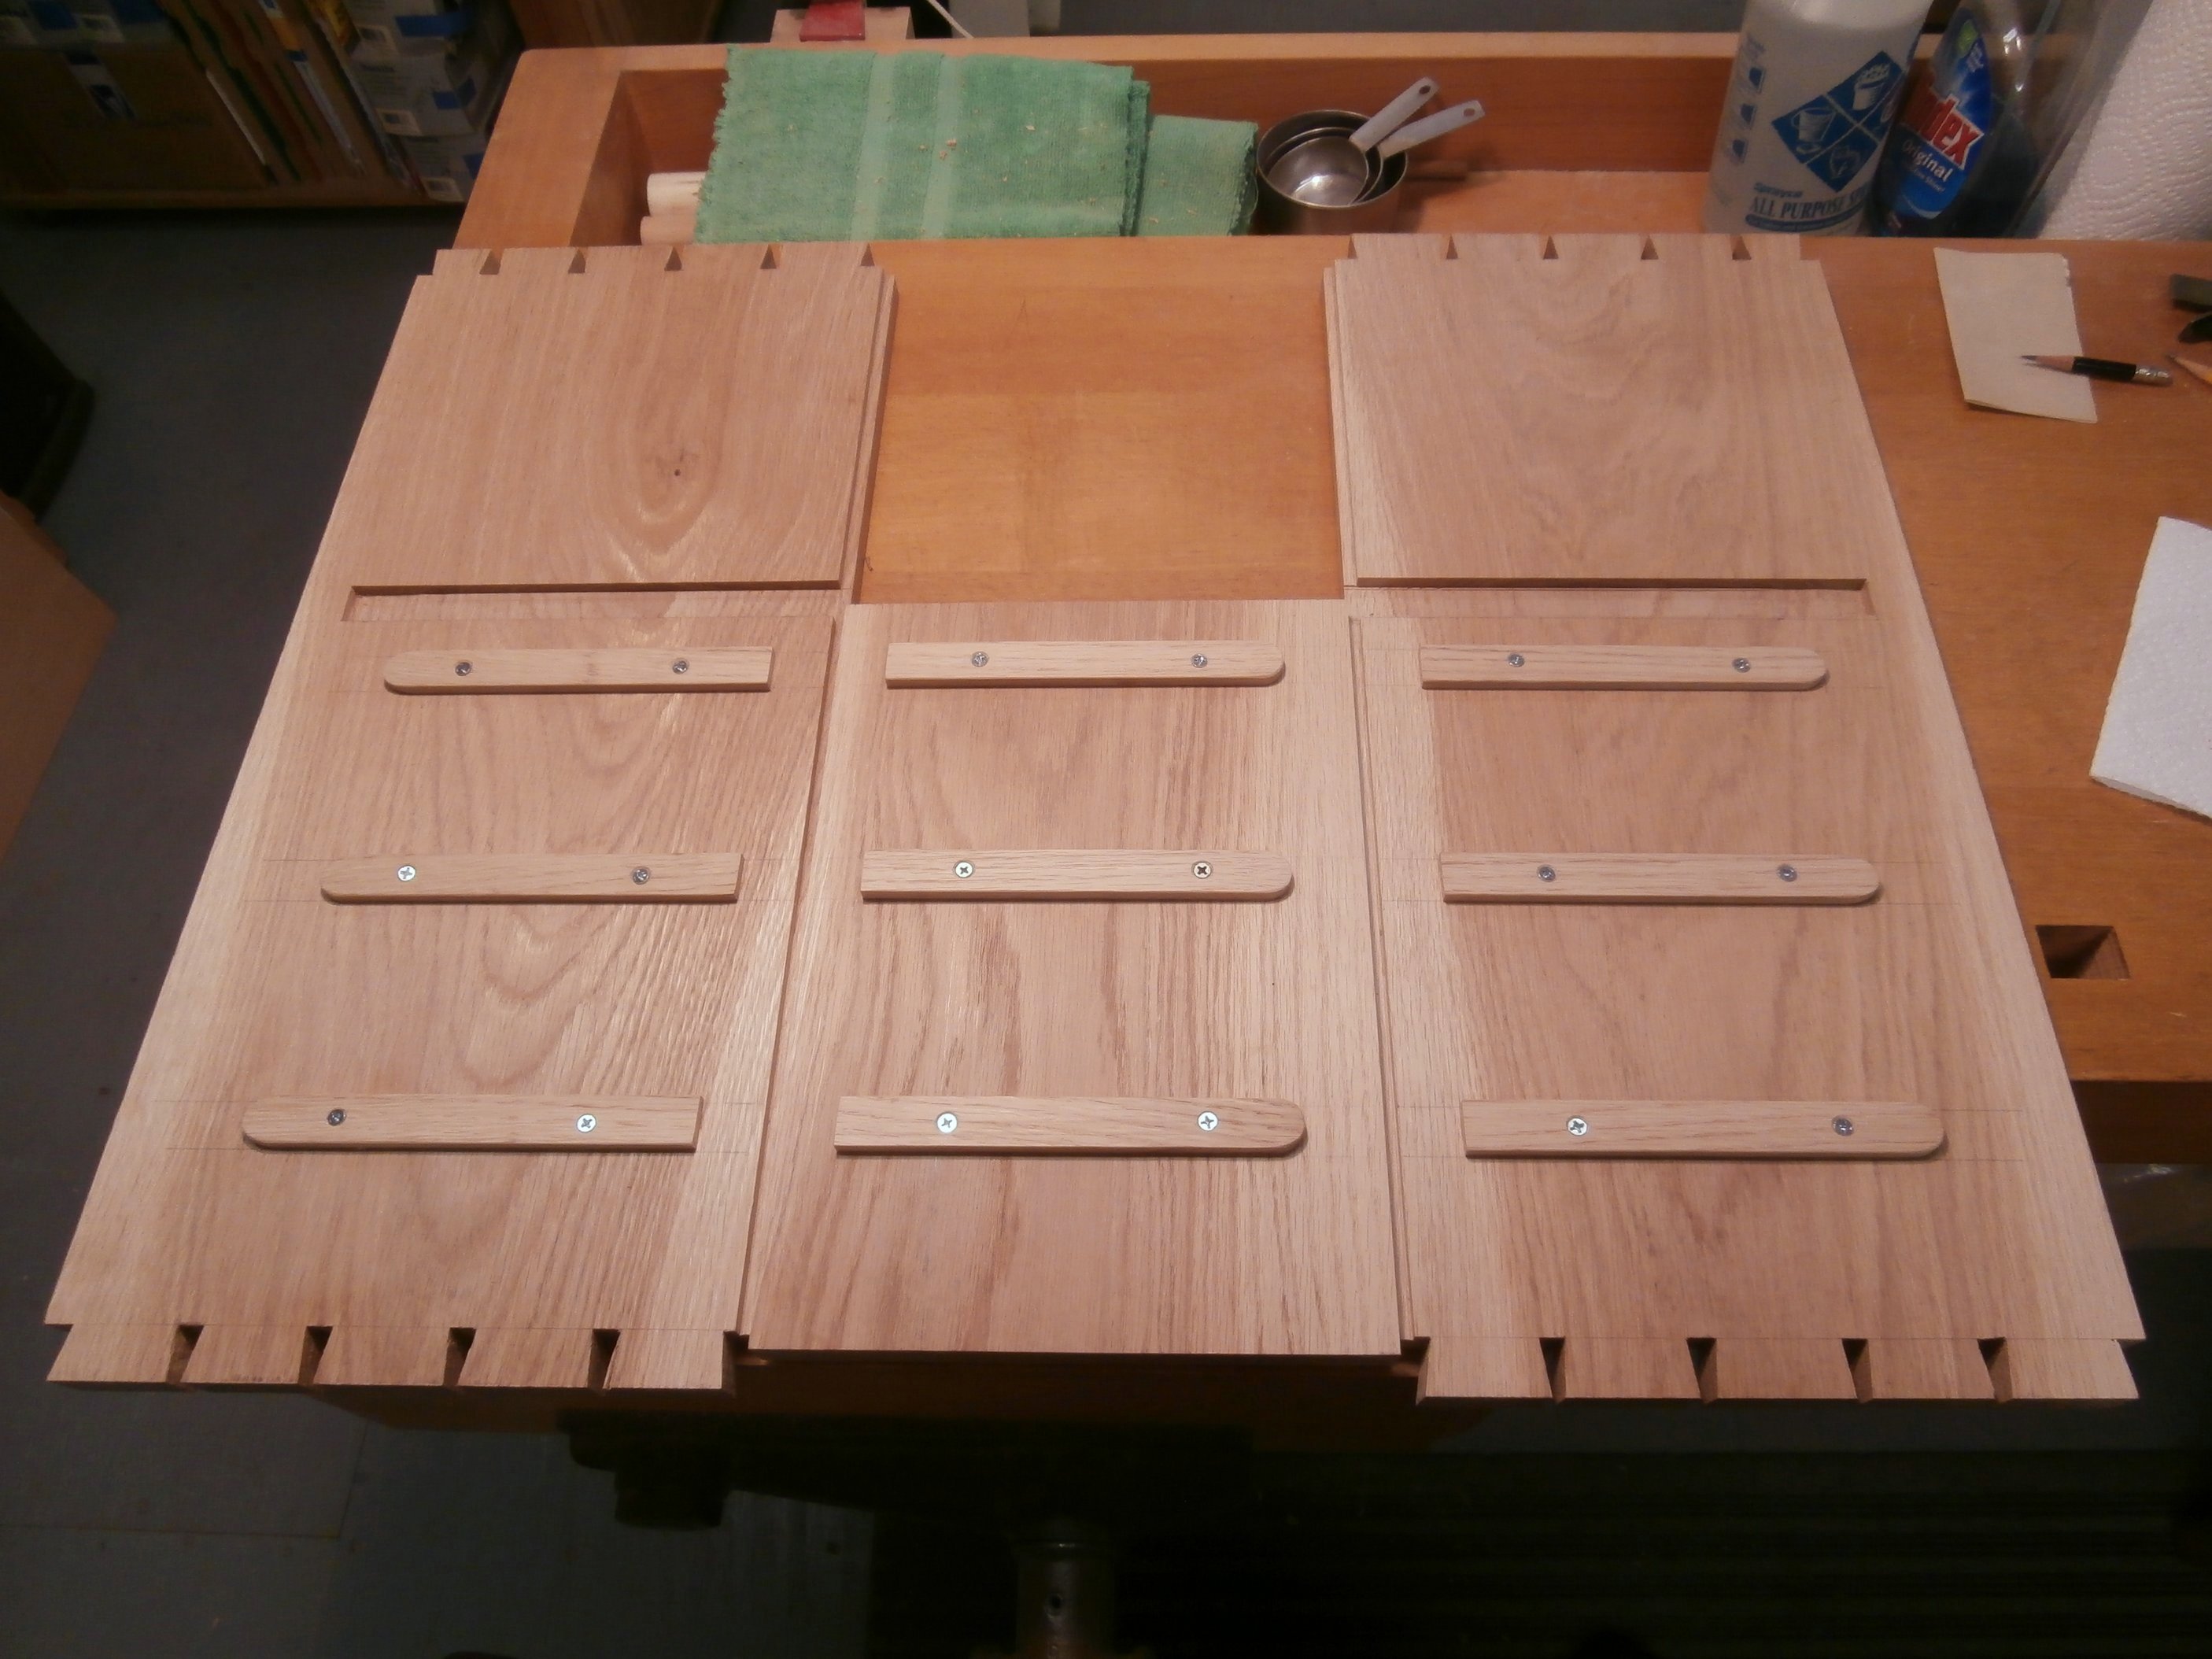
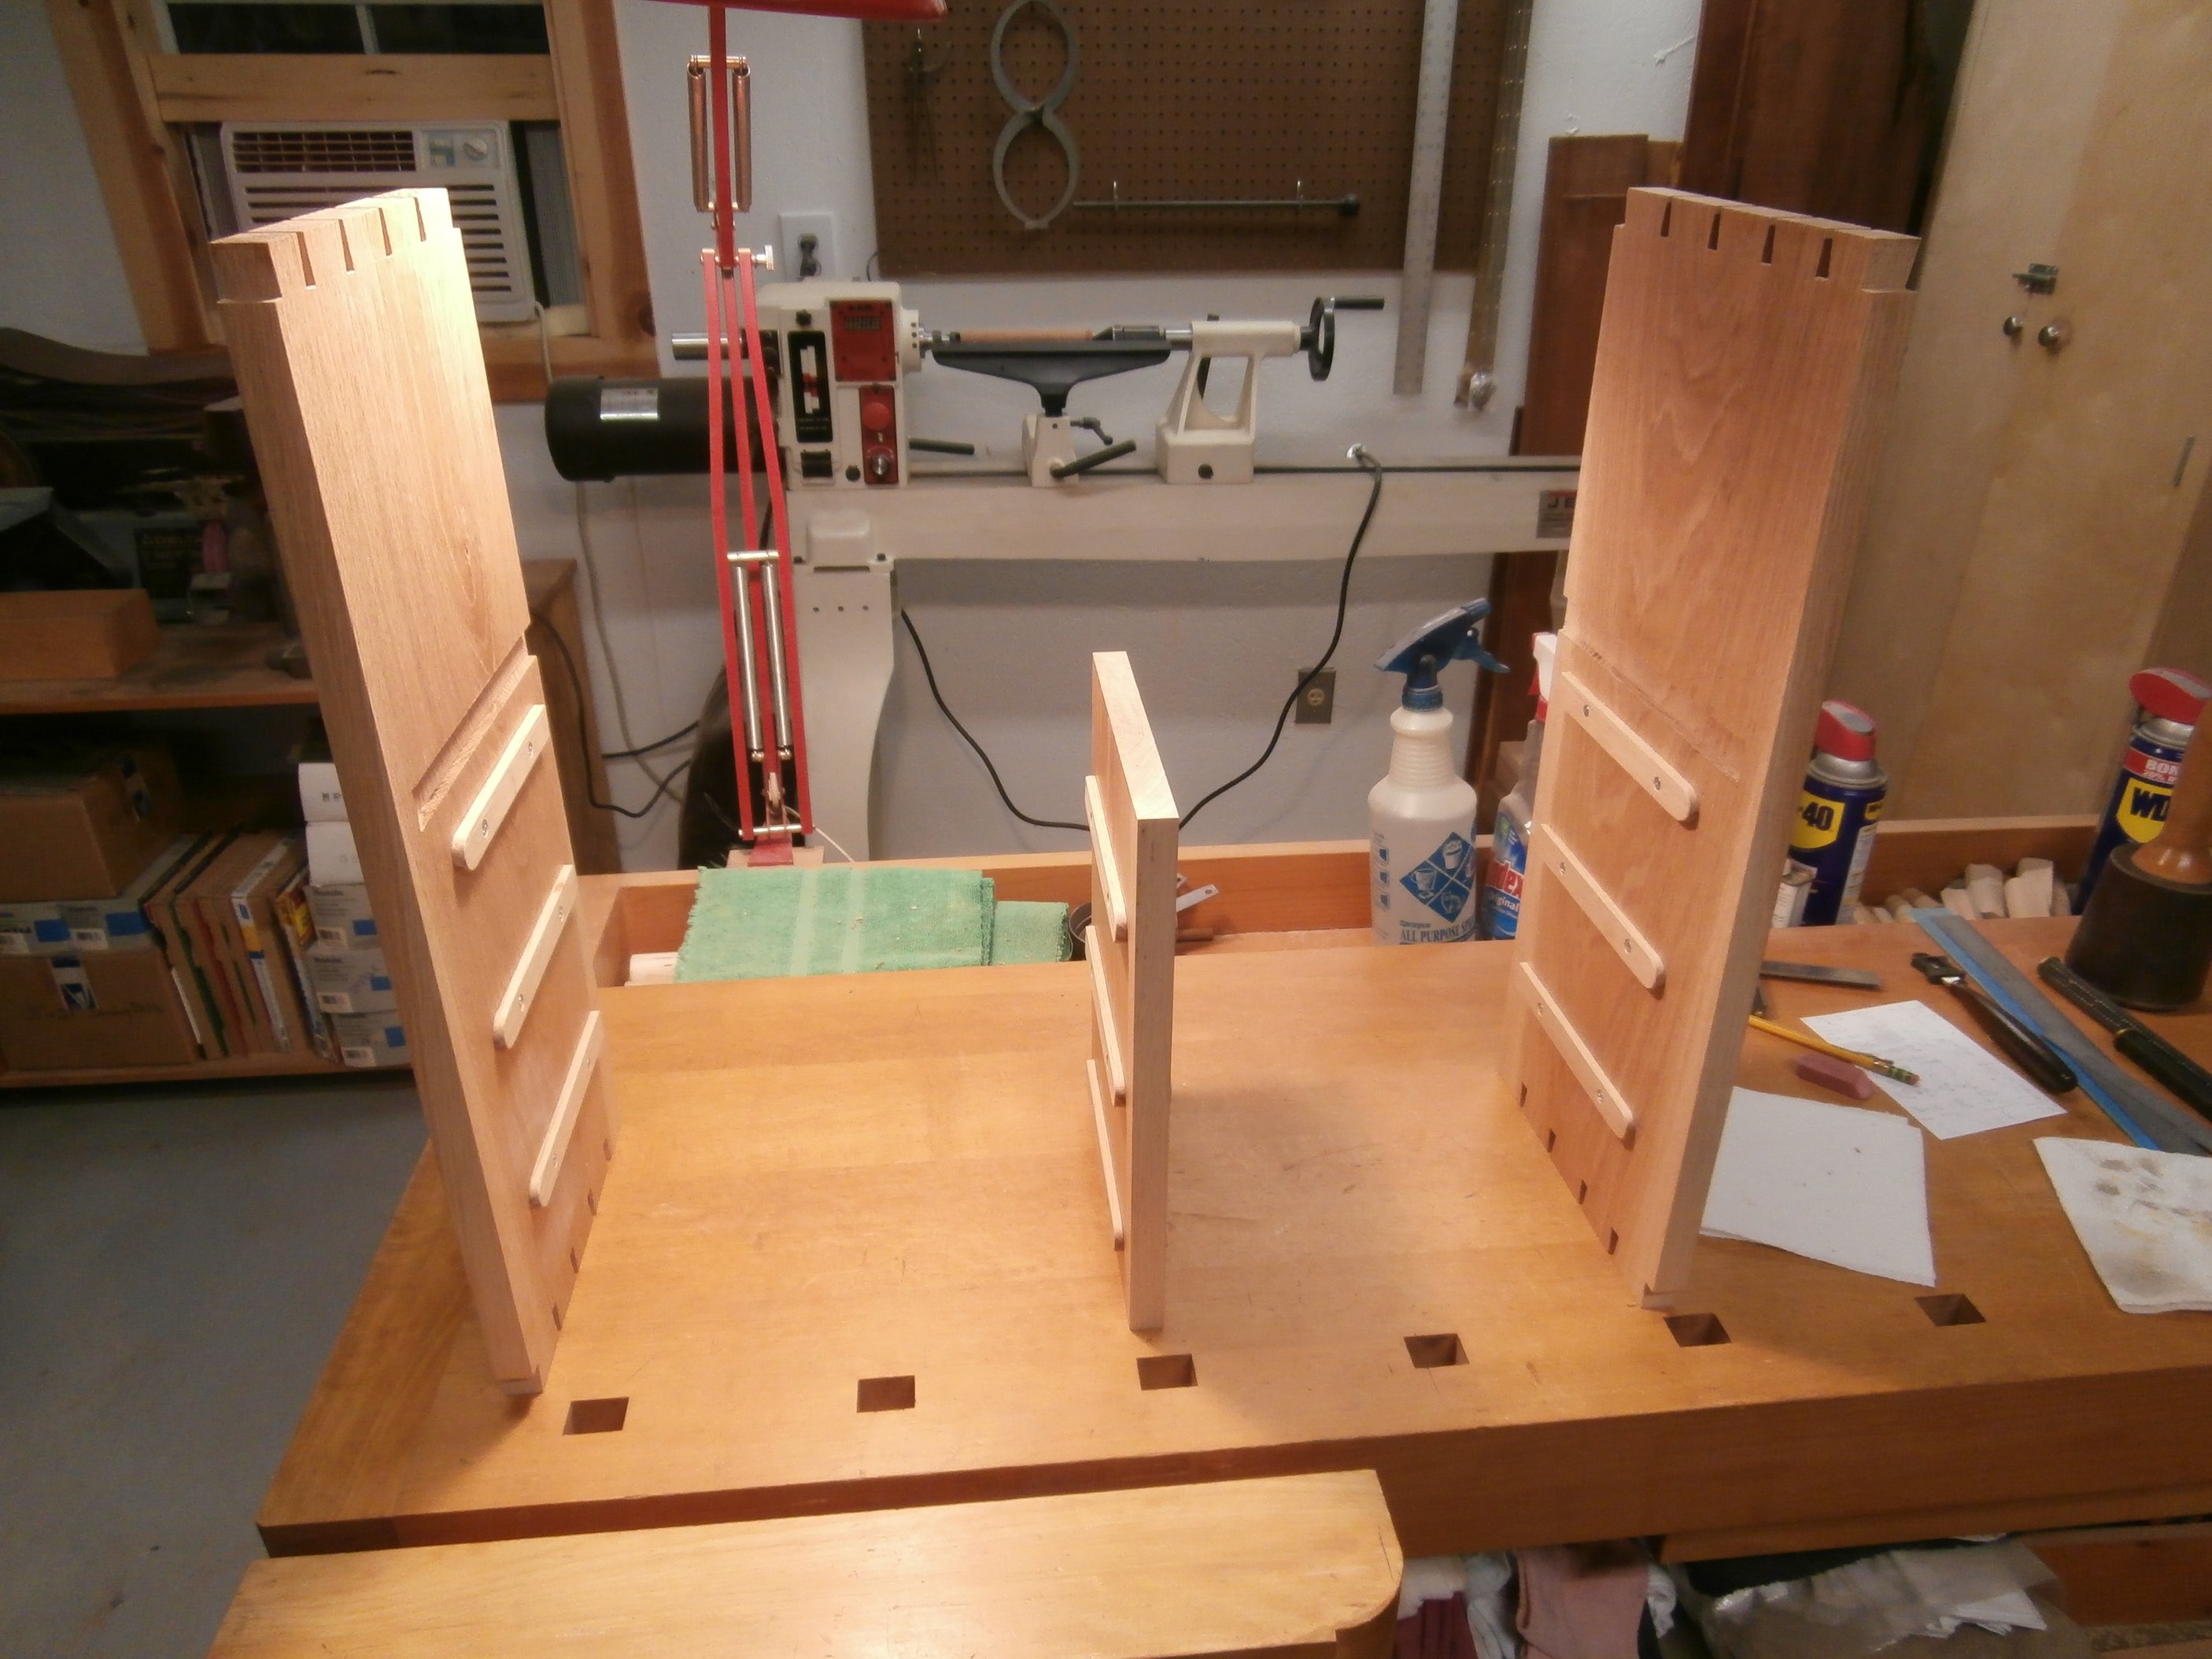
After cutting the 3/16″ oak plywood for the drawer bottoms, I cut and shaped a piece of Sugar maple with the table saw and a router to be cut into individual lengths for drawer pulls.  Then I cut stopped dadoes on the outside faces of the drawer sides before final assembly, and made and attached matching wood drawer guides on the inside faces of the case pieces .

Assembled drawers.  Drawer sides have stopped dadoes cut on the outside face to match up with drawer guides mounted on the inside faces of the case work.
Case sides and center section with guides for drawers.

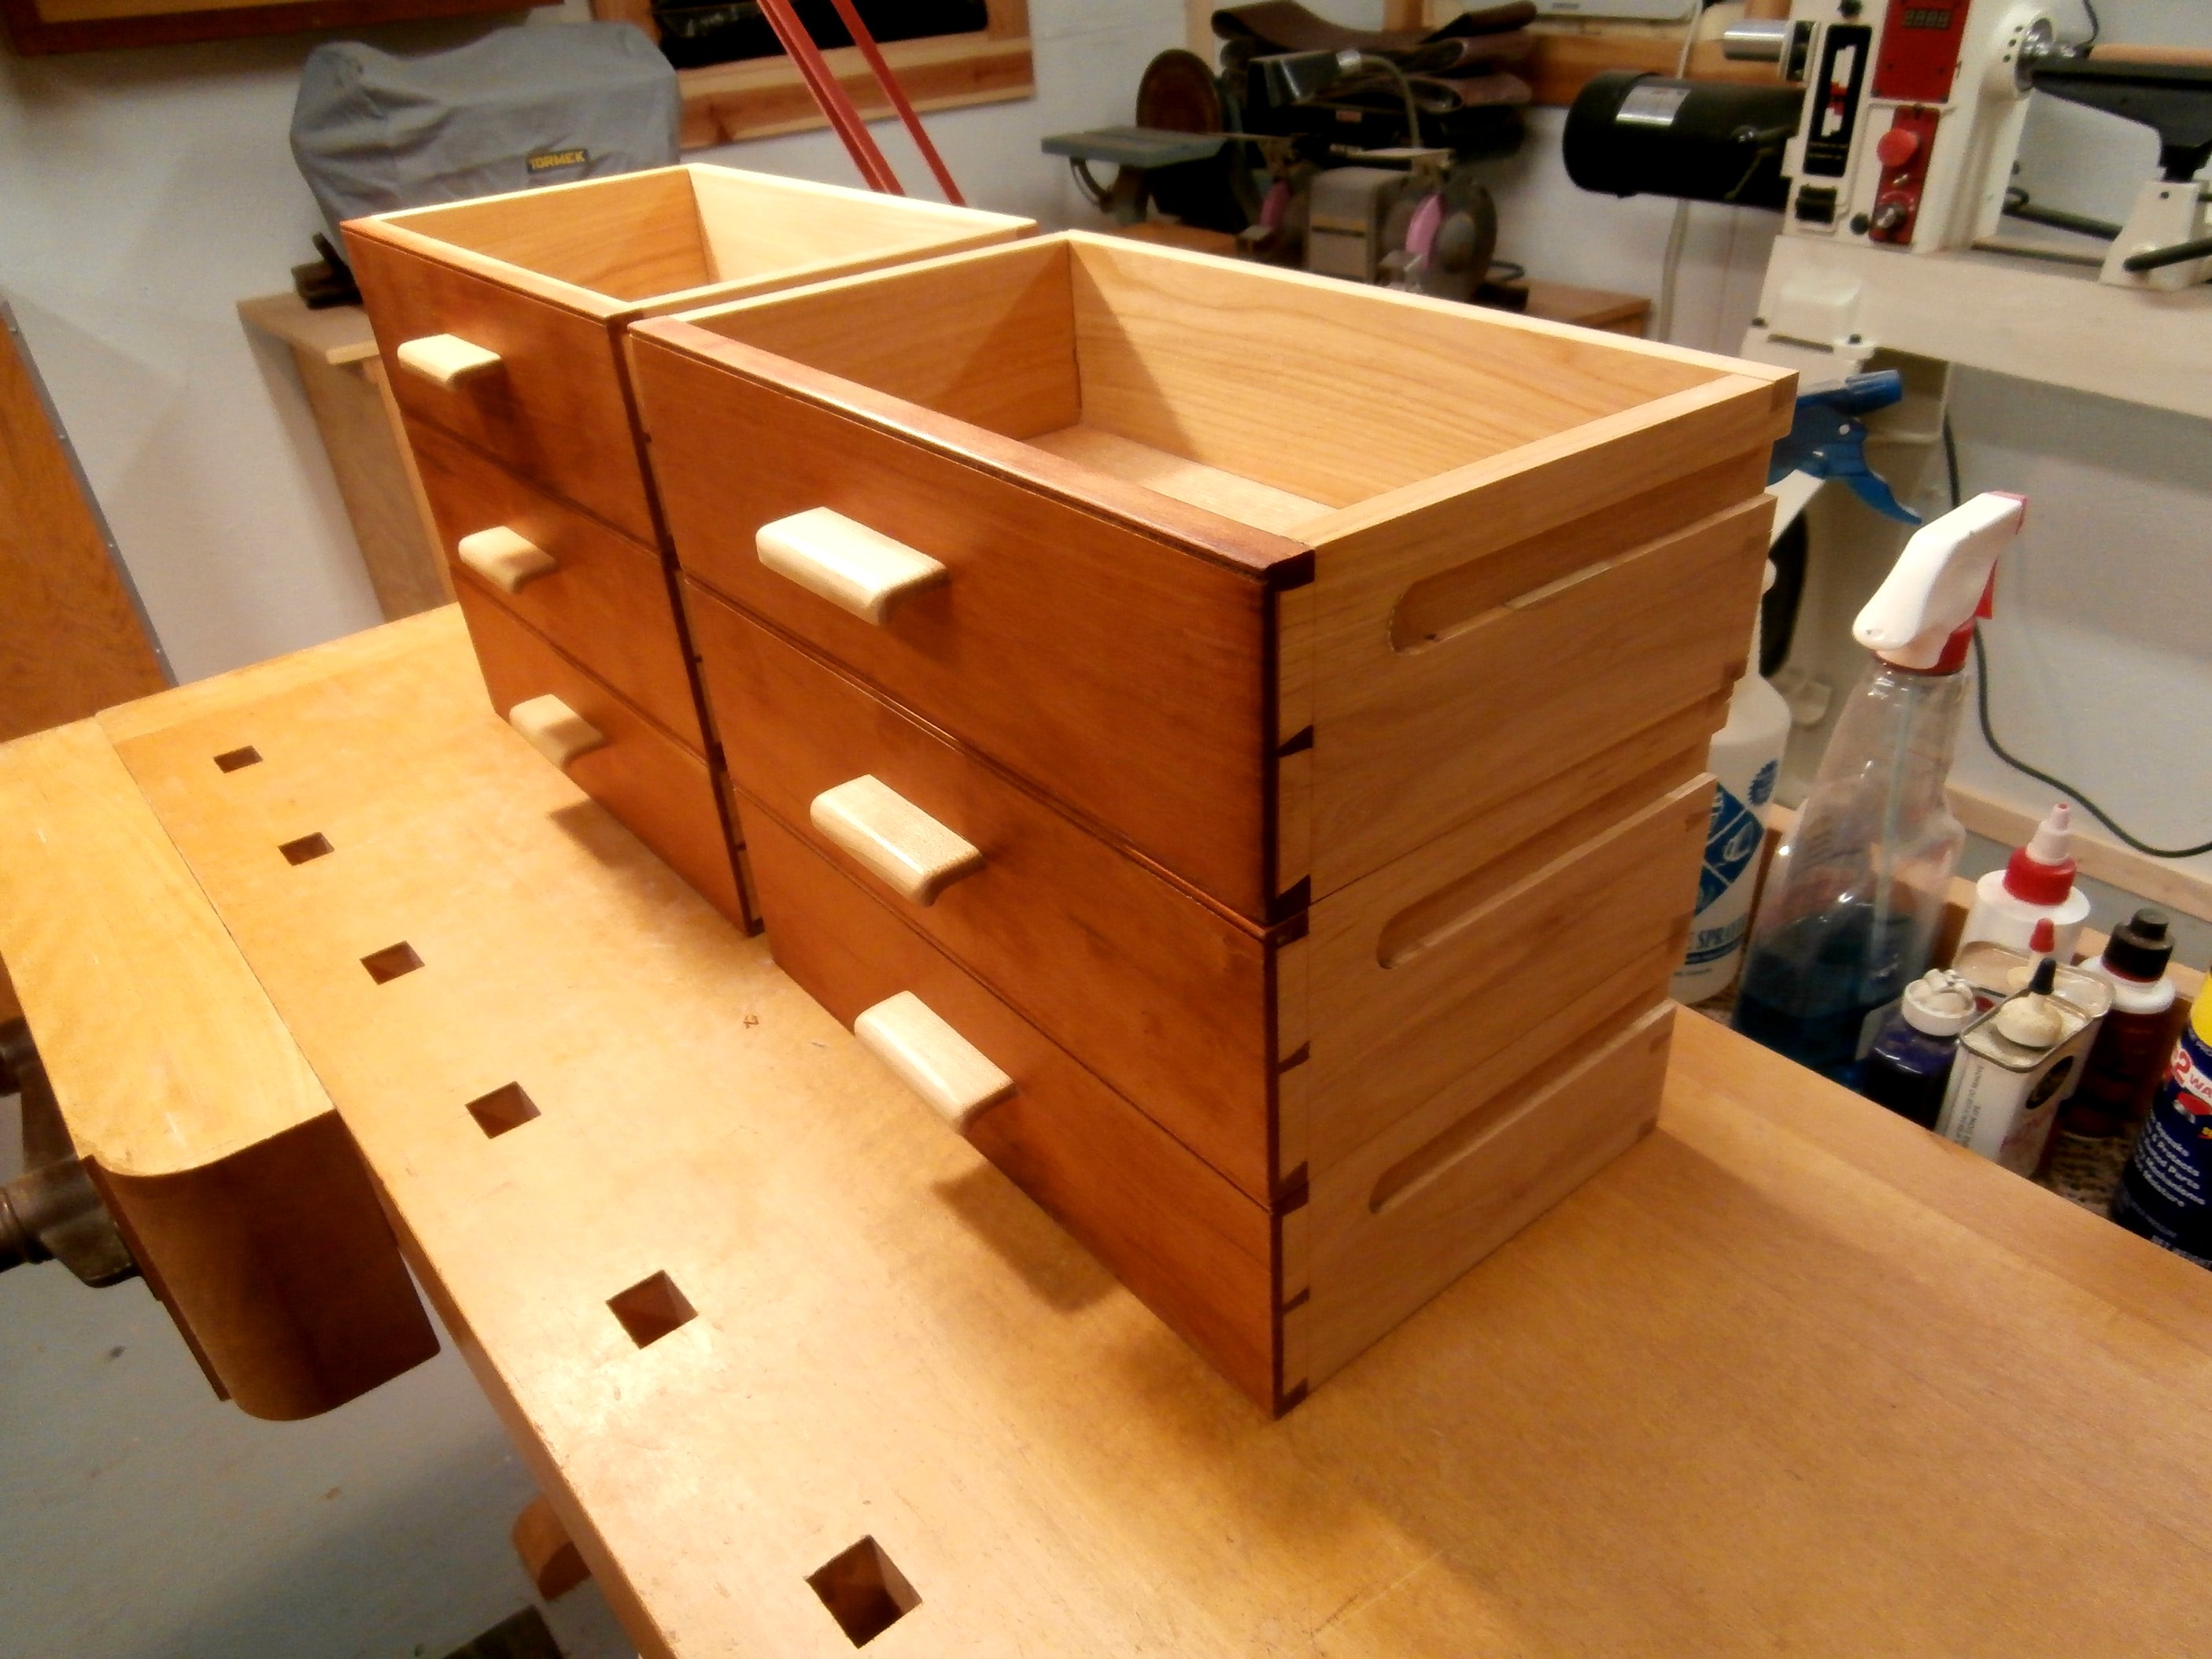
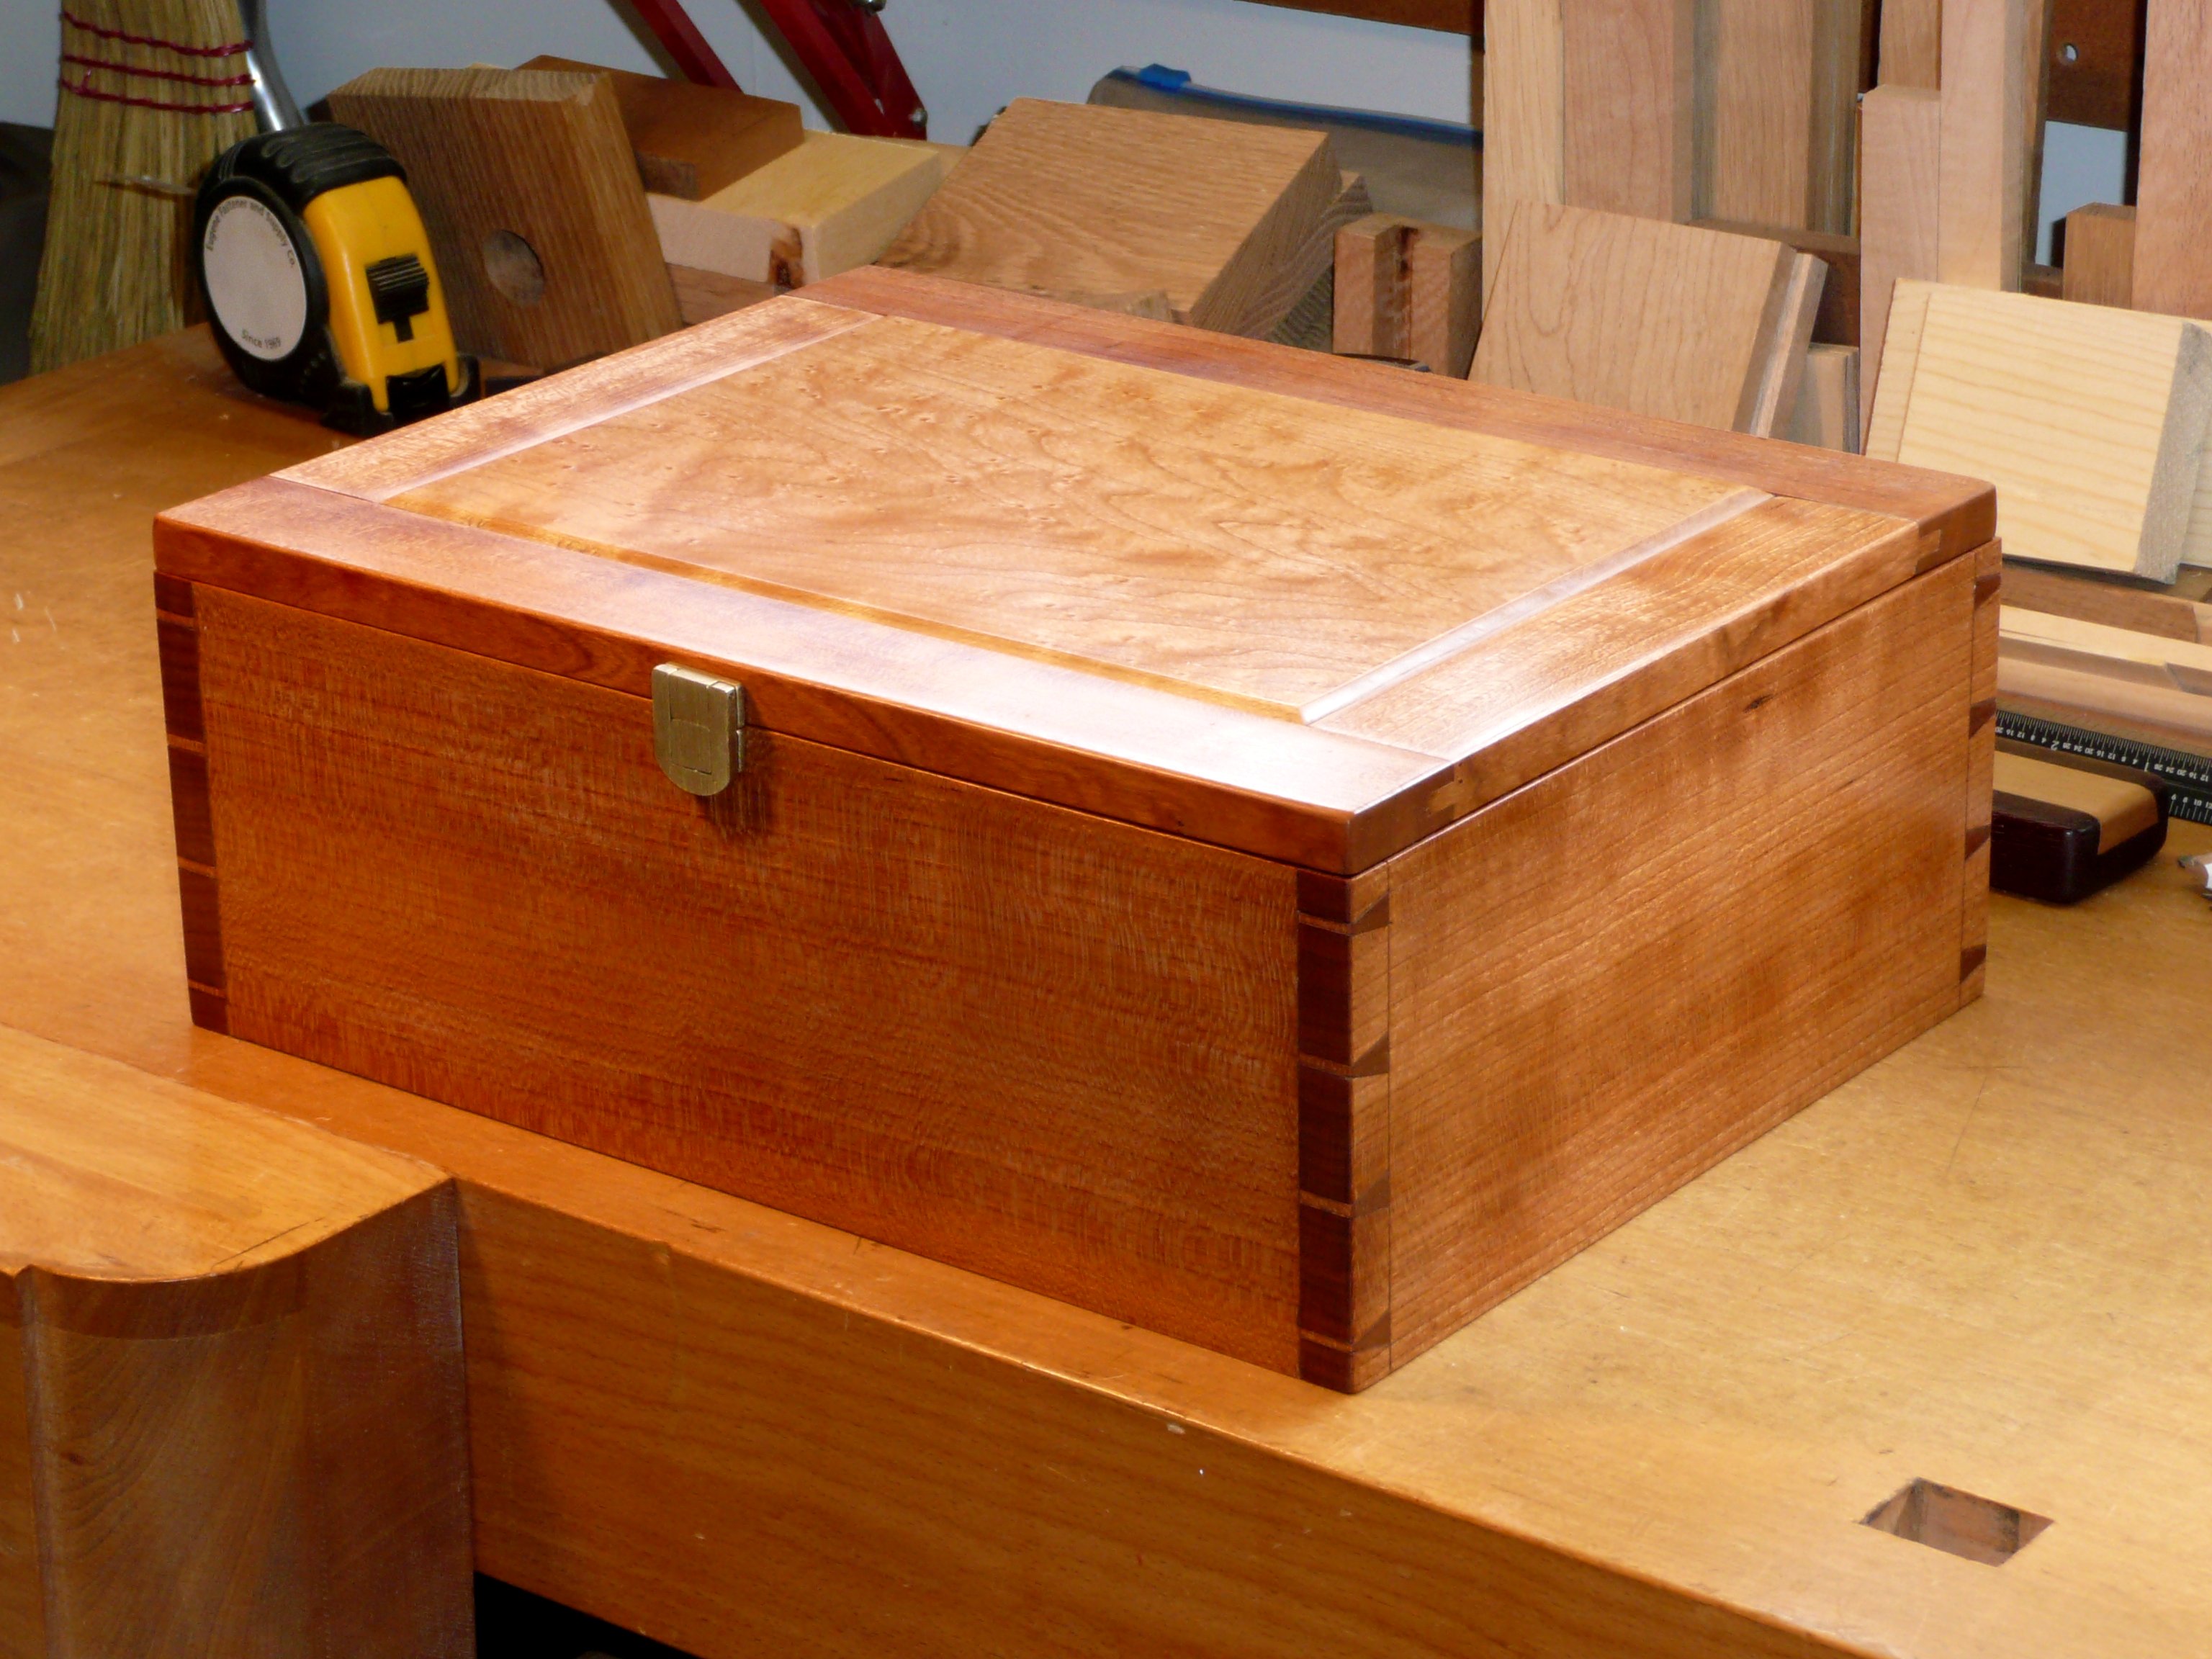
What remained was assembly and finishing with clear/natural Watco Danish Oil.

Case sides and center section.
Case.
Assembled.
Finished.

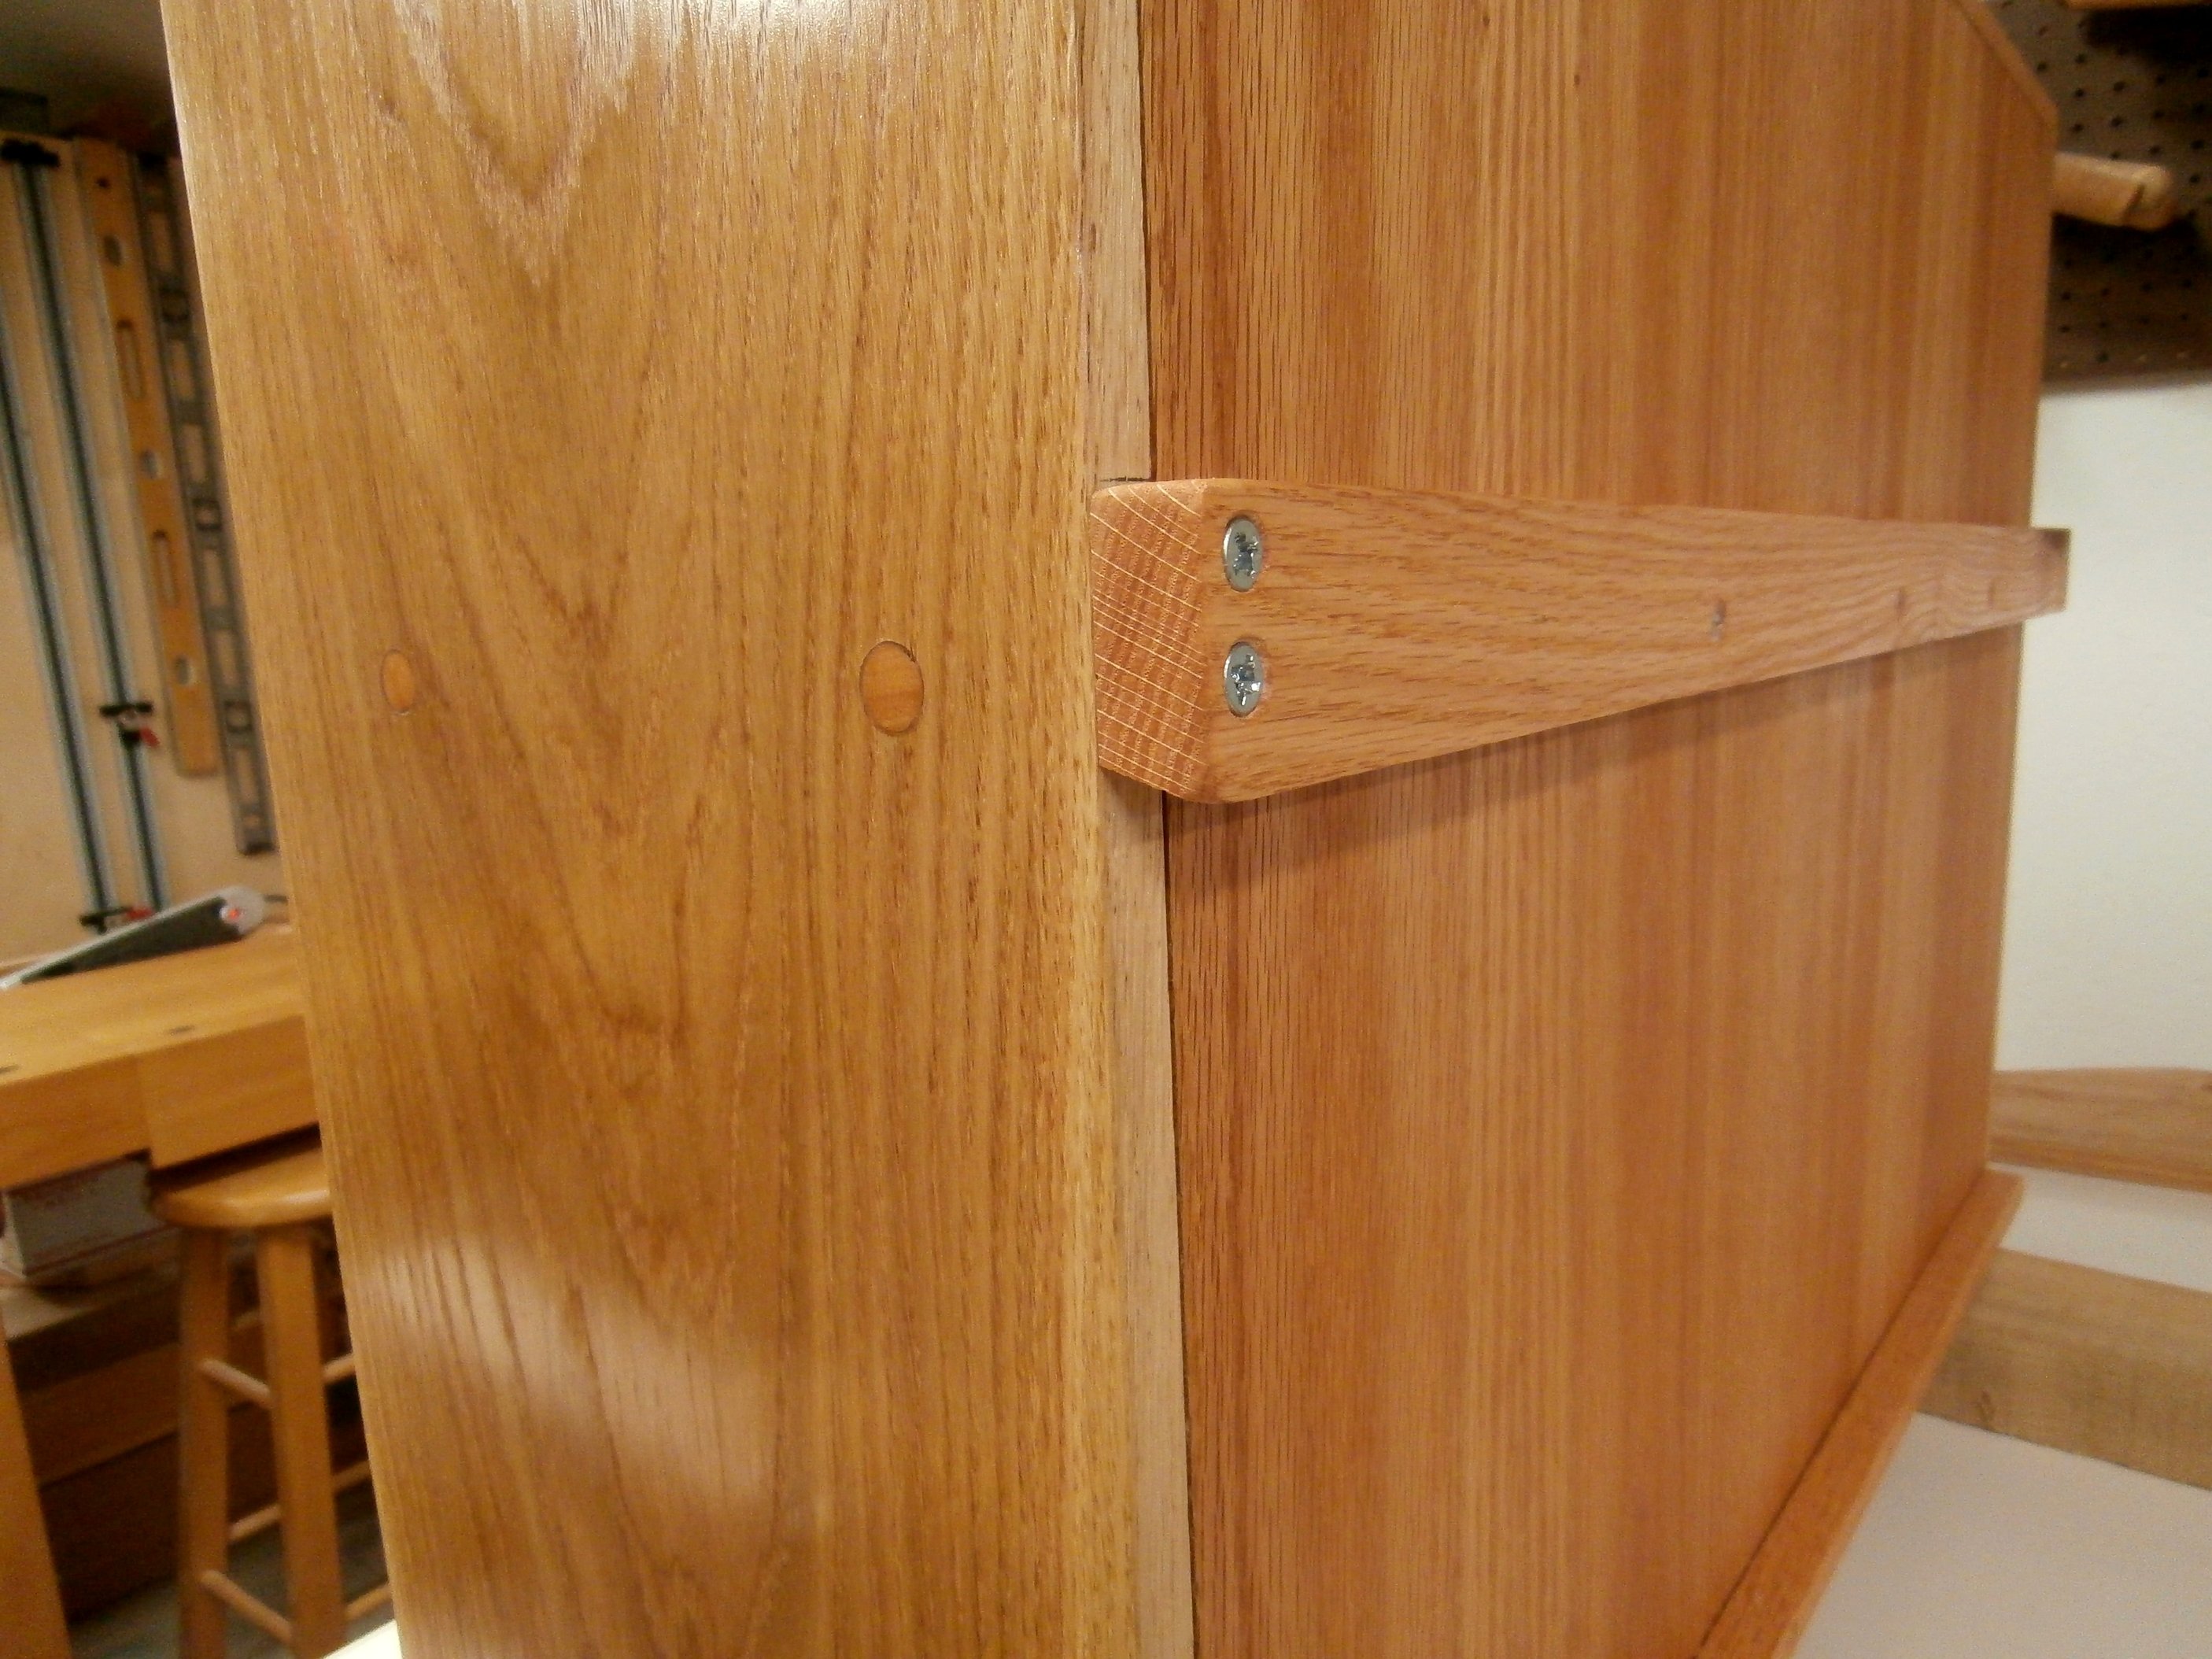
To hang the wall cabinet, I used a piece of oak with an angle cut mounted to the back of the case that mates with another oak piece, with the complimentary angle cut, that is mounted to the wall.  In this way the cabinet can be hung and removed as needed.

The back of the case with a cross piece that has an angle cut on its bottom edge to mate up with a complimentary piece mounted on the wall that allows me to hang the cabinet.


Finished!!

I finished this tall chest in late May.  The primary wood is American Black Cherry, about 90% of it from one tree.  Cherry plywood was used for drawer bottoms and the back panels, while quarter-sawn white oak was used for the drawer sides and backs.  The entire chest, inside and out, has three coats of hand-rubbed Watco Danish Oil (Natural). The solid brass drawer pulls (called “bridge” pulls) and knobs for the cabinet doors came from Crown City Hardware in Pasadena, CA. The hand-cast, solid brass hinges are from Horton Brasses in Cromwell, CT.  From concept drawings to completion, this took me about 160 hours.  (Click on any photo to enlarge.)

OLYMPUS DIGITAL CAMERA

The chest is 72 inches tall, 34 inches wide, and 22 inches front to back.

OLYMPUS DIGITAL CAMERA

Each panel in the cabinet doors is made up of a book-matched pair of boards which were beveled first on the table saw, and then finished with a hand plane.  The door frames are quarter-sawn cherry with the rails tenoned into the stiles.  The transition molding and the crown molding were cut on the table saw as coves and then split into the quarter round profile.  The outer edge of the crown molding was extended with solid stock.

OLYMPUS DIGITAL CAMERA

The drawer fronts are graduated from bottom to top (9.5″, 9″, 8.5″, 7.5″) and each drawer front is one solid piece of American Black Cherry.

OLYMPUS DIGITAL CAMERA

Quarter-sawn, Eastern white oak was chosen for its stability in the drawer sides and backs.  The half-blind dovetails were all hand cut with a 14 ppi saw and chisel.

OLYMPUS DIGITAL CAMERA

Shelves and center divider are solid cherry.

OLYMPUS DIGITAL CAMERA

The upper section of the chest is a separate unit and can be removed for transport.  Back panels for the upper and lower sections are 3/8″ cherry plywood (cherry both sides).

OLYMPUS DIGITAL CAMERA

The “Makers Mark.”

Cherry Dresser Progress

OLYMPUS DIGITAL CAMERA

This is where the basic frame work of the dresser stood on April 27.  Since then I have fabricated the raised panel doors for the upper section, the drawer fronts and sides, and drawer backs and bottoms for the lower section.  I am gluing up the drawers today and hope to mount the hinged panel doors for the upper case as well.  (Click on any image to enlarge)

OLYMPUS DIGITAL CAMERA

These are most, but not all, of the tools required for marking and cutting the hand-cut, half-blind dovetails that are used to join the drawer sides to the drawer fronts.

OLYMPUS DIGITAL CAMERA

These are the four pairs of quarter-sawn white oak drawer sides for the four, graduated size drawers.  The dovetails are hand-cut, the rabbets and the dadoes are cut on the table saw for the drawer bottoms and drawer backs.

OLYMPUS DIGITAL CAMERA

These are the four cherry drawer fronts with all dovetails cut to mate with the drawer sides, and the dadoes for the drawer bottoms are cut as well.

OLYMPUS DIGITAL CAMERA

This is how a drawer front and drawer sides come together.  Note that the dadoes on both the drawer sides and drawer front line up to accommodate the drawer bottom.

OLYMPUS DIGITAL CAMERA

OLYMPUS DIGITAL CAMERA

The two pictures above show one of the raised panel doors for the upper section before assembly, and then the pieces glued and clamped in place.  The frame pieces are glued together, but the panel floats free in dadoes that run all the way around the inside of the frame.  This is so the wide, flat-sawn panel boards can expand or contract with changes in ambient humidity without stressing or cracking the frame.  The door frame pieces are cut from quarter-sawn cherry and are joined together with mortise and tenon joints.  The door panel is made up of two “book-matched” cherry boards arranged vertically and edge glued before the beveled edges are crafted.

American Black Cherry Portable Side Tables

Cherry Smoking Stands 002

I based these two movable side tables on an early 20th century, Arts & Crafts style, smoking stand.  The original stand was white oak, but I chose black cherry from the mountains of West Virginia for my tables.  The nice, light cherry color will deepen to a wine red over time.   They are finished with a hand rubbed oil finish and wax.  The flat table surface is right at arm chair height making them useful for small items like TV remotes.  The cross-bar handle makes them easy to move from one placement or room to another.  (Click on any image to enlarge)

Cherry Smoking Stands 019

The cherry drawer fronts are joined to the maple drawer sides with hand cut, “half-blind” dovetail joints, which means the dovetails show on the sides but not on the face of the drawer.

Cherry & Maple, Hand Dovetailed Box

Dell II 436

This is a box I made for my son using quarter sawn, American black cherry for the sides.  I also used the cherry to frame the raised panel of birdseye maple on the lid.   I’m going to very briefly show you the steps I use to cut the dovetail joints for the box sides.  Fine, hand cut dovetail joints can always be distinguished from those produced with a power router by the very narrow spacing between the tails (i.e. the very small size of the “pins”) which cannot be accomplished in this small size with a router.  (Click on an image to enlarge it.)

Dell II 446

I first use a thin kerf, rip saw to cut the outlines of the previously laid out and marked “tails” (shaped like a stylized bird’s tail) on two sides at once (held in the vise) so that the proportions will appear even all the way around the box.

Dell II 449

Then I clamp one side at a time in a jig I designed so that I can use a Japanese dovetail chisel (with a triangular cross section) to chop out the waste between the saw cuts, thereby creating the “tails.”

Dell II 450

Finished “tails.”

Dell II 452

The “pins” that fit into the slots between the “tails” are first marked on the ends of the remaining two side boards to correspond to the size and spacing of the “tails.”  Then, after being laid out, the “pins” are cut in the same way as the “tails,” with saw and chisel.